Android主題示例
下面的例子演示如何使用的應用程序的主題(Theme)。修改默認 AppTheme 的默認文本,改變它的大小,系列,陰影等。現在開始創建一個簡單的Android應用程序按照以下步驟:
步驟
描述
1
使用Android Studio創建一個Android應用程序,並將其命名爲:ThemeDemo
2
修改 src/MainActivity.java 文件,以添加click事件偵聽器和處理程序定義的兩個按鈕
3
定義樣式風格在全局樣式文件 res/values/style.xml 定義應用程序裝飾按鈕的文本,改變默認主題自定義屬性
4
修改 res/layout/activity_main.xml 文件的默認內容包括一套Android的UI控件,並使用已定義樣式
5
定義 res/values/strings.xml 文件所需的常量
6
運行該應用程序啓動 Android模擬器並驗證應用程序所做的修改結果
以下是主活動文件 src/com.yiibai.guidemo9/MainActivity.java 修改後的內容,這個文件可以包括每個生命週期的基本方法。
package com.example.themedemo; import android.os.Bundle; import android.app.Activity; import android.view.Menu; import android.view.View; import android.widget.Button; import android.widget.TextView; public class MainActivity extends Activity { @Override protected void onCreate(Bundle savedInstanceState) { super.onCreate(savedInstanceState); setContentView(R.layout.activity_main); //--- find both the buttons--- Button sButton = (Button) findViewById(R.id.button_s); Button lButton = (Button) findViewById(R.id.button_l); // -- register click event with first button --- sButton.setOnClickListener(new View.OnClickListener() { public void onClick(View v) { // --- find the text view -- TextView txtView = (TextView) findViewById(R.id.text_id); // -- change text size -- txtView.setTextSize(20); } }); // -- register click event with second button --- lButton.setOnClickListener(new View.OnClickListener() { public void onClick(View v) { // --- find the text view -- TextView txtView = (TextView) findViewById(R.id.text_id); // -- change text size -- txtView.setTextSize(24); } }); } @Override public boolean onCreateOptionsMenu(Menu menu) { getMenuInflater().inflate(R.menu.main, menu); return true; } }
下面將是 res/values/style.xml 文件,此外,樣式 CustomButtonStyle 定義的內容:
下面是 res/layout/activity_main.xml 文件的內容:
<LinearLayout xmlns:android="http://schemas.android.com/apk/res/android" android:layout_width="fill_parent" android:layout_height="fill_parent" android:orientation="vertical" > <Button android:id="@+id/button_s" style="@style/CustomButtonStyle" android:text="@string/button_small" android:onClick="doSmall"/> <Button android:id="@+id/button_l" style="@style/CustomButtonStyle" android:text="@string/button_large" android:onClick="doLarge"/> <TextView android:id="@+id/text_id" android:layout_width="wrap_content" android:layout_height="wrap_content" android:capitalize="characters" android:text="@string/hello_world" />
下面文件 res/values/strings.xml 的內容中定義兩個新的常量:
以下是AndroidManifest.xml文件的默認內容。在這裏,我們不需要改變任何東西,保持主題名稱不變。但是,如果定義了新的主題或繼承默認用不同的名稱,那麼需要明確使用新的名稱,必須要取代AppTheme名稱。
<manifest xmlns:android="http://schemas.android.com/apk/res/android" package="com.yiibai.guidemo" android:versionCode="1" android:versionName="1.0" > <uses-sdk android:minSdkVersion="8" android:targetSdkVersion="17" /> <application android:allowBackup="true" android:icon="@drawable/ic_launcher" android:label="@string/app_name" android:theme="@style/AppTheme" > <activity android:name="com.yiibai.guidemo.MainActivity" android:label="@string/app_name" >
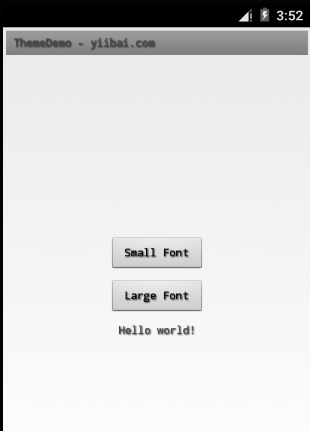
我們嘗試運行ThemeDemo 應用程序,AVD上安裝的應用程序,並啓動它,如果一切設置和應用都沒有問題,它會顯示以下模擬器窗口: