Android Animation(動畫)實例
動畫在Android中可以有許多方式。在本章中,我們將討論一個簡單的和廣泛使用的動畫製作 - 所謂的補間動畫方式。
補間動畫
補間動畫需要一些參數,如初始值,終值,大小,持續時間,旋轉角度等,並對該對象執行所需的動畫。它可以應用到任何類型的對象。因此,爲了利用這一點,Android已經爲我們提供了一個類叫做 Animation.
爲了在android系統進行顯示動畫,我們將調用AnimationUtils 類的靜態函數 loadAnimation()。我們將接受它在動畫對象的實例。它的語法如下:
Animation animation = AnimationUtils.loadAnimation(getApplicationContext(), R.anim.myanimation);
注意第二個參數。它是動畫 xml文件的名稱。必須創建一個res目錄下名爲anim的文件夾,並在anim文件夾中創建XML文件。
這個動畫 animation 類有下面列出許多有用的功能:
Sr.No
方法 & 描述
1
start()
此方法開始動畫
2
setDuration(long duration)
此方法設置動畫的持續時間
3
getDuration()
此方法獲得其通過上述方法設定的持續時間
4
end()
此方法結束動畫
5
cancel()
這個方法取消動畫
爲了應用這個動畫到對象,我們將只調用對象的startAnimation()方法。其語法是:
ImageView image1 = (ImageView)findViewById(R.id.imageView1); image.startAnimation(animation);
放大動畫
爲了在動畫進行縮放,下創建anim文件夾中XML文件在res目錄下,並把這個代碼的文件中。
<set xmlns:android="http://schemas.android.com/apk/res/android"\> <scale xmlns:android="http://schemas.android.com/apk/res/android" android:fromXScale="0.5" android:toXScale="3.0" android:fromYScale="0.5" android:toYScale="3.0" android:duration="5000" android:pivotX="50%" android:pivotY="50%" >
參數 fromXScale、fromYScale 限定開始點和參數 toXScale、toYScale定義結束點。duration 定義了動畫的時間和pivotX,pivotYdefines中心從其中動畫將開始。
例子
參數 fromXScale、fromYScale限定開始點,參數 toXScale、toYScale 定義結束點。duration 定義了動畫的時間 pivotX,pivotY 定義的中心從其中動畫將開始。
爲了試驗這個例子,需要在模擬器或實際設備上運行。
Steps
描述
1
使用Android Studio創建Android應用程序,並將其命名爲Animation ,創建這個項目時確保目標SDK編譯在Android SDK的最新版本並使用更高級別的API
2
修改src/MainActivity.java文件中添加動畫代碼
3
修改所需的佈局XML文件res/layout/activity_main.xml l添加GUI組件
4
res目錄下新建一個文件夾,並將其命名爲anim。通過訪問確認:res/anim
5
創建新的Android XML文件,必須創建下面列出了三種不同的文件
6
創建myanimation.xml,clockwise.xml,fade.xml文件並添加XML代碼
7
修改 res/values/string.xml 文件,並添加必要的字符串組成部分
8
修改res/menu/main.xml文件,並添加必要的菜單組件
9
運行應用程序並選擇要運行的Android設備,並在其上安裝的應用和驗證結果。
這裏是修改後的代碼 src/com.yii bai.animation/MainActivity.java.
package com.example.animation; import com.example.animation.R; import android.os.Bundle; import android.app.Activity; import android.view.Menu; import android.view.MenuItem; import android.view.animation.Animation; import android.view.animation.AnimationUtils; import android.widget.ImageView; public class MainActivity extends Activity { @Override protected void onCreate(Bundle savedInstanceState) { super.onCreate(savedInstanceState); setContentView(R.layout.activity_main); } @Override public boolean onCreateOptionsMenu(Menu menu) { // Inflate the menu; this adds items to the action bar if it is present. getMenuInflater().inflate(R.menu.main, menu); return true; } public boolean onOptionsItemSelected(MenuItem item) { super.onOptionsItemSelected(item); switch(item.getItemId()) { case R.id.zoomInOut: ImageView image = (ImageView)findViewById(R.id.imageView1); Animation animation = AnimationUtils.loadAnimation(getApplicationContext(), R.anim.myanimation); image.startAnimation(animation); return true; case R.id.rotate360: ImageView image1 = (ImageView)findViewById(R.id.imageView1); Animation animation1 = AnimationUtils.loadAnimation(getApplicationContext(), R.anim.clockwise); image1.startAnimation(animation1); return true; case R.id.fadeInOut: ImageView image2 = (ImageView)findViewById(R.id.imageView1); Animation animation2 = AnimationUtils.loadAnimation(getApplicationContext(), R.anim.fade); image2.startAnimation(animation2); return true; } return false; } }
這裏是修改後的代碼 res/layout/activity_main.xml.
<RelativeLayout xmlns:android="http://schemas.android.com/apk/res/android" xmlns:tools="http://schemas.android.com/tools" android:layout_width="match_parent" android:layout_height="match_parent" android:gravity="top" android:paddingBottom="@dimen/activity_vertical_margin" android:paddingLeft="@dimen/activity_horizontal_margin" android:paddingRight="@dimen/activity_horizontal_margin" android:paddingTop="@dimen/activity_vertical_margin" tools:context=".MainActivity" > <ImageView android:id="@+id/imageView1" android:layout_width="wrap_content" android:layout_height="wrap_content" android:layout_alignParentTop="true" android:layout_centerHorizontal="true" android:layout_marginTop="179dp" android:src="@drawable/ic_launcher" />
這裏是修改後的代碼 res/anim/myanimation.xml.
<set xmlns:android="http://schemas.android.com/apk/res/android"\> <scale xmlns:android="http://schemas.android.com/apk/res/android" android:fromXScale="0.5" android:toXScale="3.0" android:fromYScale="0.5" android:toYScale="3.0" android:duration="5000" android:pivotX="50%" android:pivotY="50%" > <scale xmlns:android="http://schemas.android.com/apk/res/android" android:startOffset="5000" android:fromXScale="3.0" android:toXScale="0.5" android:fromYScale="3.0" android:toYScale="0.5" android:duration="5000" android:pivotX="50%" android:pivotY="50%" >
這裏是修改後的代碼 res/anim/clockwise.xml.
<set xmlns:android="http://schemas.android.com/apk/res/android"\> <rotate xmlns:android="http://schemas.android.com/apk/res/android" android:fromDegrees="0" android:toDegrees="360" android:pivotX="50%" android:pivotY="50%" android:duration="5000" > <rotate xmlns:android="http://schemas.android.com/apk/res/android" android:startOffset="5000" android:fromDegrees="360" android:toDegrees="0" android:pivotX="50%" android:pivotY="50%" android:duration="5000" >
這裏是 res/anim/fade.xml 的代碼
<set xmlns:android="http://schemas.android.com/apk/res/android" android:interpolator="@android:anim/accelerate_interpolator" > <alpha android:fromAlpha="0" android:toAlpha="1" android:duration="2000" > <alpha android:startOffset="2000" android:fromAlpha="1" android:toAlpha="0" android:duration="2000" >
這裏是修改後的代碼 res/menu/main.xml.
這裏是修改後的代碼 res/values/string.xml.
下面是默認代碼 AndroidManifest.xml.
<manifest xmlns:android="http://schemas.android.com/apk/res/android" package="com.yiibai.animation" android:versionCode="1" android:versionName="1.0" > <uses-sdk android:minSdkVersion="8" android:targetSdkVersion="17" /> <application android:allowBackup="true" android:icon="@drawable/ic_launcher" android:label="@string/app_name" android:theme="@style/AppTheme" > <activity android:name="com.yiibai.animation.MainActivity" android:label="@string/app_name" >
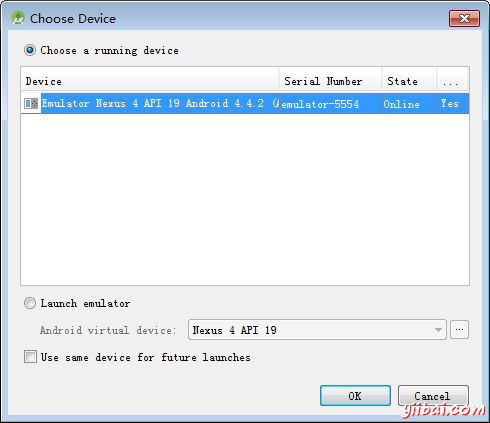
讓我們試着運行上面動畫應用程序。啓動應用程序之前Android Studio會顯示如下窗口,選擇要運行Android應用程序的選項。
選擇移動設備作爲一個選項,然後檢看移動設備將顯示如下界面:
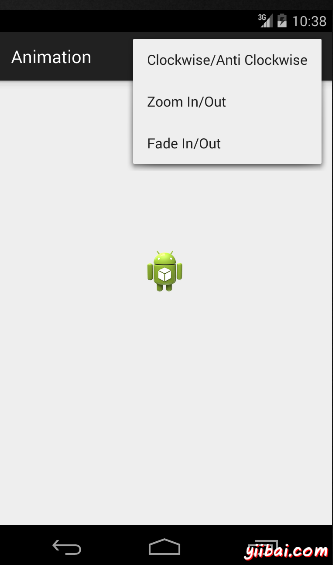
現在只要從手機中選擇菜單,菜單將顯示這將是這樣的:
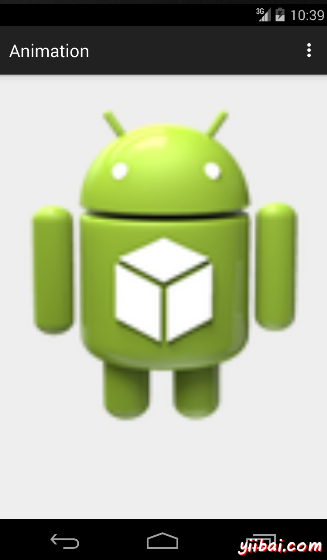
現在只是在選擇Zoom in , Zoom out從菜單縮小選項,動畫將是這樣的:
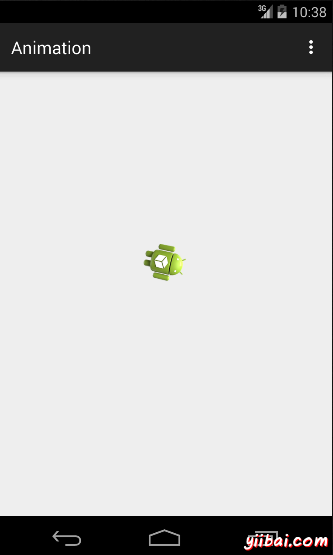
現在只要從菜單中選擇順時針選項和動畫看起來是這樣的:
現在只從菜單中選擇輸入/輸出選件褪色和動畫看起來是這樣的:

注:如果在模擬器中運行它,可能會遇到不流暢的動畫效果。所以必須運行在Android手機中才能體驗到流暢的動畫。
以上代碼下載:http://pan.baidu.com/s/1sjuNZ7R