Android自定義字體
在Android中,可以定義自己的自定義字體,在應用程序中的字符串。只需要從互聯網上下載所需的字體,然後將其放置在 assets/fonts 文件夾中。
在字體文件放到 assets/fonts 文件夾後,在Java代碼中可以通過 Typeface類訪問它。首先,獲取在代碼文本視圖的參考。它的語法如下:
TextView tx = (TextView)findViewById(R.id.textview1);
需要做的下一件事就是調用Typeface類的createFromAsset()靜態方法,從assets的自定義字體。它的語法如下:
Typeface custom_font = Typeface.createFromAsset(getAssets(), "fonts/font name.ttf");
需要做的最後一件事就是這個自定義字體對象設置TextView的字體屬性。需要調用setTypeface()方法來做到這一點。它的語法如下:
tx.setTypeface(custom_font);
除了這些方法,還有在字體類中定義的其它方法,可以使用更有效地處理字體。
Sr.No
方法及說明
1
create(String familyName, int style)
創建給定一個familyName 字體Typeface對象,並選擇樣式信息
2
create(Typeface family, int style)
創建一個字體對象指定的現有字體和指定的風格最適合
3
createFromFile(String path)
創建一個從指定的字體文件的新字體
4
defaultFromStyle(int style)
返回一個默認的字體對象的基礎上指定的樣式
5
getStyle()
返回字樣的內在樣式屬性
例子
這裏有一個例子演示如何使用字體的處理CustomFont。它創建一個顯示字體文件中指定的自定義字體的基本應用。
爲了試驗這個例子,可以在實際設備或模擬器運行此程序。
Steps
描述
1
使用Eclipse IDE創建Android應用程序,並將其命名爲CustomFonts。在創建這個項目,確保目標SDK編譯在Android SDK中的最新版本或使用更高級別的API
2
從互聯網上下載的字體,並把它在assets/fonts文件夾中
3
修改src/MainActivity.java文件中添加必要的代碼
4
修改 res/layout/activity_main.xml添加相應的XML組件
5
修改res/values/string.xml 添加必要的字符串
6
運行應用程序並選擇運行Android設備,並在其上安裝的應用和驗證結果
以下是修改後的主活動文件的內容 src/com.yiibai.customfonts/MainActivity.java.
package com.example.customfonts; import android.app.Activity; import android.graphics.Typeface; import android.os.Bundle; import android.view.Menu; import android.widget.TextView; public class MainActivity extends Activity { @Override protected void onCreate(Bundle savedInstanceState) { super.onCreate(savedInstanceState); setContentView(R.layout.activity_main); TextView tx = (TextView)findViewById(R.id.hello); Typeface custom_font = Typeface.createFromAsset(getAssets(), "fonts/Erika Type.ttf"); tx.setTypeface(custom_font); } @Override public boolean onCreateOptionsMenu(Menu menu) { // Inflate the menu; this adds items to the action bar if it is present. getMenuInflater().inflate(R.menu.main, menu); return true; } }
以下是XML的經修改的內容 res/layout/activity_main.xml.
<LinearLayout xmlns:android="http://schemas.android.com/apk/res/android" android:layout_width="fill_parent" android:layout_height="fill_parent" android:orientation="vertical"> <TextView android:id="@+id/hello" android:layout_width="fill_parent" android:layout_height="wrap_content" android:textSize="70dip" android:text="@string/hello_world" />
以下是 res/values/string.xml.的內容
以下是 AndroidManifest.xml 的內容.
<manifest xmlns:android="http://schemas.android.com/apk/res/android" package="com.yiibai.customfonts" android:versionCode="1" android:versionName="1.0" > <uses-sdk android:minSdkVersion="8" android:targetSdkVersion="17" /> <application android:allowBackup="true" android:icon="@drawable/ic_launcher" android:label="@string/app_name" android:theme="@style/AppTheme" > <activity android:name="com.yiibai.customfonts.MainActivity" android:label="@string/app_name" >
讓我們試着來運行上面的程序,這裏只是修改自定義字體。安裝程序在AVD並啓動它,如果一切設置和應用程序都沒有問題,它會顯示以下仿真器窗口:
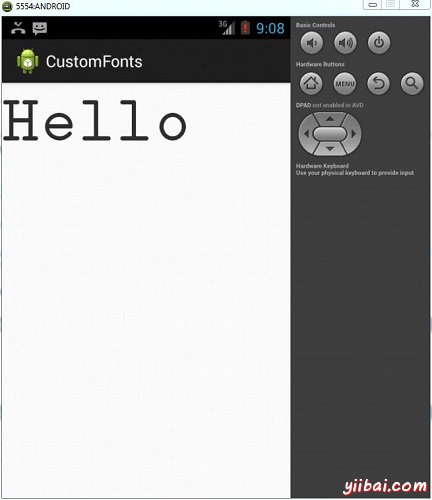
正如看到的,出現在AVD的文本還沒有一個默認的Android字體,而是在字體文件夾中指定的自定義字體。
注意:需要考慮使用自定義字體字體大小,和支持的字符。