Yii模型
模型代表業務邏輯和規則的對象。要創建一個模型,應該擴展 yii\base\Model類或它的子類。
屬性
屬性代表業務數據。它們可以像數組元素或對象的屬性那樣來訪問。一個模型的每個屬性都是公開訪問的屬性。要指定模型擁有什麼屬性,應該重寫yii\base\Model::attributes() 方法。
我們看一下基本應用程序模板中的 ContactForm 模型。
'Verification Code', \]; } /\*\* \* Sends an email to the specified email address using the information collected by this model. \* @param string $email the target email address \* @return boolean whether the model passes validation \*/ public function contact($email) { if ($this->validate()) { Yii::$app->mailer->compose() ->setTo($email) ->setFrom(\[$this->email => $this->name\]) ->setSubject($this->subject) ->setTextBody($this->body) ->send(); return true; } return false; } } ?>第1步 - 在 SiteController中創建一個 actionShowContactModel 函數並使用下面的代碼。
public function actionShowContactModel() {
$mContactForm = new \app\models\ContactForm();
$mContactForm->name = "contactForm";
$mContactForm->email = "user@gmail.com";
$mContactForm->subject = "標題";
$mContactForm->body = "內容主體";
var_dump($mContactForm);
}
在上面的代碼中,我們定義 ContactForm 表單模型,設置屬性,並在屏幕上顯示模型。
第2步 - 現在,如果在Web瀏覽器的地址欄中輸入URL: http://localhost:8080/index.php?r=site/show-contact-model ,應該會看到以下內容。
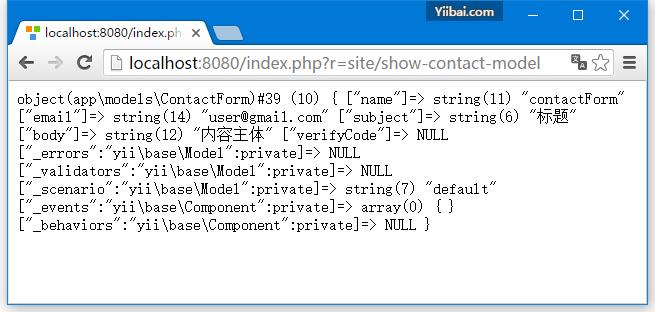
如模型是從 yii\base\Model 擴展,那麼它的所有成員變量應該爲公共且是非靜態的屬性。在 ContactForm 模型五個屬性 - name, email, subject, body, verifyCode,也可以再添加一些新的。
屬性標籤
在應用中我們經常需要使用屬性相關聯來顯示標籤。默認情況下,屬性標籤由 yii\base\Model::generateAttributeLabel() 方法自動生成。要手動聲明屬性標籤,可以覆蓋yii\base\Model::attributeLabels() 方法。
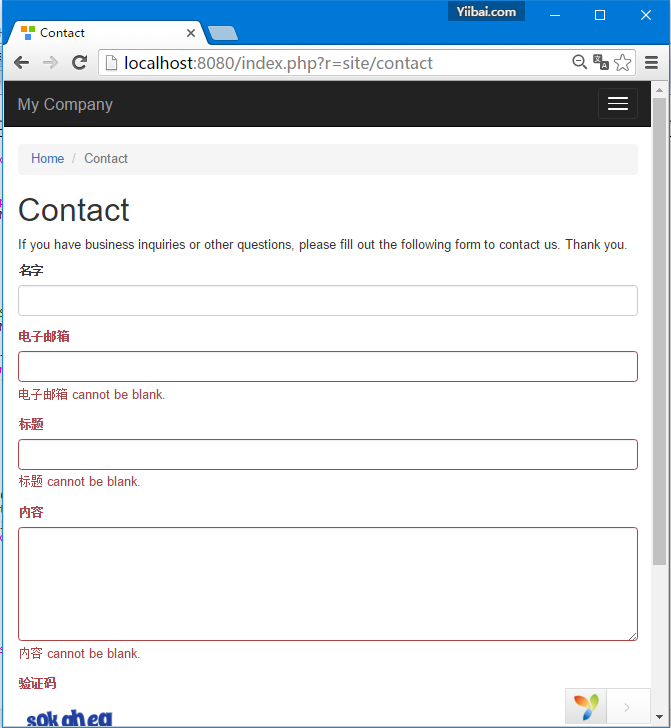
第1步 - 如果在瀏覽器中打開URL: http://localhost:8080/index.php?r=site/contact,將看到以下頁面。
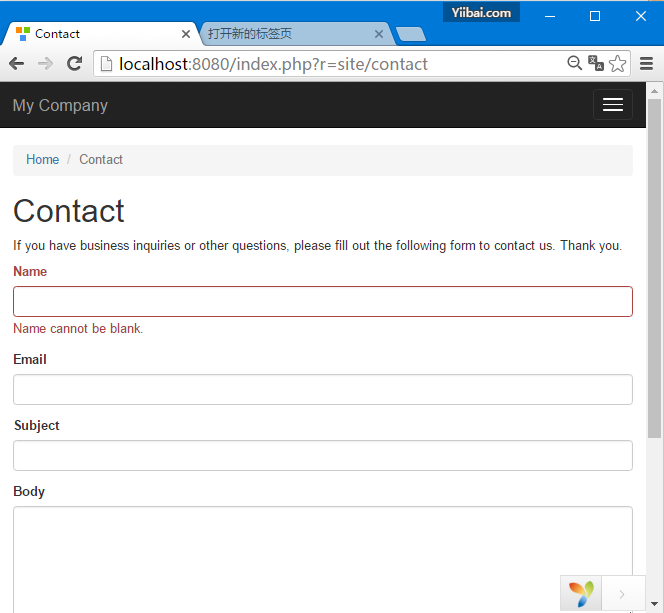
注意,標籤的名稱與屬性的名稱相同。
步驟2 - 現在,中以下列方式修改在 ContactForm 模型中的 attributeLabels() 函數。
public function attributeLabels() {
return [
'name' => '名字',
'email' => '郵箱地址',
'subject' => '標題',
'body' => '內容',
'verifyCode' => '驗證碼',
];
}
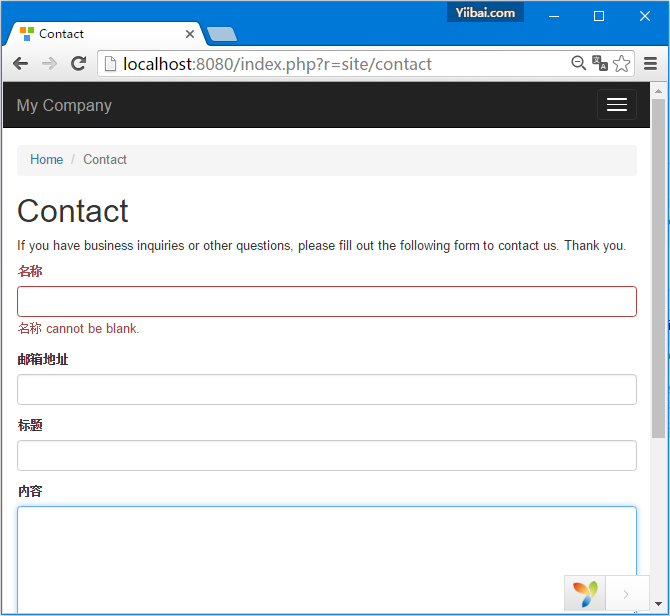
第3步 - 如果再次打開URL: http://localhost:8080/index.php?r=site/contact,你會發現,標籤已經改變如下面圖片所示。
模型使用在不同的場景
可以使用模型在不同的場景。 例如,當一個訪問用戶要發送一份聯繫表單,我們需要所有的模型屬性。 當用戶已經登錄,我們並不需要他的名字,因爲我們可以很容易地從數據庫把它讀取出來。
要聲明場景,應該覆蓋 scenarios() 函數。它返回一個數組,其鍵是場景名稱而其值是 Active 屬性。Active屬性是用來來驗證的。它們也可以被大量分配。
第1步 - 以下方式修改 ContactForm 模型。
\['name', 'email', 'subject', 'body', 'verifyCode'\], self::SCENARIO\_EMAIL\_FROM\_USER => \['email' ,'subject', 'body', 'verifyCode'\], \]; } /\*\* \* @return array the validation rules. \*/ public function rules() { return \[ // name, email, subject and body are required \[\['name', 'email', 'subject', 'body'\], 'required'\], // email has to be a valid email address \['email', 'email'\], // verifyCode needs to be entered correctly \['verifyCode', 'captcha'\], \]; } /\*\* \* @return array customized attribute labels \*/ public function attributeLabels() { return \[ 'name' => '名字', 'email' => '電子郵箱', 'subject' => '標題', 'body' => '內容', 'verifyCode' => '驗證碼', \]; } /\*\* \* Sends an email to the specified email address using the information collected by this model. \* @param string $email the target email address \* @return boolean whether the model passes validation \*/ public function contact($email) { if ($this -> validate()) { Yii::$app->mailer->compose() ->setTo($email) ->setFrom(\[$this->email => $this->name\]) ->setSubject($this->subject) ->setTextBody($this->body) ->send(); return true; } return false; } } ?>
我們增加了兩個場景。一個用於訪問遊客用戶,另一個用於身份驗證的用戶。當用戶通過驗證後,再不需要他填入名字。
第2步- 現在,修改 SiteController 的 actionContact 功能。
public function actionContact() {
$model = new ContactForm();
$model->scenario = ContactForm::SCENARIO_EMAIL_FROM_GUEST;
if ($model->load(Yii::$app->request->post()) && $model->
contact(Yii::$app->params ['adminEmail'])) {
Yii::$app->session->setFlash('contactFormSubmitted');
return $this->refresh();
}
return $this->render('contact', [
'model' => $model,
]);
}
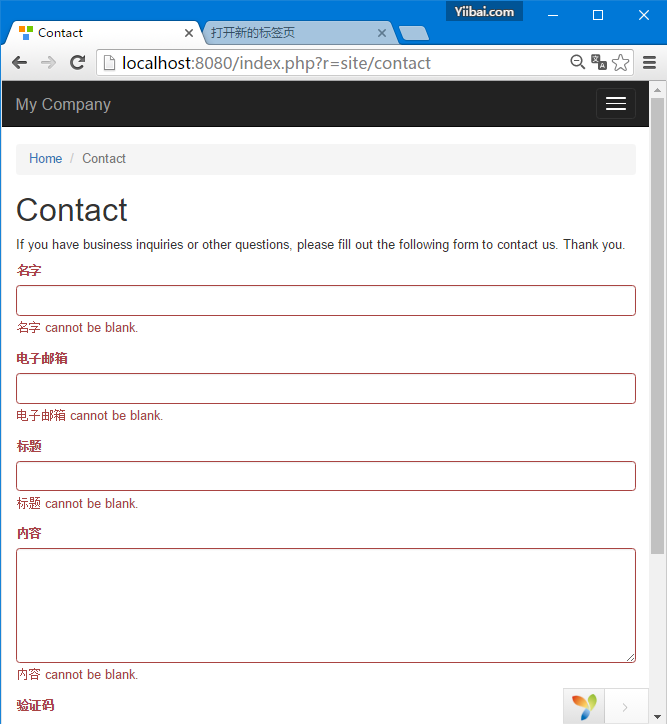
第3步 - 在瀏覽器訪問URL => http://localhost:8080/index.php?r=site/contact 。你應該已經注意到,當前所有模型的屬性都是必須的。
第4步 - 如果你在模式的 actionContact 動作中更改了場景。如下面給出的代碼,你會發現 name 屬性不再是必需的。
$model->scenario = ContactForm::SCENARIO_EMAIL_FROM_USER;
大量的分配
大規模的分配是通過一個單一的代碼行創建多個輸入模型屬性的一種便捷方式。
如下的代碼行 -
$mContactForm = new \app\models\ContactForm;
$mContactForm->attributes = \Yii::$app->request->post('ContactForm');
上面給出的代碼行相當於-
$mContactForm = new \app\models\ContactForm;
$postData = \Yii::$app->request->post('ContactForm', []);
$mContactForm->name = isset($postData['name']) ? $postData['name'] : null;
$mContactForm->email = isset($postData['email']) ? $postData['email'] : null;
$mContactForm->subject = isset($postData['subject']) ? $postData['subject'] : null;
$mContactForm->body = isset($postData['body']) ? $postData['body'] : null;
前者乾淨多了。注意,大量分配僅適用於安全屬性。它們只是在 scenario() 函數中列出當前場景屬性。
數據導出
模型往往需要以不同的格式導出。要轉模型轉換爲數組,則修改 SiteController 的 actionShowContactModel() 函數-
public function actionShowContactModel() {
$mContactForm = new \app\models\ContactForm();
$mContactForm->name = "用戶名稱";
$mContactForm->email = "user@gmail.com";
$mContactForm->subject = "標題";
$mContactForm->body = "內容";
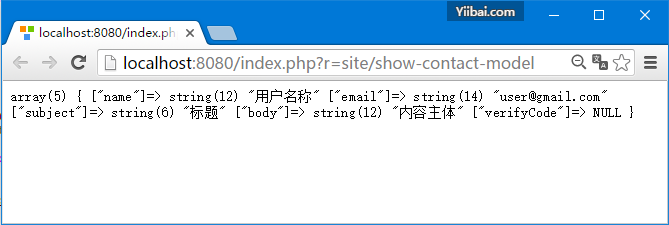
var_dump($mContactForm->attributes);
}
在瀏覽器地址欄中輸入URL: http://localhost:8080/index.php?r=site/show-contact-model,你會看到如下結果 -
要將模型轉換成JSON格式,修改actionShowContactModel()函數如以下方式-
public function actionShowContactModel() {
$mContactForm = new \app\models\ContactForm();
$mContactForm->name = "username";
$mContactForm->email = "user@gmail.com";
$mContactForm->subject = "subject";
$mContactForm->body = "body-content";
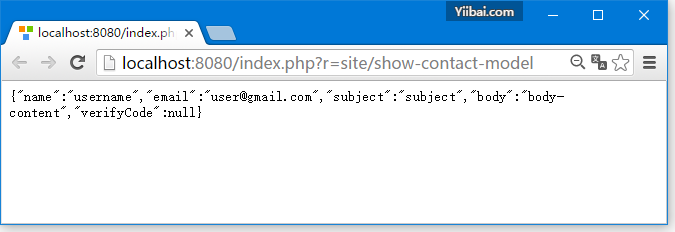
return \yii\helpers\Json::encode($mContactForm);
}
瀏覽器輸出 -
要點
模型通常是一個精心設計比控制器快得多的應用。模型應該-
- 包含業務邏輯
- 包含驗證規則
- 包含屬性
- 不嵌入HTML
- 不能直接訪問請求
- 不要有太多的場景