Yii數據Widgets
Yii提供了一組小部件用於顯示數據。您可以使用 DetailView控件顯示一條記錄。在 ListView 小部件,以及網格視圖可用於過濾,排序和分頁功能,以顯示記錄在表格中。
準備數據庫
第1步 - 創建一個新的數據庫。數據庫可以通過以下兩種方式進行。
在終端運行 mysql -u root –p
登錄數據後,通過執行 CREATE DATABASE mystudy CHARACTER SET utf8 COLLATE utf8_general_ci; 創建一個新的數據庫;
第2步 - 在 config/db.php 文件中配置數據庫連接。下面的配置可根據自己的實際情況配置。
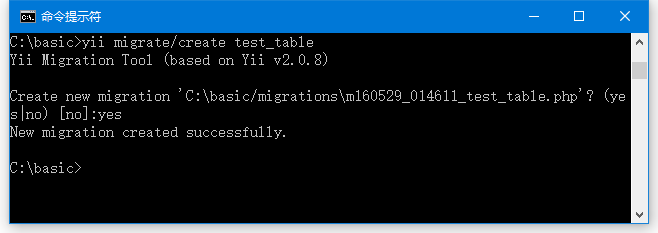
'yii\\db\\Connection', 'dsn' => 'mysql:host = localhost;dbname = mystudy', 'username' => 'root', 'password' => '', 'charset' => 'utf8', \]; ?>第3步 - 在項目根文件夾執行:yii migrate/create test_table 。此命令將用於創建管理數據庫數據庫遷移。 migrations文件會出現在項目的根的 migrations 文件夾中。
第4步 - 修改遷移文件(在本示例中生成的是:m160529_014611_test_table.php),並使用以下這些代碼。
createTable("user", \[ "id" => Schema::TYPE\_PK, "name" => Schema::TYPE\_STRING, "email" => Schema::TYPE\_STRING, \]); $this->batchInsert("user", \["name", "email"\], \[ \["User1", "[email protected]"\], \["User2", "[email protected]"\], \["User3", "[email protected]"\], \["User4", "[email protected]"\], \["User5", "[email protected]"\], \["User6", "[email protected]"\], \["User7", "[email protected]"\], \["User8", "[email protected]"\], \["User9", "[email protected]"\], \["User10", "[email protected]"\], \["User11", "[email protected]"\], \]); } public function down() { //$this->dropTable('user'); } } ?>上述遷移創建用戶表,它包含了以下這些字段:id, name, 和 email。它還增加了一些演示用戶帳號。
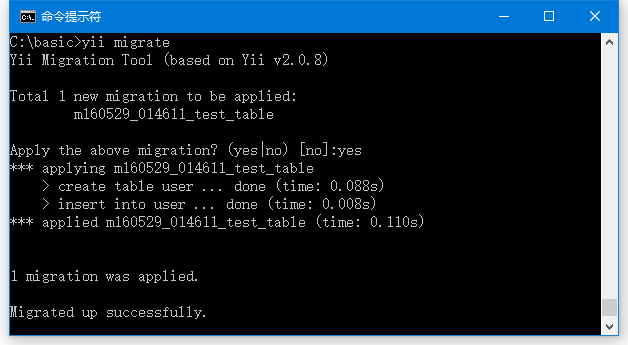
第5步 - 在項目的根目錄內運行: yii migrate 來遷移應用到數據庫。執行結果如下圖所示:
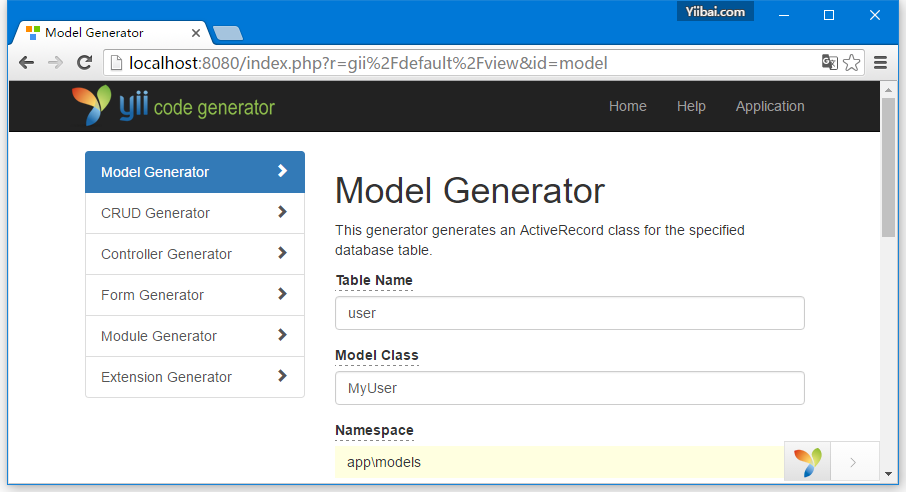
第6步-現在,我們需要爲user表創建模型。爲了簡便起見,我們將使用GII代碼生成工具。在瀏覽器中打開 url: http://localhost:8080/index.php?r=gii 。
然後,點擊 「Model generator」 下的 「Start」按鈕。 填寫表名(「user」)和模型類(「MyUser」),單擊「Preview」按鈕,最後點擊 「Generate」 按鈕。
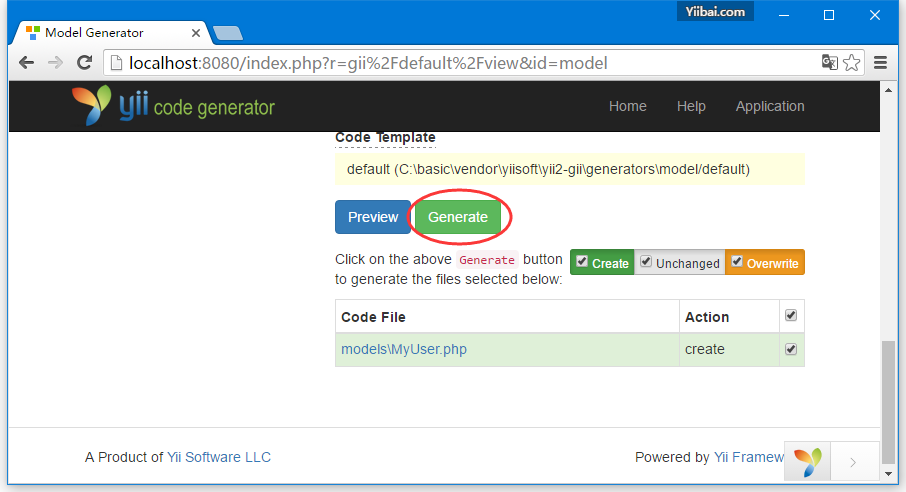
MyUser 文件憶經生成在 models 目錄。
DetailView Widget
DetailView 小部件顯示單個模型的數據。屬性 $attributes 定義哪個模型屬性需要顯示。
第1步 - 添加 actionDataWidget()方法到 SiteController 控制器中。
public function actionDataWidget() {
$model = MyUser::find()->one();
return $this->render('datawidget', [
'model' => $model
]);
}
在上面的代碼,我們可以看到一個 MyUser 模型,並把它傳遞給數據小工具(datawidget)視圖。
第2步 - 在 views/site 文件夾內創建一個視圖文件 datawidget.php。
$model, 'attributes' => \[ 'id', //formatted as html 'name:html', \[ 'label' => 'e-mail', 'value' => $model->email, \], \], \]); ?>第3步 - 在瀏覽器中打開網址: http://localhost:8080/index.php?r=site/data-widget ,將看到 DetailView 控件的典型用法的結果。
