Django RSS
Django帶有聚合feed生成框架。有了它,你可以創建RSS或Atom只需繼承django.contrib.syndication.views.Feed類。
讓我們創建一個訂閱源的應用程序。
from django.contrib.syndication.views import Feed
from django.contrib.comments import Comment
from django.core.urlresolvers import reverse
class DreamrealCommentsFeed(Feed):
title = "Dreamreal's comments"
link = "/drcomments/"
description = "Updates on new comments on Dreamreal entry."
def items(self):
return Comment.objects.all().order_by("-submit_date")[:5]
def item_title(self, item):
return item.user_name
def item_description(self, item):
return item.comment
def item_link(self, item):
return reverse('comment', kwargs = {'object_pk':item.pk})
在feed類, title, link 和 description 屬性對應標準RSS 的
, <link> 和 <description>元素。</p> </li> <li><p> 條目方法返回應該進入feed的item的元素。在我們的示例中是最後五個註釋。</p> </li> </ul> <p>現在,我們有feed,並添加評論在視圖views.py,以顯示我們的評論−</p> <p>from django.contrib.comments import Comment</p> <p>def comment(request, object_pk):<br> mycomment = Comment.objects.get(object_pk = object_pk)<br> text = '<strong>User :</strong> %s <p>'%mycomment.user_name</p><br> text += '<strong>Comment :</strong> %s <p>'%mycomment.comment</p><br> return HttpResponse(text) </p> <p>我們還需要一些網址在myapp urls.py中映射 −</p> <p>from myapp.feeds import DreamrealCommentsFeed<br>from django.conf.urls import patterns, url</p> <p>urlpatterns += patterns('',<br> url(r'^latest/comments/', DreamrealCommentsFeed()),<br> url(r'^comment/(?P\w+)/', 'comment', name = 'comment'),<br>) </p> <p>當訪問/myapp/latest/comments/會得到 feed −<br> <img src=https://asset.1ju.org/cmsstatic/django-rss-1.jpg loading='lazy' alt=Django RSS class='my-8 w-full relative rounded-sm object-cover shadow-lg' /> </p> <p>當點擊其中的一個用戶名都會得到:/myapp/comment/comment_id 在您的評論視圖定義之前,會得到 −<br> <img src=https://asset.1ju.org/cmsstatic/django-rss-2.jpg loading='lazy' alt=Django RSS class='my-8 w-full relative rounded-sm object-cover shadow-lg' /> </p> <p>因此,定義一個RSS源是 Feed 類的子類,並確保這些URL(一個用於訪問feed,一個用於訪問feed元素)的定義。 正如評論,這可以連接到您的應用程序的任何模型。</p> </div></div></div><div class="functional-area-bottom"><div class="text-center"><div class="d-inline-block dropdown"><button type="button" id="dropdown-basic" aria-expanded="false" class="dropdown-toggle btn btn-outline-secondary btn-lg"><svg aria-hidden="true" focusable="false" data-prefix="fas" data-icon="share-nodes" class="svg-inline--fa fa-share-nodes " role="img" xmlns="http://www.w3.org/2000/svg" viewBox="0 0 448 512"><path fill="currentColor" d="M352 224c53 0 96-43 96-96s-43-96-96-96s-96 43-96 96c0 4 .2 8 .7 11.9l-94.1 47C145.4 170.2 121.9 160 96 160c-53 0-96 43-96 96s43 96 96 96c25.9 0 49.4-10.2 66.6-26.9l94.1 47c-.5 3.9-.7 7.8-.7 11.9c0 53 43 96 96 96s96-43 96-96s-43-96-96-96c-25.9 0-49.4 10.2-66.6 26.9l-94.1-47c.5-3.9 .7-7.8 .7-11.9s-.2-8-.7-11.9l94.1-47C302.6 213.8 326.1 224 352 224z"></path></svg><span class="ml-1 show-row">Share</span></button></div></div></div></article></div><div class="card-footer"><div class="row"><div class="col"><svg aria-hidden="true" focusable="false" data-prefix="fas" data-icon="arrow-left" class="svg-inline--fa fa-arrow-left " role="img" xmlns="http://www.w3.org/2000/svg" viewBox="0 0 448 512"><path fill="currentColor" d="M9.4 233.4c-12.5 12.5-12.5 32.8 0 45.3l160 160c12.5 12.5 32.8 12.5 45.3 0s12.5-32.8 0-45.3L109.2 288 416 288c17.7 0 32-14.3 32-32s-14.3-32-32-32l-306.7 0L214.6 118.6c12.5-12.5 12.5-32.8 0-45.3s-32.8-12.5-45.3 0l-160 160z"></path></svg><a href="/django/django-caching">Django緩存</a></div><div class="col text-md-end"><a href="/django/django-ajax"><svg aria-hidden="true" focusable="false" data-prefix="fas" data-icon="arrow-right" class="svg-inline--fa fa-arrow-right " role="img" xmlns="http://www.w3.org/2000/svg" viewBox="0 0 448 512"><path fill="currentColor" d="M438.6 278.6c12.5-12.5 12.5-32.8 0-45.3l-160-160c-12.5-12.5-32.8-12.5-45.3 0s-12.5 32.8 0 45.3L338.8 224 32 224c-17.7 0-32 14.3-32 32s14.3 32 32 32l306.7 0L233.4 393.4c-12.5 12.5-12.5 32.8 0 45.3s32.8 12.5 45.3 0l160-160z"></path></svg>Django Ajax應用</a></div></div></div></div></div></div></div></div><footer class="bg-white py-5 font-size-14" id="footer"><div class="container"><div class="row"><dl class="col-6 col-md-3 d-none d-sm-block"><dt class="h6">鏈接</dt><dd class="my-1"><a class="text-secondary" href="https://www.ecool.shop/" title="Ecool Shop">Ecool Shop</a></dd></dl></div><hr class="mt-2 mb-4"/><div class="row"><div class="col-md-12"><div class="text-secondary text-center"> Copyright © 2015-2023 億聚網.</div></div></div></div></footer><script src="/_next/static/chunks/webpack-546743ddf7e8cb4f.js" async=""></script><script src="/_next/static/chunks/bce60fc1-3d5ef5c4572453f6.js" async=""></script><script src="/_next/static/chunks/698-b4ee1b293f5fb4bc.js" async=""></script><script src="/_next/static/chunks/main-app-a5eb339177c85de1.js" async=""></script><script>(self.__next_f=self.__next_f||[]).push([0])</script><script>self.__next_f.push([1,"1:HL[\"/_next/static/css/1c4d07c82cde5388.css\",{\"as\":\"style\"}]\n0:\"$L2\"\n"])</script><script>self.__next_f.push([1,"3:I{\"id\":2353,\"chunks\":[\"272:static/chunks/webpack-546743ddf7e8cb4f.js\",\"253:static/chunks/bce60fc1-3d5ef5c4572453f6.js\",\"698:static/chunks/698-b4ee1b293f5fb4bc.js\"],\"name\":\"default\",\"async\":false}\n5:I{\"id\":43012,\"chunks\":[\"470:static/chunks/app/global-error-2d20c7d510a72141.js\"],\"name\":\"\",\"async\":false}\n6:I{\"id\":67676,\"chunks\":[\"957:static/chunks/59925f94-6302db480f248368.js\",\"210:static/chunks/ce69f5c4-ada3b84c9854a250.js\",\"703:static/chunks/703-ad7f7a9d88b70895.js\",\"652:static/chunks/652-2922f1746919c870"])</script><script>self.__next_f.push([1,".js\",\"814:static/chunks/814-8c170bd1a2e2c86e.js\",\"928:static/chunks/928-e2c979bb342b0445.js\",\"285:static/chunks/285-4809214f326cf011.js\",\"185:static/chunks/app/layout-491b43680903f5ac.js\"],\"name\":\"\",\"async\":false}\n7:I{\"id\":29099,\"chunks\":[\"957:static/chunks/59925f94-6302db480f248368.js\",\"210:static/chunks/ce69f5c4-ada3b84c9854a250.js\",\"703:static/chunks/703-ad7f7a9d88b70895.js\",\"652:static/chunks/652-2922f1746919c870.js\",\"814:static/chunks/814-8c170bd1a2e2c86e.js\",\"928:static/chunks/928-e2c979bb342b0445.js\""])</script><script>self.__next_f.push([1,",\"285:static/chunks/285-4809214f326cf011.js\",\"185:static/chunks/app/layout-491b43680903f5ac.js\"],\"name\":\"\",\"async\":false}\nb:I{\"id\":49180,\"chunks\":[\"272:static/chunks/webpack-546743ddf7e8cb4f.js\",\"253:static/chunks/bce60fc1-3d5ef5c4572453f6.js\",\"698:static/chunks/698-b4ee1b293f5fb4bc.js\"],\"name\":\"default\",\"async\":false}\nc:I{\"id\":92306,\"chunks\":[\"272:static/chunks/webpack-546743ddf7e8cb4f.js\",\"253:static/chunks/bce60fc1-3d5ef5c4572453f6.js\",\"698:static/chunks/698-b4ee1b293f5fb4bc.js\"],\"name\":\"default\",\"async\""])</script><script>self.__next_f.push([1,":false}\n"])</script><script>self.__next_f.push([1,"2:[[[\"$\",\"link\",\"0\",{\"rel\":\"stylesheet\",\"href\":\"/_next/static/css/1c4d07c82cde5388.css\",\"precedence\":\"next\"}]],[\"$\",\"$L3\",null,{\"buildId\":\"PeSdcBxKDNQIZlulyUEdm\",\"assetPrefix\":\"\",\"initialCanonicalUrl\":\"/django/django-rss\",\"initialTree\":[\"\",{\"children\":[[\"slug\",\"django\",\"d\"],{\"children\":[[\"post\",\"django-rss\",\"d\"],{\"children\":[\"__PAGE__\",{}]}]}]},\"$undefined\",\"$undefined\",true],\"initialHead\":[\"$L4\",null],\"globalErrorComponent\":\"$5\",\"notFound\":[\"$\",\"html\",null,{\"lang\":\"zh-Hant-TW\",\"children\":[[\"$\",\"meta\",null,{\"name\":\"viewport\",\"content\":\"minimum-scale=1, initial-scale=1, width=device-width, shrink-to-fit=no, user-scalable=no, viewport-fit=cover\"}],[\"$\",\"meta\",null,{\"charSet\":\"utf-8\"}],[\"$\",\"link\",null,{\"rel\":\"icon\",\"href\":\"/favicon.png\"}],[\"$\",\"$L6\",null,{\"async\":true,\"src\":\"https://pagead2.googlesyndication.com/pagead/js/adsbygoogle.js?client=ca-pub-1574283203161704\"}],[\"$\",\"body\",null,{\"children\":[\"$\",\"$L7\",null,{\"children\":[\"$L8\",[\"$L9\",[],[\"$\",\"div\",null,{\"className\":\"page-content\",\"children\":[\"$\",\"div\",null,{\"className\":\"container\",\"children\":[\"$\",\"div\",null,{\"className\":\"box-404-wrap\",\"children\":[\"$\",\"div\",null,{\"className\":\"box\",\"children\":[\"$\",\"div\",null,{\"className\":\"d-flex flex-column align-items-center\",\"children\":[[\"$\",\"div\",null,{\"className\":\"text-wrap\",\"children\":[\"$\",\"h1\",null,{\"data-t\":\"404\",\"className\":\"h1\",\"children\":\"404\"}]}],[\"$\",\"div\",null,{\"className\":\"text-center mt-2\",\"children\":\"很抱歉,找不到此頁面! \"}],[\"$\",\"div\",null,{\"className\":\"mt-4\",\"children\":[\"$\",\"a\",null,{\"role\":\"button\",\"tabindex\":\"0\",\"href\":\"/\",\"className\":\"btn btn-primary\",\"children\":\"可前往首頁重新尋找頁面\"}]}]]}]}]}]}]}]],[\"$\",\"footer\",null,{\"className\":\"bg-white py-5 font-size-14\",\"id\":\"footer\",\"children\":[\"$\",\"div\",null,{\"className\":\"container\",\"children\":[[\"$\",\"div\",null,{\"className\":\"row\",\"children\":[\"$\",\"dl\",null,{\"className\":\"col-6 col-md-3 d-none d-sm-block\",\"children\":[[\"$\",\"dt\",null,{\"className\":\"h6\",\"children\":\"鏈接\"}],[\"$\",\"dd\",null,{\"className\":\"my-1\",\"children\":[\"$\",\"a\",null,{\"className\":\"text-secondary\",\"href\":\"https://www.ecool.shop/\",\"title\":\"Ecool Shop\",\"children\":\"Ecool Shop\"}]}]]}]}],[\"$\",\"hr\",null,{\"className\":\"mt-2 mb-4\"}],[\"$\",\"div\",null,{\"className\":\"row\",\"children\":[\"$\",\"div\",null,{\"className\":\"col-md-12\",\"children\":[\"$\",\"div\",null,{\"className\":\"text-secondary text-center\",\"children\":\" Copyright © 2015-2023 億聚網.\"}]}]}]]}]}]]}]}]]}],\"asNotFound\":false,\"children\":[[\"$\",\"html\",null,{\"lang\":\"zh-Hant-TW\",\"children\":[[\"$\",\"meta\",null,{\"name\":\"viewport\",\"content\":\"minimum-scale=1, initial-scale=1, width=device-width, shrink-to-fit=no, user-scalable=no, viewport-fit=cover\"}],[\"$\",\"meta\",null,{\"charSet\":\"utf-8\"}],[\"$\",\"link\",null,{\"rel\":\"icon\",\"href\":\"/favicon.png\"}],[\"$\",\"$L6\",null,{\"async\":true,\"src\":\"https://pagead2.googlesyndication.com/pagead/js/adsbygoogle.js?client=ca-pub-1574283203161704\"}],[\"$\",\"body\",null,{\"children\":[\"$\",\"$L7\",null,{\"children\":[\"$La\",[\"$\",\"$Lb\",null,{\"parallelRouterKey\":\"children\",\"segmentPath\":[\"children\"],\"error\":\"$undefined\",\"errorStyles\":\"$undefined\",\"loading\":\"$undefined\",\"loadingStyles\":\"$undefined\",\"hasLoading\":false,\"template\":[\"$\",\"$Lc\",null,{}],\"templateStyles\":\"$undefined\",\"notFound\":[\"$\",\"div\",null,{\"className\":\"page-content\",\"children\":[\"$\",\"div\",null,{\"className\":\"container\",\"children\":[\"$\",\"div\",null,{\"className\":\"box-404-wrap\",\"children\":[\"$\",\"div\",null,{\"className\":\"box\",\"children\":[\"$\",\"div\",null,{\"className\":\"d-flex flex-column align-items-center\",\"children\":[[\"$\",\"div\",null,{\"className\":\"text-wrap\",\"children\":[\"$\",\"h1\",null,{\"data-t\":\"404\",\"className\":\"h1\",\"children\":\"404\"}]}],[\"$\",\"div\",null,{\"className\":\"text-center mt-2\",\"children\":\"很抱歉,找不到此頁面! \"}],[\"$\",\"div\",null,{\"className\":\"mt-4\",\"children\":[\"$\",\"a\",null,{\"role\":\"button\",\"tabindex\":\"0\",\"href\":\"/\",\"className\":\"btn btn-primary\",\"children\":\"可前往首頁重新尋找頁面\"}]}]]}]}]}]}]}],\"notFoundStyles\":[],\"childProp\":{\"current\":[\"$\",\"$Lb\",null,{\"parallelRouterKey\":\"children\",\"segmentPath\":[\"children\",[\"slug\",\"django\",\"d\"],\"children\"],\"error\":\"$undefined\",\"errorStyles\":\"$undefined\",\"loading\":\"$undefined\",\"loadingStyles\":\"$undefined\",\"hasLoading\":false,\"template\":[\"$\",\"$Lc\",null,{}],\"templateStyles\":\"$undefined\",\"notFound\":\"$undefined\",\"notFoundStyles\":\"$undefined\",\"childProp\":{\"current\":[\"$\",\"$Lb\",null,{\"parallelRouterKey\":\"children\",\"segmentPath\":[\"children\",[\"slug\",\"django\",\"d\"],\"children\",[\"post\",\"django-rss\",\"d\"],\"children\"],\"error\":\"$undefined\",\"errorStyles\":\"$undefined\",\"loading\":\"$undefined\",\"loadingStyles\":\"$undefined\",\"hasLoading\":false,\"template\":[\"$\",\"$Lc\",null,{}],\"templateStyles\":\"$undefined\",\"notFound\":\"$undefined\",\"notFoundStyles\":\"$undefined\",\"childProp\":{\"current\":[\"$Ld\",null],\"segment\":\"__PAGE__\"},\"styles\":[]}],\"segment\":[\"post\",\"django-rss\",\"d\"]},\"styles\":[]}],\"segment\":[\"slug\",\"django\",\"d\"]},\"styles\":[]}],[\"$\",\"footer\",null,{\"className\":\"bg-white py-5 font-size-14\",\"id\":\"footer\",\"children\":[\"$\",\"div\",null,{\"className\":\"container\",\"children\":[[\"$\",\"div\",null,{\"className\":\"row\",\"children\":[\"$\",\"dl\",null,{\"className\":\"col-6 col-md-3 d-none d-sm-block\",\"children\":[[\"$\",\"dt\",null,{\"className\":\"h6\",\"children\":\"鏈接\"}],[\"$\",\"dd\",null,{\"className\":\"my-1\",\"children\":[\"$\",\"a\",null,{\"className\":\"text-secondary\",\"href\":\"https://www.ecool.shop/\",\"title\":\"Ecool Shop\",\"children\":\"Ecool Shop\"}]}]]}]}],[\"$\",\"hr\",null,{\"className\":\"mt-2 mb-4\"}],[\"$\",\"div\",null,{\"className\":\"row\",\"children\":[\"$\",\"div\",null,{\"className\":\"col-md-12\",\"children\":[\"$\",\"div\",null,{\"className\":\"text-secondary text-center\",\"children\":\" Copyright © 2015-2023 億聚網.\"}]}]}]]}]}]]}]}]]}],null]}]]\n"])</script><script>self.__next_f.push([1,"e:I{\"id\":43817,\"chunks\":[\"957:static/chunks/59925f94-6302db480f248368.js\",\"210:static/chunks/ce69f5c4-ada3b84c9854a250.js\",\"703:static/chunks/703-ad7f7a9d88b70895.js\",\"652:static/chunks/652-2922f1746919c870.js\",\"814:static/chunks/814-8c170bd1a2e2c86e.js\",\"928:static/chunks/928-e2c979bb342b0445.js\",\"285:static/chunks/285-4809214f326cf011.js\",\"185:static/chunks/app/layout-491b43680903f5ac.js\"],\"name\":\"\",\"async\":false}\nf:I{\"id\":77095,\"chunks\":[\"703:static/chunks/703-ad7f7a9d88b70895.js\",\"91:static/chunks/app/c"])</script><script>self.__next_f.push([1,"ategory/[slug]/page-bbf4c946a9f81329.js\"],\"name\":\"\",\"async\":false}\n10:I{\"id\":48364,\"chunks\":[\"957:static/chunks/59925f94-6302db480f248368.js\",\"703:static/chunks/703-ad7f7a9d88b70895.js\",\"652:static/chunks/652-2922f1746919c870.js\",\"814:static/chunks/814-8c170bd1a2e2c86e.js\",\"507:static/chunks/507-b7b248284dd3c803.js\",\"928:static/chunks/928-e2c979bb342b0445.js\",\"27:static/chunks/app/[slug]/[post]/page-f1024873a96f4ead.js\"],\"name\":\"\",\"async\":false}\n2c:I{\"id\":84010,\"chunks\":[\"703:static/chunks/703-ad7f7a9d88b70"])</script><script>self.__next_f.push([1,"895.js\",\"91:static/chunks/app/category/[slug]/page-bbf4c946a9f81329.js\"],\"name\":\"\",\"async\":false}\n2d:I{\"id\":9362,\"chunks\":[\"957:static/chunks/59925f94-6302db480f248368.js\",\"703:static/chunks/703-ad7f7a9d88b70895.js\",\"652:static/chunks/652-2922f1746919c870.js\",\"814:static/chunks/814-8c170bd1a2e2c86e.js\",\"507:static/chunks/507-b7b248284dd3c803.js\",\"190:static/chunks/app/article/[slug]/page-8819d505c1df94c3.js\"],\"name\":\"\",\"async\":false}\n2f:I{\"id\":91947,\"chunks\":[\"957:static/chunks/59925f94-6302db480f248368.js\""])</script><script>self.__next_f.push([1,",\"703:static/chunks/703-ad7f7a9d88b70895.js\",\"652:static/chunks/652-2922f1746919c870.js\",\"814:static/chunks/814-8c170bd1a2e2c86e.js\",\"507:static/chunks/507-b7b248284dd3c803.js\",\"928:static/chunks/928-e2c979bb342b0445.js\",\"27:static/chunks/app/[slug]/[post]/page-f1024873a96f4ead.js\"],\"name\":\"\",\"async\":false}\n9:[[\"$\",\"meta\",\"0\",{\"charSet\":\"utf-8\"}],[\"$\",\"meta\",\"1\",{\"name\":\"viewport\",\"content\":\"width=device-width, initial-scale=1\"}]]\n"])</script><script>self.__next_f.push([1,"8:[\"$\",\"div\",null,{\"className\":\"shadow-sm\",\"id\":\"sf-header\",\"children\":[[\"$\",\"$Le\",null,{}],[\"$\",\"div\",null,{\"className\":\"sub-head d-lg-flex bg-white\",\"children\":[\"$\",\"div\",null,{\"className\":\"container\",\"children\":[\"$\",\"div\",null,{\"className\":\"tag-container-outer\",\"children\":[[\"$\",\"div\",null,{\"className\":\"tag-container\",\"children\":[[\"$\",\"span\",\"java\",{\"className\":\"tag-nav__item me-3\",\"children\":[\"$\",\"$Lf\",null,{\"href\":\"/category/java\",\"className\":\"text-secondNav\",\"prefetch\":false,\"children\":\"Java技術\"}]}],[\"$\",\"span\",\"web\",{\"className\":\"tag-nav__item me-3\",\"children\":[\"$\",\"$Lf\",null,{\"href\":\"/category/web\",\"className\":\"text-secondNav\",\"prefetch\":false,\"children\":\"Web開發\"}]}],[\"$\",\"span\",\"hightlang\",{\"className\":\"tag-nav__item me-3\",\"children\":[\"$\",\"$Lf\",null,{\"href\":\"/category/hightlang\",\"className\":\"text-secondNav\",\"prefetch\":false,\"children\":\"高級語言\"}]}],[\"$\",\"span\",\"misc\",{\"className\":\"tag-nav__item me-3\",\"children\":[\"$\",\"$Lf\",null,{\"href\":\"/category/misc\",\"className\":\"text-secondNav\",\"prefetch\":false,\"children\":\"其他技術\"}]}],[\"$\",\"span\",\"script\",{\"className\":\"tag-nav__item me-3\",\"children\":[\"$\",\"$Lf\",null,{\"href\":\"/category/script\",\"className\":\"text-secondNav\",\"prefetch\":false,\"children\":\"腳本語言\"}]}],[\"$\",\"span\",\"database\",{\"className\":\"tag-nav__item me-3\",\"children\":[\"$\",\"$Lf\",null,{\"href\":\"/category/database\",\"className\":\"text-secondNav\",\"prefetch\":false,\"children\":\"數據庫\"}]}],[\"$\",\"span\",\"bigdata\",{\"className\":\"tag-nav__item me-3\",\"children\":[\"$\",\"$Lf\",null,{\"href\":\"/category/bigdata\",\"className\":\"text-secondNav\",\"prefetch\":false,\"children\":\"大數據教程\"}]}],[\"$\",\"span\",\"xml\",{\"className\":\"tag-nav__item me-3\",\"children\":[\"$\",\"$Lf\",null,{\"href\":\"/category/xml\",\"className\":\"text-secondNav\",\"prefetch\":false,\"children\":\"XML技術\"}]}],[\"$\",\"span\",\"zhuanyejiaoyu\",{\"className\":\"tag-nav__item me-3\",\"children\":[\"$\",\"$Lf\",null,{\"href\":\"/category/zhuanyejiaoyu\",\"className\":\"text-secondNav\",\"prefetch\":false,\"children\":\"專業教育\"}]}],[\"$\",\"span\",\"framework\",{\"className\":\"tag-nav__item me-3\",\"children\":[\"$\",\"$Lf\",null,{\"href\":\"/category/framework\",\"className\":\"text-secondNav\",\"prefetch\":false,\"children\":\"框架\"}]}],[\"$\",\"span\",\"software\",{\"className\":\"tag-nav__item me-3\",\"children\":[\"$\",\"$Lf\",null,{\"href\":\"/category/software\",\"className\":\"text-secondNav\",\"prefetch\":false,\"children\":\"軟件工具教程\"}]}],[\"$\",\"span\",\"telecom\",{\"className\":\"tag-nav__item me-3\",\"children\":[\"$\",\"$Lf\",null,{\"href\":\"/category/telecom\",\"className\":\"text-secondNav\",\"prefetch\":false,\"children\":\"通信技術\"}]}],[\"$\",\"span\",\"5f75e0e8c632ea000650d41e\",{\"className\":\"tag-nav__item me-3\",\"children\":[\"$\",\"$Lf\",null,{\"href\":\"/category/microsoft-technology\",\"className\":\"text-secondNav\",\"prefetch\":false,\"children\":\"微軟技術\"}]}],[\"$\",\"span\",\"quality\",{\"className\":\"tag-nav__item me-3\",\"children\":[\"$\",\"$Lf\",null,{\"href\":\"/category/quality\",\"className\":\"text-secondNav\",\"prefetch\":false,\"children\":\"軟件測試\"}]}],[\"$\",\"span\",\"mobile-dev\",{\"className\":\"tag-nav__item me-3\",\"children\":[\"$\",\"$Lf\",null,{\"href\":\"/category/mobile-dev\",\"className\":\"text-secondNav\",\"prefetch\":false,\"children\":\"手機開發\"}]}],[\"$\",\"span\",\"frontend\",{\"className\":\"tag-nav__item me-3\",\"children\":[\"$\",\"$Lf\",null,{\"href\":\"/category/frontend\",\"className\":\"text-secondNav\",\"prefetch\":false,\"children\":\"前端技術\"}]}],[\"$\",\"span\",\"5f75e2d9c632ea000650d488\",{\"className\":\"tag-nav__item me-3\",\"children\":[\"$\",\"$Lf\",null,{\"href\":\"/category/artificial-intelligence\",\"className\":\"text-secondNav\",\"prefetch\":false,\"children\":\"人工智能\"}]}],[\"$\",\"span\",\"how2code\",{\"className\":\"tag-nav__item me-3\",\"children\":[\"$\",\"$Lf\",null,{\"href\":\"/category/how2code\",\"className\":\"text-secondNav\",\"prefetch\":false,\"children\":\"實例代碼\"}]}]]}],[\"$\",\"div\",null,{\"className\":\"gradient-block\"}]]}]}]}]]}]\n"])</script><script>self.__next_f.push([1,"a:[\"$\",\"div\",null,{\"className\":\"shadow-sm\",\"id\":\"sf-header\",\"children\":[[\"$\",\"$Le\",null,{}],[\"$\",\"div\",null,{\"className\":\"sub-head d-lg-flex bg-white\",\"children\":[\"$\",\"div\",null,{\"className\":\"container\",\"children\":[\"$\",\"div\",null,{\"className\":\"tag-container-outer\",\"children\":[[\"$\",\"div\",null,{\"className\":\"tag-container\",\"children\":[[\"$\",\"span\",\"java\",{\"className\":\"tag-nav__item me-3\",\"children\":[\"$\",\"$Lf\",null,{\"href\":\"/category/java\",\"className\":\"text-secondNav\",\"prefetch\":false,\"children\":\"Java技術\"}]}],[\"$\",\"span\",\"web\",{\"className\":\"tag-nav__item me-3\",\"children\":[\"$\",\"$Lf\",null,{\"href\":\"/category/web\",\"className\":\"text-secondNav\",\"prefetch\":false,\"children\":\"Web開發\"}]}],[\"$\",\"span\",\"hightlang\",{\"className\":\"tag-nav__item me-3\",\"children\":[\"$\",\"$Lf\",null,{\"href\":\"/category/hightlang\",\"className\":\"text-secondNav\",\"prefetch\":false,\"children\":\"高級語言\"}]}],[\"$\",\"span\",\"misc\",{\"className\":\"tag-nav__item me-3\",\"children\":[\"$\",\"$Lf\",null,{\"href\":\"/category/misc\",\"className\":\"text-secondNav\",\"prefetch\":false,\"children\":\"其他技術\"}]}],[\"$\",\"span\",\"script\",{\"className\":\"tag-nav__item me-3\",\"children\":[\"$\",\"$Lf\",null,{\"href\":\"/category/script\",\"className\":\"text-secondNav\",\"prefetch\":false,\"children\":\"腳本語言\"}]}],[\"$\",\"span\",\"database\",{\"className\":\"tag-nav__item me-3\",\"children\":[\"$\",\"$Lf\",null,{\"href\":\"/category/database\",\"className\":\"text-secondNav\",\"prefetch\":false,\"children\":\"數據庫\"}]}],[\"$\",\"span\",\"bigdata\",{\"className\":\"tag-nav__item me-3\",\"children\":[\"$\",\"$Lf\",null,{\"href\":\"/category/bigdata\",\"className\":\"text-secondNav\",\"prefetch\":false,\"children\":\"大數據教程\"}]}],[\"$\",\"span\",\"xml\",{\"className\":\"tag-nav__item me-3\",\"children\":[\"$\",\"$Lf\",null,{\"href\":\"/category/xml\",\"className\":\"text-secondNav\",\"prefetch\":false,\"children\":\"XML技術\"}]}],[\"$\",\"span\",\"zhuanyejiaoyu\",{\"className\":\"tag-nav__item me-3\",\"children\":[\"$\",\"$Lf\",null,{\"href\":\"/category/zhuanyejiaoyu\",\"className\":\"text-secondNav\",\"prefetch\":false,\"children\":\"專業教育\"}]}],[\"$\",\"span\",\"framework\",{\"className\":\"tag-nav__item me-3\",\"children\":[\"$\",\"$Lf\",null,{\"href\":\"/category/framework\",\"className\":\"text-secondNav\",\"prefetch\":false,\"children\":\"框架\"}]}],[\"$\",\"span\",\"software\",{\"className\":\"tag-nav__item me-3\",\"children\":[\"$\",\"$Lf\",null,{\"href\":\"/category/software\",\"className\":\"text-secondNav\",\"prefetch\":false,\"children\":\"軟件工具教程\"}]}],[\"$\",\"span\",\"telecom\",{\"className\":\"tag-nav__item me-3\",\"children\":[\"$\",\"$Lf\",null,{\"href\":\"/category/telecom\",\"className\":\"text-secondNav\",\"prefetch\":false,\"children\":\"通信技術\"}]}],[\"$\",\"span\",\"5f75e0e8c632ea000650d41e\",{\"className\":\"tag-nav__item me-3\",\"children\":[\"$\",\"$Lf\",null,{\"href\":\"/category/microsoft-technology\",\"className\":\"text-secondNav\",\"prefetch\":false,\"children\":\"微軟技術\"}]}],[\"$\",\"span\",\"quality\",{\"className\":\"tag-nav__item me-3\",\"children\":[\"$\",\"$Lf\",null,{\"href\":\"/category/quality\",\"className\":\"text-secondNav\",\"prefetch\":false,\"children\":\"軟件測試\"}]}],[\"$\",\"span\",\"mobile-dev\",{\"className\":\"tag-nav__item me-3\",\"children\":[\"$\",\"$Lf\",null,{\"href\":\"/category/mobile-dev\",\"className\":\"text-secondNav\",\"prefetch\":false,\"children\":\"手機開發\"}]}],[\"$\",\"span\",\"frontend\",{\"className\":\"tag-nav__item me-3\",\"children\":[\"$\",\"$Lf\",null,{\"href\":\"/category/frontend\",\"className\":\"text-secondNav\",\"prefetch\":false,\"children\":\"前端技術\"}]}],[\"$\",\"span\",\"5f75e2d9c632ea000650d488\",{\"className\":\"tag-nav__item me-3\",\"children\":[\"$\",\"$Lf\",null,{\"href\":\"/category/artificial-intelligence\",\"className\":\"text-secondNav\",\"prefetch\":false,\"children\":\"人工智能\"}]}],[\"$\",\"span\",\"how2code\",{\"className\":\"tag-nav__item me-3\",\"children\":[\"$\",\"$Lf\",null,{\"href\":\"/category/how2code\",\"className\":\"text-secondNav\",\"prefetch\":false,\"children\":\"實例代碼\"}]}]]}],[\"$\",\"div\",null,{\"className\":\"gradient-block\"}]]}]}]}]]}]\n"])</script><script>self.__next_f.push([1,"11:Tba3,"])</script><script>self.__next_f.push([1,"\u003cdiv\u003e \n \u003cdiv\u003e\n Django是一個高層次的 Python\u0026nbsp;Web 框架,它是一個鼓勵快速開發和乾淨,實用的框架設計。Django可以更容易地快速構建更好的Web應用程序,並且它使用更少的代碼。 \n \u003c/div\u003e \n\u003c/div\u003e \n\u003cdiv\u003e \n \u003cp\u003e \u003cstrong\u003e注意\u003c/strong\u003e\u0026nbsp;−\u0026nbsp;Django是Django 軟件基金會的一個註冊商標,並在BSD許可證授權。 \u003c/p\u003e \n \u003ch2\u003e Django的歷史 \u003c/h2\u003e \n \u003cul\u003e \n \u003cli\u003e \u003cp\u003e 2003\u0026nbsp;−\u0026nbsp;開始時,由Adrian\u0026nbsp;Holovaty和Simon\u0026nbsp;Willison\u0026nbsp;將其作爲勞倫斯雜誌\u0026nbsp;-\u0026nbsp;世界報紙的一個內部項目。 \u003c/p\u003e \u003c/li\u003e \n \u003cli\u003e \u003cp\u003e 2005\u0026nbsp;−\u0026nbsp;把它命名爲Django發佈2005年7月,在爵士吉他手Django Reinhardt 之後。 \u003c/p\u003e \u003c/li\u003e \n \u003cli\u003e \u003cp\u003e 2005\u0026nbsp;−\u0026nbsp;成熟到可以處理多個高流量網站。 \u003c/p\u003e \u003c/li\u003e \n \u003cli\u003e \u003cp\u003e 當前\u0026nbsp;−\u0026nbsp;Django是由世界各地的貢獻者來開發的一個開源項目。 \u003c/p\u003e \u003c/li\u003e \n \u003c/ul\u003e \n \u003ch2\u003e \n \u003cdiv\u003e\n Django的設計理念 \n \u003c/div\u003e \u003c/h2\u003e \n \u003cp\u003e Django自帶了以下設計原則\u0026nbsp;− \u003c/p\u003e \n \u003cul\u003e \n \u003cli\u003e \u003cp\u003e \u003cstrong\u003e鬆耦合\u003c/strong\u003e\u0026nbsp;−\u0026nbsp;Django的目的是使其堆棧中的每個元素獨立於其他。 \u003c/p\u003e \u003c/li\u003e \n \u003cli\u003e \u003cp\u003e \u003cstrong\u003e較少編碼\u003c/strong\u003e\u0026nbsp;−\u0026nbsp;較少代碼,所以能迅速的開發。 \u003c/p\u003e \u003c/li\u003e \n \u003cli\u003e \u003cp\u003e \u003cstrong\u003e不必再重複(DRY)\u0026nbsp;\u003c/strong\u003e−\u0026nbsp;一切都應只在一個地方,而不是一次又一次地重複來開發它。 \u003c/p\u003e \u003c/li\u003e \n \u003cli\u003e \u003cp\u003e \u003cstrong\u003e更快的開發\u003c/strong\u003e\u0026nbsp;−\u0026nbsp;Django的理念是盡一切所能,便於超高速開發。 \u003c/p\u003e \u003c/li\u003e \n \u003cli\u003e \u003cp\u003e \u003cstrong\u003e乾淨的設計\u003c/strong\u003e\u0026nbsp;−\u0026nbsp;Django嚴格維護一個乾淨的設計在其自己的代碼,並可以很容易地遵循最佳Web開發實踐。 \u003c/p\u003e \u003c/li\u003e \n \u003c/ul\u003e \n \u003ch2\u003e \n \u003cdiv\u003e\n Django的優勢 \n \u003c/div\u003e \u003c/h2\u003e \n \u003cdiv\u003e\n 下面是使用\u0026nbsp;Django\u0026nbsp;列出一些優勢- \n \u003c/div\u003e \n \u003cul\u003e \n \u003cli\u003e \u003cp\u003e \u003cstrong\u003e對象關係映射(ORM)支持\u003c/strong\u003e\u0026nbsp;−\u0026nbsp;Django提供數據模型和數據庫引擎之間的橋樑,\u0026nbsp;並支持大量的數據庫系統,包括MySQL,\u0026nbsp;Oracle,\u0026nbsp;Postgres等等。在Django中還支持通過Django-nonrel\u0026nbsp;支持\u0026nbsp;NoSQL 數據庫。 \u003c/p\u003e \n \u003cdiv\u003e\n 現在,唯一的NoSQL數據庫方面支持是MongoDB和谷歌應用程序引擎。 \n \u003c/div\u003e \u003c/li\u003e \n \u003cli\u003e \u003cp\u003e \u003cstrong\u003e多種語言支持\u003c/strong\u003e\u0026nbsp;−\u0026nbsp;Django通過其內置的國際化系統支持多語種網站。所以,可以開發支持多國語言的網站。 \u003c/p\u003e \u003c/li\u003e \n \u003cli\u003e \u003cp\u003e \u003cstrong\u003e框架支持\u0026nbsp;\u003c/strong\u003e−\u0026nbsp;Django內置了對Ajax,RSS,緩存和其他各種框架的支持。 \u003c/p\u003e \u003c/li\u003e \n \u003cli\u003e \u003cp\u003e \u003cstrong\u003e管理GUI\u0026nbsp;\u003c/strong\u003e−\u0026nbsp;Django提供用於管理活動的一個很好的用戶界面。 \u003c/p\u003e \u003c/li\u003e \n \u003cli\u003e \u003cp\u003e \u003cstrong\u003e開發環境\u003c/strong\u003e\u0026nbsp;−\u0026nbsp;Django自帶了一個輕量級的Web服務器,方便終端到終端應用的開發和測試。 \u003c/p\u003e \u003c/li\u003e \n \u003c/ul\u003e \n\u003c/div\u003e \n\u003cbr\u003e"])</script><script>self.__next_f.push([1,"12:T18b9,"])</script><script>self.__next_f.push([1,"\u003cdiv\u003e \n \u003cdiv\u003e\n Django開發環境安裝和設置包括Python,Django,和數據庫系統。由於Django處理Web應用程序,這裏值得一提的是,你需也需要設置一個Web服務器。 \n \u003c/div\u003e \n\u003c/div\u003e \n\u003cdiv\u003e \n \u003ch2\u003e 第1步\u0026nbsp;-\u0026nbsp;安裝Python \u003c/h2\u003e \n \u003cp\u003e Django是用100%純Python代碼編寫,所以需要在你的系統上安裝Python。最新Django的版本需要Python2.6.5或高於2.6.x分支或2.7.3或高於2.7.x\u0026nbsp;的分支,本教程中我們使用的是 Python2.7 和 Django-1.9.1。 \u003c/p\u003e \n \u003cp\u003e 如果是在最新的 Linux 或 Mac\u0026nbsp;OS\u0026nbsp;X,在這些系統可能已經安裝了Python。可以通過在命令提示符下鍵入命令:python\u0026nbsp;來驗證它。如果你看到類似下面這樣的輸出,那麼說明Python已經安裝了。 \u003c/p\u003e \n \u003cpre\u003e$ python\r\nPython 2.7.5 (default, Jun 17 2014, 18:11:42)\r\n[GCC 4.8.2 20140120 (Red Hat 4.8.2-16)] on linux2\u0026nbsp;\u003c/pre\u003e \n \u003cp\u003e 否則,你可以從下面的鏈接下載最新版本安裝Python:\u0026nbsp;\u003ca href=\"https://www.python.org/downloads/\"\u003ehttp://www.python.org/download\u003c/a\u003e. 下面是對應的版本: \u003c/p\u003e \n \u003ctable\u003e \n \u003ctbody\u003e \n \u003ctr\u003e \n \u003cth\u003e Django 版本 \u003c/th\u003e \n \u003cth\u003e Python 版本 \u003c/th\u003e \n \u003c/tr\u003e \n \u003c/tbody\u003e \n \u003ctbody\u003e \n \u003ctr\u003e \n \u003ctd\u003e 1.8 \u003c/td\u003e \n \u003ctd\u003e 2.7, 3.2 (until the end of 2016), 3.3, 3.4, 3.5 \u003c/td\u003e \n \u003c/tr\u003e \n \u003ctr\u003e \n \u003ctd\u003e \u003cstrong\u003e1.9, 1.10\u003c/strong\u003e \u003c/td\u003e \n \u003ctd\u003e \u003cstrong\u003e2.7, 3.4, 3.5\u003c/strong\u003e \u003c/td\u003e \n \u003c/tr\u003e \n \u003c/tbody\u003e \n \u003c/table\u003e \n \u003ch2\u003e \u003c/h2\u003e \n \u003ch2\u003e 第2步\u0026nbsp;-\u0026nbsp;安裝的Django \u003c/h2\u003e \n \u003cp\u003e 安裝Django是很容易的,但需要其安裝的步驟取決於您的操作系統。因爲Python是一種與平臺無關的語言,Django有一個包它可工作在任何地方,而不管您的操作系統。 \u003c/p\u003e \n \u003cp\u003e 您可以從該鏈接下載 Django 的最新版本:\u003ca href=\"https://www.djangoproject.com/download/\"\u003ehttp://www.djangoproject.com/download\u003c/a\u003e. \u003c/p\u003e \n \u003cp\u003e 注:本教程是基於 Window7 64bit 來作實例開發。 \u003c/p\u003e \n \u003ch3\u003e \n \u003cdiv\u003e\n UNIX/Linux和Mac\u0026nbsp;OS\u0026nbsp;X安裝 \n \u003c/div\u003e \u003c/h3\u003e \n \u003cp\u003e 如果你運行的是Linux或Mac\u0026nbsp;OS系統,那麼可以有兩種方式來安裝Django\u0026nbsp;− \u003c/p\u003e \n \u003cul\u003e \n \u003cli\u003e \n \u003cdiv\u003e\n 可以使用包管理器的操作系統可以使用\u0026nbsp;easy_install\u0026nbsp;或\u0026nbsp;pip\u0026nbsp;安裝。 \n \u003c/div\u003e \u003c/li\u003e \n \u003cli\u003e \n \u003cdiv\u003e\n 在手動安裝之前您手動下載的官方壓縮包。 \n \u003c/div\u003e \u003c/li\u003e \n \u003c/ul\u003e \n \u003cp\u003e 我們將介紹第二個選項作爲第一個,看你的操作系統類型。\u0026nbsp;如果你決定按照第一種選擇,那麼需要注意的是\u0026nbsp;Django\u0026nbsp;安裝的版本。 \u003c/p\u003e \n \u003cdiv\u003e\n 比方說,你從上面的鏈接下載了壓縮包,它應該是類似這樣\u0026nbsp;Django\u0026nbsp;x.xx.tar.gz: \n \u003c/div\u003e \n \u003cdiv\u003e\n 解壓並安裝。 \n \u003c/div\u003e \n \u003cpre\u003e$ tar xzvf Django-x.xx.tar.gz\r\n$ cd Django-x.xx\r\n$ sudo python setup.py install\u0026nbsp;\u003c/pre\u003e \n \u003cp\u003e 您可以通過運行下面的這個命令來測試你的安裝\u0026nbsp;− \u003c/p\u003e \n \u003cpre\u003e$ django-admin.py --version\r\u003c/pre\u003e \n \u003cdiv\u003e\n 如果你看到打印在屏幕上的當前Django版本,那麼說明一切都設置好了。 \n \u003c/div\u003e \n \u003cdiv\u003e\n 注\u0026nbsp;-\u0026nbsp;對於某些版本的Django\u0026nbsp;它將\u0026nbsp;django-admin\u0026nbsp;的「.py」\u0026nbsp;刪除。 \n \u003c/div\u003e \n \u003ch3\u003e \n \u003cdiv\u003e\n Windows安裝 \n \u003c/div\u003e \u003c/h3\u003e \n \u003cdiv\u003e\n 本教程我們以Window系統來講解演示實例,假設 Django 壓縮和Python安裝在計算機上。 \n \u003c/div\u003e \n \u003cdiv\u003e\n 首先,路徑驗證。 \n \u003c/div\u003e \n \u003cp\u003e 在某些版本的Windows(Windows7)中,可能需要保證Path系統變量的路徑如下,C:\\Python27\\;C:\\Python27\\Lib\\site-packages\\django\\bin\\\u0026nbsp;,\u0026nbsp;當然這取決於你的Python版本。 \u003c/p\u003e \n \u003cdiv\u003e\n 然後,提取和安裝Django,這裏我們放到目錄\u0026nbsp;C:\\Python27\\Django-1.9.1 \n \u003c/div\u003e \n \u003cpre\u003e\u003cspan\u003ec:\\Python27\\Django-1.9.1\u0026gt;\u003c/span\u003e\u003c/pre\u003e \n \u003cdiv\u003e\n 接下來,安裝\u0026nbsp;Django\u0026nbsp;需要運行下面的命令,你在窗口需要管理員權限來執行Shell\u0026nbsp;命令\u0026nbsp;「cmd」\u0026nbsp;- \n \u003c/div\u003e \n \u003cpre\u003e\u003cspan\u003eC:\\Python27\\Django-1.9.1\u0026gt;\u003c/span\u003epython setup.py install\u0026nbsp;\u003c/pre\u003e \n \u003cp\u003e 經過一段時間後,所顯示的結果如下圖所示: \u003c/p\u003e \n \u003cp\u003e \u003cimg src=\"https://asset.1ju.org/cmsstatic/django-1.png\" alt=\"Django開發環境安裝配置\"\u003e \u003c/p\u003e \n \u003cp\u003e 要測試你的安裝,打開命令提示符,然後鍵入以下命令− \u003c/p\u003e \n \u003cpre\u003ec:\\\u0026gt;django-admin.py --version\r\u003c/pre\u003e \n \u003cdiv\u003e\n 如果你看到 Django 的當前版本顯示在屏幕上,那麼一切設置都 OK 了。 \n \u003c/div\u003e \n \u003cp\u003e \u003cstrong\u003e或者\u003c/strong\u003e \u003c/p\u003e \n \u003cdiv\u003e\n 發出\u0026nbsp;「cmd」\u0026nbsp;提示符,然後鍵入python,然後 - \n \u003c/div\u003e \n \u003cpre\u003ec:\\\u0026gt; python\r\n\u0026gt;\u0026gt;\u0026gt; import django\r\n\u0026gt;\u0026gt;\u0026gt; print django.get_version()\r\u003c/pre\u003e \n \u003cimg src=\"https://asset.1ju.org/cmsstatic/django-2.png\" alt=\"Django開發環境安裝配置\"\u003e \n \u003cstrong\u003e\u003cbr\u003e \u003c/strong\u003e \n \u003ch2\u003e \u003cstrong\u003e第3步\u0026nbsp;-\u0026nbsp;數據庫安裝\u003c/strong\u003e \u003c/h2\u003e \n \u003cdiv\u003e\n Django支持幾種主要的數據庫引擎,可以根據你的要求。 \n \u003c/div\u003e \n \u003cul\u003e \n \u003cli\u003e \u003ca href=\"http://www.mysql.com/\"\u003eMySQL (http://www.mysql.com/)\u003c/a\u003e \u003c/li\u003e \n \u003cli\u003e \u003ca href=\"http://www.postgresql.org/\"\u003ePostgreSQL (http://www.postgresql.org/)\u003c/a\u003e \u003c/li\u003e \n \u003cli\u003e \u003ca href=\"http://www.sqlite.org/\"\u003eSQLite 3 (http://www.sqlite.org/)\u003c/a\u003e \u003c/li\u003e \n \u003cli\u003e \u003ca href=\"http://www.oracle.com/index.html\"\u003eOracle (http://www.oracle.com/)\u003c/a\u003e \u003c/li\u003e \n \u003cli\u003e \u003ca href=\"https://django-mongodb-engine.readthedocs.org/en/latest/\"\u003eMongoDb (https://django-mongodb-engine.readthedocs.org)\u003c/a\u003e \u003c/li\u003e \n \u003cli\u003e \u003ca href=\"https://cloud.google.com/appengine/articles/django-nonrel\"\u003eGoogleAppEngine Datastore (https://cloud.google.com/appengine/articles/django-nonrel)\u003c/a\u003e \u003c/li\u003e \n \u003c/ul\u003e \n \u003cdiv\u003e\n 可以參考相應的文檔,以安裝和配置您選擇的數據庫。 \n \u003c/div\u003e \n \u003cdiv\u003e\n 注\u0026nbsp;-\u0026nbsp;第5和第6是NoSQL數據庫。 \n \u003c/div\u003e \n \u003ch2\u003e \u003cstrong\u003e第4步\u0026nbsp;-\u0026nbsp;Web服務器\u003c/strong\u003e \u003c/h2\u003e \n \u003cp\u003e Django自帶了一個輕量級的Web服務器,用於開發和測試應用程序。此服務器預配置支持 Django 相關工作,更重要的是它會在開發人員對其修改代碼保存後重新啓動。 \u003c/p\u003e \n \u003cp\u003e 然而,Django支持Apache和其他流行的Web服務器,如:lighttpd。\u0026nbsp;我們將討論在這兩個不同的實例在後續章節。 \u003c/p\u003e \n\u003c/div\u003e \n\u003cbr\u003e"])</script><script>self.__next_f.push([1,"13:T1057,"])</script><script>self.__next_f.push([1,"\u003cdiv\u003e \n \u003cdiv\u003e\n 現在我們已經安裝了Django,讓我們開始使用它。\u0026nbsp;在Django中,每個要創建Web應用程序稱爲項目;\u0026nbsp;一個項目是應用程序的總和。應用程序是一組依託於MVC模式的代碼文件。\u0026nbsp;作爲例子,讓我們要建立一個網站,該網站是我們的項目,論壇,新聞,聯繫方式的應用程序。\u0026nbsp;這種結構使得移動的項目之間的應用更容易,因爲每一個應用程序都是獨立的。 \n \u003c/div\u003e \n\u003c/div\u003e \n\u003cdiv\u003e \n \u003ch2\u003e \n \u003cdiv\u003e\n 創建項目 \n \u003c/div\u003e \u003c/h2\u003e \n \u003cp\u003e 無論您是在Windows或Linux,只是得到一個終端或一個命令提示符並導航至要創建項目的位置,然後執行下面的代碼\u0026nbsp;− \u003c/p\u003e \n \u003cpre\u003e\u003cspan\u003ec:\\\u0026gt; \u003c/span\u003edjango-admin startproject myproject\u0026nbsp;\u003c/pre\u003e \n \u003cp\u003e 這將創建一個「myproject」文件夾結構如下− \u003c/p\u003e \n \u003cpre\u003emyproject/\r\n manage.py\r\n myproject/\r\n __init__.py\r\n settings.py\r\n urls.py\r\n wsgi.py\r\u003c/pre\u003e \n \u003ch2\u003e \n \u003cdiv\u003e\n 項目結構 \n \u003c/div\u003e \u003c/h2\u003e \n \u003cp\u003e 「myproject」文件夾只是你的項目的容器,它實際上包含了兩個元素\u0026nbsp;− \u003c/p\u003e \n \u003cul\u003e \n \u003cli\u003e \u003cp\u003e manage.py\u0026nbsp;−\u0026nbsp;文件是一種項目本地\u0026nbsp;django-admin\u0026nbsp;通過命令行與項目交互(啓動開發服務器,同步數據庫...)。通過 manage.py 可以瞭解可使用的代碼\u0026nbsp;− \u003c/p\u003e \u003c/li\u003e \n \u003c/ul\u003e \n \u003cpre\u003eC:\u0026gt; python manage.py help\r\u003c/pre\u003e \n \u003cul\u003e \n \u003cli\u003e \u003cp\u003e \u0026nbsp;「myproject」 子目錄中\u0026nbsp;−\u0026nbsp;此文件夾是項目的實際Python包。它包含四個文件\u0026nbsp;− \u003c/p\u003e \n \u003cul\u003e \n \u003cli\u003e \u003cp\u003e __init__.py\u0026nbsp;−\u0026nbsp;只對於Python,處理這個文件夾的包。 \u003c/p\u003e \u003c/li\u003e \n \u003cli\u003e \u003cp\u003e settings.py\u0026nbsp;−\u0026nbsp;正如名稱所示,用於項目設置。 \u003c/p\u003e \u003c/li\u003e \n \u003cli\u003e \u003cp\u003e urls.py\u0026nbsp;−\u0026nbsp;項目創建的各個環節和要調用的函數。項目的所有Toc。 \u003c/p\u003e \u003c/li\u003e \n \u003cli\u003e \u003cp\u003e wsgi.py\u0026nbsp;−\u0026nbsp;如果需要部署項目在 WSGI 上。 \u003c/p\u003e \u003c/li\u003e \n \u003c/ul\u003e \u003c/li\u003e \n \u003c/ul\u003e \n \u003ch2\u003e \n \u003cdiv\u003e\n 設置項目 \n \u003c/div\u003e \u003c/h2\u003e \n \u003cp\u003e 您的項目是建立在子文件夾\u0026nbsp;myproject/settings.py。以下是可能需要設置一些重要的選項\u0026nbsp;- \u003c/p\u003e \n \u003cpre\u003eDEBUG = True\u0026nbsp;\u003c/pre\u003e \n \u003cp\u003e 此選項如上看到的,你的項目是否處於調試模式或沒有。\u0026nbsp;調試模式可以讓您獲得有關項目的錯誤的詳細信息。線上的項目千萬不要將其設置爲「True」。然而,這必須設置爲「True」,如果想Django服務器處理靜態文件。它一般使用的是開發模式。 \u003c/p\u003e \n \u003cpre\u003eDATABASES = {\r\n 'default': {\r\n 'ENGINE': 'django.db.backends.sqlite3',\r\n 'NAME': 'database.sql',\r\n 'USER': '',\r\n 'PASSWORD': '',\r\n 'HOST': '',\r\n 'PORT': '',\r\n }\r\n}\u0026nbsp;\u003c/pre\u003e \n \u003cp\u003e 數據庫設置在「Database」字典。上面的例子是 SQLite 引擎。如前面所述,Django 也支持− \u003c/p\u003e \n \u003cul\u003e \n \u003cli\u003e MySQL (django.db.backends.mysql) \u003c/li\u003e \n \u003cli\u003e PostGreSQL (django.db.backends.postgresql_psycopg2) \u003c/li\u003e \n \u003cli\u003e Oracle (django.db.backends.oracle) and NoSQL DB \u003c/li\u003e \n \u003cli\u003e MongoDB (django_mongodb_engine) \u003c/li\u003e \n \u003c/ul\u003e \n \u003cdiv\u003e\n 在設置任何新引擎,確保你安裝了正確的 DB 驅動程序。 \n \u003c/div\u003e \n \u003cp\u003e 還可以設置其他選項,如:TIME_ZONE, LANGUAGE_CODE, TEMPLATE… \u003c/p\u003e \n \u003cdiv\u003e\n 現在,您的項目創建和配置,確保它能工作\u0026nbsp;- \n \u003c/div\u003e \n \u003cpre\u003e\u003cspan\u003ec:\\myproject\u0026gt; \u003c/span\u003e\u003cspan\u003epython manage.py runserver\u003c/span\u003e\u003c/pre\u003e \n \u003cdiv\u003e\n 這裏將獲得像上運行上面的代碼如下\u0026nbsp;- \n \u003cbr\u003e \n \u003cpre class=\"prettyprint lang-bsh\"\u003eC:\\myproject\u0026gt;python manage.py runserver\r\nPerforming system checks...\r\nSystem check identified no issues (0 silenced).\r\nYou have unapplied migrations; your app may not work properly until they are app\r\nlied.\r\nRun 'python manage.py migrate' to apply them.\r\nJanuary 23, 2016 - 09:08:32\r\nDjango version 1.9.1, using settings 'myproject.settings'\r\nStarting development server at http://127.0.0.1:8000/ \r\nQuit the server with CTRL-BREAK.\u003c/pre\u003e \n \u003c/div\u003e \n\u003c/div\u003e \n\u003cdiv\u003e \n \u003cimg src=\"https://asset.1ju.org/cmsstatic/django-3.png\" alt=\"Django創建工程\"\u003e \n \u003cbr\u003e \n\u003c/div\u003e \n\u003cbr\u003e"])</script><script>self.__next_f.push([1,"14:T7d9,"])</script><script>self.__next_f.push([1,"\u003cdiv\u003e \n \u003cdiv\u003e\n 一個項目是許多應用的總和。每個應用程序有一個客觀並可重複使用到另一個項目,像在網站上的聯繫表單可以是一個應用程序,並且可以重複使用到其它應用。看到它作爲項目的一個模塊。 \n \u003c/div\u003e \n\u003c/div\u003e \n\u003cdiv\u003e \n \u003ch2\u003e \n \u003cdiv\u003e\n 創建應用程序 \n \u003c/div\u003e \u003c/h2\u003e \n \u003cp\u003e 我們假設在項目文件夾。在我們有主項目「myproject」文件夾,並在一級文件夾有一個文件:manage.py\u0026nbsp;,執行以下命令 − \u003c/p\u003e \n \u003cpre\u003e\u003cspan\u003eC:\\myproject\u0026gt; \u003c/span\u003epython manage.py startapp myapp\u0026nbsp;\u003c/pre\u003e \n \u003cp\u003e 剛剛創建的\u0026nbsp;myapp\u0026nbsp;應用程序類似於項目,Django創建\u0026nbsp;「myapp」\u0026nbsp;文件夾中的應用程序結構如下\u0026nbsp;− \u003c/p\u003e \n \u003cpre\u003emyapp/\r\n __init__.py\r\n admin.py\r\n models.py\r\n tests.py\r\n views.py\r\u003c/pre\u003e \n \u003cul\u003e \n \u003cli\u003e \u003cp\u003e \u003cstrong\u003e__init__.py\u003c/strong\u003e\u0026nbsp;−\u0026nbsp;只是爲了確保\u0026nbsp;python\u0026nbsp;作爲包處理此文件夾。 \u003c/p\u003e \u003c/li\u003e \n \u003cli\u003e \u003cp\u003e \u003cstrong\u003eadmin.py\u003c/strong\u003e\u0026nbsp;−\u0026nbsp;此文件幫助您在管理界面中修改應用程序。 \u003c/p\u003e \u003c/li\u003e \n \u003cli\u003e \u003cp\u003e \u003cstrong\u003emodels.py\u003c/strong\u003e\u003cstrong\u003e\u0026nbsp;\u003c/strong\u003e−\u0026nbsp;這是存儲所有的應用程序的模型。 \u003c/p\u003e \u003c/li\u003e \n \u003cli\u003e \u003cp\u003e \u003cstrong\u003etests.py\u003c/strong\u003e\u0026nbsp;−\u0026nbsp;這是單元測試。 \u003c/p\u003e \u003c/li\u003e \n \u003cli\u003e \u003cp\u003e \u003cstrong\u003eviews.py\u003c/strong\u003e\u003cstrong\u003e\u0026nbsp;\u003c/strong\u003e−\u0026nbsp;這是應用程序視圖。 \u003c/p\u003e \u003c/li\u003e \n \u003c/ul\u003e \n \u003ch2\u003e \n \u003cdiv\u003e\n 獲取項目來了解應用程序 \n \u003c/div\u003e \u003c/h2\u003e \n \u003cp\u003e 在這個階段,我們有「myapp」這個應用程序,現在我們需要註冊它到 Django項目「myproject」。要做到這一點,在你的項目中(添加應用程序名稱)到 settings.py 文件更新 INSTALLED_APPS 元組\u0026nbsp;- \u003c/p\u003e \n \u003cpre\u003eINSTALLED_APPS = (\r\n 'django.contrib.admin',\r\n 'django.contrib.auth',\r\n 'django.contrib.contenttypes',\r\n 'django.contrib.sessions',\r\n 'django.contrib.messages',\r\n 'django.contrib.staticfiles',\r\n 'myapp',\r\n)\u003c/pre\u003e \n\u003c/div\u003e \n\u003cbr\u003e"])</script><script>self.__next_f.push([1,"15:T135e,"])</script><script>self.__next_f.push([1,"\u003cdiv\u003e \n \u003cdiv\u003e \n \u003cspan\u003eDjango爲管理活動提供隨時可以使用的用戶界面。\u003c/span\u003e \n \u003cspan\u003e我們都知道,管理界面對於一個Web項目是十分重要的。\u003c/span\u003e \n \u003cspan\u003eDjango根據您的項目模型自動生成管理界面。\u003c/span\u003e \n \u003c/div\u003e \n\u003c/div\u003e \n\u003cdiv\u003e \n \u003ch2\u003e \n \u003cdiv\u003e\n 啓動管理界面 \n \u003c/div\u003e \u003c/h2\u003e \n \u003cp\u003e 管理界面依賴於 django.contrib 模塊。若需它工作,需要確保一些模塊是否導入在\u0026nbsp;myproject/settings.py\u0026nbsp;文件中的INSTALLED_APPS和MIDDLEWARE_CLASSES元組。 \u003c/p\u003e \n \u003cdiv\u003e\n 對於 INSTALLED_APPS 確保有\u0026nbsp;- \n \u003c/div\u003e \n \u003cpre\u003eINSTALLED_APPS = (\r\n 'django.contrib.admin',\r\n 'django.contrib.auth',\r\n 'django.contrib.contenttypes',\r\n 'django.contrib.sessions',\r\n 'django.contrib.messages',\r\n 'django.contrib.staticfiles',\r\n 'myapp',\r\n)\r\u003c/pre\u003e \n \u003cp\u003e 對於 MIDDLEWARE_CLASSES 有− \u003c/p\u003e \n \u003cpre\u003eMIDDLEWARE_CLASSES = (\r\n 'django.contrib.sessions.middleware.SessionMiddleware',\r\n 'django.middleware.common.CommonMiddleware',\r\n 'django.middleware.csrf.CsrfViewMiddleware',\r\n 'django.contrib.auth.middleware.AuthenticationMiddleware',\r\n 'django.contrib.messages.middleware.MessageMiddleware',\r\n 'django.middleware.clickjacking.XFrameOptionsMiddleware',\r\n)\r\u003c/pre\u003e \n \u003cdiv\u003e\n 在啓動服務器,我們來訪問管理界面,可能還需要啓動數據庫\u0026nbsp;- \n \u003c/div\u003e \n \u003cpre\u003ec:\\myproject\u0026gt; python manage.py syncdb\u0026nbsp;\u003c/pre\u003e \n \u003cp\u003e syncdb將創建必要的表,或根據您的數據庫類型的集合,以及必要的管理界面來運行。\u0026nbsp;即使你不是一個超級用戶,系統會提示創建一個。 \u003c/p\u003e \n \u003cp\u003e 如果你已經有一個超級用戶或忘記了,可以用下面的代碼來直接創建一個\u0026nbsp;− \u003c/p\u003e \n \u003cpre\u003e\u003cspan\u003ec:\\myproject\u0026gt;\u003c/span\u003e python manage.py createsuperuser\u0026nbsp;\u003c/pre\u003e \n \u003cp\u003e 現在就開始啓動管理界面,我們需要確保已經爲管理界面配置URL。打開 myproject/url.py,應該有這樣的東西\u0026nbsp;− \u003c/p\u003e \n \u003cpre class=\"prettyprint lang-bsh\"\u003e\"\"\"myproject URL Configuration\r\nThe `urlpatterns` list routes URLs to views. For more information please see:\r\n https://docs.djangoproject.com/en/1.9/topics/http/urls/ \r\nExamples:\r\nFunction views\r\n 1. Add an import: from my_app import views\r\n 2. Add a URL to urlpatterns: url(r'^$', views.home, name='home')\r\nClass-based views\r\n 1. Add an import: from other_app.views import Home\r\n 2. Add a URL to urlpatterns: url(r'^$', Home.as_view(), name='home')\r\nIncluding another URLconf\r\n 1. Import the include() function: from django.conf.urls import url, include\r\n 2. Add a URL to urlpatterns: url(r'^blog/', include('blog.urls'))\r\n\"\"\"\r\nfrom django.conf.urls import url\r\nfrom django.contrib import admin\r\nurlpatterns = [\r\n url(r'^admin/', admin.site.urls),\r\n]\u003c/pre\u003e \n \u003cp\u003e \u003cbr\u003e \u003c/p\u003e \n \u003cdiv\u003e \n \u003cdiv\u003e\n 整個執行命令過程: \n \u003cbr\u003e \n \u003cpre class=\"prettyprint lang-bsh\"\u003e# 創建必要的數據庫表,並初始化相關數據\r\nC:\\myproject\u0026gt;python manage.py migrate\r\nOperations to perform:\r\n Apply all migrations: admin, contenttypes, auth, sessions\r\nRunning migrations:\r\n Rendering model states... DONE\r\n Applying contenttypes.0001_initial... OK\r\n Applying auth.0001_initial... OK\r\n Applying admin.0001_initial... OK\r\n Applying admin.0002_logentry_remove_auto_add... OK\r\n Applying contenttypes.0002_remove_content_type_name... OK\r\n Applying auth.0002_alter_permission_name_max_length... OK\r\n Applying auth.0003_alter_user_email_max_length... OK\r\n Applying auth.0004_alter_user_username_opts... OK\r\n Applying auth.0005_alter_user_last_login_null... OK\r\n Applying auth.0006_require_contenttypes_0002... OK\r\n Applying auth.0007_alter_validators_add_error_messages... OK\r\n Applying sessions.0001_initial... OK\r\nC:\\myproject\u0026gt;python manage.py createsuperuser\r\nUsername (leave blank to use 'administrator'): admin\r\nEmail address: admin@yiibai.com \r\nPassword:\r\nPassword (again):\r\nThis password is too short. It must contain at least 8 characters.\r\nThis password is too common.\r\nThis password is entirely numeric.\r\nPassword:\r\nPassword (again):\r\nSuperuser created successfully.\r\nC:\\myproject\u0026gt;\u003c/pre\u003e \n \u003c/div\u003e \n \u003c/div\u003e \n \u003cdiv\u003e\n 現在,只需使用下面的命令運行啓動服務器。 \n \u003c/div\u003e \n \u003cpre\u003e\u003cspan\u003ec:\\myproject\u0026gt;\u003c/span\u003e python manage.py runserver\u0026nbsp;\u003c/pre\u003e \n \u003cp\u003e 管理界面如下URL,應該是可以訪問:http://127.0.0.1:8000/admin/ \u003c/p\u003e \n \u003cimg src=\"https://asset.1ju.org/cmsstatic/django-4.png\" alt=\"Django管理員界面\"\u003e \n \u003cbr\u003e \n \u003cp\u003e 使用超級用戶帳號登陸,會看到如下界面\u0026nbsp;− \u003c/p\u003e \n \u003cimg src=\"https://asset.1ju.org/cmsstatic/django-5.png\" alt=\"Django管理員界面\"\u003e \n \u003cbr\u003e \n \u003cp\u003e 這個界面可以讓我們管理 Django 中的組和用戶,以及所有在應用程序中註冊的模型。這個界面使您能夠至少做到「CRUD」(創建,讀取,更新,刪除)模型操作。 \u003c/p\u003e \n \u003cdiv\u003e \n \u003cspan\u003e\u003cbr\u003e \u003c/span\u003e \n \u003c/div\u003e \n\u003c/div\u003e \n\u003cbr\u003e"])</script><script>self.__next_f.push([1,"16:T7bc,"])</script><script>self.__next_f.push([1,"\u003cdiv\u003e \n \u003cdiv\u003e\n 視圖功能,或簡稱\"view\",是一個簡單的Python函數,它接受一個Web請求,並返回一個Web響應。此響應可以是 Web頁的HTML內容,或重定向,或404錯誤,或XML文檔,或圖像/片等。例如:使用視圖創建頁面,請注意需要將一個視圖關聯到一個URL,並把它看作一個網頁。 \n \u003c/div\u003e \n\u003c/div\u003e \n\u003cdiv\u003e \n \u003cdiv\u003e\n 在Django中,視圖必須在應用程序的\u0026nbsp;views.py\u0026nbsp;文件中創建。 \n \u003c/div\u003e \n \u003ch2\u003e 簡單的視圖 \u003c/h2\u003e \n \u003cp\u003e 我們將在 myapp\u0026nbsp;創建一個簡單的視圖顯示:\u0026nbsp;\"welcome to yiibai !\" \u003c/p\u003e \n \u003cp\u003e 查看如下的視圖 − \u003c/p\u003e \n \u003cpre\u003efrom django.http import HttpResponse\r\n\r\ndef hello(request):\r\n text = \"\"\"\u0026lt;h1\u0026gt;welcome to yiibai !\u0026lt;/h1\u0026gt;\"\"\"\r\n return HttpResponse(text)\u0026nbsp;\u003c/pre\u003e \n \u003cp\u003e 在這個視圖中,我們使用 HttpResponse 呈現 HTML(你可能已經注意到了,我們將HTML硬編碼在視圖中)。\u0026nbsp;在這個視圖我們只是需要把它映射到一個URL(這將在即將到來的章節中討論)的頁面。 \u003c/p\u003e \n \u003cp\u003e 我們使用 HttpResponse 在渲染視圖 HTML 之前。\u0026nbsp;這不是渲染網頁的最佳方式。Django支持MVT模式,從而先渲染視圖,Django\u0026nbsp;-\u0026nbsp;MVT這是我們需要的− \u003c/p\u003e \n \u003cp\u003e 一個模板文件: myapp/templates/hello.html \u003c/p\u003e \n \u003cp\u003e 現在,我們的視圖內容如下\u0026nbsp;− \u003c/p\u003e \n \u003cpre\u003efrom django.shortcuts import render\r\n\r\ndef hello(request):\r\n return render(request, \"myapp/template/hello.html\", {})\r\u003c/pre\u003e \n \u003cdiv\u003e\n 視圖還可以接受的參數\u0026nbsp;- \n \u003c/div\u003e \n \u003cpre\u003efrom django.http import HttpResponse\r\n\r\ndef hello(request, number):\r\n text = \"\u0026lt;h1\u0026gt;welcome to my app number %s!\u0026lt;/h1\u0026gt;\"% number\r\n return HttpResponse(text)\u0026nbsp;\u003c/pre\u003e \n \u003cp\u003e 當鏈接到一個網址,頁面會顯示作爲參數傳遞的數值。\u0026nbsp;注意,參數將通過URL(在下一章節中討論)傳遞。 \u003c/p\u003e \n \u003cdiv\u003e \n \u003cspan\u003e\u003cbr\u003e \u003c/span\u003e \n \u003c/div\u003e \n\u003c/div\u003e \n\u003cbr\u003e"])</script><script>self.__next_f.push([1,"17:T2221,"])</script><script>self.__next_f.push([1,"現在,我們有一個工作視圖在前面的章節中解釋。我們希望通過一個URL來訪問該視圖。\u0026nbsp;Django有他自己\u0026nbsp;URL映射的方式,現在我們來編輯項目中的\u0026nbsp;url.py\u0026nbsp;文件(myproject/url.py)完成。url.py\u0026nbsp;文件內容看起來如下: \n\u003cdiv\u003e \n \u003cpre\u003efrom django.conf.urls import patterns, include, url\r\nfrom django.contrib import admin\r\nadmin.autodiscover()\r\n\r\nurlpatterns = patterns('',\r\n #Examples\r\n #url(r'^$', 'myproject.view.home', name = 'home'),\r\n #url(r'^blog/', include('blog.urls')),\r\n\r\n url(r'^admin', include(admin.site.urls)),\r\n)\u0026nbsp;\u003c/pre\u003e \n \u003cp\u003e 當用戶在您的網絡應用程序發起一個網頁的請求,Django控制器會接管通過url.py文件來尋找相應的視圖,然後返回HTML響應或如果沒有找到則返回404未找到錯誤。最重要的是「urlpatterns」\u0026nbsp;元組。這就是定義URL和視圖之間的映射。一個映射的URL模式就像一個元組\u0026nbsp;− \u003c/p\u003e \n \u003cpre\u003efrom django.conf.urls import patterns, include, url\r\nfrom django.contrib import admin\r\nadmin.autodiscover()\r\n\r\nurlpatterns = patterns('',\r\n #Examples\r\n #url(r'^$', 'myproject.view.home', name = 'home'),\r\n #url(r'^blog/', include('blog.urls')),\r\n\r\n url(r'^admin', include(admin.site.urls)),\r\n url(r'^hello/', 'myapp.views.hello', name = 'hello'),\r\n)\u0026nbsp;\u003c/pre\u003e \n \u003cp\u003e 標記行映射URL\u0026nbsp;\"/home\"\u0026nbsp;到\u0026nbsp;myapp/\u0026nbsp;view.py文件中創建的Hello視圖。正如你看到上面的映射是由三個要素\u0026nbsp;- \u003c/p\u003e \n \u003cul\u003e \n \u003cli\u003e \u003cp\u003e 模式−\u0026nbsp;一個正則表達式匹配以URL予以解決和映射。\u0026nbsp;能夠與python\u0026nbsp;「re」模塊工作一切都符合的模式(非常有用在你想通過URL來傳遞參數時)。 \u003c/p\u003e \u003c/li\u003e \n \u003cli\u003e \u003cp\u003e python到視圖的路徑−在你導入模塊時相同。 \u003c/p\u003e \u003c/li\u003e \n \u003cli\u003e \u003cp\u003e 名稱−爲了執行URL反轉,需要使用URL模式的命名來執行上面示例。這樣做以後,啓動服務器,通過以下URL訪問您的視圖:http://127.0.0.1/hello \u003c/p\u003e \u003c/li\u003e \n \u003c/ul\u003e \n \u003ch2\u003e 整理網址 \u003c/h2\u003e \n \u003cp\u003e 到目前爲止,我們已經創建了「myprojects/url.py」文件的URL,然而,正如前面關於Django說明,創建一個應用程序,最好是能夠重複使用在不同的項目中應用。\u0026nbsp;這樣就可以很容易地看到的問題是什麼,如果要保存所有網址中在「projecturl.py」文件中。\u0026nbsp;所以,最好的做法是創建每個應用程序的「url.py」,並把它列入我們的主項目 url.py 文件(包括在我們的管理界面管理的 URL 之前)。\u003cbr\u003e \u003cimg src=\"https://asset.1ju.org/cmsstatic/django-url-1.jpg\" alt=\"Django URL映射\"\u003e \u003c/p\u003e \n \u003ch2\u003e \n \u003cdiv\u003e\n 它是如何做的呢? \n \u003c/div\u003e \u003c/h2\u003e \n \u003cp\u003e 我們需要使用下面的代碼來創建一個\u0026nbsp;urls.py\u0026nbsp;文件在 myapp 文件夾中(myapp/urls.py)\u0026nbsp;− \u003c/p\u003e \n \u003cpre\u003efrom django.conf.urls import patterns, include, url\r\n\r\nurlpatterns = patterns('', url(r'^hello/', 'myapp.views.hello', name = 'hello'),)\r\u003c/pre\u003e \n \u003cdiv\u003e\n myproject/urls.py\u0026nbsp;將變更爲以下- \n \u003c/div\u003e \n \u003cpre\u003efrom django.conf.urls import patterns, include, url\r\nfrom django.contrib import admin\r\nadmin.autodiscover()\r\n\r\nurlpatterns = patterns('',\r\n #Examples\r\n #url(r'^$', 'myproject.view.home', name = 'home'),\r\n #url(r'^blog/', include('blog.urls')),\r\n\r\n url(r'^admin', include(admin.site.urls)),\r\n url(r'^myapp/', include(myapp.urls)),\r\n)\u0026nbsp;\u003c/pre\u003e \n \u003cp\u003e 我們已經包括了\u0026nbsp;myapp\u0026nbsp;應用程序的所有URL。這是通過訪問\u0026nbsp;home.html\u0026nbsp;爲\u0026nbsp;「/hello」,現在是\u0026nbsp;「/myapp/hello」\u0026nbsp;,這是 Web應用程序的更好和更容易理解的結構。 \u003c/p\u003e \n \u003cp\u003e 再創建一個視圖文件:C:\\myproject\\templates\\myapp\\hello.html,其內容如下: \u003c/p\u003e \n \u003cpre class=\"prettyprint lang-html\"\u003e\u0026lt;html lang=\"en\"\u0026gt;\r\n\u0026lt;head\u0026gt;\r\n \u0026lt;meta http-equiv=\"content-type\" content=\"text/html; charset=utf-8\"\u0026gt;\r\n \u0026lt;title\u0026gt;Hello \u0026lt;/title\u0026gt;\r\n \u0026lt;meta name=\"robots\" content=\"NONE,NOARCHIVE\"\u0026gt;\r\n \u0026lt;/style\u0026gt;\r\n\u0026lt;/head\u0026gt;\r\n \u0026lt;body\u0026gt;\r\n \u0026lt;h2\u0026gt;Welcome to Yiibai .\u0026lt;/h2\u0026gt;\r\n \u0026lt;p\u0026gt;This is my first Django App\u0026lt;/p\u0026gt;\r\n \u0026lt;body\u0026gt;\r\n\u0026lt;/html\u0026gt;\u003c/pre\u003e \n \u003cp\u003e \u003cbr\u003e \u003c/p\u003e \n \u003cp\u003e 注:如果出錯找不到視圖文件請參考:\u003ca href=\"http://www.zhihu.com/question/36065560\"\u003ehttp://www.zhihu.com/question/36065560\u003c/a\u003e\u003cbr\u003e \u003cimg src=\"https://asset.1ju.org/cmsstatic/django-url-1.png\" alt=\"Django URL映射\"\u003e \u003c/p\u003e \n \u003cp\u003e 現在讓我們想象一下在\u0026nbsp;myapp\u0026nbsp;的\u0026nbsp;「morning」 的另一個視圖,我們希望它在映射myapp/url.py,we will then change our myapp/url.py to − \u003c/p\u003e \n \u003cpre\u003efrom django.conf.urls import patterns, include, url\r\n\r\nurlpatterns = patterns('',\r\n url(r'^hello/', 'myapp.views.hello', name = 'hello'),\r\n url(r'^morning/', 'myapp.views.morning', name = 'morning'),\r\n)\u0026nbsp;\u003c/pre\u003e \n \u003cp\u003e 這可以被重構爲\u0026nbsp;− \u003c/p\u003e \n \u003cpre\u003efrom django.conf.urls import patterns, include, url\r\n\r\nurlpatterns = patterns('myapp.views',\r\n url(r'^hello/', 'hello', name = 'hello'),\r\n url(r'^morning/', 'morning', name = 'morning'),)\u0026nbsp;\u003c/pre\u003e \n \u003cp\u003e 正如你所看到的,我們現在使用\u0026nbsp;urlpatterns\u0026nbsp;元組的第一個元素。當你想改變應用程序的名稱時,這非常有用。\u003cbr\u003e \u003cimg src=\"https://asset.1ju.org/cmsstatic/django-url-2.jpg\" alt=\"Django URL映射\"\u003e \u003c/p\u003e \n \u003ch2\u003e \u003c/h2\u003e \n \u003ch2\u003e 發送參數到視圖 \u003c/h2\u003e \n \u003cp\u003e 現在我們知道如何映射URL,如何組織他們,現在就讓我們來看看如何將參數傳遞給視圖。一個經典的文章例子(您要訪問文章到「/articles/article_id」)。 \u003c/p\u003e \n \u003cp\u003e 傳遞參數是通過URL模式正則表達式捕捉它們完成的。如果我們有類似以下的視圖\u0026nbsp;「myapp/view.py」 \u003c/p\u003e \n \u003cpre\u003efrom django.shortcuts import render\r\nfrom django.http import HttpResponse\r\n\r\ndef hello(request):\r\n return render(request, \"hello.html\", {})\r\n\r\ndef viewArticle(request, articleId):\r\n text = \"Displaying article Number : %s\"%articleId\r\n return HttpResponse(text)\u0026nbsp;\u003c/pre\u003e \n \u003cp\u003e 我們想把它映射放在myapp/urls.py\u0026nbsp;,所以我們可以通過\u0026nbsp;「/myapp/article/articleId」\u0026nbsp;訪問,\u0026nbsp;我們需要在下列\u0026nbsp;「myapp/urls.py」 定義− \u003c/p\u003e \n \u003cpre class=\"prettyprint lang-py\"\u003efrom django.conf.urls import url\r\nfrom . import views\r\nurlpatterns = [\r\n url(r'^hello', views.hello, name='hello'),\r\n url(r'^article/(\\d+)/', views.viewArticle, name = 'article'), \r\n url(r'^$', views.index, name='index'),\r\n]\u003c/pre\u003e \n \u003cp\u003e \u003cbr\u003e \u003c/p\u003e \n \u003cp\u003e 當Django會看到URL:\u0026nbsp;「/myapp/article/42」\u0026nbsp;,它將傳遞參數'42'到viewArticle視圖,在瀏覽器中,應該得到以下結果\u0026nbsp;-\u003cbr\u003e \u003cimg src=\"https://asset.1ju.org/cmsstatic/django-url-2.png\" alt=\"Django URL映射\"\u003e \u003c/p\u003e \n \u003cp\u003e 注意,參數的順序這裏是很重要的。假設我們希望查看一年中某個一個月的文章列表,現在添加一個 viewArticles 視圖。 view.py 代碼變爲\u0026nbsp;- \u003c/p\u003e \n \u003cpre\u003efrom django.shortcuts import render\r\nfrom django.http import HttpResponse\r\n\r\ndef hello(request):\r\n return render(request, \"hello.html\", {})\r\n\r\ndef viewArticle(request, articleId):\r\n text = \"Displaying article Number : %s\"%articleId\r\n return HttpResponse(text)\r\n\r\ndef viewArticles(request, month, year):\r\n text = \"Displaying articles of : %s/%s\"%(year, month)\r\n return HttpResponse(text)\u0026nbsp;\u003c/pre\u003e \n \u003cp\u003e 相應的 myapp/urls.py\u0026nbsp;文件看起來如下\u0026nbsp;− \u003c/p\u003e \n \u003cpre\u003efrom django.conf.urls import patterns, include, url\r\n\r\nurlpatterns = patterns('myapp.views',\r\n url(r'^hello/', 'hello', name = 'hello'),\r\n url(r'^morning/', 'morning', name = 'morning'),\r\n url(r'^article/(\\d+)/', 'viewArticle', name = 'article'),\r\n url(r'^articles/(\\d{2})/(\\d{4})', 'viewArticles', name = 'articles'),)\r\u003c/pre\u003e \n \u003cdiv\u003e\n 現在,當您訪問\u0026nbsp;「 \n \u003ca href=\"https://asset.1ju.org/myapp/articles/12/2015/\"\u003ehttps://asset.1ju.org/myapp/articles/12/2015/\u003c/a\u003e」,會得到'Displaying\u0026nbsp;articles\u0026nbsp;of:\u0026nbsp;2015/12'\u0026nbsp;,但如果轉換參數,將不能得到相同的結果。 \n \u003cbr\u003e \n \u003cimg src=\"https://asset.1ju.org/cmsstatic/django-url-3.png\" alt=\"Django URL映射\"\u003e \n \u003cbr\u003e \n \u003c/div\u003e \n \u003cdiv\u003e\n 爲避免這種情況,有可能一個URL參數會鏈接到視圖參數。因此\u0026nbsp;url.py\u0026nbsp;將成爲\u0026nbsp;- \n \u003c/div\u003e \n \u003cpre\u003efrom django.conf.urls import patterns, include, url\r\n\r\nurlpatterns = patterns('myapp.views',\r\n url(r'^hello/', 'hello', name = 'hello'),\r\n url(r'^morning/', 'morning', name = 'morning'),\r\n url(r'^article/(\\d+)/', 'viewArticle', name = 'article'),\r\n url(r'^articles/(?P\\d{2})/(?P\\d{4})', 'viewArticles', name = 'articles'),)\u003c/pre\u003e \n\u003c/div\u003e \n\u003cbr\u003e"])</script><script>self.__next_f.push([1,"18:T1802,"])</script><script>self.__next_f.push([1,"\u003cdiv\u003e \n \u003cdiv\u003e\n Django能夠單獨分開 Python 和 HTML,Python代碼/變量進入視圖和HTML模板。\u0026nbsp;連接這兩個,Django依賴於渲染函數和Django模板語言。 \n \u003c/div\u003e \n\u003c/div\u003e \n\u003cdiv\u003e \n \u003ch2\u003e \n \u003cdiv\u003e\n 渲染函數 \n \u003c/div\u003e \u003c/h2\u003e \n \u003cp\u003e 這個函數有三個參數\u0026nbsp;− \u003c/p\u003e \n \u003cul\u003e \n \u003cli\u003e \u003cp\u003e 請求− 初始化請求 \u003c/p\u003e \u003c/li\u003e \n \u003cli\u003e \u003cp\u003e 模板路徑\u0026nbsp;−\u0026nbsp;這是相對於在項目 settings.py 文件的變量到 TEMPLATE_DIRS 選項的路徑。 \u003c/p\u003e \u003c/li\u003e \n \u003cli\u003e \u003cp\u003e 參數字典\u0026nbsp;−\u0026nbsp;字典包含所需的模板中的所有變量。這個變量可以創建或者可以使用\u0026nbsp;locals()\u0026nbsp;通過在視圖中聲明的所有局部變量。 \u003c/p\u003e \u003c/li\u003e \n \u003c/ul\u003e \n \u003ch2\u003e \n \u003cdiv\u003e\n Django模板語言(DTL) \n \u003c/div\u003e \u003c/h2\u003e \n \u003cdiv\u003e\n Django模板引擎提供了一個小型的語言來定義應用程序面向用戶的層。 \n \u003c/div\u003e \n \u003ch3\u003e \n \u003cdiv\u003e\n 顯示變量 \n \u003c/div\u003e \u003c/h3\u003e \n \u003cp\u003e 變量顯示如下:{{variable}}.\u0026nbsp;模板由視圖在渲染(render)函數的第三個參數發送的變量來替換變量。讓我們改變 hello.html 顯示當天的日期 : \u003c/p\u003e \n \u003cp\u003e hello.html \u003c/p\u003e \n \u003cpre\u003e\u0026lt;html\u0026gt; \r\n \u0026lt;body\u0026gt;\r\n Hello World!!!\u0026lt;p\u0026gt;Today is {{today}}\u0026lt;/p\u0026gt;\r\n \u0026lt;/body\u0026gt; \r\n\u0026lt;/html\u0026gt;\r\u003c/pre\u003e \n \u003cdiv\u003e\n 然後,我們的視圖將改變爲 - \n \u003c/div\u003e \n \u003cpre\u003edef hello(request):\r\n today = datetime.datetime.now().date()\r\n return render(request, \"hello.html\", {\"today\" : today})\u0026nbsp;\u003c/pre\u003e \n \u003cp\u003e 現在,我們將得到下面的輸出在訪問URL\u0026nbsp;/myapp/hello\u0026nbsp;之後− \u003c/p\u003e \n \u003cpre\u003eHello World!!!\r\nToday is Sept. 11, 2015\u0026nbsp;\u003c/pre\u003e \n \u003cp\u003e 正如你可能已經注意到,如果變量不是一個字符串,Django會使用__str__方法來顯示它;並以同樣的原則,你可以訪問對象的屬性,就像在Python中使用的一樣。例如:如果我們想顯示日期的年份,這裏的變量是:\u0026nbsp;{{today.year}}. \u003c/p\u003e \n \u003ch2\u003e 過濾器 \u003c/h2\u003e \n \u003cp\u003e 它們可以幫助您顯示修改的變量。過濾器的結構如下所示:\u0026nbsp;{{var|filters}}. \u003c/p\u003e \n \u003cp\u003e 一個簡單的實例\u0026nbsp;− \u003c/p\u003e \n \u003cul\u003e \n \u003cli\u003e \u003cp\u003e {{string|truncatewords:80}}\u0026nbsp;−\u0026nbsp;過濾器將截斷字符串,所以只看到前80個字符。 \u003c/p\u003e \u003c/li\u003e \n \u003cli\u003e \u003cp\u003e {{string|lower}}\u0026nbsp;− 轉換字符爲小寫 \u003c/p\u003e \u003c/li\u003e \n \u003cli\u003e \u003cp\u003e {{string|escape|linebreaks}}\u0026nbsp;−\u0026nbsp;轉義字符串內容,然後換行轉換爲標籤。 \u003c/p\u003e \u003c/li\u003e \n \u003c/ul\u003e \n \u003cdiv\u003e\n 還可以設置默認的變量。 \n \u003c/div\u003e \n \u003ch2\u003e 標籤 \u003c/h2\u003e \n \u003cp\u003e 標籤可以執行以下操作:if 條件,for循環,模板繼承以及更多。 \u003c/p\u003e \n \u003ch3\u003e if標籤 \u003c/h3\u003e \n \u003cp\u003e 就像在Python中,你可以使用if,else和elif在模板中\u0026nbsp;− \u003c/p\u003e \n \u003cpre\u003e\u0026lt;html\u0026gt;\r\n \u0026lt;body\u0026gt;\r\n \r\n Hello World!!!\u0026lt;p\u0026gt;Today is {{today}}\u0026lt;/p\u0026gt;\r\n We are\r\n {% if today.day == 1 %}\r\n \r\n the first day of month.\r\n {% elif today == 30 %}\r\n \r\n the last day of month.\r\n {% else %}\r\n \r\n I don't know.\r\n {%endif%}\r\n \r\n \u0026lt;/body\u0026gt;\r\n\u0026lt;/html\u0026gt;\r\u003c/pre\u003e \n \u003cdiv\u003e\n 在這個新的模板,根據當天的日期,該模板將呈現這個值。 \n \u003c/div\u003e \n \u003ch3\u003e for標籤 \u003c/h3\u003e \n \u003cp\u003e 就像'if',我們有\u0026nbsp;'for'\u0026nbsp;標籤,這些完全像在Python中一樣使用它們。讓我們改變\u0026nbsp;hello視圖列表發送到我們的模板\u0026nbsp;− \u003c/p\u003e \n \u003cpre\u003edef hello(request):\r\n today = datetime.datetime.now().date()\r\n \r\n daysOfWeek = ['Mon', 'Tue', 'Wed', 'Thu', 'Fri', 'Sat', 'Sun']\r\n return render(request, \"hello.html\", {\"today\" : today, \"days_of_week\" : daysOfWeek})\u0026nbsp;\u003c/pre\u003e \n \u003cp\u003e 該模板用來顯示列表\u0026nbsp;{{ for }} − \u003c/p\u003e \n \u003cpre\u003e\u0026lt;html\u0026gt;\r\n \u0026lt;body\u0026gt;\r\n \r\n Hello World!!!\u0026lt;p\u0026gt;Today is {{today}}\u0026lt;/p\u0026gt;\r\n We are\r\n {% if today.day == 1 %}\r\n \r\n the first day of month.\r\n {% elif today == 30 %}\r\n \r\n the last day of month.\r\n {% else %}\r\n \r\n I don't know.\r\n {%endif%}\r\n \r\n \u0026lt;p\u0026gt;\r\n {% for day in days_of_week %}\r\n {{day}}\r\n \u0026lt;/p\u0026gt;\r\n\t\t\r\n {% endfor %}\r\n \r\n \u0026lt;/body\u0026gt;\r\n\u0026lt;/html\u0026gt;\u0026nbsp;\u003c/pre\u003e \n \u003cp\u003e 我們應該得到輸出的內容如下\u0026nbsp;− \u003c/p\u003e \n \u003cpre\u003eHello World!!!\r\nToday is Sept. 11, 2015\r\nWe are I don't know.\r\nMon\r\nTue\r\nWed\r\nThu\r\nFri\r\nSat\r\nSun\r\u003c/pre\u003e \n \u003ch3\u003e \n \u003cdiv\u003e\n 塊和擴展標籤 \n \u003c/div\u003e \u003c/h3\u003e \n \u003cp\u003e 模板系統是不完整模板繼承。當您設計模板的含義,子模板會根據自己的需要填寫一個主模板,就像一個頁面中所選選項卡可能需要一個特殊的CSS。 \u003c/p\u003e \n \u003cdiv\u003e\n 讓我們修改\u0026nbsp;hello.html\u0026nbsp;模板來從 main_template.html 繼承。 \n \u003c/div\u003e \n \u003cp\u003e main_template.html \u003c/p\u003e \n \u003cpre\u003e\u0026lt;html\u0026gt;\r\n \u0026lt;head\u0026gt; \r\n \u0026lt;title\u0026gt;\r\n {% block title %}Page Title{% endblock %}\r\n \u0026lt;/title\u0026gt; \r\n \u0026lt;/head\u0026gt;\r\n\t\r\n \u0026lt;body\u0026gt; \r\n {% block content %}\r\n Body content\r\n {% endblock %} \r\n \u0026lt;/body\u0026gt;\r\n\u0026lt;/html\u0026gt;\r\u003c/pre\u003e \n \u003cp\u003e hello.html \u003c/p\u003e \n \u003cpre\u003e{% extends \"main_template.html\" %}\r\n{% block title %}My Hello Page{% endblock %}\r\n{% block content %}\r\n\r\nHello World!!!\u0026lt;p\u0026gt;Today is {{today}}\u0026lt;/p\u0026gt;\r\nWe are\r\n{% if today.day == 1 %}\r\n\r\nthe first day of month.\r\n{% elif today == 30 %}\r\n\r\nthe last day of month.\r\n{% else %}\r\n\r\nI don't know.\r\n{%endif%}\r\n\r\n\u0026lt;p\u0026gt;\r\n {% for day in days_of_week %}\r\n {{day}}\r\n\u0026lt;/p\u0026gt;\r\n\r\n{% endfor %}\r\n{% endblock %}\r\u003c/pre\u003e \n \u003cp\u003e 在上面的示例,\u0026nbsp;在調用 /myapp/hello,我們仍然會得到相同的結果和以前一樣,但現在我們靠的是擴展,並不用重構代碼-− \u003c/p\u003e \n \u003cp\u003e 在 main_template.html 我們定義使用標籤塊。標題欄塊將包含頁面標題,以及內容塊將在頁面主內容。在Home.html中使用擴展繼承來自main_template.html,那麼我們使用上面塊定義(內容和標題)。 \u003c/p\u003e \n \u003ch3\u003e 註釋標籤 \u003c/h3\u003e \n \u003cp\u003e 註釋標籤用來模板定義註釋,不是HTML註釋,它們將不會出現在HTML頁面。它可以是一個文件或只是註釋一行代碼。 \u003c/p\u003e \n\u003c/div\u003e \n\u003cbr\u003e"])</script><script>self.__next_f.push([1,"19:T1b81,"])</script><script>self.__next_f.push([1,"\u003cdiv\u003e\n 模型是表示我們的數據庫表或集合類,並且其中所述類的每個屬性是表或集合的字段。模型是在\u0026nbsp;app/models.py\u0026nbsp;中定義(在我們的例子中是:myapp/models.py) \n\u003c/div\u003e \n\u003cdiv\u003e \n \u003ch2\u003e \u003c/h2\u003e \n \u003ch2\u003e 創建模型 \u003c/h2\u003e \n \u003cp\u003e 下面是創建一個\u0026nbsp;Dreamreal\u0026nbsp;模型實例\u0026nbsp;− \u003c/p\u003e \n \u003cpre\u003efrom django.db import models\r\n\r\nclass Dreamreal(models.Model):\r\n\r\n website = models.CharField(max_length = 50)\r\n mail = models.CharField(max_length = 50)\r\n name = models.CharField(max_length = 50)\r\n phonenumber = models.IntegerField()\r\n\r\n class Meta:\r\n db_table = \"dreamreal\"\r\u003c/pre\u003e \n \u003cdiv\u003e\n 每一個模型繼承自django.db.models.Model。 \n \u003c/div\u003e \n \u003cdiv\u003e\n 我們類有4個屬性(3\u0026nbsp;CharField和1個整數),這將是表中的字段。 \n \u003c/div\u003e \n \u003cp\u003e Meta類與db_table屬性可以讓我們定義的實際表或集合名稱。Django會自動命名錶或集合:myapp_modelName.\u0026nbsp;這個類將強制表的名稱。 \u003c/p\u003e \n \u003cp\u003e 在 django.db.models 更多的字段的類型,你可以瞭解更多關於他們的URL: \u003c/p\u003e \n \u003cp\u003e \u003ca href=\"https://docs.djangoproject.com/en/1.5/ref/models/fields/#field-types\"\u003ehttps://docs.djangoproject.com/en/1.5/ref/models/fields/#field-types\u003c/a\u003e \u003c/p\u003e \n \u003cp\u003e 在創建模型後需要 Django 產生實際的數據庫\u0026nbsp;− \u003c/p\u003e \n \u003cpre\u003e$python manage.py syncdb\u0026nbsp;\u003c/pre\u003e \n \u003ch2\u003e 操作數據(CRUD) \u003c/h2\u003e \n \u003cp\u003e 讓我們創建一個「crudops」的視圖,看看如何能夠在模型上做的CRUD操作。\u0026nbsp;現在\u0026nbsp;myapp/views.py 然後將看起來像\u0026nbsp;− \u003c/p\u003e \n \u003cp\u003e myapp/views.py \u003c/p\u003e \n \u003cpre\u003efrom myapp.models import Dreamreal\r\nfrom django.http import HttpResponse\r\n\r\ndef crudops(request):\r\n #Creating an entry\r\n \r\n dreamreal = Dreamreal(\r\n website = \"www.polo.com\", mail = \"sorex@polo.com\", \r\n name = \"sorex\", phonenumber = \"002376970\"\r\n )\r\n \r\n dreamreal.save()\r\n \r\n #Read ALL entries\r\n objects = Dreamreal.objects.all()\r\n res ='Printing all Dreamreal entries in the DB : \u0026lt;br\u0026gt;'\r\n \r\n for elt in objects:\r\n res += elt.name+\"\u0026lt;br\u0026gt;\"\r\n \r\n #Read a specific entry:\r\n sorex = Dreamreal.objects.get(name = \"sorex\")\r\n res += 'Printing One entry \u0026lt;br\u0026gt;'\r\n res += sorex.name\r\n \r\n #Delete an entry\r\n res += '\u0026lt;br\u0026gt; Deleting an entry \u0026lt;br\u0026gt;'\r\n sorex.delete()\r\n \r\n #Update\r\n dreamreal = Dreamreal(\r\n website = \"www.polo.com\", mail = \"sorex@polo.com\", \r\n name = \"sorex\", phonenumber = \"002376970\"\r\n )\r\n \r\n dreamreal.save()\r\n res += 'Updating entry\u0026lt;br\u0026gt;'\r\n \r\n dreamreal = Dreamreal.objects.get(name = 'sorex')\r\n dreamreal.name = 'thierry'\r\n dreamreal.save()\r\n \r\n return HttpResponse(res)\r\u003c/pre\u003e \n \u003ch3\u003e \u003c/h3\u003e \n \u003ch2\u003e 其他數據操作 \u003c/h2\u003e \n \u003cp\u003e 讓我們來探討可以對模型做的其他操作。\u0026nbsp;需要注意的是 CRUD 操作都做對模型的實例,現在我們將直接表示模型類的工作。 \u003c/p\u003e \n \u003cdiv\u003e\n 讓我們創建一個「datamanipulation」視圖在\u0026nbsp;myapp/views.py \n \u003c/div\u003e \n \u003cpre\u003efrom myapp.models import Dreamreal\r\nfrom django.http import HttpResponse\r\n\r\ndef datamanipulation(request):\r\n res = ''\r\n \r\n #Filtering data:\r\n qs = Dreamreal.objects.filter(name = \"paul\")\r\n res += \"Found : %s results\u0026lt;br\u0026gt;\"%len(qs)\r\n \r\n #Ordering results\r\n qs = Dreamreal.objects.order_by(\"name\")\r\n \r\n for elt in qs:\r\n res += elt.name + '\u0026lt;br\u0026gt;'\r\n \r\n return HttpResponse(res)\r\u003c/pre\u003e \n \u003ch2\u003e \u003c/h2\u003e \n \u003ch2\u003e 鏈接模型 \u003c/h2\u003e \n \u003cp\u003e Django ORM提供3種方式來鏈接模型\u0026nbsp;− \u003c/p\u003e \n \u003cp\u003e 我們將在這裏看到的第一示例是一個一對多的關係。正如在上面的例子中看到的,一個公司可以有多個在線網站。定義這種關係是通過使用 django.db.models.ForeignKey 完成\u0026nbsp;- \u003c/p\u003e \n \u003cp\u003e myapp/models.py \u003c/p\u003e \n \u003cpre\u003efrom django.db import models\r\n\r\nclass Dreamreal(models.Model):\r\n website = models.CharField(max_length = 50)\r\n mail = models.CharField(max_length = 50)\r\n name = models.CharField(max_length = 50)\r\n phonenumber = models.IntegerField()\r\n online = models.ForeignKey('Online', default = 1)\r\n \r\n class Meta:\r\n db_table = \"dreamreal\"\r\n\r\nclass Online(models.Model):\r\n domain = models.CharField(max_length = 30)\r\n \r\n class Meta:\r\n db_table = \"online\"\r\u003c/pre\u003e \n \u003cdiv\u003e\n 可以更新myapp/models.py,正如你看到的,我們添加了一個在線模式,並鏈接到\u0026nbsp;Dreamreal模型。 \n \u003c/div\u003e \n \u003cp\u003e 讓我們來看看如何通過\u0026nbsp;manage.py\u0026nbsp;shell\u0026nbsp;執行所有工作\u0026nbsp;− \u003c/p\u003e \n \u003cp\u003e 首先讓我們來測試\u0026nbsp;Django\u0026nbsp;shell創建一些公司(Dreamreal項)− \u003c/p\u003e \n \u003cpre\u003e$python manage.py shell\r\n\r\n\u0026gt;\u0026gt;\u0026gt; from myapp.models import Dreamreal, Online\r\n\u0026gt;\u0026gt;\u0026gt; dr1 = Dreamreal()\r\n\u0026gt;\u0026gt;\u0026gt; dr1.website = 'company1.com'\r\n\u0026gt;\u0026gt;\u0026gt; dr1.name = 'company1'\r\n\u0026gt;\u0026gt;\u0026gt; dr1.mail = 'contact@company1'\r\n\u0026gt;\u0026gt;\u0026gt; dr1.phonenumber = '12345'\r\n\u0026gt;\u0026gt;\u0026gt; dr1.save()\r\n\u0026gt;\u0026gt;\u0026gt; dr2 = Dreamreal()\r\n\u0026gt;\u0026gt;\u0026gt; dr1.website = 'company2.com'\r\n\u0026gt;\u0026gt;\u0026gt; dr2.website = 'company2.com'\r\n\u0026gt;\u0026gt;\u0026gt; dr2.name = 'company2'\r\n\u0026gt;\u0026gt;\u0026gt; dr2.mail = 'contact@company2'\r\n\u0026gt;\u0026gt;\u0026gt; dr2.phonenumber = '56789'\r\n\u0026gt;\u0026gt;\u0026gt; dr2.save()\u0026nbsp;\u003c/pre\u003e \n \u003cspan\u003e \u003cp\u003e 現在有一些代管網域\u0026nbsp;− \u003c/p\u003e \u003cpre\u003e\u0026gt;\u0026gt;\u0026gt; on1 = Online()\r\n\u0026gt;\u0026gt;\u0026gt; on1.company = dr1\r\n\u0026gt;\u0026gt;\u0026gt; on1.domain = \"site1.com\"\r\n\u0026gt;\u0026gt;\u0026gt; on2 = Online()\r\n\u0026gt;\u0026gt;\u0026gt; on2.company = dr1\r\n\u0026gt;\u0026gt;\u0026gt; on2.domain = \"site2.com\"\r\n\u0026gt;\u0026gt;\u0026gt; on3 = Online()\r\n\u0026gt;\u0026gt;\u0026gt; on3.domain = \"site3.com\"\r\n\u0026gt;\u0026gt;\u0026gt; dr2 = Dreamreal.objects.all()[2]\r\n\u0026gt;\u0026gt;\u0026gt; on3.company = dr2\r\n\u0026gt;\u0026gt;\u0026gt; on1.save()\r\n\u0026gt;\u0026gt;\u0026gt; on2.save()\r\n\u0026gt;\u0026gt;\u0026gt; on3.save()\u0026nbsp;\u003c/pre\u003e \u003c/span\u003e \n \u003cspan\u003e \u003cp\u003e 從在線域訪問託管公司(Dreamreal項)的屬性是很簡單的\u0026nbsp;− \u003c/p\u003e \u003cpre\u003e\u0026gt;\u0026gt;\u0026gt; on1.company.name\u0026nbsp;\u003c/pre\u003e \u003c/span\u003e \n \u003cspan\u003e \u003cp\u003e 如果想知道公司Dreamreal主辦的所有網上域名,我們將使用代碼\u0026nbsp;− \u003c/p\u003e \u003cpre\u003e\u0026gt;\u0026gt;\u0026gt; dr1.online_set.all()\u0026nbsp;\u003c/pre\u003e \u003c/span\u003e \n \u003cp\u003e 爲了得到一個QuerySet,請注意,所有的操作方法,我們以前見過(filter, all, exclude, order_by....) \u003c/p\u003e \n \u003cp\u003e 也可以訪問進行過濾操作鏈接模型屬性,比方說,想獲得的所有在線域所在Dreamreal名稱包含「company」- \u003c/p\u003e \n \u003cspan\u003e \u003cpre\u003e\u0026gt;\u0026gt;\u0026gt; Online.objects.filter(company__name__contains = 'company'\u0026nbsp;\u003c/pre\u003e \u003c/span\u003e \n \u003cp\u003e \u003cstrong\u003e注\u0026nbsp;\u003c/strong\u003e-\u0026nbsp;那種查詢只支持SQL數據庫。\u0026nbsp;它不會對非關係數據庫工作,其中連接不存在,並有兩個「_」。 \u003c/p\u003e \n \u003cp\u003e 但是,這不是鏈接模型的唯一方法,也有OneToOneField,這保證了兩個對象之間的關係是唯一的鏈接關係。如果使用了OneToOneField在上面的例子中,這將意味着只有一個在線條目對應於每個Dreamreal條目。 \u003c/p\u003e \n \u003cdiv\u003e\n 最後一個,ManyToManyField 表之間(NN)的關係這些都是基於SQL的數據庫。 \n \u003c/div\u003e \n \u003cdiv\u003e \n \u003cbr\u003e \n \u003c/div\u003e \n\u003c/div\u003e \n\u003cbr\u003e"])</script><script>self.__next_f.push([1,"1a:Tf7b,"])</script><script>self.__next_f.push([1,"頁面重定向在Web應用程序有很多原因是必要的。您可能希望將用戶重定向到另一個頁面,當一個特定的動作發生,或者有錯誤的情況下。例如,當用戶登錄網站,他經常被重定向到他的主頁或個人的儀表板。在Django中,定向使用「redirect」的方法來實現。 \n\u003cdiv\u003e \n \u003cdiv\u003e\n 在「redirect」方法需要作爲參數:URL要被重定向到的字符串的視圖名字。 \n \u003c/div\u003e \n \u003cp\u003e myapp/views\u0026nbsp;到現在爲止如下所示\u0026nbsp;− \u003c/p\u003e \n \u003cpre\u003edef hello(request):\r\n today = datetime.datetime.now().date()\r\n daysOfWeek = ['Mon', 'Tue', 'Wed', 'Thu', 'Fri', 'Sat', 'Sun']\r\n return render(request, \"hello.html\", {\"today\" : today, \"days_of_week\" : daysOfWeek})\r\n\t\r\ndef viewArticle(request, articleId):\r\n \"\"\" A view that display an article based on his ID\"\"\"\r\n text = \"Displaying article Number : %s\" %articleId\r\n return HttpResponse(text)\r\n\t\r\ndef viewArticles(request, year, month):\r\n text = \"Displaying articles of : %s/%s\"%(year, month)\r\n return HttpResponse(text)\u0026nbsp;\u003c/pre\u003e \n \u003cp\u003e 讓我們修改hello,以重定向到\u0026nbsp;djangoproject.com\u0026nbsp;,以及\u0026nbsp;viewArticle\u0026nbsp;重定向到我們內部的\u0026nbsp;'/myapp/articles'。myapp/view.py將修改爲如下:\u0026nbsp; \u003c/p\u003e \n \u003cpre\u003efrom django.shortcuts import render, redirect\r\nfrom django.http import HttpResponse\r\nimport datetime\r\n\r\n# Create your views here.\r\ndef hello(request):\r\n today = datetime.datetime.now().date()\r\n daysOfWeek = ['Mon', 'Tue', 'Wed', 'Thu', 'Fri', 'Sat', 'Sun']\r\n return redirect(\"https://www.djangoproject.com\")\r\n\t\r\ndef viewArticle(request, articleId):\r\n \"\"\" A view that display an article based on his ID\"\"\"\r\n text = \"Displaying article Number : %s\" %articleId\r\n return redirect(viewArticles, year = \"2045\", month = \"02\")\r\n\t\r\ndef viewArticles(request, year, month):\r\n text = \"Displaying articles of : %s/%s\"%(year, month)\r\n return HttpResponse(text)\u0026nbsp;\u003c/pre\u003e \n \u003cp\u003e 在上面的例子中,我們首先從Django導入重定向(redirect)。快捷方式並重定向到Django的官方網站上,我們只需使用完整URL到「redirect」方法作爲字符串,在第二例子(在viewArticle視圖)'redirect'方法取視圖名字和它的參數作爲參數。 \u003c/p\u003e \n \u003cdiv\u003e\n 訪問/myapp/hello,會顯示如下的屏幕- \n \u003cbr\u003e \n \u003cimg src=\"https://asset.1ju.org/cmsstatic/django-2.jpg\" alt=\"Django頁面重定向\"\u003e \n \u003cbr\u003e \n \u003c/div\u003e \n \u003cdiv\u003e\n 並訪問\u0026nbsp;/myapp/article/42,會給出下面的屏幕- \n \u003cbr\u003e \n \u003cimg src=\"https://asset.1ju.org/cmsstatic/django-3.jpg\" alt=\"Django頁面重定向\"\u003e \n \u003cbr\u003e \n \u003c/div\u003e \n \u003cp\u003e 也可以指定「redirect」是否是暫時的還是永久性的,加入permanent\u0026nbsp;=\u0026nbsp;True參數。用戶看到不會有什麼區別,但這些都是細節,搜索引擎網站排名時考慮到。 \u003c/p\u003e \n \u003cp\u003e 我們在url.py定義「name」參數在映射URL時− \u003c/p\u003e \n \u003cpre\u003eurl(r'^articles/(?P\\d{2})/(?P\\d{4})/', 'viewArticles', name = 'articles'),\u0026nbsp;\u003c/pre\u003e \n \u003cp\u003e 該名稱(這裏的文章)可以被用作「redirect」方法的實參,那麼 viewArticle 重定向可以修改 - \u003c/p\u003e \n \u003cpre\u003edef viewArticle(request, articleId):\r\n \"\"\" A view that display an article based on his ID\"\"\"\r\n text = \"Displaying article Number : %s\" %articleId\r\n return redirect(viewArticles, year = \"2045\", month = \"02\")\r\u003c/pre\u003e \n \u003cp\u003e 修改爲\u0026nbsp;− \u003c/p\u003e \n \u003cpre\u003edef viewArticle(request, articleId):\r\n \"\"\" A view that display an article based on his ID\"\"\"\r\n text = \"Displaying article Number : %s\" %articleId\r\n return redirect(articles, year = \"2045\", month = \"02\")\u0026nbsp;\u003c/pre\u003e \n \u003cp\u003e \u003cstrong\u003e注\u003c/strong\u003e\u0026nbsp;-\u0026nbsp;還有一個函數生成 URL; 它是用在相同的方式重定向;\u0026nbsp;「reverse」方法(django.core.urlresolvers.reverse)。這個函數不返回HttpResponseRedirect對象,而僅僅包含URL和任何傳入的參數編譯視圖的字符串。 \u003c/p\u003e \n \u003cdiv\u003e \n \u003cspan\u003e\u003cbr\u003e \u003c/span\u003e \n \u003c/div\u003e \n\u003c/div\u003e \n\u003cbr\u003e"])</script><script>self.__next_f.push([1,"1b:T2696,"])</script><script>self.__next_f.push([1,"\u003cdiv\u003e \n \u003cdiv\u003e\n Django提供了一個現成的,易於使用發送電子郵件的輕型引擎。類似Python,你需要導入 smtplib。在Django中只需要導入django.core.mail。\u0026nbsp;要發送電子郵件,編輯項目settings.py文件,並設置下列選項\u0026nbsp;− \n \u003c/div\u003e \n\u003c/div\u003e \n\u003cdiv\u003e \n \u003cul\u003e \n \u003cli\u003e \u003cp\u003e \u003cstrong\u003eEMAIL_HOST\u003c/strong\u003e\u0026nbsp;− smtp 服務器 \u003c/p\u003e \u003c/li\u003e \n \u003cli\u003e \u003cp\u003e \u003cstrong\u003eEMAIL_HOST_USER\u003c/strong\u003e\u0026nbsp;−\u0026nbsp;登錄憑證SMTP服務器 \u003c/p\u003e \u003c/li\u003e \n \u003cli\u003e \u003cp\u003e \u003cstrong\u003eEMAIL_HOST_PASSWORD\u003c/strong\u003e\u0026nbsp;−\u0026nbsp;SMTP服務器密碼憑證 \u003c/p\u003e \u003c/li\u003e \n \u003cli\u003e \u003cp\u003e \u003cstrong\u003eEMAIL_PORT\u003c/strong\u003e\u0026nbsp;− smtp服務器端口 \u003c/p\u003e \u003c/li\u003e \n \u003cli\u003e \u003cp\u003e \u003cstrong\u003eEMAIL_USE_TLS\u003c/strong\u003e 或 \u003cstrong\u003e_SSL\u003c/strong\u003e\u0026nbsp;−\u0026nbsp;如果設置爲True則爲安全連接。 \u003c/p\u003e \u003c/li\u003e \n \u003c/ul\u003e \n \u003ch2\u003e 發送一個簡單的電子郵件 \u003c/h2\u003e \n \u003cdiv\u003e\n 讓我們創建一個「sendSimpleEmail」視圖發送一個簡單的電子郵件。 \n \u003c/div\u003e \n \u003cpre\u003efrom django.core.mail import send_mail\r\nfrom django.http import HttpResponse\r\n\r\ndef sendSimpleEmail(request,emailto):\r\n res = send_mail(\"hello paul\", \"comment tu vas?\", \"paul@yiibai.com\", [emailto])\r\n return HttpResponse('%s'%res)\u0026nbsp;\u003c/pre\u003e \n \u003cp\u003e 這裏是 send_mail 參數的細節\u0026nbsp;− \u003c/p\u003e \n \u003cul\u003e \n \u003cli\u003e \u003cp\u003e \u003cstrong\u003esubject\u0026nbsp;\u003c/strong\u003e− E-mail 標題 \u003c/p\u003e \u003c/li\u003e \n \u003cli\u003e \u003cp\u003e \u003cstrong\u003emessage\u003c/strong\u003e\u0026nbsp;− E-mail 主題內容 \u003c/p\u003e \u003c/li\u003e \n \u003cli\u003e \u003cp\u003e \u003cstrong\u003efrom_email\u003c/strong\u003e\u0026nbsp;− E-mail 發送方 \u003c/p\u003e \u003c/li\u003e \n \u003cli\u003e \u003cp\u003e \u003cstrong\u003erecipient_list\u0026nbsp;\u003c/strong\u003e−\u0026nbsp;接收者的電子郵件地址列表 \u003c/p\u003e \u003c/li\u003e \n \u003cli\u003e \u003cp\u003e \u003cstrong\u003efail_silently\u003c/strong\u003e\u0026nbsp;−\u0026nbsp;布爾,如果是false,send_mail將在出現錯誤時引發異常 \u003c/p\u003e \u003c/li\u003e \n \u003cli\u003e \u003cp\u003e \u003cstrong\u003eauth_user\u003c/strong\u003e\u0026nbsp;−\u0026nbsp;用戶登錄,如果不在\u0026nbsp;settings.py\u0026nbsp;中設置 \u003c/p\u003e \u003c/li\u003e \n \u003cli\u003e \u003cp\u003e \u003cstrong\u003eauth_password\u003c/strong\u003e\u0026nbsp;−\u0026nbsp;用戶密碼,如果不在 settings.py 設置 \u003c/p\u003e \u003c/li\u003e \n \u003cli\u003e \u003cp\u003e \u003cstrong\u003econnection\u003c/strong\u003e\u0026nbsp;− E-mail\u0026nbsp;後端 \u003c/p\u003e \u003c/li\u003e \n \u003cli\u003e \u003cp\u003e \u003cstrong\u003ehtml_message\u003c/strong\u003e\u0026nbsp;−\u0026nbsp;(Django1.7中新增功能),如果存在的話,該郵件將爲\u0026nbsp;multipart/alternative。 \u003c/p\u003e \u003c/li\u003e \n \u003c/ul\u003e \n \u003cdiv\u003e\n 讓我們訪問我們視圖的網址\u0026nbsp;- \n \u003c/div\u003e \n \u003cpre\u003efrom django.conf.urls import patterns, url\r\n\r\nurlpatterns = paterns('myapp.views', url(r'^simpleemail/(?P\u0026lt;emailto\u0026gt;\r\n [\\w.%+-]+@[A-Za-z0-9.-]+\\.[A-Za-z]{2,4})/', \r\n 'sendSimpleEmail' , name = 'sendSimpleEmail'),)\u0026nbsp;\u003c/pre\u003e \n \u003cp\u003e 所以,在訪問 /myapp/simpleemail/\u003ca href=\"mailto:polo@gmail.com\"\u003epolo@gmail.com\u003c/a\u003e/\u0026nbsp;的時候,會進入以下頁面\u0026nbsp;−\u003cbr\u003e \u003cimg src=\"https://asset.1ju.org/cmsstatic/djangoe-mail-1.jpg\" alt=\"Django發送E-mail\"\u003e \u003c/p\u003e \n \u003ch2\u003e \u003c/h2\u003e \n \u003ch2\u003e 發送帶有 send_mass_mail 多個郵件 \u003c/h2\u003e \n \u003cp\u003e 方法返回的消息成功傳遞的數量。\u0026nbsp;這與 send_mail\u0026nbsp;一樣但需要一個額外的參數;\u0026nbsp;datatuple,我們 sendMassEmail 視圖爲− \u003c/p\u003e \n \u003cpre\u003efrom django.core.mail import send_mass_mail\r\nfrom django.http import HttpResponse\r\n\r\ndef sendMassEmail(request,emailto):\r\n msg1 = ('subject 1', 'message 1', 'polo@polo.com', [emailto1])\r\n msg2 = ('subject 2', 'message 2', 'polo@polo.com', [emailto2])\r\n res = send_mass_mail((msg1, msg2), fail_silently = False)\r\n return HttpResponse('%\u003cb\u003es\u003c/b\u003e'%res)\u0026nbsp;\u003c/pre\u003e \n \u003cp\u003e 讓我們創建訪問我們的視圖網址\u0026nbsp;− \u003c/p\u003e \n \u003cpre\u003efrom django.conf.urls import patterns, url\r\n\r\nurlpatterns = paterns('myapp.views', url(r'^massEmail/(?P\u0026lt;emailto1\u0026gt;\r\n [\\w.%+-]+@[A-Za-z0-9.-]+\\.[A-Za-z]{2,4})/(?P\u0026lt;emailto2\u0026gt;\r\n [\\w.%+-]+@[A-Za-z0-9.-]+\\.[A-Za-z]{2,4})', 'sendMassEmail' , name = 'sendMassEmail'),)\r\u003c/pre\u003e \n \u003cp\u003e 當我們訪問 /myapp/massemail/polo@gmail.com/sorex@gmail.com/, 我們得到 −\u003cbr\u003e \u003cimg src=\"https://asset.1ju.org/cmsstatic/djangoe-mail-2.jpg\" alt=\"Django發送E-mail\"\u003e \u003c/p\u003e \n \u003cp\u003e send_mass_mail 參數詳細如下 − \u003c/p\u003e \n \u003cul\u003e \n \u003cli\u003e \u003cp\u003e \u003cstrong\u003edatatuples\u003c/strong\u003e\u003cstrong\u003e\u0026nbsp;\u003c/strong\u003e−\u0026nbsp;元組,每個元素都是像\u0026nbsp;(subject, message, from_email, recipient_list) \u003c/p\u003e \u003c/li\u003e \n \u003cli\u003e \u003cp\u003e \u003cstrong\u003efail_silently\u003c/strong\u003e\u0026nbsp;−\u0026nbsp;布爾,如果爲false,send_mail將在出現錯誤時引發異常 \u003c/p\u003e \u003c/li\u003e \n \u003cli\u003e \u003cp\u003e \u003cstrong\u003eauth_user\u003c/strong\u003e\u0026nbsp;−\u0026nbsp;用戶登錄,如果不在 settings.py 設置 \u003c/p\u003e \u003c/li\u003e \n \u003cli\u003e \u003cp\u003e \u003cstrong\u003eauth_password\u003c/strong\u003e\u0026nbsp;−\u0026nbsp;用戶密碼,如果不在 settings.py 中設置 \u003c/p\u003e \u003c/li\u003e \n \u003cli\u003e \u003cp\u003e \u003cstrong\u003econnection\u003c/strong\u003e\u0026nbsp;− E-mail\u0026nbsp;後端 \u003c/p\u003e \u003c/li\u003e \n \u003c/ul\u003e \n \u003cdiv\u003e\n 正如你可以在上面的圖片看到,兩條消息已成功發送。 \n \u003c/div\u003e \n \u003cp\u003e 注\u0026nbsp;-\u0026nbsp;在這個例子中,我們使用Python的smtpd\u0026nbsp;debuggingserver,可以使用下面命令啓動\u0026nbsp;− \u003c/p\u003e \n \u003cpre\u003e$python -m smtpd -n -c DebuggingServer localhost:1025\r\u003c/pre\u003e \n \u003cdiv\u003e\n 這意味着所有已發送的郵件將被打印在stdout和虛擬服務器運行在localhost:1025。 \n \u003c/div\u003e \n \u003cdiv\u003e\n 發送使用mail_admins和mail_managers方法電子郵件給管理員和管理人員 \n \u003c/div\u003e \n \u003cp\u003e 這些方法發送電子郵件給網站管理員作爲settings.py文件的ADMINS選項定義,網站管理人員在settings.py文件MANAGERS項中定義。假設我們的ADMINS和MANAGERS的看起來如下- \u003c/p\u003e \n \u003cp\u003e \u003cstrong\u003eADMINS\u003c/strong\u003e\u003cstrong\u003e\u0026nbsp;\u003c/strong\u003e= (('polo', 'polo@polo.com'),) \u003c/p\u003e \n \u003cp\u003e \u003cstrong\u003eMANAGERS\u003c/strong\u003e\u0026nbsp;= (('popoli', 'popoli@polo.com'),) \u003c/p\u003e \n \u003cpre\u003efrom django.core.mail import mail_admins\r\nfrom django.http import HttpResponse\r\n\r\ndef sendAdminsEmail(request):\r\n res = mail_admins('my subject', 'site is going down.')\r\n return HttpResponse('\u003cb\u003e%s\u003c/b\u003e'%res)\r\u003c/pre\u003e \n \u003cdiv\u003e\n 上面的代碼將發送一封電子郵件,在ADMINS部分定義的每個管理員。 \n \u003c/div\u003e \n \u003cpre\u003efrom django.core.mail import mail_managers\r\nfrom django.http import HttpResponse\r\n\r\ndef sendManagersEmail(request):\r\n res = mail_managers('my subject 2', 'Change date on the site.')\r\n return HttpResponse('\u003cb\u003e%s\u003c/b\u003e'%res)\r\u003c/pre\u003e \n \u003cdiv\u003e\n 上面的代碼會發郵件到MANAGERS\u0026nbsp;部分定義的每個管理員。 \n \u003c/div\u003e \n \u003cp\u003e 參數詳細信息\u0026nbsp;− \u003c/p\u003e \n \u003cul\u003e \n \u003cli\u003e \u003cp\u003e \u003cstrong\u003eSubject\u003c/strong\u003e\u0026nbsp;− E-mail 標題. \u003c/p\u003e \u003c/li\u003e \n \u003cli\u003e \u003cp\u003e \u003cstrong\u003emessage\u003c/strong\u003e\u0026nbsp;− E-mail 主題. \u003c/p\u003e \u003c/li\u003e \n \u003cli\u003e \u003cp\u003e \u003cstrong\u003efail_silently\u003c/strong\u003e\u0026nbsp;−\u0026nbsp;布爾,如果爲false,send_mail將在出現錯誤時引發異常 \u003c/p\u003e \u003c/li\u003e \n \u003cli\u003e \u003cp\u003e \u003cstrong\u003econnection\u003c/strong\u003e\u0026nbsp;− E-mail後端. \u003c/p\u003e \u003c/li\u003e \n \u003cli\u003e \u003cp\u003e \u003cstrong\u003ehtml_message\u003c/strong\u003e\u0026nbsp;−\u0026nbsp;(Django1.7中新增功能),如果存在的話,該郵件將爲\u0026nbsp;multipart/alternative。 \u003c/p\u003e \u003c/li\u003e \n \u003c/ul\u003e \n \u003ch2\u003e 發送HTML E-mail \u003c/h2\u003e \n \u003cdiv\u003e\n 在Django\u0026gt;=1.7發送HTML消息一樣簡單\u0026nbsp;- \n \u003c/div\u003e \n \u003cpre\u003efrom django.core.mail import send_mail\r\n\r\nfrom django.http import HttpResponse\r\n res = send_mail(\"hello paul\", \"comment tu vas?\", \"paul@polo.com\", \r\n [\"polo@gmail.com\"], html_message=\")\r\u003c/pre\u003e \n \u003cdiv\u003e\n 這將產生一個 multipart/alternative 的郵件。 \n \u003c/div\u003e \n \u003cp\u003e 但對於 Django\u0026lt;1.7 發送HTML郵件是通過 django.core.mail.mailMessage 類來完成,然後調用「send」對象− \u003c/p\u003e \n \u003cdiv\u003e\n 讓我們創建一個「sendHTMLEmail」視圖來發送HTML電子郵件。 \n \u003c/div\u003e \n \u003cpre\u003efrom django.core.mail import EmailMessage\r\nfrom django.http import HttpResponse\r\n\r\ndef sendHTMLEmail(request , emailto):\r\n html_content = \"\u0026lt;strong\u0026gt;Comment tu vas?\u0026lt;/strong\u0026gt;\"\r\n email = EmailMessage(\"my subject\", html_content, \"paul@polo.com\", [emailto])\r\n email.content_subtype = \"html\"\r\n res = email.send()\r\n return HttpResponse('\u003cb\u003e%s\u003c/b\u003e'%res)\u0026nbsp;\u003c/pre\u003e \n \u003cp\u003e 參數的詳細信息的電子郵件消息創建類\u0026nbsp;− \u003c/p\u003e \n \u003cul\u003e \n \u003cli\u003e \u003cp\u003e \u003cstrong\u003eSubject\u003c/strong\u003e\u0026nbsp;− E-mail 標題. \u003c/p\u003e \u003c/li\u003e \n \u003cli\u003e \u003cp\u003e \u003cstrong\u003emessage\u003c/strong\u003e\u0026nbsp;− E-mail 在HTML主體. \u003c/p\u003e \u003c/li\u003e \n \u003cli\u003e \u003cp\u003e \u003cstrong\u003efrom_email\u003c/strong\u003e\u0026nbsp;− E-mail 發送方. \u003c/p\u003e \u003c/li\u003e \n \u003cli\u003e \u003cp\u003e \u003cstrong\u003eto\u003c/strong\u003e\u0026nbsp;−\u0026nbsp;接收者的電子郵件地址列表。 \u003c/p\u003e \u003c/li\u003e \n \u003cli\u003e \u003cp\u003e \u003cstrong\u003ebcc\u003c/strong\u003e\u0026nbsp;−\u0026nbsp;「密件抄送」收件人的電子郵件地址列表。 \u003c/p\u003e \u003c/li\u003e \n \u003cli\u003e \u003cp\u003e \u003cstrong\u003econnection\u003c/strong\u003e\u0026nbsp;− E-mail 後端. \u003c/p\u003e \u003c/li\u003e \n \u003c/ul\u003e \n \u003cp\u003e 讓我們創建訪問視圖網址\u0026nbsp;− \u003c/p\u003e \n \u003cpre\u003efrom django.conf.urls import patterns, url\r\n\r\nurlpatterns = paterns('myapp.views', url(r'^htmlemail/(?P\u0026lt;emailto\u0026gt;\r\n [\\w.%+-]+@[A-Za-z0-9.-]+\\.[A-Za-z]{2,4})/', \r\n 'sendHTMLEmail' , name = 'sendHTMLEmail'),)\r\u003c/pre\u003e \n \u003cp\u003e 當我們訪問 /myapp/htmlemail/polo@gmail.com, 會得到以下內容 −\u003cbr\u003e \u003cimg src=\"https://asset.1ju.org/cmsstatic/djangoe-mail-3.jpg\" alt=\"Django發送E-mail\"\u003e \u003c/p\u003e \n \u003ch2\u003e \u003c/h2\u003e \n \u003ch2\u003e 發送帶附件的電子郵件 \u003c/h2\u003e \n \u003cdiv\u003e\n 這是通過使用所述EmailMessage對象上的「attach」方法進行。 \n \u003c/div\u003e \n \u003cp\u003e 一個視圖用於發送一封電子郵件,附件如下\u0026nbsp;− \u003c/p\u003e \n \u003cpre\u003efrom django.core.mail import EmailMessage\r\nfrom django.http import HttpResponse\r\n\r\ndef sendEmailWithAttach(request, emailto):\r\n html_content = \"\u003cb\u003eComment tu vas?\u003c/b\u003e\"\r\n email = EmailMessage(\"my subject\", html_content, \"paul@polo.com\", emailto])\r\n email.content_subtype = \"html\"\r\n \r\n fd = open('manage.py', 'r')\r\n email.attach('manage.py', fd.read(), 'text/plain')\r\n \r\n res = email.send()\r\n return HttpResponse('\u003cb\u003e%s\u003c/b\u003e'%res)\u0026nbsp;\u003c/pre\u003e \n \u003cp\u003e 在附件中的詳細參數\u0026nbsp;− \u003c/p\u003e \n \u003cul\u003e \n \u003cli\u003e \u003cp\u003e \u003cstrong\u003efilename\u003c/strong\u003e\u0026nbsp;−\u0026nbsp;附加的文件的名稱 \u003c/p\u003e \u003c/li\u003e \n \u003cli\u003e \u003cp\u003e \u003cstrong\u003econtent\u003c/strong\u003e\u0026nbsp;−\u0026nbsp;該文件的內容,以附加。 \u003c/p\u003e \u003c/li\u003e \n \u003cli\u003e \u003cp\u003e \u003cstrong\u003emimetype\u003c/strong\u003e\u0026nbsp;−\u0026nbsp;附件的內容MIME類型。 \u003c/p\u003e \u003c/li\u003e \n \u003c/ul\u003e \n\u003c/div\u003e \n\u003cbr\u003e"])</script><script>self.__next_f.push([1,"1c:T113f,"])</script><script>self.__next_f.push([1,"\u003cdiv\u003e \n \u003cdiv\u003e\n 在某些情況下編寫視圖代碼,正如我們所看到前面工作真的很繁重。想象一下,只需要一個靜態頁面或列表頁。\u0026nbsp;Django還提供了一種簡單的方法來設置這些簡單的視圖被稱爲通用視圖。 \n \u003c/div\u003e \n\u003c/div\u003e \n\u003cdiv\u003e \n \u003cp\u003e 不同於傳統的視圖,一般的視圖是一個類但沒有函數。Django還提供了一組類 django.views.generic 通用視圖,以及每一個普通視圖是這些類或從它們中的一個類繼承的。 \u003c/p\u003e \n \u003cp\u003e 有10+泛型類− \u003c/p\u003e \n \u003cpre\u003e\u0026gt;\u0026gt;\u0026gt; import django.views.generic\r\n\u0026gt;\u0026gt;\u0026gt; dir(django.views.generic)\r\n\r\n['ArchiveIndexView', 'CreateView', 'DateDetailView', 'DayArchiveView', \r\n 'DeleteView', 'DetailView', 'FormView', 'GenericViewError', 'ListView', \r\n 'MonthArchiveView', 'RedirectView', 'TemplateView', 'TodayArchiveView', \r\n 'UpdateView', 'View', 'WeekArchiveView', 'YearArchiveView', '__builtins__', \r\n '__doc__', '__file__', '__name__', '__package__', '__path__', 'base', 'dates', \r\n 'detail', 'edit', 'list']\r\u003c/pre\u003e \n \u003cdiv\u003e\n 你可以使用通用視圖。讓我們來看一些例子來看看它是如何工作的。 \n \u003c/div\u003e \n \u003ch2\u003e 靜態網頁 \u003c/h2\u003e \n \u003cdiv\u003e\n 讓我們從「static.html」模板發佈靜態頁面。 \n \u003c/div\u003e \n \u003cp\u003e 我們的 static.html − \u003c/p\u003e \n \u003cpre\u003e\u0026lt;html\u0026gt;\r\n \u0026lt;body\u0026gt; \r\n This is a static page!!! \r\n \u0026lt;/body\u0026gt;\r\n\u0026lt;/html\u0026gt;\u0026nbsp;\u003c/pre\u003e \n \u003cp\u003e 如果我們這樣做,按以前學過的方式,我們將不得不改變 myapp/views.py\u0026nbsp;− \u003c/p\u003e \n \u003cpre\u003efrom django.shortcuts import render\r\n\r\ndef static(request):\r\n return render(request, 'static.html', {})\u0026nbsp;\u003c/pre\u003e \n \u003cp\u003e myapp/urls.py 如下\u0026nbsp;− \u003c/p\u003e \n \u003cpre\u003efrom django.conf.urls import patterns, url\r\n\r\nurlpatterns = patterns(\"myapp.views\", url(r'^static/', 'static', name = 'static'),)\u0026nbsp;\u003c/pre\u003e \n \u003cp\u003e 最好的辦法就是使用通用視圖。對於這一點,我們的 myapp/views.py 將變成爲\u0026nbsp;− \u003c/p\u003e \n \u003cpre\u003efrom django.views.generic import TemplateView\r\n\r\nclass StaticView(TemplateView):\r\n template_name = \"static.html\"\u0026nbsp;\u003c/pre\u003e \n \u003cp\u003e 而我們的 myapp/urls.py 將如下\u0026nbsp;− \u003c/p\u003e \n \u003cpre\u003efrom myapp.views import StaticView\r\nfrom django.conf.urls import patterns\r\n\r\nurlpatterns = patterns(\"myapp.views\", (r'^static/$', StaticView.as_view()),)\u0026nbsp;\u003c/pre\u003e \n \u003cp\u003e 當訪問\u0026nbsp;/myapp/static\u0026nbsp;將得到\u0026nbsp;−\u003cbr\u003e \u003cimg src=\"https://asset.1ju.org/cmsstatic/django-4.jpg\" alt=\"Django通用視圖\"\u003e \u003c/p\u003e \n \u003cp\u003e 出於同樣的結果,我們也可以,執行下列操作\u0026nbsp;− \u003c/p\u003e \n \u003cul\u003e \n \u003cli\u003e 不需要修改 views.py \u003c/li\u003e \n \u003cli\u003e \n \u003cdiv\u003e\n 更改url.py文件爲 - \n \u003c/div\u003e \u003c/li\u003e \n \u003c/ul\u003e \n \u003cpre\u003efrom django.views.generic import TemplateView\r\nfrom django.conf.urls import patterns, url\r\n\r\nurlpatterns = patterns(\"myapp.views\",\r\n url(r'^static/',TemplateView.as_view(template_name = 'static.html')),)\r\u003c/pre\u003e \n \u003cdiv\u003e\n 正如你所看到的,只需要改變url.py文件中的第二個方法。 \n \u003c/div\u003e \n \u003ch3\u003e \u003c/h3\u003e \n \u003ch2\u003e 從數據庫列表和顯示數據 \u003c/h2\u003e \n \u003cp\u003e 我們要列出所有條目在Dreamreal模型。這樣使用ListView通用視圖類變得容易。編輯url.py文件,並對其進行更新 - \u003c/p\u003e \n \u003cpre\u003efrom django.views.generic import ListView\r\nfrom django.conf.urls import patterns, url\r\n\r\nurlpatterns = patterns(\r\n \"myapp.views\", url(r'^dreamreals/', ListView.as_view(model = Dreamreal, \r\n template_name = \"dreamreal_list.html\")),\r\n)\u0026nbsp;\u003c/pre\u003e \n \u003cp\u003e 重要的是要注意,在這一點上是變量通由通用視圖到模板爲object_list。如果你想自己的名字,將需要一個 context_object_name 參數添加到as_view方法。然後 url.py 成爲\u0026nbsp;- \u003c/p\u003e \n \u003cpre\u003efrom django.views.generic import ListView\r\nfrom django.conf.urls import patterns, url\r\n\r\nurlpatterns = patterns(\"myapp.views\",\r\n url(r'^dreamreals/', ListView.as_view(\r\n template_name = \"dreamreal_list.html\")),\r\n model = Dreamreal, context_object_name = 」dreamreals_objects」 ,)\u0026nbsp;\u003c/pre\u003e \n \u003cp\u003e 然後關聯的模板將成爲\u0026nbsp;− \u003c/p\u003e \n \u003cpre\u003e{% extends \"main_template.html\" %}\r\n{% block content %}\r\nDreamreals:\u0026lt;p\u0026gt;\r\n{% for dr in object_list %}\r\n{{dr.name}}\u0026lt;/p\u0026gt;\r\n{% endfor %}\r\n{% endblock %}\u0026nbsp;\u003c/pre\u003e \n \u003cp\u003e 訪問 /myapp/dreamreals/ 將產生如下頁面\u0026nbsp;−\u003cbr\u003e \u003cimg src=\"https://asset.1ju.org/cmsstatic/django-5.jpg\" alt=\"Django通用視圖\"\u003e \u003c/p\u003e \n\u003c/div\u003e \n\u003cbr\u003e"])</script><script>self.__next_f.push([1,"1d:T1751,"])</script><script>self.__next_f.push([1,"\u003cdiv\u003e \n \u003cdiv\u003e\n 在Django創建表單,類似於創建一個模型。\u0026nbsp;在這裏,我們只需要從Django的類並繼承此類屬性表單字段。讓我們在myapp文件夾中添加forms.py文件包含我們的應用程序的表單。我們將創建一個登錄表單。 \n \u003c/div\u003e \n\u003c/div\u003e \n\u003cdiv\u003e \n \u003cp\u003e \u003cstrong\u003emyapp/forms.py\u003c/strong\u003e \u003c/p\u003e \n \u003cpre\u003e#-*- coding: utf-8 -*-\r\nfrom django import forms\r\n\r\nclass LoginForm(forms.Form):\r\n user = forms.CharField(max_length = 100)\r\n password = forms.CharField(widget = forms.PasswordInput())\u0026nbsp;\u003c/pre\u003e \n \u003cp\u003e 由上可見,字段類型可以利用「widget」的參數到HTML渲染;\u0026nbsp;在我們的例子中,我們要隱藏密碼,不會顯示。在我們的例子中,想要隱藏密碼而不用顯示。\u0026nbsp;日期輸入是DateInput,CheckboxInput是複選框等等。 \u003c/p\u003e \n \u003ch2\u003e \n \u003cdiv\u003e\n 在視圖中使用表單 \n \u003c/div\u003e \u003c/h2\u003e \n \u003cp\u003e 有兩種HTTP請求,它們分別是GET和POST。在Django,作爲參數傳遞到視圖請求對象有一個屬性叫作「方法」,其中請求的類型被設置,並通過POST傳遞的所有數據可以經由request.POST字典進行訪問。 \u003c/p\u003e \n \u003cp\u003e 讓我們在\u0026nbsp;myapp/views.py\u0026nbsp;創建一個登錄視圖\u0026nbsp;− \u003c/p\u003e \n \u003cpre\u003e#-*- coding: utf-8 -*-\r\nfrom myapp.forms import LoginForm\r\n\r\ndef login(request):\r\n username = \"not logged in\"\r\n \r\n if request.method == \"POST\":\r\n #Get the posted form\r\n MyLoginForm = LoginForm(request.POST)\r\n \r\n if MyLoginForm.is_valid():\r\n username = MyLoginForm.cleaned_data['username']\r\n else:\r\n MyLoginForm = Loginform()\r\n\t\t\r\n return render(request, 'loggedin.html', {\"username\" : username})\u0026nbsp;\u003c/pre\u003e \n \u003cp\u003e 該視圖將通過\u0026nbsp;loggedin.html\u0026nbsp;登錄顯示錶單結果。\u0026nbsp;爲了測試它,我們首先需要登錄表單模板。讓我們把它命名爲:login.html。 \u003c/p\u003e \n \u003cpre\u003e\u0026lt;html\u0026gt;\r\n \u0026lt;body\u0026gt;\r\n \r\n \u0026lt;form name = \"form\" action = \"{% url \"myapp.views.login\" %}\" \r\n method = \"POST\" \u0026gt;{% csrf_token %}\r\n \r\n \u0026lt;div style = \"max-width:470px;\"\u0026gt;\r\n \u0026lt;center\u0026gt; \r\n \u0026lt;input type = \"text\" style = \"margin-left:20%;\" \r\n placeholder = \"Identifiant\" name = \"username\" /\u0026gt;\r\n \u0026lt;/center\u0026gt;\r\n \u0026lt;/div\u0026gt;\r\n\t\t\t\r\n \u0026lt;br\u0026gt;\r\n \r\n \u0026lt;div style = \"max-width:470px;\"\u0026gt;\r\n \u0026lt;center\u0026gt;\r\n \u0026lt;input type = \"password\" style = \"margin-left:20%;\" \r\n placeholder = \"password\" name = \"password\" /\u0026gt;\r\n \u0026lt;/center\u0026gt;\r\n \u0026lt;/div\u0026gt;\r\n\t\t\t\r\n \u0026lt;br\u0026gt;\r\n \r\n \u0026lt;div style = \"max-width:470px;\"\u0026gt;\r\n \u0026lt;center\u0026gt; \r\n \r\n \u0026lt;button style = \"border:0px; background-color:#4285F4; margin-top:8%;\r\n height:35px; width:80%;margin-left:19%;\" type = \"submit\" \r\n value = \"Login\" \u0026gt;\r\n \u0026lt;strong\u0026gt;Login\u0026lt;/strong\u0026gt;\r\n \u0026lt;/button\u0026gt;\r\n \r\n \u0026lt;/center\u0026gt;\r\n \u0026lt;/div\u0026gt;\r\n \r\n \u0026lt;/form\u0026gt;\r\n \r\n \u0026lt;/body\u0026gt;\r\n\u0026lt;/html\u0026gt;\u0026nbsp;\u003c/pre\u003e \n \u003cp\u003e 模板將顯示一個登錄表單,併發布結果我們上面登錄查看。您可能已經注意到模板,這只是爲了防止您網站上的跨站請求僞造(CSRF)攻擊的標籤。 \u003c/p\u003e \n \u003cpre\u003e{% csrf_token %}\r\u003c/pre\u003e \n \u003cdiv\u003e\n 當擁有了登錄模板後,我們需要將表格處理後呈現 loggedin.html 模板。 \n \u003c/div\u003e \n \u003cpre\u003e\u0026lt;html\u0026gt;\r\n \r\n \u0026lt;body\u0026gt;\r\n You are : \u0026lt;strong\u0026gt;{{username}}\u0026lt;/strong\u0026gt;\r\n \u0026lt;/body\u0026gt;\r\n \r\n\u0026lt;/html\u0026gt;\u0026nbsp;\u003c/pre\u003e \n \u003cp\u003e 現在,我們只需要URLs對來開始:\u0026nbsp;myapp/urls.py \u003c/p\u003e \n \u003cpre\u003efrom django.conf.urls import patterns, url\r\nfrom django.views.generic import TemplateView\r\n\r\nurlpatterns = patterns('myapp.views',\r\n url(r'^connection/',TemplateView.as_view(template_name = 'login.html')),\r\n url(r'^login/', 'login', name = 'login'))\u0026nbsp;\u003c/pre\u003e \n \u003cp\u003e 當訪問\"/myapp/connection\",我們會得到 login.html 模板顯示如下−\u003cbr\u003e \u003cimg src=\"https://asset.1ju.org/cmsstatic/django-6.jpg\" alt=\"Django表單處理\"\u003e \u003c/p\u003e \n \u003cp\u003e 上面的表格提交後,格式是有效的。在我們的例子中一定要填寫兩個字段,得到以下結果\u0026nbsp;−\u003cbr\u003e \u003cimg src=\"https://asset.1ju.org/cmsstatic/django-7.jpg\" alt=\"Django表單處理\"\u003e \u003c/p\u003e \n \u003cp\u003e 如果您的用戶名是polo,並且如果忘記了密碼。會收到以下消息\u0026nbsp;−\u003cbr\u003e \u003cimg src=\"https://asset.1ju.org/cmsstatic/django-8.jpg\" alt=\"Django表單處理\"\u003e \u003c/p\u003e \n \u003ch3\u003e \n \u003cdiv\u003e\n 用我們自己的表單驗證 \n \u003c/div\u003e \u003c/h3\u003e \n \u003cp\u003e 在上面的例子中,驗證表單爲\u0026nbsp;− \u003c/p\u003e \n \u003cpre\u003eMyLoginForm.is_valid()\u0026nbsp;\u003c/pre\u003e \n \u003cp\u003e 我們只用Django的自我形式驗證引擎,在例子中只是確保這個字段是必需的。現在讓我們嘗試以確保嘗試登錄的用戶是存在於我們的數據庫作爲Dreamreal項。\u0026nbsp;對於這一點,改變 myapp/forms.py 爲\u0026nbsp;− \u003c/p\u003e \n \u003cpre\u003e#-*- coding: utf-8 -*-\r\nfrom django import forms\r\nfrom myapp.models import Dreamreal\r\n\r\nclass LoginForm(forms.Form):\r\n user = forms.CharField(max_length = 100)\r\n password = forms.CharField(widget = forms.PasswordInput())\r\n\r\n def clean_message(self):\r\n username = self.cleaned_data.get(\"username\")\r\n dbuser = Dreamreal.objects.filter(name = username)\r\n \r\n if not dbuser:\r\n raise forms.ValidationError(\"User does not exist in our db!\")\r\n return username\u0026nbsp;\u003c/pre\u003e \n \u003cp\u003e 現在,調用「is_valid」方法之後,我們將獲得正確的輸出,僅當用戶是在我們的數據庫。如果想查詢表單字段,僅僅通過添加一個以「clean_」開頭方法,字段名稱對應到表單類字段。\u0026nbsp;引發一個\u0026nbsp;forms.ValidationError\u0026nbsp;錯誤是很重要的。 \u003c/p\u003e \n \u003cdiv\u003e \n \u003cspan\u003e\u003cbr\u003e \u003c/span\u003e \n \u003c/div\u003e \n\u003c/div\u003e \n\u003cbr\u003e"])</script><script>self.__next_f.push([1,"1e:T1428,"])</script><script>self.__next_f.push([1,"\u003cdiv\u003e\n 對於Web應用程序,以便能夠上傳文件(資料圖片,歌曲,PDF格式,文字......),它通常是很有用的。讓我們在這一節中來討論如何使用Django上傳文件。 \n\u003c/div\u003e \n\u003cdiv\u003e \n \u003ch2\u003e \n \u003cdiv\u003e\n 上傳圖片 \n \u003c/div\u003e \u003c/h2\u003e \n \u003cp\u003e 在開始開發圖片上傳之前,請確保Python的圖像庫(PIL)已經安裝。現在來說明上傳圖片,讓我們創建一個配置文件格式,在 myapp/forms.py\u0026nbsp;- \u003c/p\u003e \n \u003cpre\u003e#-*- coding: utf-8 -*-\r\nfrom django import forms\r\n\r\nclass ProfileForm(forms.Form):\r\n name = forms.CharField(max_length = 100)\r\n picture = forms.ImageFields()\u0026nbsp;\u003c/pre\u003e \n \u003cp\u003e 正如你所看到的,這裏的主要區別僅僅是 forms.ImageField。ImageField字段將確保上傳的文件是一個圖像。如果不是,格式驗證將失敗。 \u003c/p\u003e \n \u003cdiv\u003e\n 現在,讓我們創建一個\u0026nbsp;「Profile」\u0026nbsp;模型,以保存上傳的資料。在\u0026nbsp;myapp/models.py\u0026nbsp;- \n \u003c/div\u003e \n \u003cpre\u003efrom django.db import models\r\n\r\nclass Profile(models.Model):\r\n name = models.CharField(max_length = 50)\r\n picture = models.ImageField(upload_to = 'pictures')\r\n\r\n class Meta:\r\n db_table = \"profile\"\u0026nbsp;\u003c/pre\u003e \n \u003cp\u003e 正如所看到的模型,ImageField\u0026nbsp;使用強制性參數:upload_to.\u0026nbsp;這表示硬盤驅動器,圖像保存所在的地方。注意,該參數將被添加到 settings.py文件中定義的MEDIA_ROOT選項。 \u003c/p\u003e \n \u003cdiv\u003e\n 現在我們有表單和模型,讓我們來創建視圖,在 myapp/\u0026nbsp;views.py\u0026nbsp;- \n \u003c/div\u003e \n \u003cpre\u003e#-*- coding: utf-8 -*-\r\nfrom myapp.forms import ProfileForm\r\nfrom myapp.models import Profile\r\n\r\ndef SaveProfile(request):\r\n saved = False\r\n \r\n if request.method == \"POST\":\r\n #Get the posted form\r\n MyProfileForm = ProfileForm(request.POST, request.FILES)\r\n \r\n if MyProfileForm.is_valid():\r\n profile = Profile()\r\n profile.name = MyProfileForm.cleaned_data[\"name\"]\r\n profile.picture = MyProfileForm.cleaned_data[\"picture\"]\r\n profile.save()\r\n saved = True\r\n else:\r\n MyProfileForm = Profileform()\r\n\t\t\r\n return render(request, 'saved.htmll', locals())\u0026nbsp;\u003c/pre\u003e \n \u003cp\u003e 這部分不要錯過,創建一個ProfileForm 並做了一些修改,添加了第二個參數:request.FILES.\u0026nbsp;如果不通過表單驗證會失敗,給一個消息,說該圖片是空的。 \u003c/p\u003e \n \u003cp\u003e 現在,我們只需要saved.htmll模板和profile.htmll模板,表單和重定向頁面− \u003c/p\u003e \n \u003cp\u003e myapp/templates/saved.htmll\u0026nbsp;− \u003c/p\u003e \n \u003cpre\u003e\u0026lt;html\u0026gt;\r\n \u0026lt;body\u0026gt;\r\n \r\n {% if saved %}\r\n \u0026lt;strong\u0026gt;Your profile was saved.\u0026lt;/strong\u0026gt;\r\n {% endif %}\r\n \r\n {% if not saved %}\r\n \u0026lt;strong\u0026gt;Your profile was not saved.\u0026lt;/strong\u0026gt;\r\n {% endif %}\r\n \r\n \u0026lt;/body\u0026gt;\r\n\u0026lt;/html\u0026gt;\r\u003c/pre\u003e \n \u003cp\u003e myapp/templates/profile.htmll\u0026nbsp;− \u003c/p\u003e \n \u003cpre\u003e\u0026lt;html\u0026gt;\r\n \u0026lt;body\u0026gt;\r\n \r\n \u0026lt;form name = \"form\" enctype = \"multipart/form-data\" \r\n action = \"{% url \"myapp.views.SaveProfile\" %}\" method = \"POST\" \u0026gt;{% csrf_token %}\r\n \r\n \u0026lt;div style = \"max-width:470px;\"\u0026gt;\r\n \u0026lt;center\u0026gt; \r\n \u0026lt;input type = \"text\" style = \"margin-left:20%;\" \r\n placeholder = \"Name\" name = \"name\" /\u0026gt;\r\n \u0026lt;/center\u0026gt;\r\n \u0026lt;/div\u0026gt;\r\n\t\t\t\r\n \u0026lt;br\u0026gt;\r\n \r\n \u0026lt;div style = \"max-width:470px;\"\u0026gt;\r\n \u0026lt;center\u0026gt; \r\n \u0026lt;input type = \"file\" style = \"margin-left:20%;\" \r\n placeholder = \"Picture\" name = \"picture\" /\u0026gt;\r\n \u0026lt;/center\u0026gt;\r\n \u0026lt;/div\u0026gt;\r\n\t\t\t\r\n \u0026lt;br\u0026gt;\r\n \r\n \u0026lt;div style = \"max-width:470px;\"\u0026gt;\r\n \u0026lt;center\u0026gt; \r\n \r\n \u0026lt;button style = \"border:0px;background-color:#4285F4; margin-top:8%; \r\n height:35px; width:80%; margin-left:19%;\" type = \"submit\" value = \"Login\" \u0026gt;\r\n \u0026lt;strong\u0026gt;Login\u0026lt;/strong\u0026gt;\r\n \u0026lt;/button\u0026gt;\r\n \r\n \u0026lt;/center\u0026gt;\r\n \u0026lt;/div\u0026gt;\r\n \r\n \u0026lt;/form\u0026gt;\r\n \r\n \u0026lt;/body\u0026gt;\r\n\u0026lt;/html\u0026gt;\u0026nbsp;\u003c/pre\u003e \n \u003cp\u003e 接下來,我們需要配對網址以開始:\u0026nbsp;myapp/urls.py \u003c/p\u003e \n \u003cpre\u003efrom django.conf.urls import patterns, url\r\nfrom django.views.generic import TemplateView\r\n\r\nurlpatterns = patterns(\r\n 'myapp.views', url(r'^profile/',TemplateView.as_view(\r\n template_name = 'profile.htmll')), url(r'^saved/', 'SaveProfile', name = 'saved')\r\n)\u0026nbsp;\u003c/pre\u003e \n \u003cp\u003e 當訪問\"/myapp/profile\",我們會得到下面 profile.htmll 模板顯示\u0026nbsp;−\u003cbr\u003e \u003cimg src=\"https://asset.1ju.org/cmsstatic/django-9.jpg\" alt=\"Django上傳文件\"\u003e \u003c/p\u003e \n \u003cp\u003e 在格式提交後,已保存的模板將顯示如下\u0026nbsp;−\u003cbr\u003e \u003cimg src=\"https://asset.1ju.org/cmsstatic/django-10.jpg\" alt=\"Django上傳文件\"\u003e \u003c/p\u003e \n \u003cdiv\u003e\n 這裏我們只講解圖片上傳示例,但如果想上傳其他類型的文件,只需更換\u0026nbsp;ImageField\u0026nbsp;在這兩個模型及 FileField 表單。 \n \u003c/div\u003e \n \u003cdiv\u003e \n \u003cbr\u003e \n \u003c/div\u003e \n\u003c/div\u003e \n\u003cbr\u003e"])</script><script>self.__next_f.push([1,"1f:T7c7,"])</script><script>self.__next_f.push([1,"\u003cdiv\u003e \n \u003cdiv\u003e\n 到目前爲止,在我們的例子中,都是使用\u0026nbsp;Django\u0026nbsp;開發的web服務器。但這種服務器只是用於測試和不適合生產環境。一旦程序發佈投入生產,就需要如Apache,Nginx等一個真正的服務器,我們在這一節中討論Apache的配置。 \n \u003c/div\u003e \n\u003c/div\u003e \n\u003cdiv\u003e \n \u003cp\u003e 服務Django應用程序是通過Apache使用mod_wsgi的完成。\u0026nbsp;因此,第一件事情就是要確保你已經安裝了Apache和mod_wsgi。請記住,當我們創建我們的項目,項目結構它看起來應該如下所示 - \u003c/p\u003e \n \u003cpre\u003emyproject/\r\n manage.py\r\n myproject/\r\n __init__.py\r\n settings.py\r\n urls.py\r\n wsgi.py\r\u003c/pre\u003e \n \u003cdiv\u003e\n wsgi.py文件是一個考慮Django和Apache之間的聯繫和處理。 \n \u003c/div\u003e \n \u003cp\u003e 比方說,我們希望分享項目(myproject)在Apache中。\u0026nbsp;我們只需要設置Apache來訪問這個文件夾。假設我們把myproject的文件夾在\u0026nbsp;\"/var/www/html\".\u0026nbsp;在此階段,訪問該項目將經由\u0026nbsp;\u003ca href=\"http://127.0.0.1/myproject\"\u003ehttp://127.0.0.1/myproject\u003c/a\u003e\u0026nbsp;來完成。\u0026nbsp;這將導致Apache\u0026nbsp;列出文件夾顯示如在下面的快照。\u003cbr\u003e \u003cimg src=\"https://asset.1ju.org/cmsstatic/django-apache-1.jpg\" alt=\"Django Apache配置\"\u003e \u003c/p\u003e \n \u003cp\u003e 可以看出,Apache不需要處理Django的東西。\u0026nbsp;對於需要處理的,需要在Apache的httpd.conf配置。\u0026nbsp;於是打開httpd.conf並添加以下行\u0026nbsp;− \u003c/p\u003e \n \u003cpre\u003eWSGIScriptAlias / /var/www/html/myproject/myproject/wsgi.py\r\nWSGIPythonPath /var/www/html/myproject/\r\n\r\n\u0026lt;Directory /var/www/html/myproject/\u0026gt;\r\n \u0026lt;Files wsgi.py\u0026gt;\r\n Order deny,allow\r\n Allow from all\r\n \u0026lt;/Files\u0026gt;\r\n\u0026lt;/Directory\u0026gt;\u0026nbsp;\u003c/pre\u003e \n \u003cp\u003e 如果可以訪問登錄頁面:\u0026nbsp;http://127.0.0.1/myapp/connection,\u0026nbsp;你將看到如下頁面\u0026nbsp;-\u003cbr\u003e \u003cimg src=\"https://asset.1ju.org/cmsstatic/django-apache-2.jpg\" alt=\"Django Apache配置\"\u003e \u003c/p\u003e \n\u003c/div\u003e \n\u003cbr\u003e"])</script><script>self.__next_f.push([1,"20:Td85,"])</script><script>self.__next_f.push([1,"\u003cdiv\u003e \n \u003cdiv\u003e\n 有時候,可能要按您的Web應用程序的要求存儲訪問者一些數據在每個站點。始終牢記,那cookies被保存在客戶端,並根據您的客戶端瀏覽器的安全級別,設置cookie\u0026nbsp;存活的時間,有時候可能不需要。 \n \u003c/div\u003e \n\u003c/div\u003e \n\u003cdiv\u003e \n \u003cp\u003e 爲了說明在Django如何cookie處理,讓我們創建一個使用之前創建的登錄功能的系統。\u0026nbsp;系統將讓你登錄爲時間x分鐘,在此時間之後,應用程序將會自動註銷你的登陸信息。 \u003c/p\u003e \n \u003cdiv\u003e\n 對於這一點,需要設置兩個cookie:last_connection和username。 \n \u003c/div\u003e \n \u003cp\u003e 首先,讓我們改變登錄視圖以存儲用戶名和last_connection\u0026nbsp;cookies\u0026nbsp;− \u003c/p\u003e \n \u003cpre\u003efrom django.template import RequestContext\r\n\r\ndef login(request):\r\n username = \"not logged in\"\r\n \r\n if request.method == \"POST\":\r\n #Get the posted form\r\n MyLoginForm = LoginForm(request.POST)\r\n \r\n if MyLoginForm.is_valid():\r\n username = MyLoginForm.cleaned_data['username']\r\n else:\r\n MyLoginForm = LoginForm()\r\n \r\n response = render_to_response(request, 'loggedin.html', {\"username\" : username}, \r\n context_instance = RequestContext(request))\r\n \r\n response.set_cookie('last_connection', datetime.datetime.now())\r\n response.set_cookie('username', datetime.datetime.now())\r\n\t\r\n return response\u0026nbsp;\u003c/pre\u003e \n \u003cp\u003e 正如在上面這個視圖,設置cookie是調用setcookie方法完成的,而不是請求響應的,\u0026nbsp;還要注意所有Cookie的值是作爲字符串返回的。 \u003c/p\u003e \n \u003cp\u003e 讓我們爲登錄表單創建一個FormView,我們將不會顯示的表單,如果Cookie設置並且在10秒內\u0026nbsp;− \u003c/p\u003e \n \u003cpre\u003edef formView(request):\r\n if 'username' in request.COOKIES and 'last_connection' in request.COOKIES:\r\n username = request.COOKIES['username']\r\n \r\n last_connection = request.COOKIES['last_connection']\r\n last_connection_time = datetime.datetime.strptime(last_connection[:-7], \r\n \"%Y-%m-%d %H:%M:%S\")\r\n \r\n if (datetime.datetime.now() - last_connection_time).seconds \u0026lt; 10:\r\n return render(request, 'loggedin.html', {\"username\" : username})\r\n else:\r\n return render(request, 'login.html', {})\r\n\t\t\t\r\n else:\r\n return render(request, 'login.html', {})\u0026nbsp;\u003c/pre\u003e \n \u003cp\u003e 可以在\u0026nbsp;formView\u0026nbsp;視圖上訪問您設置Cookie,通過請求COOKIES類屬性(字典)完成。 \u003c/p\u003e \n \u003cp\u003e 現在修改url.py文件更改URL,配對新的視圖\u0026nbsp;− \u003c/p\u003e \n \u003cpre\u003efrom django.conf.urls import patterns, url\r\nfrom django.views.generic import TemplateView\r\n\r\nurlpatterns = patterns('myapp.views',\r\n url(r'^connection/','formView', name = 'loginform'),\r\n url(r'^login/', 'login', name = 'login'))\r\u003c/pre\u003e \n \u003cdiv\u003e\n 當訪問\u0026nbsp;/myapp/connection,您將進入以下頁面- \n \u003cbr\u003e \n \u003cimg src=\"https://asset.1ju.org/cmsstatic/django-cookies-1.jpg\" alt=\"Django Cookies處理\"\u003e \n \u003cbr\u003e \n \u003c/div\u003e \n \u003cdiv\u003e\n 提交後會重定向到以下界面\u0026nbsp;- \n \u003cbr\u003e \n \u003cimg src=\"https://asset.1ju.org/cmsstatic/django-cookies-2.jpg\" alt=\"Django Cookies處理\"\u003e \n \u003cbr\u003e \n \u003c/div\u003e \n \u003cp\u003e 現在,如果你在10秒內訪問\u0026nbsp;/myapp/connection\u0026nbsp;一遍,\u0026nbsp;會得到直接重定向到第二個屏幕。如果你再次訪問\u0026nbsp;/myapp/connection\u0026nbsp;超出這個範圍,將會得到的登錄表單(屏幕1)。 \u003c/p\u003e \n \u003cdiv\u003e \n \u003cspan\u003e\u003cbr\u003e \u003c/span\u003e \n \u003c/div\u003e \n\u003c/div\u003e \n\u003cbr\u003e"])</script><script>self.__next_f.push([1,"21:T1441,"])</script><script>self.__next_f.push([1,"\u003cdiv\u003e \n \u003cdiv\u003e\n 如前所述,我們可以在Web應用程序客戶端使用Cookie來存儲大量的有用數據。\u0026nbsp;我們在此之前已經看到了可以使用客戶端的cookie存儲各種數據,在Web應用程序這是非常有用的。這就導致了很多要保存數據的重要性和一些安全漏洞問題。 \n \u003c/div\u003e \n\u003c/div\u003e \n\u003cdiv\u003e \n \u003cp\u003e 出於安全原因,Django有一個會話框架來處理Cookies。\u0026nbsp;會話用於抽象的接收和發送cookie,數據保存在服務器端(如數據庫),而客戶端的cookie只是有識別會話ID。會話也有助於避免在用戶瀏覽器設置爲「不接受」cookies行爲。 \u003c/p\u003e \n \u003ch2\u003e \n \u003cdiv\u003e\n 設置會話 \n \u003c/div\u003e \u003c/h2\u003e \n \u003cp\u003e 在Django中,使會話在項目 settings.py 完成,通過添加一些行到MIDDLEWARE_CLASSES和INSTALLED_APPS選項。這應該在創建項目完成,但它總是很容易知道,所以MIDDLEWARE_CLASSES應該類似如下\u0026nbsp;− \u003c/p\u003e \n \u003cpre\u003e'django.contrib.sessions.middleware.SessionMiddleware'\r\u003c/pre\u003e \n \u003cdiv\u003e\n INSTALLED_APPS應該有\u0026nbsp;- \n \u003c/div\u003e \n \u003cpre\u003e'django.contrib.sessions'\u0026nbsp;\u003c/pre\u003e \n \u003cp\u003e 默認情況下,Django在數據庫保存會話信息(表django_session中或集合),但可以用其他的方式類似配置的引擎存儲的信息:在文件中或在緩存中。 \u003c/p\u003e \n \u003cdiv\u003e\n 當會話啓用,每個請求(在Django任何針對第一個參數)有一個會話(字典)屬性。 \n \u003c/div\u003e \n \u003cp\u003e 讓我們創建一個簡單的示例,看看如何創建和保存會話。我們之前已經建立了一個簡單的登錄系統(見Django的表單處理的章節和Django的Cookies處理一章)。讓我們保存用戶名在cookie。因此如果不註銷,訪問我們的登錄頁面時,你不會看到登錄表單。\u0026nbsp;在Django通過保存Cookie在服務器端,使用cookies處理更加安全。 \u003c/p\u003e \n \u003cdiv\u003e\n 對於這一點,首先讓我們改變登錄代碼以保存username 在服務器端- \n \u003c/div\u003e \n \u003cpre\u003edef login(request):\r\n username = 'not logged in'\r\n \r\n if request.method == 'POST':\r\n MyLoginForm = LoginForm(request.POST)\r\n \r\n if MyLoginForm.is_valid():\r\n username = MyLoginForm.cleaned_data['username']\r\n request.session['username'] = username\r\n else:\r\n MyLoginForm = LoginForm()\r\n\t\t\t\r\n return render(request, 'loggedin.html', {\"username\" : username}\r\u003c/pre\u003e \n \u003cdiv\u003e\n 那麼讓我們來創建視圖對應登錄表單的視圖,如果cookie設置將不會顯示錶單\u0026nbsp;- \n \u003c/div\u003e \n \u003cpre\u003edef formView(request):\r\n if request.session.has_key('username'):\r\n username = request.session['username']\r\n return render(request, 'loggedin.html', {\"username\" : username})\r\n else:\r\n return render(request, 'login.html', {})\u0026nbsp;\u003c/pre\u003e \n \u003cp\u003e 現在,讓我們修改url.py文件並更改URL,因此配對新視圖\u0026nbsp;− \u003c/p\u003e \n \u003cpre\u003efrom django.conf.urls import patterns, url\r\nfrom django.views.generic import TemplateView\r\n\r\nurlpatterns = patterns('myapp.views',\r\n url(r'^connection/','formView', name = 'loginform'),\r\n url(r'^login/', 'login', name = 'login'))\u0026nbsp;\u003c/pre\u003e \n \u003cp\u003e 當訪問\u0026nbsp;/myapp/connection,將能看到如下頁面−\u003cbr\u003e \u003cimg src=\"https://asset.1ju.org/cmsstatic/django-session-1.jpg\" alt=\"Django Session會話\"\u003e \u003c/p\u003e \n \u003cdiv\u003e\n 你會被重定向到下面的頁面\u0026nbsp;- \n \u003cbr\u003e \n \u003cimg src=\"https://asset.1ju.org/cmsstatic/django-session-2.jpg\" alt=\"Django Session會話\"\u003e \n \u003cbr\u003e \n \u003c/div\u003e \n \u003cdiv\u003e\n 現在,如果您嘗試再次訪問/myapp/connection,它會直接重定向到第二個屏幕。 \n \u003c/div\u003e \n \u003cdiv\u003e\n 讓我們創建一個簡單的註銷視圖,用於清除Cookie。 \n \u003c/div\u003e \n \u003cpre\u003edef logout(request):\r\n try:\r\n del request.session['username']\r\n except:\r\n pass\r\n return HttpResponse(\"\u0026lt;strong\u0026gt;You are logged out.\u0026lt;/strong\u0026gt;\")\r\u003c/pre\u003e \n \u003cdiv\u003e\n 並在 myapp/url.py 中配對 URL 註銷 \n \u003c/div\u003e \n \u003cpre\u003eurl(r'^logout/', 'logout', name = 'logout'),\r\u003c/pre\u003e \n \u003cdiv\u003e\n 現在,如果訪問/myapp/logout,將得到如下頁面- \n \u003cbr\u003e \n \u003cimg src=\"https://asset.1ju.org/cmsstatic/django-session-3.jpg\" alt=\"Django Session會話\"\u003e \n \u003cbr\u003e \n \u003c/div\u003e \n \u003cdiv\u003e\n 如果再次訪問\u0026nbsp;/myapp/connection\u0026nbsp;,將會得到的登錄表單(屏幕1)。 \n \u003c/div\u003e \n \u003ch3\u003e \n \u003cdiv\u003e\n 可能使用會話的一些動作 \n \u003c/div\u003e \u003c/h3\u003e \n \u003cp\u003e 我們已經看到如何存儲和訪問會話,下面是一個很好的瞭解請求的會話屬性還有其他一些有用的操作,如\u0026nbsp;- \u003c/p\u003e \n \u003cul\u003e \n \u003cli\u003e \u003cp\u003e \u003cstrong\u003eset_expiry (\u003c/strong\u003e\u003cstrong\u003evalue\u003c/strong\u003e\u003cstrong\u003e)\u003c/strong\u003e\u0026nbsp;−\u0026nbsp;設置會話的過期時間 \u003c/p\u003e \u003c/li\u003e \n \u003cli\u003e \u003cp\u003e \u003cstrong\u003eget_expiry_age()\u003c/strong\u003e\u0026nbsp;−\u0026nbsp;返回直到會話過期的秒數 \u003c/p\u003e \u003c/li\u003e \n \u003cli\u003e \u003cp\u003e \u003cstrong\u003eget_expiry_date()\u003c/strong\u003e\u0026nbsp;−\u0026nbsp;返回本會話將到期的日期 \u003c/p\u003e \u003c/li\u003e \n \u003cli\u003e \u003cp\u003e \u003cstrong\u003eclear_expired()\u003c/strong\u003e\u0026nbsp;−\u0026nbsp;從會話中刪除過期的會話存儲 \u003c/p\u003e \u003c/li\u003e \n \u003cli\u003e \u003cp\u003e \u003cstrong\u003eget_expire_at_browser_close()\u003c/strong\u003e\u003cstrong\u003e\u0026nbsp;\u003c/strong\u003e−\u0026nbsp;返回true或false,具體取決於用戶的會話cookie是否已過期在用戶的Web瀏覽器關閉時 \u003c/p\u003e \u003c/li\u003e \n \u003c/ul\u003e \n\u003c/div\u003e \n\u003cbr\u003e"])</script><script>self.__next_f.push([1,"22:T17b9,"])</script><script>self.__next_f.push([1,"\u003cdiv\u003e \n \u003cdiv\u003e\n 若要緩存一些昂貴的計算結果,\u0026nbsp;下一次你需要它時不需要再執行它。以下是解釋緩存如何工作的僞代碼− \n \u003c/div\u003e \n\u003c/div\u003e \n\u003cdiv\u003e \n \u003cpre\u003egiven a URL, try finding that page in the cache\r\n\r\nif the page is in the cache:\r\n return the cached page\r\nelse:\r\n generate the page\r\n save the generated page in the cache (for next time)\r\n return the generated page\u0026nbsp;\u003c/pre\u003e \n \u003cp\u003e Django提供了自己的緩存系統,可以讓您保存動態網頁,爲了避免在需要時重新計算它們。Django緩存架構的優點是,讓你緩存\u0026nbsp;- \u003c/p\u003e \n \u003cul\u003e \n \u003cli\u003e \n \u003cdiv\u003e\n 特定視圖的輸出 \n \u003c/div\u003e \u003c/li\u003e \n \u003cli\u003e \n \u003cdiv\u003e\n 模板的一部分 \n \u003c/div\u003e \u003c/li\u003e \n \u003cli\u003e \n \u003cdiv\u003e\n 整個網站 \n \u003c/div\u003e \u003c/li\u003e \n \u003c/ul\u003e \n \u003cp\u003e 要使用在Django中使用高速緩存,首先要做的是設置在那裏的緩存會保存下來。高速緩存框架提供了不同的可能性\u0026nbsp;-\u0026nbsp;高速緩存可以被保存在數據庫中,關於文件系統,或直接在內存中。可在項目的 settings.py 文件設置完成。 \u003c/p\u003e \n \u003ch2\u003e 在數據庫設置緩存 \u003c/h2\u003e \n \u003cdiv\u003e\n 只需在項目settings.py文件添加如下- \n \u003c/div\u003e \n \u003cpre\u003eCACHES = {\r\n 'default': {\r\n 'BACKEND': 'django.core.cache.backends.db.DatabaseCache',\r\n 'LOCATION': 'my_table_name',\r\n }\r\n}\u0026nbsp;\u003c/pre\u003e \n \u003cp\u003e 對於這項工作,並完成設置,我們需要創建高速緩存表「my_table_name」。對於這一點,需要做到以下幾點\u0026nbsp;- \u003c/p\u003e \n \u003cpre\u003epython manage.py createcachetable\r\u003c/pre\u003e \n \u003ch2\u003e \n \u003cdiv\u003e\n 在文件系統設置高速緩存 \n \u003c/div\u003e \u003c/h2\u003e \n \u003cdiv\u003e\n 只需在項目settings.py文件添加如下- \n \u003c/div\u003e \n \u003cpre\u003eCACHES = {\r\n 'default': {\r\n 'BACKEND': 'django.core.cache.backends.filebased.FileBasedCache',\r\n 'LOCATION': '/var/tmp/django_cache',\r\n }\r\n}\r\u003c/pre\u003e \n \u003ch2\u003e \n \u003cdiv\u003e\n 設置緩存在內存中 \n \u003c/div\u003e \u003c/h2\u003e \n \u003cdiv\u003e\n 這是緩存的最有效的方法,你可以使用它這取決於Python綁定庫選擇了內存高速緩存,如下列選項之一\u0026nbsp;- \n \u003c/div\u003e \n \u003cpre\u003eCACHES = {\r\n 'default': {\r\n 'BACKEND': 'django.core.cache.backends.memcached.MemcachedCache',\r\n 'LOCATION': '127.0.0.1:11211',\r\n }\r\n}\r\u003c/pre\u003e \n \u003cp\u003e \u003cb\u003e或\u003c/b\u003e \u003c/p\u003e \n \u003cpre\u003eCACHES = {\r\n 'default': {\r\n 'BACKEND': 'django.core.cache.backends.memcached.MemcachedCache',\r\n 'LOCATION': 'unix:/tmp/memcached.sock',\r\n }\r\n}\r\u003c/pre\u003e \n \u003ch2\u003e \n \u003cdiv\u003e\n 緩存整個網站 \n \u003c/div\u003e \u003c/h2\u003e \n \u003cp\u003e 使用高速緩存在Django的最簡單的方法就是緩存整個網站。這可以通過編輯項目settings.py的MIDDLEWARE_CLASSES選項來完成。以下需要添加到選項- \u003c/p\u003e \n \u003cpre\u003eMIDDLEWARE_CLASSES += (\r\n 'django.middleware.cache.UpdateCacheMiddleware',\r\n 'django.middleware.common.CommonMiddleware',\r\n 'django.middleware.cache.FetchFromCacheMiddleware',\r\n)\r\u003c/pre\u003e \n \u003cdiv\u003e\n 請注意,這裏的順序是很重要的,更新應在獲取中間件之前。 \n \u003c/div\u003e \n \u003cdiv\u003e\n 然後在同一個文件,還需要設置\u0026nbsp;- \n \u003c/div\u003e \n \u003cpre\u003eCACHE_MIDDLEWARE_ALIAS – The cache alias to use for storage.\r\nCACHE_MIDDLEWARE_SECONDS – The number of seconds each page should be cached.\r\u003c/pre\u003e \n \u003ch2\u003e \n \u003cdiv\u003e\n 緩存視圖 \n \u003c/div\u003e \u003c/h2\u003e \n \u003cp\u003e 如果不想緩存整個網站,可以緩存特定視圖。這可通過使用附帶 Django 的 cache_page 修飾符完成。我們要緩存視圖viewArticles的結果- \u003c/p\u003e \n \u003cpre\u003efrom django.views.decorators.cache import cache_page\r\n\r\n@cache_page(60 * 15)\r\n\r\ndef viewArticles(request, year, month):\r\n text = \"Displaying articles of : %s/%s\"%(year, month)\r\n return HttpResponse(text)\u0026nbsp;\u003c/pre\u003e \n \u003cp\u003e 正如你所看到 cache_page 是您希望視圖結果被緩存的需要的秒數(參數)。在上面的例子中,結果將會緩存 15 分鐘。 \u003c/p\u003e \n \u003cdiv\u003e\n 注\u0026nbsp;-\u0026nbsp;正如我們之前看到的上述視圖是映射到\u0026nbsp;- \n \u003c/div\u003e \n \u003cpre\u003eurlpatterns = patterns('myapp.views',\r\n url(r'^articles/(?P\u0026lt;month\u0026gt;\\d{2})/(?P\u0026lt;year\u0026gt;\\d{4})/', 'viewArticles', name = 'articles'),)\u0026nbsp;\u003c/pre\u003e \n \u003cp\u003e 由於URL使用參數,每一個不同的調用將被單獨地執行緩存。例如,請求 /myapp/articles/02/2007\u0026nbsp;將分別緩存到\u0026nbsp;/myapp/articles/03/2008。 \u003c/p\u003e \n \u003cp\u003e 緩存一個視圖也可以直接在url.py文件中完成。接着下面有相同的結果與上所述。只要編輯 myapp/url.py 文件並更改(以上)的相關映射URL爲 - \u003c/p\u003e \n \u003cpre\u003eurlpatterns = patterns('myapp.views',\r\n url(r'^articles/(?P\u0026lt;month\u0026gt;\\d{2})/(?P\u0026lt;year\u0026gt;\\d{4})/', \r\n cache_page(60 * 15)('viewArticles'), name = 'articles'),)\r\u003c/pre\u003e \n \u003cdiv\u003e\n 當然,它不再需要myapp/views.py。 \n \u003c/div\u003e \n \u003ch2\u003e \n \u003cdiv\u003e\n 緩存模板片段 \n \u003c/div\u003e \u003c/h2\u003e \n \u003cdiv\u003e\n 也可以緩存模板的一部分,這是通過使用\u0026nbsp;cache\u0026nbsp;標籤進行的。讓我們把\u0026nbsp;hello.html\u0026nbsp;模板修改\u0026nbsp;- \n \u003c/div\u003e \n \u003cpre\u003e{% extends \"main_template.html\" %}\r\n{% block title %}My Hello Page{% endblock %}\r\n{% block content %}\r\n\r\nHello World!!!\u0026lt;p\u0026gt;Today is {{today}}\u0026lt;/p\u0026gt;\r\nWe are\r\n{% if today.day == 1 %}\r\n\r\nthe first day of month.\r\n{% elif today == 30 %}\r\n\r\nthe last day of month.\r\n{% else %}\r\n\r\nI don't know.\r\n{%endif%}\r\n\r\n\u0026lt;p\u0026gt;\r\n {% for day in days_of_week %}\r\n {{day}}\r\n\u0026lt;/p\u0026gt;\r\n\r\n{% endfor %}\r\n{% endblock %}\r\u003c/pre\u003e \n \u003cdiv\u003e\n 緩存內容塊模板將成爲\u0026nbsp;- \n \u003c/div\u003e \n \u003cpre\u003e{% load cache %}\r\n{% extends \"main_template.html\" %}\r\n{% block title %}My Hello Page{% endblock %}\r\n{% cache 500 content %}\r\n{% block content %}\r\n\r\nHello World!!!\u0026lt;p\u0026gt;Today is {{today}}\u0026lt;/p\u0026gt;\r\nWe are\r\n{% if today.day == 1 %}\r\n\r\nthe first day of month.\r\n{% elif today == 30 %}\r\n\r\nthe last day of month.\r\n{% else %}\r\n\r\nI don't know.\r\n{%endif%}\r\n\r\n\u0026lt;p\u0026gt;\r\n {% for day in days_of_week %}\r\n {{day}}\r\n\u0026lt;/p\u0026gt;\r\n\r\n{% endfor %}\r\n{% endblock %}\r\n{% endcache %}\u0026nbsp;\u003c/pre\u003e \n \u003cp\u003e 正如你可以在上面看到,緩存標籤將需要2個參數\u0026nbsp;−\u0026nbsp;想要的塊被緩存(秒)以及名稱提供給緩存片段。 \u003c/p\u003e \n\u003c/div\u003e \n\u003cbr\u003e"])</script><script>self.__next_f.push([1,"23:Ta39,"])</script><script>self.__next_f.push([1,"\u003cdiv\u003e\n Django帶有聚合feed生成框架。有了它,你可以創建RSS或Atom只需繼承django.contrib.syndication.views.Feed類。 \n\u003c/div\u003e \n\u003cp\u003e 讓我們創建一個訂閱源的應用程序。 \u003c/p\u003e \n\u003cpre\u003efrom django.contrib.syndication.views import Feed\r\nfrom django.contrib.comments import Comment\r\nfrom django.core.urlresolvers import reverse\r\n\r\nclass DreamrealCommentsFeed(Feed):\r\n title = \"Dreamreal's comments\"\r\n link = \"/drcomments/\"\r\n description = \"Updates on new comments on Dreamreal entry.\"\r\n\r\n def items(self):\r\n return Comment.objects.all().order_by(\"-submit_date\")[:5]\r\n\t\t\r\n def item_title(self, item):\r\n return item.user_name\r\n\t\t\r\n def item_description(self, item):\r\n return item.comment\r\n\t\t\r\n def item_link(self, item):\r\n return reverse('comment', kwargs = {'object_pk':item.pk})\u0026nbsp;\u003c/pre\u003e \n\u003cul\u003e \n \u003cli\u003e \u003cp\u003e 在feed類,\u0026nbsp;title,\u0026nbsp;link\u0026nbsp;和\u0026nbsp;description\u0026nbsp;屬性對應標準RSS\u0026nbsp;的\u0026lt;title\u0026gt;,\u0026nbsp;\u0026lt;link\u0026gt;\u0026nbsp;和\u0026nbsp;\u0026lt;description\u0026gt;元素。 \u003c/p\u003e \u003c/li\u003e \n \u003cli\u003e \u003cp\u003e 條目方法返回應該進入feed的item的元素。在我們的示例中是最後五個註釋。 \u003c/p\u003e \u003c/li\u003e \n\u003c/ul\u003e \n\u003cp\u003e 現在,我們有feed,並添加評論在視圖views.py,以顯示我們的評論− \u003c/p\u003e \n\u003cpre\u003efrom django.contrib.comments import Comment\r\n\r\ndef comment(request, object_pk):\r\n mycomment = Comment.objects.get(object_pk = object_pk)\r\n text = '\u0026lt;strong\u0026gt;User :\u0026lt;/strong\u0026gt; %s \u0026lt;p\u0026gt;'%mycomment.user_name\u0026lt;/p\u0026gt;\r\n text += '\u0026lt;strong\u0026gt;Comment :\u0026lt;/strong\u0026gt; %s \u0026lt;p\u0026gt;'%mycomment.comment\u0026lt;/p\u0026gt;\r\n return HttpResponse(text)\u0026nbsp;\u003c/pre\u003e \n\u003cp\u003e 我們還需要一些網址在myapp\u0026nbsp;urls.py中映射\u0026nbsp;− \u003c/p\u003e \n\u003cpre\u003efrom myapp.feeds import DreamrealCommentsFeed\r\nfrom django.conf.urls import patterns, url\r\n\r\nurlpatterns += patterns('',\r\n url(r'^latest/comments/', DreamrealCommentsFeed()),\r\n url(r'^comment/(?P\\w+)/', 'comment', name = 'comment'),\r\n)\u0026nbsp;\u003c/pre\u003e \n\u003cp\u003e 當訪問/myapp/latest/comments/會得到 feed\u0026nbsp;−\u003cbr\u003e \u003cimg src=\"https://asset.1ju.org/cmsstatic/django-rss-1.jpg\" alt=\"Django RSS\"\u003e \u003c/p\u003e \n\u003cp\u003e 當點擊其中的一個用戶名都會得到:/myapp/comment/comment_id\u0026nbsp;在您的評論視圖定義之前,會得到\u0026nbsp;−\u003cbr\u003e \u003cimg src=\"https://asset.1ju.org/cmsstatic/django-rss-2.jpg\" alt=\"Django RSS\"\u003e \u003c/p\u003e \n\u003cp\u003e 因此,定義一個RSS源是\u0026nbsp;Feed\u0026nbsp;類的子類,並確保這些URL(一個用於訪問feed,一個用於訪問feed元素)的定義。\u0026nbsp;正如評論,這可以連接到您的應用程序的任何模型。 \u003c/p\u003e \n\u003cdiv\u003e \n \u003cbr\u003e \n\u003c/div\u003e \n\u003cbr\u003e"])</script><script>self.__next_f.push([1,"24:T196c,"])</script><script>self.__next_f.push([1,"\u003cdiv\u003e \n \u003cdiv\u003e\n Ajax基本上是集成到一起,以減少頁負載數量的技術的組合。我們通常使用Ajax來緩解的最終用戶體驗。在Django使用Ajax可以直接使用Ajax庫如jQuery或其它來完成。比方說,想使用jQuery,那麼你需要下載並服務於庫服務器通過Apache或其他服務器。然後用它在模板,就像開發一個基於Ajax的應用程序。 \n \u003c/div\u003e \n\u003c/div\u003e \n\u003cdiv\u003e \n \u003cp\u003e Django使用 Ajax 另一種方法是使用Django的Ajax框架。\u0026nbsp;最常用的是django-dajax,這是一個強大的工具,能夠輕鬆異步表示邏輯和超快速開發Web應用程序,使用Python和幾乎不需要 JavaScript 源代碼。它支持四種最流行的js框架:Prototype,\u0026nbsp;jQuery,\u0026nbsp;Dojo\u0026nbsp;和MooTools \u003c/p\u003e \n \u003ch2\u003e 使用Django-dajax \u003c/h2\u003e \n \u003cp\u003e 首先要做的就是安裝\u0026nbsp;django-dajax。這可以通過使用easy_install\u0026nbsp;或\u0026nbsp;pid\u0026nbsp;進行− \u003c/p\u003e \n \u003cpre\u003e$ pip install django_dajax\r\n$ easy_install django_dajax\u0026nbsp;\u003c/pre\u003e \n \u003cp\u003e 這將自動安裝django-dajaxice,按django-dajaxice要求。然後,我們需要配置Ajax和dajaxice。 \u003c/p\u003e \n \u003cp\u003e 添加 dajax 和 dajaxice 在 settings.py\u0026nbsp;的\u0026nbsp;INSTALLED_APPS選擇項目\u0026nbsp;− \u003c/p\u003e \n \u003cpre\u003eINSTALLED_APPS += (\r\n 'dajaxice',\r\n 'dajax'\r\n)\u0026nbsp;\u003c/pre\u003e \n \u003cp\u003e \u003cspan\u003e確保在同一個 settings.py 文件,則有以下\u003c/span\u003e\u0026nbsp;− \u003c/p\u003e \n \u003cpre\u003eTEMPLATE_LOADERS = (\r\n 'django.template.loaders.filesystem.Loader',\r\n 'django.template.loaders.app_directories.Loader',\r\n 'django.template.loaders.eggs.Loader',\r\n)\r\n\r\nTEMPLATE_CONTEXT_PROCESSORS = (\r\n 'django.contrib.auth.context_processors.auth',\r\n 'django.core.context_processors.debug',\r\n 'django.core.context_processors.i18n',\r\n 'django.core.context_processors.media',\r\n 'django.core.context_processors.static',\r\n 'django.core.context_processors.request',\r\n 'django.contrib.messages.context_processors.messages'\r\n)\r\n\r\nSTATICFILES_FINDERS = (\r\n 'django.contrib.staticfiles.finders.FileSystemFinder',\r\n 'django.contrib.staticfiles.finders.AppDirectoriesFinder',\r\n 'dajaxice.finders.DajaxiceFinder',\r\n)\r\n\r\nDAJAXICE_MEDIA_PREFIX = 'dajaxice'\u0026nbsp;\u003c/pre\u003e \n \u003cp\u003e 現在打開\u0026nbsp;myapp/url.py文件,確保有以下設置dajax\u0026nbsp;URL和加載dajax靜態js文件\u0026nbsp;− \u003c/p\u003e \n \u003cpre\u003efrom dajaxice.core import dajaxice_autodiscover, dajaxice_config\r\nfrom django.contrib.staticfiles.urls import staticfiles_urlpatterns\r\nfrom django.conf import settings\r\n\r\nThen dajax urls:\r\n\r\nurlpatterns += patterns('',\r\n url(r'^%s/' % settings.DAJAXICE_MEDIA_PREFIX, include('dajaxice.urls')),)\r\n\t\r\nurlpatterns += staticfiles_urlpatterns()\r\u003c/pre\u003e \n \u003cdiv\u003e\n 我們創建一個基於Dreamreal模型來存儲它一個簡單的表格,使用Ajax(指無刷新)。 \n \u003c/div\u003e \n \u003cdiv\u003e\n 首先,我們需要在\u0026nbsp;myapp/form.py\u0026nbsp;的\u0026nbsp;Dreamreal\u0026nbsp;表單。 \n \u003c/div\u003e \n \u003cpre\u003eclass DreamrealForm(forms.Form):\r\n website = forms.CharField(max_length = 100)\r\n name = forms.CharField(max_length = 100)\r\n phonenumber = forms.CharField(max_length = 50)\r\n email = forms.CharField(max_length = 100)\u0026nbsp;\u003c/pre\u003e \n \u003cp\u003e 然後,我們需要在應用程序的ajax.py文件:\u0026nbsp;myapp/ajax.py.\u0026nbsp;這裏是相關的邏輯,我們把將表單保存,然後返回彈出顯示結果 - \u003c/p\u003e \n \u003cpre\u003efrom dajaxice.utils import deserialize_form\r\nfrom myapp.form import DreamrealForm\r\nfrom dajax.core import Dajax\r\nfrom myapp.models import Dreamreal\r\n\r\n@dajaxice_register\r\ndef send_form(request, form):\r\n dajax = Dajax()\r\n form = DreamrealForm(deserialize_form(form))\r\n \r\n if form.is_valid():\r\n dajax.remove_css_class('#my_form input', 'error')\r\n dr = Dreamreal()\r\n dr.website = form.cleaned_data.get('website')\r\n dr.name = form.cleaned_data.get('name')\r\n dr.phonenumber = form.cleaned_data.get('phonenumber')\r\n dr.save()\r\n \r\n dajax.alert(\"Dreamreal Entry %s was successfully saved.\" % \r\n form.cleaned_data.get('name'))\r\n else:\r\n dajax.remove_css_class('#my_form input', 'error')\r\n for error in form.errors:\r\n dajax.add_css_class('#id_%s' % error, 'error')\r\n\t\t\t\r\n return dajax.json()\r\u003c/pre\u003e \n \u003cdiv\u003e\n 現在,讓我們創建 dreamreal.html 模板,裏面有需要的表單 - \n \u003c/div\u003e \n \u003cpre\u003e\u0026lt;html\u0026gt;\r\n \u0026lt;head\u0026gt;\u0026lt;/head\u0026gt;\r\n \u0026lt;body\u0026gt;\r\n \r\n \u0026lt;form action = \"\" method = \"post\" id = \"my_form\" accept-charset = \"utf-8\"\u0026gt;\r\n {{ form.as_p }}\r\n \u0026lt;p\u0026gt;\u0026lt;input type = \"button\" value = \"Send\" onclick = \"send_form();\"\u0026gt;\u0026lt;/p\u0026gt;\r\n \u0026lt;/form\u0026gt;\r\n \r\n \u0026lt;/body\u0026gt;\r\n\u0026lt;/html\u0026gt;\u0026nbsp;\u003c/pre\u003e \n \u003cp\u003e 補充一點,在模板視圖:myapp/views.py − \u003c/p\u003e \n \u003cpre\u003edef dreamreal(request):\r\n form = DreamrealForm()\r\n return render(request, 'dreamreal.html', locals())\u0026nbsp;\u003c/pre\u003e \n \u003cp\u003e 添加相應的網址:myapp/urls.py − \u003c/p\u003e \n \u003cpre\u003eurl(r'^dreamreal/', 'dreamreal', name = 'dreamreal'),\u0026nbsp;\u003c/pre\u003e \n \u003cp\u003e 現在添加必要的代碼在模板中,以使\u0026nbsp;Ajax\u0026nbsp;工作− \u003c/p\u003e \n \u003cp\u003e 在文件中頂部添加 - \u003c/p\u003e \n \u003cpre\u003e{% load static %}\r\n{% load dajaxice_templatetags %}\r\u003c/pre\u003e \n \u003cdiv\u003e\n 在dreamreal.html模板的\u0026lt;head\u0026gt;部分添加\u0026nbsp;- \n \u003c/div\u003e \n \u003cp\u003e 我們使用 JQuery 庫對於本例,所以加上以下代碼\u0026nbsp;− \u003c/p\u003e \n \u003cpre\u003e\u0026lt;script src = \"{% static '/static/jquery-1.11.3.min.js' %}\" \r\n type = \"text/javascript\" charset = \"utf-8\"\u0026gt;\u0026lt;/script\u0026gt;\r\n\u0026lt;script src = \"{% static '/static/dajax/jquery.dajax.core.js' %}\"\u0026gt;\u0026lt;/script\u0026gt;\u0026nbsp;\u003c/pre\u003e \n \u003cp\u003e 點擊將會調用 Ajax 函數− \u003c/p\u003e \n \u003cpre\u003e\u0026lt;script\u0026gt;\r\n\r\n function send_form(){\r\n Dajaxice.myapp.send_form(Dajax.process,{'form':$('#my_form').serialize(true)});\r\n }\r\n\u0026lt;/script\u0026gt;\u0026nbsp;\u003c/pre\u003e \n \u003cp\u003e 請注意,需要在靜態文件目錄添入\u0026nbsp;「jquery-1.11.3.min.js」,也是\u0026nbsp;jquery.dajax.core.js。\u0026nbsp;爲了確保所有 dajax 靜態文件的靜態目錄服務,運行\u0026nbsp;- \u003c/p\u003e \n \u003cpre\u003e$python manage.py collectstatic\r\u003c/pre\u003e \n \u003cdiv\u003e\n 注\u0026nbsp;-\u0026nbsp;有時 jquery.dajax.core.js 可以缺失,如果出現這種情況,只需下載源代碼並把它放在靜態文件夾中。 \n \u003c/div\u003e \n \u003cp\u003e 訪問將能看到下面的畫面,\u0026nbsp;/myapp/dreamreal/ −\u003cbr\u003e \u003cimg src=\"https://asset.1ju.org/cmsstatic/django-ajax-1.jpg\" alt=\"Django Ajax應用\"\u003e \u003c/p\u003e \n \u003cp\u003e 在提交後,將得到以下顯示畫面\u0026nbsp;−\u003cbr\u003e \u003cimg src=\"https://asset.1ju.org/cmsstatic/django-ajax-2.jpg\" alt=\"Django Ajax應用\"\u003e \u003c/p\u003e \n \u003cbr\u003e \n\u003c/div\u003e \n\u003cbr\u003e"])</script><script>self.__next_f.push([1,"25:T409d,"])</script><script>self.__next_f.push([1,"\u003ch2\u003e 快速安裝 \u003c/h2\u003e \n\u003cp\u003e 在使用Django之前,我們需要把它先安裝好。我們這裏有一個完整的安裝指南,涵蓋了所有的可能性;\u0026nbsp;本指南將引導您通過簡單的,最小化安裝。 \u003c/p\u003e \n\u003cp\u003e Windows 安裝參考:\u003ca href=\"https://docs.djangoproject.com/en/1.9/howto/windows/\"\u003ehttps://docs.djangoproject.com/en/1.9/howto/windows/\u003c/a\u003e \u003c/p\u003e \n\u003cdiv\u003e \n \u003ch2\u003e 安裝Python \u003c/h2\u003e \n \u003cp\u003e 作爲一個Python\u0026nbsp;Web框架,Django 需要 Python 環境的支持。Python中包括一個輕量級的數據庫:SQLite,所以我們不會需要建立數據庫。 \u003c/p\u003e \n \u003cdiv\u003e\n 獲得 Python 的最新版本在以下網址: \n \u003ca href=\"https://www.python.org/download/\"\u003ehttps://www.python.org/download/\u003c/a\u003e\u0026nbsp;或選擇你對應操作系統的軟件包管理器。 \n \u003c/div\u003e \n \u003cdiv\u003e\n 可以驗證Python是否安裝,通過從shell\u0026nbsp;鍵入python;\u0026nbsp;應該看到類似這樣輸出結果: \n \u003c/div\u003e \n \u003cdiv\u003e \n \u003cpre\u003ePython 3.4.x\r\n[GCC 4.x] on linux\r\nType \"help\", \"copyright\", \"credits\" or \"license\" for more information.\r\n\u0026gt;\u0026gt;\u0026gt;\u003cspan\u003e\u003c/span\u003e\u003c/pre\u003e \n \u003c/div\u003e \n\u003c/div\u003e \n\u003cdiv\u003e \n \u003ch2\u003e 配置數據庫 \u003c/h2\u003e \n \u003cp\u003e 如果想使用像PostgreSQL,MySQL和Oracle這些一個「大」數據庫引擎工作。要安裝這樣的數據庫,請查閱\u003ca href=\"https://docs.djangoproject.com/en/1.9/topics/install/#database-installation\"\u003e數據庫的安裝信息\u003c/a\u003e。 \u003c/p\u003e \n\u003c/div\u003e \n\u003cdiv\u003e \n \u003ch2\u003e \u003c/h2\u003e \n \u003ch2\u003e 刪除所有舊版本的Django \u003c/h2\u003e \n \u003cp\u003e 如果您是從舊版本升級安裝Django的等方面,需要\u003ca href=\"https://docs.djangoproject.com/en/1.9/topics/install/#removing-old-versions-of-django\"\u003e安裝新版本前卸載舊版本的Django\u003c/a\u003e。 \u003c/p\u003e \n\u003c/div\u003e \n\u003cdiv\u003e \n \u003ch2\u003e 安裝Django \u003c/h2\u003e \n \u003cdiv\u003e\n 一般使用三個簡單的選項來安裝Django: \n \u003c/div\u003e \n \u003cul\u003e \n \u003cli\u003e 安裝由\u003ca href=\"https://docs.djangoproject.com/en/1.9/misc/distributions/\"\u003e操作系統分配提供的一個Django版本\u003c/a\u003e。\u0026nbsp;這是最快的選擇對於那些有分發Django的操作系統。 \u003c/li\u003e \n \u003cli\u003e \n \u003cdiv\u003e\n 安裝 \n \u003ca href=\"https://docs.djangoproject.com/en/1.9/topics/install/#installing-official-release\"\u003e官方發佈版本\u003c/a\u003e。這是大多數用戶的最佳方法。 \n \u003c/div\u003e \u003c/li\u003e \n \u003cli\u003e 安裝最新開發版本。此選項是那些想要最新的,並且不怕新代碼有BUG的愛好者。您可能會遇到在開發新版本遇到bug,並報告給他們以幫助Django的發展。另外,第三方軟件包版本在開發版本不太可能比最新的穩定版本兼容。 \u003c/li\u003e \n \u003c/ul\u003e \n \u003cdiv\u003e \n \u003ch3\u003e 安裝Windows \u003c/h3\u003e \n \u003cdiv\u003e\n 我們假設你的 Django 存檔並且\u0026nbsp;Python\u0026nbsp;安裝在計算機上,當前的最新版本是:1.9.1,可通過以下網址下載: \n \u003ca href=\"https://www.djangoproject.com/download/\"\u003ehttps://www.djangoproject.com/download/\u003c/a\u003e \n \u003c/div\u003e \n \u003cdiv\u003e\n 首先,路徑驗證。 \n \u003c/div\u003e \n \u003cp\u003e 在某些版本的Windows(Windows\u0026nbsp;7)中,需要確保 Path 系統變量的路徑如下:C:\\Python27\\;C:\\Python27\\Lib\\site-packages\\django\\bin\\\u0026nbsp;在裏面,當然這取決於你的Python版本。 \u003c/p\u003e \n \u003cdiv\u003e\n 然後,提取和安裝Django,這裏我們把解壓到\u0026nbsp;C:\\Python27\\ \n \u003c/div\u003e \n \u003cdiv\u003e \n \u003cimg src=\"https://asset.1ju.org/cmsstatic/django-6.png\" alt=\"Django快速入門\"\u003e \n \u003c/div\u003e \n \u003cp\u003e 接下來,通過運行以下命令,在windows\u0026nbsp;shell\u0026nbsp;「cmd」\u0026nbsp;可能需要管理權限來安裝Django\u0026nbsp;− \u003c/p\u003e \n \u003cpre\u003e\u003cspan\u003eC:\\Python27\\Django-1.9.1\u003c/span\u003e\u003cspan\u003e\u0026gt;python setup.py install\u0026nbsp;\u003c/span\u003e\u003c/pre\u003e \n \u003cp\u003e 要測試你的安裝,打開命令提示符,從 shell 輸入Python可以看到。然後在Python提示符,嘗試導入Django: \u003c/p\u003e \n \u003c/div\u003e \n\u003c/div\u003e \n\u003cdiv\u003e \n \u003cpre\u003e\u0026gt;\u0026gt;\u0026gt; import django\r\n\u0026gt;\u0026gt;\u0026gt; print(django.get_version())\r\n1.9.1\u003cspan\u003e\u003c/span\u003e\u003c/pre\u003e \n \u003cdiv\u003e\n 這就算安裝完成了。接下來我們要進入開發的第一步。 \n \u003c/div\u003e \n \u003cp\u003e \u003c/p\u003e \n \u003ch2\u003e 開發第一個Django app \u003c/h2\u003e \n \u003cdiv\u003e\n 讓我們開始創建一個Web應用程序並一步步地學習。 \n \u003c/div\u003e \n \u003cdiv\u003e\n 在本教程中,將引導您完成創建一個基本的民意調查 (poll) 的應用。 \n \u003c/div\u003e \n \u003cdiv\u003e\n 這將包括兩部分: \n \u003c/div\u003e \n \u003cul\u003e \n \u003cli\u003e \n \u003cdiv\u003e\n 一個公共網站,讓人們在上面查看投票和投票。 \n \u003c/div\u003e \u003c/li\u003e \n \u003cli\u003e \n \u003cdiv\u003e\n 一個網站管理,您可以添加,更改和刪除投票。 \n \u003c/div\u003e \u003c/li\u003e \n \u003c/ul\u003e \n \u003cdiv\u003e\n 假設你的 Django 已經安裝完成。可以確認 Django\u0026nbsp;安裝和版本,運行以下命令: \n \u003c/div\u003e \n \u003cdiv\u003e \n \u003cdiv\u003e \n \u003cpre\u003e\u003cspan\u003e$\u003c/span\u003e python -c \u003cspan\u003e\"import django; print(django.get_version())\"\u0026nbsp;\u0026nbsp;\u003c/span\u003e\u003cspan\u003e\u003c/span\u003e\u003c/pre\u003e \n \u003c/div\u003e \n \u003c/div\u003e \n \u003cp\u003e 如果安裝 Django,你應該看到安裝的版本。如果還未安裝會得到一個錯誤提示:\u0026nbsp;「No module named django」。 \u003c/p\u003e \n \u003cp\u003e 本教程是使用 Django1.9和Python2.7或更高版本編寫的。如果Django的版本不匹配,您可以通過使用版本切換 Django 版本,或者 Django 更新到最新版本。如果還在使用Python2.7,則需要稍微調整代碼,如在註釋中描述。 \u003c/p\u003e \n \u003ch2\u003e 創建一個項目 \u003c/h2\u003e \n \u003cp\u003e 如果第一次使用Django,必須採取一些初始設置。也就是說,需要自動生成一些代碼,建立一個Django項目\u0026nbsp;-\u0026nbsp;設置Django實例的集合,包括數據庫配置,Django 特定選項和特定應用程序設置。 \u003c/p\u003e \n \u003cdiv\u003e\n 在命令行,cd 到你想要存儲代碼目錄,比如,這裏我創建項目的地方是:C:\\Python7\\ ,然後運行以下命令: \n \u003c/div\u003e \n \u003cdiv\u003e \n \u003cdiv\u003e \n \u003cpre\u003e\u003cspan\u003e\u003cb\u003eC:\\python27\u0026gt; \u003c/b\u003e\u003c/span\u003e\u003cspan\u003edjango-admin startproject mysite\u003cspan\u003e\u003c/span\u003e\u003c/span\u003e\u003c/pre\u003e \n \u003c/div\u003e \n \u003c/div\u003e \n \u003cdiv\u003e\n 這將在 C:\\python17下創建 mysite 目錄。如下圖: \n \u003c/div\u003e \n \u003cdiv\u003e \n \u003cimg src=\"https://asset.1ju.org/cmsstatic/django-7.png\" alt=\"Django快速入門\"\u003e \n \u003cbr\u003e \n \u003c/div\u003e \n \u003cdiv\u003e\n 讓我們來看看 startproject 命令創建的目錄結構: \n \u003c/div\u003e \n \u003cdiv\u003e \n \u003cdiv\u003e \n \u003cdiv\u003e \n \u003cpre\u003emysite/\r\n manage.py\r\n mysite/\r\n __init__.py\r\n settings.py\r\n urls.py\r\n wsgi.py\u003cspan\u003e\u003c/span\u003e\u003c/pre\u003e \n \u003c/div\u003e \n \u003c/div\u003e \n \u003cp\u003e 對上面這些文件的簡要說明: \u003c/p\u003e \n \u003cul\u003e \n \u003cli\u003e \n \u003cdiv\u003e\n 在\u0026nbsp;mysite/ 根目錄上級僅僅是一個容器項目。對於Django它的名字隨意,可以將其重命名爲任何你喜歡的。 \n \u003c/div\u003e \u003c/li\u003e \n \u003cli\u003e manage.py:\u0026nbsp;一個命令行工具,可以讓您以各種方式與Django項目進行交互。你可以閱讀所有關於manage.py 在\u0026nbsp;\u003ca href=\"https://docs.djangoproject.com/en/1.9/ref/django-admin/\"\u003edjango-admin和manage.py 的細節\u003c/a\u003e。 \u003c/li\u003e \n \u003cli\u003e 內部\u0026nbsp;mysite/目錄是實際項目的Python包。它的名字是你需要使用導入裏面的任何Python包的名稱(例如mysite.urls)。 \u003c/li\u003e \n \u003cli\u003e mysite/__init__.py:\u0026nbsp;一個空文件,該文件告訴Python這個目錄應該作爲一個Python包。 \u003c/li\u003e \n \u003cli\u003e mysite/settings.py:\u0026nbsp;設置/配置這個Django項目。\u0026nbsp;Django的設置,會告訴你如何設置工作。 \u003c/li\u003e \n \u003cli\u003e mysite/urls.py:\u0026nbsp;該 URL 聲明這個Django項目; 類似Django網站的一個「表的內容」。 \u003c/li\u003e \n \u003cli\u003e mysite/wsgi.py:\u0026nbsp;一個WSGI兼容Web服務器的入口點,以滿足您的項目需要。 \u003c/li\u003e \n \u003c/ul\u003e \n \u003c/div\u003e \n \u003cdiv\u003e\n 開發服務器 \n \u003c/div\u003e \n \u003ch2\u003e \u003c/h2\u003e \n \u003cdiv\u003e\n 讓我們來驗證你的Django項目工程。更改到外mysite的目錄,如果你有沒有準備好,並運行以下命令: \n \u003c/div\u003e \n \u003cdiv\u003e \n \u003cdiv\u003e \n \u003cpre\u003e\u003cspan\u003e\u003cb\u003eC:\\python27\\mysite\u0026gt;\u003c/b\u003e\u003c/span\u003e\u003cspan\u003e python manage.py runserver\u003cspan\u003e\u003c/span\u003e\u003c/span\u003e\u003c/pre\u003e \n \u003c/div\u003e \n \u003c/div\u003e \n \u003cdiv\u003e\n 你會看到在命令行下面的輸出: \n \u003c/div\u003e \n \u003cpre\u003ePerforming system checks...\r\n\r\nSystem check identified no issues (0 silenced).\r\n\r\nYou have unapplied migrations; your app may not work properly until they are applied.\r\nRun 'python manage.py migrate' to apply them.\r\n\r\nJanuary 24, 2016 - 15:50:53\r\nDjango version 1.9, using settings 'mysite.settings'\r\nStarting development server at \u003ca href=\"http://127.0.0.1:8000/\"\u003ehttp://127.0.0.1:8000/\u003c/a\u003e Quit the server with CONTROL-C.\u003c/pre\u003e \n \u003cp\u003e 你已經啓動Django開發服務器,它是用Python寫的純粹一個輕量級的Web服務器。我們已經包含在 Django 中了,所以你可以很快開發東西了,而不必處理配置生產服務器\u0026nbsp;-\u0026nbsp;如:Apache 。 \u003c/p\u003e \n \u003cp\u003e 需要注意的是:不要在任何類似生產環境中使用此服務器。它的目的只是用於開發(我們是在使用Web框架,而不是Web服務器的業務。) \u003c/p\u003e \n \u003cdiv\u003e\n 現在,服務器的運行,請使用Web瀏覽器訪問: \n \u003ca href=\"http://127.0.0.1:8000/\"\u003ehttp://127.0.0.1:8000/\u003c/a\u003e。會看到一個「Welcome\u0026nbsp;to\u0026nbsp;Django」頁面。這表示它安裝成功了! \n \u003cbr\u003e \n \u003cimg src=\"https://asset.1ju.org/cmsstatic/django-8.png\" alt=\"Django快速入門\"\u003e \n \u003cbr\u003e \n \u003c/div\u003e \n \u003cdiv\u003e \n \u003cdiv\u003e\n 默認情況下 runserver 命令啓動就在內部IP開發服務器的端口 8000。 \n \u003c/div\u003e \n \u003cdiv\u003e\n 如果你想改變服務器的端口,將它作爲命令行參數。例如,下面這個命令會在服務器8080端口運行: \n \u003c/div\u003e \n \u003cdiv\u003e \n \u003cpre\u003e\u003cspan\u003e$\u003c/span\u003e python manage.py runserver 8080\u003cspan\u003e\u003c/span\u003e\u003c/pre\u003e \n \u003c/div\u003e \n \u003cdiv\u003e\n 如果想改變服務器的IP,傳遞給它端口。(如果你想暴露在其他計算機或網絡上工作)所有公網IP聽,使用以下方法: \n \u003c/div\u003e \n \u003cdiv\u003e \n \u003cpre\u003e\u003cspan\u003e$\u003c/span\u003e python manage.py runserver 0.0.0.0:8000\u003c/pre\u003e \n \u003c/div\u003e \n \u003c/div\u003e \n \u003ch2\u003e 創建Polls app \u003c/h2\u003e \n \u003cdiv\u003e\n 現在的「project」\u0026nbsp;-\u0026nbsp;設置完畢後就開始可以工作了。 \n \u003c/div\u003e \n \u003cp\u003e 在Django寫的每個應用程序包含一個Python包,遵循一定的約定。\u0026nbsp;Django提供了一個實用程序,自動生成一個應用程序的基本目錄結構,這樣就可以專注於寫代碼而不是建立目錄。 \u003c/p\u003e \n \u003cdiv\u003e\n 應用程序可以在Python路徑中的任何地方。在本教程中,我們將創建投票程序在 manage.py 文件同級目錄中,以便它可以被導入作爲自己的頂層模塊,而不是 mysite 的一個子模塊。 \n \u003c/div\u003e \n \u003cdiv\u003e\n 在創建應用程序前,確保你在 manage.py\u0026nbsp;同一個目錄中並鍵入以下命令: \n \u003c/div\u003e \n \u003cdiv\u003e \n \u003cdiv\u003e \n \u003cpre\u003e\u003cspan\u003e\u003cb\u003eC:\\python27\\mysite\u0026gt;\u003c/b\u003e\u003c/span\u003e\u003cspan\u003e python manage.py startapp polls\u003cspan\u003e\u003c/span\u003e\u003c/span\u003e\u003c/pre\u003e \n \u003c/div\u003e \n \u003c/div\u003e \n \u003cdiv\u003e\n 這將創建一個目錄polls,這是目錄結構是這樣的: \n \u003c/div\u003e \n \u003cdiv\u003e \n \u003cdiv\u003e \n \u003cpre\u003epolls/\r\n __init__.py\r\n admin.py\r\n apps.py\r\n migrations/\r\n __init__.py\r\n models.py\r\n tests.py\r\n views.py\u003cspan\u003e\u003c/span\u003e\u003c/pre\u003e \n \u003c/div\u003e \n \u003c/div\u003e \n \u003cdiv\u003e\n 這個目錄結構中的\u0026nbsp;poll\u0026nbsp;應用程序。 \n \u003c/div\u003e \n \u003ch2\u003e 編寫視圖代碼 \u003c/h2\u003e \n \u003cdiv\u003e\n 現在我們來編寫的第一個視圖。打開文件polls/views.py,把下面的Python代碼放入裏面: \n \u003c/div\u003e \n \u003cdiv\u003e \n \u003cdiv\u003e\n polls/views.py \n \u003c/div\u003e \n \u003cdiv\u003e \n \u003cpre\u003e\u003cspan\u003efrom \u003c/span\u003e\u003cspan\u003edjango.http \u003c/span\u003e\u003cspan\u003eimport\u003c/span\u003e HttpResponse \u003cspan\u003edef \u003c/span\u003e\u003cspan\u003eindex\u003c/span\u003e(request): \u003cspan\u003ereturn\u003c/span\u003e HttpResponse(\u003cspan\u003e\"Hello, world. You're at the polls index.\"\u003c/span\u003e)\u003c/pre\u003e \n \u003c/div\u003e \n \u003c/div\u003e \n \u003cdiv\u003e\n 這是 Django 最簡單的視圖。要調用這個視圖還需要把它映射到一個URL\u0026nbsp;-\u0026nbsp;對於這一點,我們需要 URL 配置。 \n \u003c/div\u003e \n \u003cdiv\u003e\n 要在polls\u0026nbsp;目錄創建URL配置,創建一個名爲\u0026nbsp;urls.py\u0026nbsp;文件,現在您的應用程序目錄應該是這樣的: \n \u003c/div\u003e \n \u003cdiv\u003e \n \u003cdiv\u003e \n \u003cpre\u003epolls/\r\n __init__.py\r\n admin.py\r\n apps.py\r\n migrations/\r\n __init__.py\r\n models.py\r\n tests.py\r\n urls.py\r\n views.py\u003cspan\u003e\u003c/span\u003e\u003c/pre\u003e \n \u003c/div\u003e \n \u003c/div\u003e \n \u003cdiv\u003e\n polls/urls.py文件包含以下代碼: \n \u003c/div\u003e \n \u003cdiv\u003e \n \u003cdiv\u003e\n polls/urls.py \n \u003c/div\u003e \n \u003cdiv\u003e \n \u003cpre\u003e\u003cspan\u003efrom \u003c/span\u003e\u003cspan\u003edjango.conf.urls \u003c/span\u003e\u003cspan\u003eimport\u003c/span\u003e url \u003cspan\u003efrom \u003c/span\u003e\u003cspan\u003e. \u003c/span\u003e\u003cspan\u003eimport\u003c/span\u003e views\r\n\r\nurlpatterns \u003cspan\u003e=\u003c/span\u003e [\r\n url(\u003cspan\u003er'^$'\u003c/span\u003e, views\u003cspan\u003e.\u003c/span\u003eindex, name\u003cspan\u003e=\u003c/span\u003e\u003cspan\u003e'index'\u003c/span\u003e),\r\n]\u003c/pre\u003e \n \u003c/div\u003e \n \u003c/div\u003e \n \u003cp\u003e 下一步驟是讓 polls.urls 模塊指向該ROOT_URLCONF。在\u0026nbsp;mysite/urls.py 中,\u0026nbsp;增加導入\u0026nbsp;django.conf.urls.include\u0026nbsp;並插入\u0026nbsp;include()\u0026nbsp;在URL模式列表中,所以這裏有: \u003c/p\u003e \n \u003cdiv\u003e \n \u003cdiv\u003e\n mysite/urls.py \n \u003c/div\u003e \n \u003cdiv\u003e \n \u003cpre\u003e\u003cspan\u003efrom \u003c/span\u003e\u003cspan\u003edjango.conf.urls \u003c/span\u003e\u003cspan\u003eimport\u003c/span\u003e include, url \u003cspan\u003efrom \u003c/span\u003e\u003cspan\u003edjango.contrib \u003c/span\u003e\u003cspan\u003eimport\u003c/span\u003e admin\r\n\r\nurlpatterns \u003cspan\u003e=\u003c/span\u003e [\r\n url(\u003cspan\u003er'^polls/'\u003c/span\u003e, include(\u003cspan\u003e'polls.urls'\u003c/span\u003e)),\r\n url(\u003cspan\u003er'^admin/'\u003c/span\u003e, admin\u003cspan\u003e.\u003c/span\u003esite\u003cspan\u003e.\u003c/span\u003eurls),\r\n]\u003c/pre\u003e \n \u003c/div\u003e \n \u003c/div\u003e \n \u003cdiv\u003e\n 現在已經連接索引視圖到URL配置。讓我們來驗證它結果,運行以下命令: \n \u003c/div\u003e \n \u003cdiv\u003e \n \u003cdiv\u003e \n \u003cpre\u003e\u003cspan\u003eC:\\Python27\\mysite\u0026gt;\u003c/span\u003e python manage.py runserver\u0026nbsp;\u0026nbsp;\u003cspan\u003e\u003c/span\u003e\u003c/pre\u003e \n \u003c/div\u003e \n \u003c/div\u003e \n \u003cp\u003e 在瀏覽器中打開\u003ca href=\"https://asset.1ju.org/polls/\"\u003ehttps://asset.1ju.org/polls/\u003c/a\u003e,應該看到如下文字顯示:\u0026nbsp;「Hello, world. You’re at the polls index.」,\u0026nbsp;在\u0026nbsp;index\u0026nbsp;視圖中所定義。\u003cbr\u003e \u003cimg src=\"https://asset.1ju.org/cmsstatic/django-9.png\" alt=\"Django快速入門\"\u003e \u003c/p\u003e \n \u003cp\u003e url()函數傳遞四個參數,兩個必需的:regex\u0026nbsp;和\u0026nbsp;view,以及兩個可選:kwargs\u0026nbsp;和\u0026nbsp;name。 \u003c/p\u003e \n \u003cdiv\u003e \n \u003ch3\u003e \u003ca href=\"https://docs.djangoproject.com/en/1.9/ref/urls/#django.conf.urls.url\"\u003eurl()\u003c/a\u003e\u0026nbsp;參數: regex \u003c/h3\u003e \n \u003cp\u003e 術語「regex」是一種常用的縮寫形式,意思是「正則表達式」,這是一個語法字符串匹配模式,或在我們的示例中是URL模式。Django從第一個正則表達式開始,並使得其遍歷列表,比對每一個正則表達式的請求的URL,直到它找到一個匹配。 \u003c/p\u003e \n \u003cp\u003e 請注意,這些正則表達式不搜索GET和POST參數,或者域名。例如,在一個請求https://www.example.com/myapp/,\u0026nbsp;URLconf 會尋找myapp/.在一個請求\u0026nbsp;https://www.example.com/myapp/?page=3,\u0026nbsp;URLconf 還將尋找\u0026nbsp;myapp/. \u003c/p\u003e \n \u003cp\u003e 如果需要使用正則表達式的幫助,請參見維基百科的條目和\u0026nbsp;\u003ca href=\"https://docs.python.org/3/library/re.html#module-re\"\u003ere\u0026nbsp;\u003c/a\u003e模塊的文檔。\u0026nbsp;然而在實踐中,你並不需要成爲正則表達式的專家,因爲只需要知道如何捕捉簡單的模式。事實上,複雜的正則表達式可以查找性能較差,所以你可能不依賴於正則表達式的全部功能。 \u003c/p\u003e \n \u003cp\u003e 最後,一個關於性能的事項需要了解:這些正則表達式編譯首次URL配置模塊被加載。它們是超級的快(只要查找東西不是太複雜 - 如上所述)。 \u003c/p\u003e \n \u003c/div\u003e \n \u003cdiv\u003e \n \u003ch3\u003e \u003ca href=\"https://docs.djangoproject.com/en/1.9/ref/urls/#django.conf.urls.url\"\u003eurl()\u003c/a\u003e\u0026nbsp;參數: view \u003c/h3\u003e \n \u003cp\u003e 當 Django 找到正則表達式匹配,Django調用指定的視圖函數,使用\u0026nbsp;HTTP 請求對象作爲第一個參數,從正則表達式「捕獲」的其他參數作爲其它的值。\u0026nbsp;正則表達式使用簡單的捕捉,值傳遞是通過位置參數;如果使用名爲捕捉,值傳遞關鍵字參數。我們將給出一個例子。 \u003c/p\u003e \n \u003c/div\u003e \n \u003cdiv\u003e \n \u003ch3\u003e \u003ca href=\"https://docs.djangoproject.com/en/1.9/ref/urls/#django.conf.urls.url\"\u003eurl()\u003c/a\u003e\u0026nbsp;參數: kwargs \u003c/h3\u003e \n \u003cdiv\u003e\n 任意關鍵字參數可以通過在字典中的目標視圖。在本教程我們不打算使用Django的這一特點。 \n \u003c/div\u003e \n \u003c/div\u003e \n \u003cp\u003e \u003cbr\u003e \u003c/p\u003e \n \u003ch3\u003e \u003ca href=\"https://docs.djangoproject.com/en/1.9/ref/urls/#django.conf.urls.url\"\u003eurl()\u003c/a\u003e\u0026nbsp;argument: name \u003c/h3\u003e \n \u003cp\u003e 命名網址可以參考它,明確地從其他地方在Django\u0026nbsp;-\u0026nbsp;尤其是模板。\u0026nbsp;這種強大的功能可讓您進行全局更改到項目的URL模式,而只需要修改一個文件。接下來我們學習如何在 Django 使用數據功能。\u003cbr\u003e \u003cbr\u003e 快速入門系列教程: \u003c/p\u003e \n \u003cp\u003e 2 - Django快速入門-數據庫模型 \u003c/p\u003e \n \u003cp\u003e \u003cspan\u003e3 -\u0026nbsp;\u003c/span\u003eDjango快速入門-視圖\u003cbr\u003e \u003cspan\u003e\u003c/span\u003e\u003cspan\u003e4 -\u0026nbsp;\u003c/span\u003eDjango快速入門-表單\u003cbr\u003e \u003cspan\u003e\u003c/span\u003e \u003c/p\u003e \n \u003cp\u003e \u003cbr\u003e \u003c/p\u003e \n \u003cp\u003e\u003c/p\u003e \n\u003c/div\u003e \n\u003cbr\u003e"])</script><script>self.__next_f.push([1,"26:T5ad3,"])</script><script>self.__next_f.push([1,"本系列教程第一部分已經講完了。在上一個教程的基礎上,在這一講中我們將建立數據庫,創建第一個模型,並使用一個 Django\u0026nbsp;快速自動生成的管理站點。 \n\u003cdiv\u003e \n \u003cdiv\u003e \n \u003ch2\u003e 數據庫配置 \u003c/h2\u003e \n \u003cdiv\u003e\n 現在,打開mysite/settings.py。Django設置模塊級的變量與正常的Python模塊一樣。 \n \u003c/div\u003e \n \u003cp\u003e 默認情況下,配置使用SQLite。如果你是數據庫新手,或者想嘗試學習Django,這是最簡單的選擇。SQLite包含在Python,所以不需要安裝任何東西來支持你的數據庫。當開始你的第一個真正的項目,可能需要使用更強大的數據庫如:PostgreSQL,MySQL等,可以配置數據庫切換就可以了。 \u003c/p\u003e \n \u003cdiv\u003e\n 如果你想使用其他數據庫,請安裝相應的數據庫綁定,並更改以下鍵在數據庫中「默認」的配置項,以適合您的數據庫連接設置: \n \u003c/div\u003e \n \u003cul\u003e \n \u003cli\u003e \u003ca href=\"https://docs.djangoproject.com/en/1.9/ref/settings/#std:setting-DATABASE-ENGINE\"\u003eENGINE\u003c/a\u003e\u0026nbsp;– 輸入'django.db.backends.sqlite3',\u0026nbsp;'django.db.backends.postgresql','django.db.backends.mysql',或'django.db.backends.oracle' \u003c/li\u003e \n \u003cli\u003e \u003ca href=\"https://docs.djangoproject.com/en/1.9/ref/settings/#std:setting-NAME\"\u003eNAME\u003c/a\u003e\u0026nbsp;–\u0026nbsp;數據庫的名稱。如果使用SQLite,數據庫會在您的計算機上創建文件;在這種情況下,名稱應該是完整的絕對路徑的文件,包括文件名。默認值爲 os.path.join(BASE_DIR,「db.sqlite3」),將存儲在您的項目目錄中的文件。 \u003c/li\u003e \n \u003c/ul\u003e \n \u003cp\u003e 如果你不使用SQLite作爲數據庫,而使用其他設置,如USER,\u0026nbsp;PASSWORD,\u0026nbsp;和\u0026nbsp;HOST\u0026nbsp;必須加入。欲瞭解更多詳細信息,請參閱用於\u003ca href=\"https://docs.djangoproject.com/en/1.9/ref/settings/#std:setting-DATABASES\"\u003e數據庫的參考文檔\u003c/a\u003e。 \u003c/p\u003e \n \u003cdiv\u003e\n 當你編輯\u0026nbsp;mysite/settings.py,時區設置TIME_ZONE。 \n \u003c/div\u003e \n \u003cp\u003e 此外,請注意,在該文件的頂部的 INSTALLED_APPS 設置。它包含了很多在本Django示例中激活的所有 Django 的應用程序的名稱。\u0026nbsp;應用程序可以在多個項目中使用,你可以打包給別人並在他們的項目分發使用。 \u003c/p\u003e \n \u003cdiv\u003e\n 默認情況下,INSTALLED_APPS包含以下內容的應用程序,這些都使用 Django : \n \u003c/div\u003e \n \u003cul\u003e \n \u003cli\u003e \u003ca href=\"https://docs.djangoproject.com/en/1.9/ref/contrib/admin/#module-django.contrib.admin\"\u003edjango.contrib.admin\u003c/a\u003e\u0026nbsp;–\u0026nbsp;管理站點,這裏會很快使用它 \u003c/li\u003e \n \u003cli\u003e \u003ca href=\"https://docs.djangoproject.com/en/1.9/topics/auth/#module-django.contrib.auth\"\u003edjango.contrib.auth\u003c/a\u003e\u0026nbsp;–\u0026nbsp;認證系統 \u003c/li\u003e \n \u003cli\u003e \u003ca href=\"https://docs.djangoproject.com/en/1.9/ref/contrib/contenttypes/#module-django.contrib.contenttypes\"\u003edjango.contrib.contenttypes\u003c/a\u003e\u0026nbsp;–\u0026nbsp;一個框架,內容類型 \u003c/li\u003e \n \u003cli\u003e \u003ca href=\"https://docs.djangoproject.com/en/1.9/topics/http/sessions/#module-django.contrib.sessions\"\u003edjango.contrib.sessions\u003c/a\u003e\u0026nbsp;–\u0026nbsp;會話框架 \u003c/li\u003e \n \u003cli\u003e \u003ca href=\"https://docs.djangoproject.com/en/1.9/ref/contrib/messages/#module-django.contrib.messages\"\u003edjango.contrib.messages\u003c/a\u003e\u0026nbsp;–\u0026nbsp;消息傳遞框架 \u003c/li\u003e \n \u003cli\u003e \u003ca href=\"https://docs.djangoproject.com/en/1.9/ref/contrib/staticfiles/#module-django.contrib.staticfiles\"\u003edjango.contrib.staticfiles\u003c/a\u003e\u0026nbsp;–\u0026nbsp;一個框架用來管理靜態文件 \u003c/li\u003e \n \u003c/ul\u003e \n \u003cdiv\u003e\n 這些應用包括默認,作爲一個方便常見的例子。 \n \u003c/div\u003e \n \u003cp\u003e 其中的一些應用程序使用至少一個數據庫表,所以我們需要在數據庫中創建的表纔可以使用它們。要做到這一點,運行以下命令: \u003c/p\u003e \n \u003cpre class=\"prettyprint lang-bsh\"\u003eC:\\Python27\\mysite\u0026gt;python manage.py migrate\r\nOperations to perform:\r\n Apply all migrations: admin, contenttypes, auth, sessions\r\nRunning migrations:\r\n Rendering model states... DONE\r\n Applying contenttypes.0001_initial... OK\r\n Applying auth.0001_initial... OK\r\n Applying admin.0001_initial... OK\r\n Applying admin.0002_logentry_remove_auto_add... OK\r\n Applying contenttypes.0002_remove_content_type_name... OK\r\n Applying auth.0002_alter_permission_name_max_length... OK\r\n Applying auth.0003_alter_user_email_max_length... OK\r\n Applying auth.0004_alter_user_username_opts... OK\r\n Applying auth.0005_alter_user_last_login_null... OK\r\n Applying auth.0006_require_contenttypes_0002... OK\r\n Applying auth.0007_alter_validators_add_error_messages... OK\r\n Applying sessions.0001_initial... OK\r\n\r\nC:\\Python27\\mysite\u0026gt;\u003c/pre\u003e \n \u003cdiv\u003e \n \u003c/div\u003e \n \u003cp\u003e migrate\u0026nbsp;命令着眼於INSTALLED_APPS設置並創建根據您的 mysite/settings.py 文件數據庫設置,並隨應用程序數據庫遷移任何數據庫表(我們將在以後的教程討論)。你會看到每個適用移植的消息。\u0026nbsp;如果有興趣,運行命令行在你的數據庫客戶端,列如類型\\dt\u0026nbsp;(PostgreSQL),\u0026nbsp;SHOW\u0026nbsp;TABLES;\u0026nbsp;(MySQL),\u0026nbsp;.schema\u0026nbsp;(SQLite),\u0026nbsp;或\u0026nbsp;SELECT\u0026nbsp;TABLE_NAME\u0026nbsp;FROMUSER_TABLES;\u0026nbsp;(Oracle)\u0026nbsp;以顯示Django所創建的表。 \u003c/p\u003e \n \u003c/div\u003e \n \u003cdiv\u003e \n \u003ch2\u003e 創建模型 \u003c/h2\u003e \n \u003cdiv\u003e\n 現在,我們將定義模型\u0026nbsp;-\u0026nbsp;本質上數據庫進行設計,使用其他元數據。 \n \u003c/div\u003e \n \u003cp\u003e 在我們的簡單調查的應用程序,我們將創建兩個模型:Question\u0026nbsp;和\u0026nbsp;Choice。Question有一個問題標題和發佈日期。Choice有兩個字段:選擇文本和票數。每個選項都與一個問題關聯。 \u003c/p\u003e \n \u003cdiv\u003e\n 這些概念由簡單的Python類來表示。編輯 polls/models.py 文件,所以\u0026nbsp; \n \u003cspan\u003epolls/models.py\u0026nbsp;\u003c/span\u003e看起來是這樣的: \n \u003c/div\u003e \n \u003cdiv\u003e \n \u003cpre class=\"prettyprint lang-py\"\u003efrom django.db import models\r\n\r\nclass Question(models.Model):\r\n question_text = models.CharField(max_length=200)\r\n pub_date = models.DateTimeField('date published')\r\n\r\nclass Choice(models.Model):\r\n question = models.ForeignKey(Question, on_delete=models.CASCADE)\r\n choice_text = models.CharField(max_length=200)\r\n votes = models.IntegerField(default=0)\u003c/pre\u003e \n \u003c/div\u003e \n \u003cp\u003e 該代碼是直接的。每個模型是django.db.models.Model類的子類。\u0026nbsp;每個模型具有許多類變量,每一個在模型變量與數據庫表的字段關聯。 \u003c/p\u003e \n \u003cp\u003e 每個字段由\u0026nbsp;Field\u0026nbsp;類實例表示\u0026nbsp;–\u0026nbsp;例如,CharField表示字符型字段,DateTimeField表示日期時間字段。這告訴Django 每個字段保存的數據類型。 \u003c/p\u003e \n \u003cp\u003e 每個Field實例(例如,question_text或pub_date)的名稱是字段的名稱,這是機器友好的格式。在Python代碼中使用這個值,數據庫將使用它作爲列名。 \u003c/p\u003e \n \u003cdiv\u003e\n 字段也可以有不同的可選參數;在本示例中,我們已經將票數的默認值設置爲0。 \n \u003c/div\u003e \n \u003cp\u003e 最後,需要注意的是關係的定義,這裏使用了外鍵。這告訴 Django 每個選項關聯一個問題。\u0026nbsp;Django支持所有常見的數據庫關係:多對一,多對多以及一對之一。 \u003c/p\u003e \n \u003c/div\u003e \n \u003cdiv\u003e \n \u003ch2\u003e \n \u003cdiv\u003e\n 激活模型 \n \u003c/div\u003e \u003c/h2\u003e \n \u003cdiv\u003e\n 模型代碼很小,但表示了 Django 的很多信息。有了它 Django 可以: \n \u003c/div\u003e \n \u003cul\u003e \n \u003cli\u003e \n \u003cdiv\u003e\n 爲這個應用程序創建數據庫(CREATE\u0026nbsp;TABLE語句) \n \u003c/div\u003e \u003c/li\u003e \n \u003cli\u003e 創建訪問\u0026nbsp;Question\u0026nbsp;和\u0026nbsp;Choice對象的Python數據庫訪問API \u003c/li\u003e \n \u003c/ul\u003e \n \u003cdiv\u003e\n 但首先我們需要告訴\u0026nbsp;polls\u0026nbsp;項安裝了的應用程序。 \n \u003c/div\u003e \n \u003cdiv\u003e\n 再次編輯\u0026nbsp;mysite/settings.py\u0026nbsp;文件,並更改INSTALLED_APPS設置包含字符串「polls.apps.PollsConfig」。結果如下所示: \n \u003c/div\u003e \n \u003cdiv\u003e\n mysite/settings.py文件內容如下: \n \u003cbr\u003e \n \u003cpre class=\"prettyprint lang-py\"\u003eINSTALLED_APPS = [\r\n 'polls.apps.PollsConfig',\r\n 'django.contrib.admin',\r\n 'django.contrib.auth',\r\n 'django.contrib.contenttypes',\r\n 'django.contrib.sessions',\r\n 'django.contrib.messages',\r\n 'django.contrib.staticfiles',\r\n]\u003c/pre\u003e \n \u003c/div\u003e \n \u003cdiv\u003e \n \u003c/div\u003e \n \u003cdiv\u003e\n 現在Django知道\u0026nbsp;polls\u0026nbsp;投票程序。讓我們運行另一個命令: \n \u003cbr\u003e \n \u003cpre class=\"prettyprint lang-py\"\u003eC:\\Python27\\mysite\u0026gt;python manage.py makemigrations polls\r\nMigrations for 'polls':\r\n 0001_initial.py:\r\n - Create model Choice\r\n - Create model Question\r\n - Add field question to choice\r\n\r\nC:\\Python27\\mysite\u0026gt;\u003c/pre\u003e \n \u003c/div\u003e \n \u003cdiv\u003e \n \u003c/div\u003e \n \u003cdiv\u003e\n 通過運行makemigrations,告訴Django你已經做了模型一些改動(在這種情況下,已經是最新的了),並且你想更改存儲作爲一個移植。 \n \u003c/div\u003e \n \u003cp\u003e 遷移是Django怎麼存儲您更改的模型(由你的數據庫架構決定)- 它們只是在磁盤上的文件。您如果喜歡可以讀取移植新的模型,它在文件\u0026nbsp;polls/migrations/0001_initial.py。你不會希望Django每一次都讀取它們,不過將它們設計成人可編輯的,你要知道Django是如何變化的並手動調整。 \u003c/p\u003e \n \u003cp\u003e 還有將運行migrations,自動管理數據庫模式(表)命令\u0026nbsp;-\u0026nbsp;這就是所謂的遷移,讓我們看看SQL瞭解移植運行。\u0026nbsp;sqlmigrate 命令將移植名稱返回SQL顯示: \u003c/p\u003e \n \u003cdiv\u003e \n \u003cpre\u003e\u003cspan\u003e$\u003c/span\u003e python manage.py sqlmigrate polls 0001\u003cspan\u003e\u003c/span\u003e\u003c/pre\u003e \n \u003c/div\u003e \n \u003cdiv\u003e\n 應該看到類似下面的東西(我們已經重新格式化它的可讀性): \n \u003cbr\u003e \n \u003cpre class=\"prettyprint lang-py\"\u003eC:\\Python27\\mysite\u0026gt;python manage.py sqlmigrate polls 0001\r\nBEGIN;\r\n--\r\n-- Create model Choice\r\n--\r\nCREATE TABLE \"polls_choice\" (\"id\" integer NOT NULL PRIMARY KEY AUTOINCREMENT, \"c\r\nhoice_text\" varchar(200) NOT NULL, \"votes\" integer NOT NULL);\r\n--\r\n-- Create model Question\r\n--\r\nCREATE TABLE \"polls_question\" (\"id\" integer NOT NULL PRIMARY KEY AUTOINCREMENT,\r\n\"question_text\" varchar(200) NOT NULL, \"pub_date\" datetime NOT NULL);\r\n--\r\n-- Add field question to choice\r\n--\r\nALTER TABLE \"polls_choice\" RENAME TO \"polls_choice__old\";\r\nCREATE TABLE \"polls_choice\" (\"id\" integer NOT NULL PRIMARY KEY AUTOINCREMENT, \"c\r\nhoice_text\" varchar(200) NOT NULL, \"votes\" integer NOT NULL, \"question_id\" integ\r\ner NOT NULL REFERENCES \"polls_question\" (\"id\"));\r\nINSERT INTO \"polls_choice\" (\"choice_text\", \"votes\", \"id\", \"question_id\") SELECT\r\n\"choice_text\", \"votes\", \"id\", NULL FROM \"polls_choice__old\";\r\nDROP TABLE \"polls_choice__old\";\r\nCREATE INDEX \"polls_choice_7aa0f6ee\" ON \"polls_choice\" (\"question_id\");\r\n\r\nCOMMIT;\r\n\r\nC:\\Python27\\mysite\u0026gt;\u003c/pre\u003e \n \u003c/div\u003e \n \u003cdiv\u003e \n \u003c/div\u003e \n \u003cp\u003e 遷移命令將所有還沒有被應用的遷移(Django跟蹤哪些是使用數據庫中的一個特殊的表名爲django_migrations應用)運行它們在數據庫中\u0026nbsp;-\u0026nbsp;基本上是,將使用模型在數據庫模式的變化同步。 \u003c/p\u003e \n \u003c/div\u003e \n \u003cp\u003e \u003cbr\u003e \u003c/p\u003e \n \u003ch2\u003e 使用API \u003c/h2\u003e \n \u003cdiv\u003e\n 現在,讓我們進入交互式 Python\u0026nbsp;shell \u0026nbsp;和 Django 所提供的API\u0026nbsp;。要調用Python命令行,請使用以下命令: \n \u003cbr\u003e \n \u003cpre class=\"prettyprint lang-py\"\u003eC:\\Python27\\mysite\u0026gt;python manage.py shell\r\nPython 2.7.10 (default, May 23 2015, 09:44:00) [MSC v.1500 64 bit (AMD64)] on wi\r\nn32\r\nType \"help\", \"copyright\", \"credits\" or \"license\" for more information.\r\n(InteractiveConsole)\r\n\u0026gt;\u0026gt;\u0026gt;\u003c/pre\u003e \n \u003c/div\u003e \n \u003cdiv\u003e \n \u003c/div\u003e \n \u003cp\u003e 只需鍵入「python」\u0026nbsp;來代替,因爲manage.py設置DJANGO_SETTINGS_MODULE環境變量,這給Django\u0026nbsp;Python\u0026nbsp;導入路徑到\u0026nbsp;mysite/settings.py文件。 \u003c/p\u003e \n \u003cpre class=\"prettyprint lang-py\"\u003e\u0026gt;\u0026gt;\u0026gt; import django\r\n\u0026gt;\u0026gt;\u0026gt; django.setup()\u003c/pre\u003e \n \u003cpre class=\"prettyprint lang-py\"\u003e\u0026gt;\u0026gt;\u0026gt; from polls.models import Question, Choice # Import the model classes we just wrote.\r\n\r\n# No questions are in the system yet.\r\n\u0026gt;\u0026gt;\u0026gt; Question.objects.all()\r\n[]\r\n\r\n# Create a new Question.\r\n# Support for time zones is enabled in the default settings file, so\r\n# Django expects a datetime with tzinfo for pub_date. Use timezone.now()\r\n# instead of datetime.datetime.now() and it will do the right thing.\r\n\u0026gt;\u0026gt;\u0026gt; from django.utils import timezone\r\n\u0026gt;\u0026gt;\u0026gt; q = Question(question_text=\"What's new?\", pub_date=timezone.now())\r\n\r\n# Save the object into the database. You have to call save() explicitly.\r\n\u0026gt;\u0026gt;\u0026gt; q.save()\r\n\r\n# Now it has an ID. Note that this might say \"1L\" instead of \"1\", depending\r\n# on which database you're using. That's no biggie; it just means your\r\n# database backend prefers to return integers as Python long integer\r\n# objects.\r\n\u0026gt;\u0026gt;\u0026gt; q.id\r\n1\r\n\r\n# Access model field values via Python attributes.\r\n\u0026gt;\u0026gt;\u0026gt; q.question_text\r\n\"What's new?\"\r\n\u0026gt;\u0026gt;\u0026gt; q.pub_date\r\ndatetime.datetime(2012, 2, 26, 13, 0, 0, 775217, tzinfo=\u0026lt;UTC\u0026gt;)\r\n\r\n# Change values by changing the attributes, then calling save().\r\n\u0026gt;\u0026gt;\u0026gt; q.question_text = \"What's up?\"\r\n\u0026gt;\u0026gt;\u0026gt; q.save()\r\n\r\n# objects.all() displays all the questions in the database.\r\n\u0026gt;\u0026gt;\u0026gt; Question.objects.all()\r\n[\u0026lt;Question: Question object\u0026gt;]\u003c/pre\u003e 這裏需要等待一會兒.\u0026nbsp;\u0026lt;Question:\u0026nbsp;Question\u0026nbsp;object\u0026gt;完全是這個對象的無用表示。讓我們來解決這個問題:通過編輯Question模型(在polls/models.py\u0026nbsp;文件),並添加一個__str__()\u0026nbsp;方法到這兩個Question\u0026nbsp;和\u0026nbsp;Choice\u0026nbsp;模型: \n \u003cspan\u003epolls/models.py文件內容如下:\u003cbr\u003e \u003cpre class=\"prettyprint lang-py\"\u003efrom django.db import models\r\nfrom django.utils.encoding import python_2_unicode_compatible\r\n\r\n@python_2_unicode_compatible # only if you need to support Python 2\r\nclass Question(models.Model):\r\n # ...\r\n def __str__(self):\r\n return self.question_text\r\n\r\n@python_2_unicode_compatible # only if you need to support Python 2\r\nclass Choice(models.Model):\r\n # ...\r\n def __str__(self):\r\n return self.choice_text\u003c/pre\u003e \u003c/span\u003e \n \u003cdiv\u003e \n \u003c/div\u003e \n \u003cdiv\u003e\n 添加\u0026nbsp;__str__()\u0026nbsp;方法是非常重要的,使用交互式提示處理添加到模型中,不僅爲自己方便,也是因爲對象的表示用於整個 Django 自動生成管理。 \n \u003c/div\u003e \n \u003cp\u003e 注意,這些都是正常的Python方法。讓我們添加一個自定義的方法,這裏只是爲了演示:polls/models.py \u003c/p\u003e \n \u003cp\u003e \u003cbr\u003e \u003c/p\u003e \n \u003cpre class=\"prettyprint lang-py\"\u003eimport datetime\r\n\r\nfrom django.db import models\r\nfrom django.utils import timezone\r\n\r\n\r\nclass Question(models.Model):\r\n # ...\r\n def was_published_recently(self):\r\n return self.pub_date \u0026gt;= timezone.now() - datetime.timedelta(days=1)\u003c/pre\u003e \n \u003cdiv\u003e \n \u003c/div\u003e \n \u003cp\u003e 注意這裏增加\u0026nbsp;import\u0026nbsp;datetime\u0026nbsp;和from\u0026nbsp;django.utils\u0026nbsp;import\u0026nbsp;timezon,引用Python的標準的datetime模塊和Django的時區相關的實用程序在django.utils.timezone,如果不熟悉在Python的時區處理,可以閱讀\u003ca href=\"https://docs.djangoproject.com/en/1.9/topics/i18n/timezones/\"\u003e時區支持文檔\u003c/a\u003e。 \u003c/p\u003e \n \u003cdiv\u003e\n 保存這些修改,並再次運行\u0026nbsp;python\u0026nbsp;manage.py\u0026nbsp;shell\u0026nbsp;啓動一個新的Python交互shell: \n \u003cbr\u003e \n \u003cpre class=\"prettyprint lang-py\"\u003e\u0026gt;\u0026gt;\u0026gt; from polls.models import Question, Choice\r\n\r\n# Make sure our __str__() addition worked.\r\n\u0026gt;\u0026gt;\u0026gt; Question.objects.all()\r\n[\u0026lt;Question: What's up?\u0026gt;]\r\n\r\n# Django provides a rich database lookup API that's entirely driven by\r\n# keyword arguments.\r\n\u0026gt;\u0026gt;\u0026gt; Question.objects.filter(id=1)\r\n[\u0026lt;Question: What's up?\u0026gt;]\r\n\u0026gt;\u0026gt;\u0026gt; Question.objects.filter(question_text__startswith='What')\r\n[\u0026lt;Question: What's up?\u0026gt;]\r\n\r\n# Get the question that was published this year.\r\n\u0026gt;\u0026gt;\u0026gt; from django.utils import timezone\r\n\u0026gt;\u0026gt;\u0026gt; current_year = timezone.now().year\r\n\u0026gt;\u0026gt;\u0026gt; Question.objects.get(pub_date__year=current_year)\r\n\u0026lt;Question: What's up?\u0026gt;\r\n\r\n# Request an ID that doesn't exist, this will raise an exception.\r\n\u0026gt;\u0026gt;\u0026gt; Question.objects.get(id=2)\r\nTraceback (most recent call last):\r\n ...\r\nDoesNotExist: Question matching query does not exist.\r\n\r\n# Lookup by a primary key is the most common case, so Django provides a\r\n# shortcut for primary-key exact lookups.\r\n# The following is identical to Question.objects.get(id=1).\r\n\u0026gt;\u0026gt;\u0026gt; Question.objects.get(pk=1)\r\n\u0026lt;Question: What's up?\u0026gt;\r\n\r\n# Make sure our custom method worked.\r\n\u0026gt;\u0026gt;\u0026gt; q = Question.objects.get(pk=1)\r\n\u0026gt;\u0026gt;\u0026gt; q.was_published_recently()\r\nTrue\r\n\r\n# Give the Question a couple of Choices. The create call constructs a new\r\n# Choice object, does the INSERT statement, adds the choice to the set\r\n# of available choices and returns the new Choice object. Django creates\r\n# a set to hold the \"other side\" of a ForeignKey relation\r\n# (e.g. a question's choice) which can be accessed via the API.\r\n\u0026gt;\u0026gt;\u0026gt; q = Question.objects.get(pk=1)\r\n\r\n# Display any choices from the related object set -- none so far.\r\n\u0026gt;\u0026gt;\u0026gt; q.choice_set.all()\r\n[]\r\n\r\n# Create three choices.\r\n\u0026gt;\u0026gt;\u0026gt; q.choice_set.create(choice_text='Not much', votes=0)\r\n\u0026lt;Choice: Not much\u0026gt;\r\n\u0026gt;\u0026gt;\u0026gt; q.choice_set.create(choice_text='The sky', votes=0)\r\n\u0026lt;Choice: The sky\u0026gt;\r\n\u0026gt;\u0026gt;\u0026gt; c = q.choice_set.create(choice_text='Just hacking again', votes=0)\r\n\r\n# Choice objects have API access to their related Question objects.\r\n\u0026gt;\u0026gt;\u0026gt; c.question\r\n\u0026lt;Question: What's up?\u0026gt;\r\n\r\n# And vice versa: Question objects get access to Choice objects.\r\n\u0026gt;\u0026gt;\u0026gt; q.choice_set.all()\r\n[\u0026lt;Choice: Not much\u0026gt;, \u0026lt;Choice: The sky\u0026gt;, \u0026lt;Choice: Just hacking again\u0026gt;]\r\n\u0026gt;\u0026gt;\u0026gt; q.choice_set.count()\r\n3\r\n\r\n# The API automatically follows relationships as far as you need.\r\n# Use double underscores to separate relationships.\r\n# This works as many levels deep as you want; there's no limit.\r\n# Find all Choices for any question whose pub_date is in this year\r\n# (reusing the 'current_year' variable we created above).\r\n\u0026gt;\u0026gt;\u0026gt; Choice.objects.filter(question__pub_date__year=current_year)\r\n[\u0026lt;Choice: Not much\u0026gt;, \u0026lt;Choice: The sky\u0026gt;, \u0026lt;Choice: Just hacking again\u0026gt;]\r\n\r\n# Let's delete one of the choices. Use delete() for that.\r\n\u0026gt;\u0026gt;\u0026gt; c = q.choice_set.filter(choice_text__startswith='Just hacking')\r\n\u0026gt;\u0026gt;\u0026gt; c.delete()\u003c/pre\u003e \n \u003c/div\u003e \n \u003cdiv\u003e \n \u003ch2\u003e 介紹 Django管理 \u003c/h2\u003e \n \u003cdiv\u003e \n \u003ch3\u003e \n \u003cdiv\u003e\n 創建一個管理員用戶 \n \u003c/div\u003e \u003c/h3\u003e \n \u003cdiv\u003e\n 首先,我們需要創建可以登錄到管理界面的用戶。運行以下命令: \n \u003c/div\u003e \n \u003cdiv\u003e \n \u003cpre\u003e\u003cspan\u003e\u003cb\u003ec:\\python27\\mysite\u0026gt;\u003c/b\u003e\u003c/span\u003e python manage.py createsuperuser\u003cspan\u003e\u003c/span\u003e\u003c/pre\u003e \n \u003c/div\u003e \n \u003cdiv\u003e\n 輸入你想要的用戶名(隨便一個),然後按Enter。 \n \u003c/div\u003e \n \u003cdiv\u003e \n \u003cpre\u003eUsername: admin\u003cspan\u003e\u003c/span\u003e\u003c/pre\u003e \n \u003c/div\u003e \n \u003cdiv\u003e\n 然後,將提示輸入電子郵件地址(隨便一個): \n \u003c/div\u003e \n \u003cdiv\u003e \n \u003cpre\u003eEmail address: admin@yiibai.com\u003cspan\u003e\u003c/span\u003e\u003c/pre\u003e \n \u003c/div\u003e \n \u003cdiv\u003e\n 最後一步是要輸入密碼。它會要求輸入密碼兩次,第二次爲第一的確認。 \n \u003c/div\u003e \n \u003cdiv\u003e \n \u003cpre\u003ePassword: **********\r\nPassword (again): *********\r\nSuperuser created successfully.\u003cspan\u003e\u003c/span\u003e\u003c/pre\u003e \n \u003c/div\u003e \n \u003c/div\u003e \n \u003cdiv\u003e \n \u003ch3\u003e \n \u003cdiv\u003e\n 啓動開發服務器 \n \u003c/div\u003e \u003c/h3\u003e \n \u003cdiv\u003e\n Django管理站點默認激活。讓我們啓動開發服務器,並探索它。 \n \u003c/div\u003e \n \u003cdiv\u003e\n 如果服務器未運行,啓動它,如下所示: \n \u003c/div\u003e \n \u003cdiv\u003e \n \u003cpre\u003ec:\\python27\\mysite\u0026gt;python manage.py runserver\u003cspan\u003e\u003c/span\u003e\u003c/pre\u003e \n \u003c/div\u003e \n \u003cp\u003e 現在,打開Web瀏覽器,進入「/admin/」\u0026nbsp;本地域名-\u0026nbsp;例如,\u0026nbsp;\u003ca href=\"http://127.0.0.1:8000/admin/\"\u003ehttp://127.0.0.1:8000/admin/\u003c/a\u003e\u0026nbsp;\u0026nbsp;應該看到管理員登錄界面:\u003cbr\u003e \u003cimg src=\"https://asset.1ju.org/cmsstatic/django-10.png\" alt=\"Django快速入門-數據庫模型\"\u003e \u003c/p\u003e \n \u003cp\u003e 由於移在默認情況下開啓,登錄屏幕可能會顯示在你自己的語言,\u0026nbsp;由於翻譯在默認情況下開啓,登錄屏幕可能會顯示在你自己的語言, \u003c/p\u003e \n \u003c/div\u003e \n \u003cdiv\u003e \n \u003ch3\u003e \n \u003cdiv\u003e\n 輸入管理員網站 \n \u003c/div\u003e \u003c/h3\u003e \n \u003cdiv\u003e\n 現在,嘗試與在上一步中創建的超級用戶帳號登錄。應該會看到 Django 管理的首頁: \n \u003cbr\u003e \n \u003cimg src=\"https://asset.1ju.org/cmsstatic/django-11.png\" alt=\"Django快速入門-數據庫模型\"\u003e \n \u003cbr\u003e \n \u003c/div\u003e \n \u003cdiv\u003e\n 你應該看到一些可編輯內容:組和用戶。它們由django.contrib.auth,Django的認證框架提供。 \n \u003c/div\u003e \n \u003c/div\u003e \n \u003cdiv\u003e \n \u003ch3\u003e \n \u003cdiv\u003e\n 修改poll\u0026nbsp;管理程序 \n \u003c/div\u003e \u003c/h3\u003e \n \u003cdiv\u003e\n poll應用程序在哪裏?它不會顯示在管理索引頁面上。 \n \u003c/div\u003e \n \u003cp\u003e 只有一件事要做:我們需要告訴管理員這個Question對象有一個管理界面。要做到這一點,打開 polls/admin.py文件,並修改它如下:\u003cspan\u003e\u003cbr\u003e \u003c/span\u003e \u003c/p\u003e \n \u003cpre class=\"prettyprint lang-py\"\u003efrom django.contrib import admin\r\n\r\nfrom .models import Question\r\n\r\nadmin.site.register(Question)\u003c/pre\u003e \n \u003cp\u003e \u003cbr\u003e \u003c/p\u003e \n \u003cdiv\u003e \n \u003c/div\u003e \n \u003c/div\u003e \n \u003cdiv\u003e \n \u003ch3\u003e \n \u003cdiv\u003e\n 瀏覽管理功能 \n \u003c/div\u003e \u003c/h3\u003e \n \u003cdiv\u003e\n 現在,我們已經註冊Question,Django知道它應該在管理主頁面上顯示: \n \u003cbr\u003e \n \u003cimg src=\"https://asset.1ju.org/cmsstatic/django-12.png\" alt=\"Django快速入門-數據庫模型\"\u003e \n \u003cbr\u003e \n \u003c/div\u003e \n \u003cp\u003e 點擊「Questions」。現在,在「change\u0026nbsp;list」頁面查看問題。該頁面顯示數據庫中的所有問題,並允許您選擇其中一個進行更改。還有我們先前創建的問題:\u003cbr\u003e \u003cimg src=\"https://asset.1ju.org/cmsstatic/django-13.png\" alt=\"Django快速入門-數據庫模型\"\u003e \u003c/p\u003e \n \u003cdiv\u003e\n 點擊「What's new?」這個問題進行編輯: \n \u003cbr\u003e \n \u003cimg src=\"https://asset.1ju.org/cmsstatic/django-14.png\" alt=\"Django快速入門-數據庫模型\"\u003e \n \u003cbr\u003e \n \u003c/div\u003e \n \u003cdiv\u003e\n 需要注意的事項在這裏列出: \n \u003c/div\u003e \n \u003cul\u003e \n \u003cli\u003e \n \u003cdiv\u003e\n 表單是從問題(Question)模型自動產生。 \n \u003c/div\u003e \u003c/li\u003e \n \u003cli\u003e \n \u003cdiv\u003e\n 不同型號的字段類型(DateTimeField,CharField)對應相應的HTML輸入部件。每個字段類型知道自己在Django管理中如何顯示。 \n \u003c/div\u003e \u003c/li\u003e \n \u003cli\u003e 每個DateTimeField字段得到 JavaScript 快捷方式。日期得到一個「Today」的快捷方式並且彈出日曆,並多次獲得了「Now」快捷方式並彈出窗口,列出了常用的輸入時間。 \u003c/li\u003e \n \u003c/ul\u003e \n \u003cp\u003e 修改「Date\u0026nbsp;published」點擊「Today」和「Now」快捷方式。然後點擊「Save\u0026nbsp;and\u0026nbsp;continue\u0026nbsp;editing.」,然後點擊「History」在右上角。你會看到一個頁面,列出通過Django管理到這個對象的所有變化,修改人用戶名和時間戳:\u003cbr\u003e \u003cimg src=\"https://asset.1ju.org/cmsstatic/django-15.png\" alt=\"Django快速入門-數據庫模型\"\u003e\u003cbr\u003e 代碼下載:\u003ca href=\"http://pan.baidu.com/s/1jGR3wDg\"\u003ehttp://pan.baidu.com/s/1jGR3wDg\u003c/a\u003e \u003c/p\u003e \n \u003c/div\u003e \n \u003c/div\u003e \n\u003c/div\u003e \n\u003cbr\u003e"])</script><script>self.__next_f.push([1,"27:T3b29,"])</script><script>self.__next_f.push([1,"\u003cdiv\u003e\n 視圖是一個網頁「類型」在Django應用程序,提供特定的功能,並且具有特定的模板。例如,在一個博客的應用程序,可能有以下幾個視圖: \n\u003c/div\u003e \n\u003cdiv\u003e \n \u003cdiv\u003e \n \u003cul\u003e \n \u003cli\u003e \n \u003cdiv\u003e\n 博客首頁\u0026nbsp;-\u0026nbsp;顯示最後的幾個文章。 \n \u003c/div\u003e \u003c/li\u003e \n \u003cli\u003e \n \u003cdiv\u003e\n 進入「detail」頁面-\u0026nbsp;對單個項目永久鏈接頁面。 \n \u003c/div\u003e \u003c/li\u003e \n \u003cli\u003e \n \u003cdiv\u003e\n 年存檔頁\u0026nbsp;-\u0026nbsp;顯示所有在給定年份各月的條目。 \n \u003c/div\u003e \u003c/li\u003e \n \u003cli\u003e \n \u003cdiv\u003e\n 月存檔頁\u0026nbsp;-\u0026nbsp;顯示所有給定月份各天的所有項。 \n \u003c/div\u003e \u003c/li\u003e \n \u003cli\u003e \n \u003cdiv\u003e\n 天存檔頁\u0026nbsp;-\u0026nbsp;顯示某一天所有條目。 \n \u003c/div\u003e \u003c/li\u003e \n \u003cli\u003e \n \u003cdiv\u003e\n 評論操作\u0026nbsp;-\u0026nbsp;處理髮布評論的一個給定輸入。 \n \u003c/div\u003e \u003c/li\u003e \n \u003c/ul\u003e \n \u003cdiv\u003e\n 在我們的\u0026nbsp;poll\u0026nbsp;應用程序,有以下四個視圖: \n \u003c/div\u003e \n \u003cul\u003e \n \u003cli\u003e \n \u003cdiv\u003e\n 問題的「index」頁-\u0026nbsp;顯示最後幾個問題。 \n \u003c/div\u003e \u003c/li\u003e \n \u003cli\u003e \n \u003cdiv\u003e\n 問題的「detail」頁\u0026nbsp;-\u0026nbsp;顯示一個問題文本,沒有結果但有一個表單用來投票。 \n \u003c/div\u003e \u003c/li\u003e \n \u003cli\u003e \n \u003cdiv\u003e\n 問題的「results」頁面\u0026nbsp;-\u0026nbsp;顯示結果一個特定問題。 \n \u003c/div\u003e \u003c/li\u003e \n \u003cli\u003e \n \u003cdiv\u003e\n 投票操作\u0026nbsp;-\u0026nbsp;處理投票在一個特定的問題進行具體選擇。 \n \u003c/div\u003e \u003c/li\u003e \n \u003c/ul\u003e \n \u003cp\u003e 在Django中,網頁和其他內容由視圖提供。每個視圖由一個簡單的Python函數來表示(或方法,基於類的視圖)。Django會選擇一個視圖通過考察多數民衆贊成請求的URL(準確地說,在域名之後URL的一部分)。 \u003c/p\u003e \n \u003cp\u003e 一個URL模式是一個簡單的URL的一般形式\u0026nbsp;-\u0026nbsp;例如:/newsarchive/\u0026lt;year\u0026gt;/\u0026lt;month\u0026gt;/. \u003c/p\u003e \n \u003c/div\u003e \n \u003cdiv\u003e \n \u003ch2\u003e \n \u003cdiv\u003e\n 編寫更多的視圖 \n \u003c/div\u003e \u003c/h2\u003e \n \u003cdiv\u003e\n 現在,讓我們添加一些視圖在\u0026nbsp;polls/views.py。這些視圖略有不同,因爲他們需要一個參數: \n \u003cbr\u003e \n \u003cpre class=\"prettyprint lang-py\"\u003edef detail(request, question_id):\r\n return HttpResponse(\"You're looking at question %s.\" % question_id)\r\n\r\ndef results(request, question_id):\r\n response = \"You're looking at the results of question %s.\"\r\n return HttpResponse(response % question_id)\r\n\r\ndef vote(request, question_id):\r\n return HttpResponse(\"You're voting on question %s.\" % question_id)\u003c/pre\u003e \n \u003c/div\u003e \n \u003cdiv\u003e \n \u003c/div\u003e \n \u003cdiv\u003e\n 這些新的視圖加入到\u0026nbsp;polls.urls\u0026nbsp;模塊中如下的 url() 調用,polls/urls.py文件中的代碼如下: \n \u003cbr\u003e \n \u003cpre class=\"prettyprint lang-py\"\u003efrom django.conf.urls import url\r\n\r\nfrom . import views\r\n\r\nurlpatterns = [\r\n # ex: /polls/\r\n url(r'^$', views.index, name='index'),\r\n # ex: /polls/5/\r\n url(r'^(?P\u0026lt;question_id\u0026gt;[0-9]+)/$', views.detail, name='detail'),\r\n # ex: /polls/5/results/\r\n url(r'^(?P\u0026lt;question_id\u0026gt;[0-9]+)/results/$', views.results, name='results'),\r\n # ex: /polls/5/vote/\r\n url(r'^(?P\u0026lt;question_id\u0026gt;[0-9]+)/vote/$', views.vote, name='vote'),\r\n]\u003c/pre\u003e \n \u003c/div\u003e \n \u003cdiv\u003e \n \u003c/div\u003e \n \u003cp\u003e \u003cspan\u003e您可以在瀏覽器打開「/polls/34/」。它會運行detail()方法,並顯示任何提供的URL內容。\u003c/span\u003e\u0026nbsp;再次嘗試訪問 「/polls/34/results/」 and 「/polls/34/vote/」 \u0026nbsp;–\u0026nbsp;\u003cspan\u003e這將顯示佔位符結果和投票頁面。\u003c/span\u003e \u003c/p\u003e \n \u003cp\u003e \u003cspan\u003einclude() 可以很容易包含入插件和網址。\u003c/span\u003e\u003cspan\u003e因爲polls是在它們自己的URL配置(polls/urls.py),它們可以放置在「/polls/」,\u003c/span\u003e\u003cspan\u003e或\u0026nbsp;「/fun_polls/」,或在「/content/polls/」,或任何其它路徑的根,應用程序仍然可以工作。\u003c/span\u003e \u003c/p\u003e \n \u003cdiv\u003e\n 下面是如果用戶進入「/polls/34/」,在這個系統會發生什麼: \n \u003c/div\u003e \n \u003cul\u003e \n \u003cli\u003e \u003cp\u003e \u003cspan\u003eDjango會找到匹配\u003c/span\u003e'^polls/' \u003c/p\u003e \u003c/li\u003e \n \u003cli\u003e \u003cp\u003e \u003cspan\u003e然後,Django會去掉匹配的文本(\"polls/\"),併發送剩餘的文本\u0026nbsp;\u003c/span\u003e–\u0026nbsp;\"34/\"\u0026nbsp;–\u0026nbsp;\u003cspan\u003e到'polls.urls'URL配置用於進一步處理相匹配\u003c/span\u003e\u003cspan\u003e\u0026nbsp;\u003c/span\u003er'^(?P\u0026lt;question_id\u0026gt;[0-9]+)/$'\u003cspan\u003e從而調用detail()\u0026nbsp;視圖,如下所示:\u003c/span\u003e \u003c/p\u003e \n \u003cdiv\u003e \n \u003cpre\u003edetail(request=\u0026lt;HttpRequest object\u0026gt;, question_id='34')\u003cspan\u003e\u003c/span\u003e\u003c/pre\u003e \n \u003c/div\u003e \u003c/li\u003e \n \u003c/ul\u003e \n \u003cp\u003e question_id='34'\u0026nbsp;是來自\u0026nbsp;(?P\u0026lt;question_id\u0026gt;[0-9]+)的一部分,\u003cspan\u003e用周圍的模式括號「捕捉」匹配該模式文本,並將其作爲參數傳遞給視圖函數;\u003c/span\u003e\u003cspan\u003e\u0026nbsp;\u0026nbsp;\u003c/span\u003e?P\u0026lt;question_id\u0026gt;\u003cspan\u003e\u0026nbsp;\u003c/span\u003e\u003cspan\u003e定義了將被用來識別所述匹配的模式的名稱;\u003c/span\u003e\u003cspan\u003e\u0026nbsp; 以及\u003c/span\u003e[0-9]+\u003cspan\u003e\u0026nbsp;\u003c/span\u003e\u003cspan\u003e正則表達式匹配一個數字序列(在一個數字)。\u003c/span\u003e \u003c/p\u003e \n \u003cp\u003e \u003cspan\u003e由於URL模式是正則表達式,可以使用它來做一些事情,沒有任何限制。而且也沒有必要添加URL爲.html\u003c/span\u003e\u0026nbsp;–\u0026nbsp;\u003cspan\u003e除非你想,在這種情況下,你可以這樣做:\u003c/span\u003e \u003c/p\u003e \n \u003cdiv\u003e \n \u003cpre\u003eurl(r'^polls/latest\\.html$', views.index),\u003c/pre\u003e \n \u003c/div\u003e \n \u003c/div\u003e \n \u003cdiv\u003e \n \u003ch2\u003e \n \u003cdiv\u003e\n 編寫視圖實現功能 \n \u003c/div\u003e \u003c/h2\u003e \n \u003cp\u003e 每個視圖負責做兩件事情之一:返回包含所請求的頁面內容的 HttpResponse 對象,或拋出一個異常,如HTTP 404。\u0026nbsp;修改polls/views.py文件代碼如下: \u003c/p\u003e \n \u003cpre class=\"prettyprint lang-py\"\u003efrom django.http import HttpResponse\r\n\r\nfrom .models import Question\r\n\r\ndef index(request):\r\n latest_question_list = Question.objects.order_by('-pub_date')[:5]\r\n output = ', '.join([q.question_text for q in latest_question_list])\r\n return HttpResponse(output)\r\n\r\n# Leave the rest of the views (detail, results, vote) unchanged\u003c/pre\u003e \n \u003cdiv\u003e \n \u003c/div\u003e \n \u003cp\u003e 在這裏有一個問題就,通過:網頁設計是硬編碼在視圖中。如果想改變頁面的樣子,必須編輯這個 Python 代碼。因此,讓我們使用 Django 模板系統通過創建視圖可以使用模板來分開Python 的代碼。\u003cspan\u003epolls/templates/polls/index.html\u0026nbsp;\u003c/span\u003e\u003cspan\u003e將下面的代碼:\u003c/span\u003e \u003c/p\u003e \n \u003cpre class=\"prettyprint lang-html\"\u003e{% if latest_question_list %}\r\n \u0026lt;ul\u0026gt;\r\n {% for question in latest_question_list %}\r\n \u0026lt;li\u0026gt;\u0026lt;a href=\"/polls/{{ question.id }}/\"\u0026gt;{{ question.question_text }}\u0026lt;/a\u0026gt;\u0026lt;/li\u0026gt;\r\n {% endfor %}\r\n \u0026lt;/ul\u0026gt;\r\n{% else %}\r\n \u0026lt;p\u0026gt;No polls are available.\u0026lt;/p\u0026gt;\r\n{% endif %}\u003c/pre\u003e \n \u003cdiv\u003e \n \u003c/div\u003e \n \u003cp\u003e 現在我們來更新首頁視圖 polls/views.py使用以下模板(代碼): \u003c/p\u003e \n \u003cpre class=\"prettyprint lang-py\"\u003efrom django.http import HttpResponse\r\nfrom django.template import loader\r\n\r\nfrom .models import Question\r\n\r\ndef index(request):\r\n latest_question_list = Question.objects.order_by('-pub_date')[:5]\r\n template = loader.get_template('polls/index.html')\r\n context = {\r\n 'latest_question_list': latest_question_list,\r\n }\r\n return HttpResponse(template.render(context, request))\u003c/pre\u003e \n \u003cdiv\u003e \n \u003c/div\u003e \n \u003cp\u003e 該代碼加載模板調用polls/index.html,然後傳遞給它的上下文。上下文是一個字典以Python對象映射模板變量名。現在訪問URL(http://127.0.0.1:8000/polls/)查看結果 : \u003c/p\u003e \n \u003cp\u003e \u003cimg src=\"https://asset.1ju.org/cmsstatic/django-16.png\" alt=\"Django快速入門-視圖\"\u003e \u003c/p\u003e \n \u003cdiv\u003e \n \u003ch3\u003e 快捷方式:\u0026nbsp;\u003ca href=\"https://docs.djangoproject.com/en/1.9/topics/http/shortcuts/#django.shortcuts.render\"\u003erender()\u003c/a\u003e \u003c/h3\u003e \n \u003cp\u003e 這是一個非常習慣用法來加載模板,填充上下文中和渲染模板的結果返回一個HttpResponse對象。Django提供了一個捷徑。下面是完整的index() 視圖,改寫polls/views.py爲: \u003c/p\u003e \n \u003cpre class=\"prettyprint lang-py\"\u003efrom django.shortcuts import render\r\n\r\nfrom .models import Question\r\n\r\ndef index(request):\r\n latest_question_list = Question.objects.order_by('-pub_date')[:5]\r\n context = {'latest_question_list': latest_question_list}\r\n return render(request, 'polls/index.html', context)\u003c/pre\u003e \n \u003cdiv\u003e \n \u003c/div\u003e \n \u003cdiv\u003e\n 請注意,當在各個視圖做到了這一點,我們不再需要導入加載器和HttpResponse對象(想保留HttpResponse,如果仍然有短截\u0026nbsp;detail,\u0026nbsp;results,\u0026nbsp;和\u0026nbsp;vote\u0026nbsp;方法。 \n \u003c/div\u003e \n \u003c/div\u003e \n \u003c/div\u003e \n \u003ch2\u003e 引發404錯誤 \u003c/h2\u003e \n \u003cp\u003e 現在,讓我們來解決這個問題詳細視圖 - 顯示爲給定的民意調查問題文本的頁面。這裏添加視圖代碼(polls/views.py): \u003c/p\u003e \n \u003cpre class=\"prettyprint lang-py\"\u003efrom django.http import Http404\r\nfrom django.shortcuts import render\r\n\r\nfrom .models import Question\r\n# ...\r\ndef detail(request, question_id):\r\n try:\r\n question = Question.objects.get(pk=question_id)\r\n except Question.DoesNotExist:\r\n raise Http404(\"Question does not exist\")\r\n return render(request, 'polls/detail.html', {'question': question})\u003c/pre\u003e \n \u003cdiv\u003e \n \u003c/div\u003e \n \u003cp\u003e 注意這裏:視圖引發HTTP404異常,如果與請求ID的問題並不存在。 \u003c/p\u003e \n \u003cp\u003e 我們將討論可以把 polls/detail.html 在後面做一些修改,但如果想快速使用上面的例子,polls/templates/polls/detail.html\u0026nbsp;文件只需包含: \u003c/p\u003e \n \u003cdiv\u003e \n \u003cpre\u003e{{question}}\u003c/pre\u003e \n \u003c/div\u003e \n \u003cp\u003e \u003cimg src=\"https://asset.1ju.org/cmsstatic/django-17.png\" alt=\"Django快速入門-視圖\"\u003e\u003cbr\u003e 引發 404\u0026nbsp;錯誤,現在我們請求一個不存在問題,如:http://127.0.0.1:8000/polls/100/,顯示結果如下: \u003c/p\u003e \n \u003cp\u003e \u003cimg src=\"https://asset.1ju.org/cmsstatic/django-18.png\" alt=\"Django快速入門-視圖\"\u003e \u003c/p\u003e \n \u003cdiv\u003e \n \u003ch3\u003e 快捷方式:\u0026nbsp;\u003ca href=\"https://docs.djangoproject.com/en/1.9/topics/http/shortcuts/#django.shortcuts.get_object_or_404\"\u003eget_object_or_404()\u003c/a\u003e \u003c/h3\u003e \n \u003cp\u003e 如果對象不存在的一個非常習慣用法使用get()並引發HTTP404錯誤。Django提供了一個捷徑。下面是 detail() 視圖,\u003cspan\u003epolls/views.py\u0026nbsp;\u003c/span\u003e改寫: \u003c/p\u003e \n \u003cpre class=\"prettyprint lang-py\"\u003efrom django.shortcuts import get_object_or_404, render\r\n\r\nfrom .models import Question\r\n# ...\r\ndef detail(request, question_id):\r\n question = get_object_or_404(Question, pk=question_id)\r\n return render(request, 'polls/detail.html', {'question': question})\u003c/pre\u003e get_object_or_404()函數接受一個Django模型作爲第一個參數和關鍵字任意參數數量,它傳遞到模型管理的 get()函數。 \n \u003cp\u003e \u003ca href=\"https://docs.djangoproject.com/en/1.9/topics/http/shortcuts/#django.shortcuts.get_object_or_404\"\u003e\u003c/a\u003e如果對象不存在將引發HTTP404。 \u003c/p\u003e \n \u003cp\u003e 還有一個get_list_or_404()函數,它的工作原理就像get_object_or_404()- 除了使用 filter()而不是get()方法。如果列表是空的它會引起HTTP404。 \u003c/p\u003e \n \u003c/div\u003e \n \u003cdiv\u003e \n \u003ch2\u003e 使用模板系統 \u003c/h2\u003e \n \u003cp\u003e 回到我們的 polls\u0026nbsp;應用程序\u0026nbsp;detail()\u0026nbsp;視圖。由於上下文變量的問題,這裏的 polls/detail.html\u0026nbsp;模板看起來是這樣的: \u003c/p\u003e \n \u003cpre class=\"prettyprint lang-html\"\u003e\u0026lt;h1\u0026gt;{{ question.question_text }}\u0026lt;/h1\u0026gt;\r\n\u0026lt;ul\u0026gt;\r\n{% for choice in question.choice_set.all %}\r\n \u0026lt;li\u0026gt;{{ choice.choice_text }}\u0026lt;/li\u0026gt;\r\n{% endfor %}\r\n\u0026lt;/ul\u0026gt;\u003c/pre\u003e \n \u003cdiv\u003e \n \u003c/div\u003e \n \u003cp\u003e 模板系統採用點查詢語法來訪問變量屬性。在這個例子\u0026nbsp;{{question.question_text }},第一個Django確實在question對象字典查找。 如果找不到,它再嘗試屬性查詢 – 如果屬性查找失敗,它會嘗試一個列表索引查找。\u003cbr\u003e 現在測試我們上面編寫的代碼,在瀏覽器中打開:http://127.0.0.1:8000/polls/5/ 得到結果如下:\u003cbr\u003e \u003cimg src=\"https://asset.1ju.org/cmsstatic/django-19.png\" alt=\"Django快速入門-視圖\"\u003e \u003c/p\u003e \n \u003c/div\u003e \n \u003cdiv\u003e \n \u003ch2\u003e 刪除模板硬編碼網址 \u003c/h2\u003e \n \u003cp\u003e 請記住,當我們在 polls/index.html 鏈接到一個問題,鏈接被硬編碼的部分是這樣的: \u003c/p\u003e \n \u003cdiv\u003e \n \u003cpre\u003e\u0026lt;li\u0026gt;\u0026lt;ahref=\"/polls/{{question.id}}/\"\u0026gt;{{question.question_text}}\u0026lt;/a\u0026gt;\u0026lt;/li\u0026gt;\u003c/pre\u003e \n \u003c/div\u003e \n \u003cp\u003e 使用此硬編碼,緊密耦合的方法的問題是:它在更改項目的URL用了很多模板。不過,既然 polls.urls模塊中定義名稱參數url() 函數,您可以通過使用 {% url %}模板刪除標籤在URL配置中定義的特定URL路徑的依賴: \u003c/p\u003e \n \u003cdiv\u003e \n \u003cpre\u003e\u0026lt;li\u0026gt;\u0026lt;ahref=\"{%url'detail'question.id%}\"\u0026gt;{{question.question_text}}\u0026lt;/a\u0026gt;\u0026lt;/li\u0026gt;\u003c/pre\u003e \n \u003c/div\u003e \n \u003cp\u003e 這種工作方式是通過爲polls.urls模塊中指定查找的URL定義。可以準確地看到'detail'的URL名稱定義如下: \u003c/p\u003e \n \u003cpre class=\"prettyprint lang-py\"\u003e...\r\n# the 'name' value as called by the {% url %} template tag\r\nurl(r'^(?P\u0026lt;question_id\u0026gt;[0-9]+)/$', views.detail, name='detail'),\r\n...\u003c/pre\u003e \n \u003cdiv\u003e \n \u003c/div\u003e \n \u003cp\u003e 如果你想要把投票詳細視圖的URL更改成其它的,也許像\u0026nbsp;polls/specifics/12/\u0026nbsp;取代在模板(或templates),需要在\u0026nbsp;polls/urls.py\u0026nbsp;改變它: \u003c/p\u003e \n \u003cpre class=\"prettyprint lang-py\"\u003e...\r\n# added the word 'specifics'\r\nurl(r'^specifics/(?P\u0026lt;question_id\u0026gt;[0-9]+)/$', views.detail, name='detail'),\r\n...\u003c/pre\u003e \n \u003cdiv\u003e \n \u003c/div\u003e \n \u003c/div\u003e \n \u003cdiv\u003e \n \u003ch2\u003e 命名空間URL名稱 \u003c/h2\u003e \n \u003cp\u003e 本教程項目只有一個應用程序 - polls。在實際的Django項目中,可能有五個,十個,二十個或更多的應用程序。Django\u0026nbsp;如何區分它們的URL的名稱? 例如,投票應用程序有一個詳細視圖,因此可能會在一個博客的同一個項目也有相同的應用程序。如何使用 {% url %} 模板標籤讓Django知道創建一個URL哪些應用有這樣視圖? \u003c/p\u003e \n \u003cp\u003e 答案就是將命名空間添加到URLconf。在polls/urls.py文件,繼續前進,添加應用程序名稱設置應用程序命名空間,打開\u0026nbsp;polls/urls.py: \u003c/p\u003e \n \u003cpre class=\"prettyprint lang-py\"\u003efrom django.conf.urls import url\r\n\r\nfrom . import views\r\n\r\napp_name = 'polls'\r\nurlpatterns = [\r\n url(r'^$', views.index, name='index'),\r\n url(r'^(?P\u0026lt;question_id\u0026gt;[0-9]+)/$', views.detail, name='detail'),\r\n url(r'^(?P\u0026lt;question_id\u0026gt;[0-9]+)/results/$', views.results, name='results'),\r\n url(r'^(?P\u0026lt;question_id\u0026gt;[0-9]+)/vote/$', views.vote, name='vote'),\r\n]\u003c/pre\u003e \n \u003cdiv\u003e \n \u003c/div\u003e \n \u003cp\u003e 現在修改 polls/index.html 模板,打開\u0026nbsp;polls/templates/polls/index.html\u0026nbsp;文件添加以下代碼: \u003c/p\u003e \n \u003cdiv\u003e \n \u003cpre\u003e\u0026lt;li\u0026gt;\u0026lt;ahref=\"{%url'detail'question.id%}\"\u0026gt;{{question.question_text}}\u0026lt;/a\u0026gt;\u0026lt;/li\u0026gt;\u003c/pre\u003e \n \u003c/div\u003e \n \u003cp\u003e 使其指向在命名空間 detail\u0026nbsp;視圖,打開 polls/templates/polls/index.html 文件如下: \u003c/p\u003e \n \u003cdiv\u003e \n \u003cpre\u003e\u0026lt;li\u0026gt;\u0026lt;ahref=\"{%url'polls:detail'question.id%}\"\u0026gt;{{question.question_text}}\u0026lt;/a\u0026gt;\u0026lt;/li\u0026gt;\u003c/pre\u003e \n \u003c/div\u003e \n \u003c/div\u003e \n\u003c/div\u003e 代碼下載: \n\u003ca href=\"http://pan.baidu.com/s/1o7iWsWi\"\u003ehttp://pan.baidu.com/s/1o7iWsWi\u003c/a\u003e \n\u003cbr\u003e"])</script><script>self.__next_f.push([1,"28:T23a3,"])</script><script>self.__next_f.push([1,"\u003cdiv\u003e\n 在上一節的教程中,我們介紹了Django的視圖,並編寫了一個簡單的實例。本小節我們將學習網絡投票應用程序,並將側重於簡單的表單處理,以最少代碼代碼量來實現。 \n\u003c/div\u003e \n\u003cdiv\u003e \n \u003cdiv\u003e \n \u003ch2\u003e \u003c/h2\u003e \n \u003ch2\u003e 編寫一個簡單的表單 \u003c/h2\u003e \n \u003cdiv\u003e\n 讓我們更新\u0026nbsp;poll\u0026nbsp;detail 模板(「polls/detail.html」)\u0026nbsp;,從上個教程,在模板\u0026nbsp;polls/templates/polls/detail.html\u0026nbsp;包含一個HTML\u0026lt;form\u0026gt;元素: \n \u003cbr\u003e \n \u003cpre class=\"prettyprint lang-html\"\u003e\u0026lt;h1\u0026gt;{{ question.question_text }}\u0026lt;/h1\u0026gt;\r\n\r\n{% if error_message %}\u0026lt;p\u0026gt;\u0026lt;strong\u0026gt;{{ error_message }}\u0026lt;/strong\u0026gt;\u0026lt;/p\u0026gt;{% endif %}\r\n\r\n\u0026lt;form action=\"{% url 'polls:vote' question.id %}\" method=\"post\"\u0026gt;\r\n{% csrf_token %}\r\n{% for choice in question.choice_set.all %}\r\n \u0026lt;input type=\"radio\" name=\"choice\" id=\"choice{{ forloop.counter }}\" value=\"{{ choice.id }}\" /\u0026gt;\r\n \u0026lt;label for=\"choice{{ forloop.counter }}\"\u0026gt;{{ choice.choice_text }}\u0026lt;/label\u0026gt;\u0026lt;br /\u0026gt;\r\n{% endfor %}\r\n\u0026lt;input type=\"submit\" value=\"Vote\" /\u0026gt;\r\n\u0026lt;/form\u0026gt;\u003c/pre\u003e \n \u003c/div\u003e \n \u003cp\u003e 簡要介紹: \u003c/p\u003e \n \u003cul\u003e \n \u003cli\u003e 上面的模板顯示每個問題選擇一個單選按鈕。每個單選按鈕的值相聯問題的選擇編號。每個單選按鈕的名稱是「choice」。這意味着,當有人選擇了其中一個單選按鈕並提交表單,它會發送POST數據choice=#,其中#是被選擇的選擇的ID。這是HTML表單的基本概念。 \u003c/li\u003e \n \u003cli\u003e 我們設置表單的動作\u0026nbsp;{%\u0026nbsp;url\u0026nbsp;'polls:vote'\u0026nbsp;question.id\u0026nbsp;%}, 以及設置 method=\"post\". 使用 method=\"post\"\u0026nbsp;(相對於\u0026nbsp;method=\"get\") 是非常重要的,因爲提交此表將改變服務器端數據的行爲。當創建一個改變數據服務器端表單形式,使用\u0026nbsp;method=\"post\". 這篇文章並不是只針對 Django; 這是一個很好的 Web 開發實踐。 \u003c/li\u003e \n \u003cli\u003e forloop.counter表示表單標籤通過多少次循環了 \u003c/li\u003e \n \u003cli\u003e 因爲我們正在創建一個POST形式(可以有修改數據的影響),我們需要擔心跨站點請求僞造。但是也不必擔心,因爲Django自帶了保護對抗的一個非常容易使用的系統。總之,這是針對內部URL所有的POST形式應該使用{%csrf_token%}模板標籤。 \u003c/li\u003e \n \u003c/ul\u003e \n \u003cp\u003e 現在,讓我們創建一個處理提交的數據的一個 Django 視圖。 \u003c/p\u003e \n \u003cdiv\u003e\n polls/urls.py文件內容如下: \n \u003c/div\u003e \n \u003cdiv\u003e \n \u003cpre\u003eurl(r'^(?P\u0026lt;question_id\u0026gt;[0-9]+)/vote/$', views.vote, name='vote'), \u003c/pre\u003e \n \u003c/div\u003e \n \u003cp\u003e 我們還創建了一個虛擬實現 vote() 函數。現在創建一個實用的版本。添加到以下代碼到文件 polls/views.py: \u003c/p\u003e \n \u003cdiv\u003e\n polls/views.py 文件的內容如下: \n \u003cbr\u003e \n \u003cpre class=\"prettyprint lang-py\"\u003efrom django.shortcuts import get_object_or_404, render\r\nfrom django.http import HttpResponseRedirect, HttpResponse\r\nfrom django.core.urlresolvers import reverse\r\n\r\nfrom .models import Choice, Question\r\n# ...\r\ndef vote(request, question_id):\r\n question = get_object_or_404(Question, pk=question_id)\r\n try:\r\n selected_choice = question.choice_set.get(pk=request.POST['choice'])\r\n except (KeyError, Choice.DoesNotExist):\r\n # Redisplay the question voting form.\r\n return render(request, 'polls/detail.html', {\r\n 'question': question,\r\n 'error_message': \"You didn't select a choice.\",\r\n })\r\n else:\r\n selected_choice.votes += 1\r\n selected_choice.save()\r\n # Always return an HttpResponseRedirect after successfully dealing\r\n # with POST data. This prevents data from being posted twice if a\r\n # user hits the Back button.\r\n return HttpResponseRedirect(reverse('polls:results', args=(question.id,)))\u003c/pre\u003e \n \u003c/div\u003e \n \u003cp\u003e 此代碼包含還沒有在本教程中涉及幾個東西: \u003c/p\u003e \n \u003cul\u003e \n \u003cli\u003e \u003cp\u003e request.POST是一個類似於字典的對象,使您可以通過鍵名訪問提交的數據。在這種情況下,request.POST['choice'] 返回被選擇的choice的ID,作爲字符串。 request.POST的值總是字符串。\u0026nbsp; \u003c/p\u003e \u003cp\u003e 注意:Django還提供 request.GET 以相同的方式訪問 GET數據\u0026nbsp; – 但我們明確使用 request.POST 在我們的代碼,以確保數據只能通過POST調用修改。 \u003c/p\u003e \u003c/li\u003e \n \u003cli\u003e \u003cp\u003e 如果POST數據未提供choice,request.POST['choice']將引發KeyError異常。上面的代碼檢查KeyError異常和錯誤消息顯示問題的表單,如果沒有給出\u0026nbsp;\u003cspan\u003echoice\u003c/span\u003e。 \u003c/p\u003e \u003c/li\u003e \n \u003cli\u003e \u003cp\u003e 選擇choice計數遞增後,代碼返回 HttpResponse 重定向,而不是一個正常的 HttpResponse。HttpResponseRedirect 需要一個參數:用戶將被重定向到URL(請參閱下面-我們如何構建在這種情況下的URL)。 \u003c/p\u003e \u003cp\u003e 如上Python的註釋所指出的,應該總是在 POST 數據處理成功\u003cspan\u003e後\u003c/span\u003e返回一個HttpResponse重定向。 \u003c/p\u003e \u003c/li\u003e \n \u003cli\u003e \u003cp\u003e 在本例中我們使用的是 HttpResponseRedirect 構造reverse()函數。此函數有助於避免硬編碼URL在視圖中。這是因爲我們想通過控制並指向該視圖的URL模式的可變部分的視圖的名稱。在這種情況下,使用 URLconf 配置使 reverse()調用返回字符串如: \u003c/p\u003e \n \u003cdiv\u003e \n \u003cpre\u003e'/polls/3/results/'\u003c/pre\u003e \n \u003c/div\u003e \u003cp\u003e 其中3是question.id的值。然後,這個重定向的URL將調用「results」視圖中顯示的最後一頁。 \u003c/p\u003e \u003c/li\u003e \n \u003c/ul\u003e \n \u003cp\u003e 現在訪問網址:http://127.0.0.1:8000/polls/1/ 得到結果如下所示:\u003cbr\u003e \u003cimg src=\"https://asset.1ju.org/cmsstatic/django-20.png\" alt=\"Django快速入門-表單\"\u003e\u003cbr\u003e 當有人在一個問題投票後,vote() 視圖重定向到該問題的結果頁面。讓我們編寫這個視圖(polls/views.py): \u003c/p\u003e \n \u003cpre class=\"prettyprint lang-py\"\u003efrom django.shortcuts import get_object_or_404, render\r\n\r\ndef results(request, question_id):\r\n question = get_object_or_404(Question, pk=question_id)\r\n return render(request, 'polls/results.html', {'question': question})\u003c/pre\u003e \n \u003cp\u003e 現在,創建一個 polls/results.html (polls/templates/polls/results.html)模板: \u003c/p\u003e \n \u003cpre class=\"prettyprint lang-html\"\u003e\u0026lt;h2\u0026gt;{{ question.question_text }}\u0026lt;/h2\u0026gt;\r\n\r\n\u0026lt;ul\u0026gt;\r\n{% for choice in question.choice_set.all %}\r\n \u0026lt;li\u0026gt;{{ choice.choice_text }} -- {{ choice.votes }} vote{{ choice.votes|pluralize }}\u0026lt;/li\u0026gt;\r\n{% endfor %}\r\n\u0026lt;/ul\u0026gt;\r\n\r\n\u0026lt;a href=\"{% url 'polls:detail' question.id %}\"\u0026gt;Vote again?\u0026lt;/a\u0026gt;\u003c/pre\u003e \n \u003cp\u003e 現在,在瀏覽器中打開 /polls/1/ 並表決的問題。應該會被每次投票時看到更新結果頁。如果您提交表單不選擇一個選項,應該看到錯誤消息。\u003cbr\u003e 選擇選項,提交後顯示如下結果:\u003cbr\u003e \u003cimg src=\"https://asset.1ju.org/cmsstatic/django-21.png\" alt=\"Django快速入門-表單\"\u003e \u003c/p\u003e \n \u003c/div\u003e \n \u003cdiv\u003e \n \u003ch2\u003e 使用通用視圖:更少的代碼更好 \u003c/h2\u003e \n \u003cdiv\u003e \n \u003ch3\u003e 修改URL配置 \u003c/h3\u003e \n \u003cp\u003e 首先,打開 polls/urls.py 並修改如下: \u003c/p\u003e \n \u003cpre class=\"prettyprint lang-py\"\u003efrom django.conf.urls import url\r\n\r\nfrom . import views\r\n\r\napp_name = 'polls'\r\nurlpatterns = [\r\n url(r'^$', views.IndexView.as_view(), name='index'),\r\n url(r'^(?P\u0026lt;pk\u0026gt;[0-9]+)/$', views.DetailView.as_view(), name='detail'),\r\n url(r'^(?P\u0026lt;pk\u0026gt;[0-9]+)/results/$', views.ResultsView.as_view(), name='results'),\r\n url(r'^(?P\u0026lt;question_id\u0026gt;[0-9]+)/vote/$', views.vote, name='vote'),\r\n]\u003c/pre\u003e \n \u003cp\u003e 請注意,第二和第三模式的正則表達式匹配的模式名稱已經從\u0026lt;question_id\u0026gt;改變爲\u0026lt;to\u0026gt;。 \u003c/p\u003e \n \u003c/div\u003e \n \u003cdiv\u003e \n \u003ch3\u003e 修改視圖 \u003c/h3\u003e \n \u003cp\u003e 接下來,我們要刪除舊的 index, detail, 和 results 視圖使用Django通用視圖代替。要做到這一點,打開 polls/views.py 文件並修改它如下: \u003c/p\u003e \n \u003cpre class=\"prettyprint lang-py\"\u003efrom django.shortcuts import get_object_or_404, render\r\nfrom django.http import HttpResponseRedirect\r\nfrom django.core.urlresolvers import reverse\r\nfrom django.views import generic\r\n\r\nfrom .models import Choice, Question\r\n\r\n\r\nclass IndexView(generic.ListView):\r\n template_name = 'polls/index.html'\r\n context_object_name = 'latest_question_list'\r\n\r\n def get_queryset(self):\r\n \"\"\"Return the last five published questions.\"\"\"\r\n return Question.objects.order_by('-pub_date')[:5]\r\n\r\n\r\nclass DetailView(generic.DetailView):\r\n model = Question\r\n template_name = 'polls/detail.html'\r\n\r\n\r\nclass ResultsView(generic.DetailView):\r\n model = Question\r\n template_name = 'polls/results.html'\r\n\r\n\r\ndef vote(request, question_id):\r\n ... # same as above\u003c/pre\u003e \n \u003cp\u003e 剩下的你自己發揮了,包教不包會,請參考:\u003ca href=\"https://docs.djangoproject.com/en/1.9/intro/tutorial04/\"\u003ehttps://docs.djangoproject.com/en/1.9/intro/tutorial04/\u003c/a\u003e \u003c/p\u003e \n \u003c/div\u003e \n \u003c/div\u003e \n\u003c/div\u003e 代碼下載: \n\u003ca href=\"http://pan.baidu.com/s/1bt4efW\"\u003ehttp://pan.baidu.com/s/1bt4efW\u003c/a\u003e \n\u003cbr\u003e"])</script><script>self.__next_f.push([1,"29:Ta39,"])</script><script>self.__next_f.push([1,"\u003cdiv\u003e\n Django帶有聚合feed生成框架。有了它,你可以創建RSS或Atom只需繼承django.contrib.syndication.views.Feed類。 \n\u003c/div\u003e \n\u003cp\u003e 讓我們創建一個訂閱源的應用程序。 \u003c/p\u003e \n\u003cpre\u003efrom django.contrib.syndication.views import Feed\r\nfrom django.contrib.comments import Comment\r\nfrom django.core.urlresolvers import reverse\r\n\r\nclass DreamrealCommentsFeed(Feed):\r\n title = \"Dreamreal's comments\"\r\n link = \"/drcomments/\"\r\n description = \"Updates on new comments on Dreamreal entry.\"\r\n\r\n def items(self):\r\n return Comment.objects.all().order_by(\"-submit_date\")[:5]\r\n\t\t\r\n def item_title(self, item):\r\n return item.user_name\r\n\t\t\r\n def item_description(self, item):\r\n return item.comment\r\n\t\t\r\n def item_link(self, item):\r\n return reverse('comment', kwargs = {'object_pk':item.pk})\u0026nbsp;\u003c/pre\u003e \n\u003cul\u003e \n \u003cli\u003e \u003cp\u003e 在feed類,\u0026nbsp;title,\u0026nbsp;link\u0026nbsp;和\u0026nbsp;description\u0026nbsp;屬性對應標準RSS\u0026nbsp;的\u0026lt;title\u0026gt;,\u0026nbsp;\u0026lt;link\u0026gt;\u0026nbsp;和\u0026nbsp;\u0026lt;description\u0026gt;元素。 \u003c/p\u003e \u003c/li\u003e \n \u003cli\u003e \u003cp\u003e 條目方法返回應該進入feed的item的元素。在我們的示例中是最後五個註釋。 \u003c/p\u003e \u003c/li\u003e \n\u003c/ul\u003e \n\u003cp\u003e 現在,我們有feed,並添加評論在視圖views.py,以顯示我們的評論− \u003c/p\u003e \n\u003cpre\u003efrom django.contrib.comments import Comment\r\n\r\ndef comment(request, object_pk):\r\n mycomment = Comment.objects.get(object_pk = object_pk)\r\n text = '\u0026lt;strong\u0026gt;User :\u0026lt;/strong\u0026gt; %s \u0026lt;p\u0026gt;'%mycomment.user_name\u0026lt;/p\u0026gt;\r\n text += '\u0026lt;strong\u0026gt;Comment :\u0026lt;/strong\u0026gt; %s \u0026lt;p\u0026gt;'%mycomment.comment\u0026lt;/p\u0026gt;\r\n return HttpResponse(text)\u0026nbsp;\u003c/pre\u003e \n\u003cp\u003e 我們還需要一些網址在myapp\u0026nbsp;urls.py中映射\u0026nbsp;− \u003c/p\u003e \n\u003cpre\u003efrom myapp.feeds import DreamrealCommentsFeed\r\nfrom django.conf.urls import patterns, url\r\n\r\nurlpatterns += patterns('',\r\n url(r'^latest/comments/', DreamrealCommentsFeed()),\r\n url(r'^comment/(?P\\w+)/', 'comment', name = 'comment'),\r\n)\u0026nbsp;\u003c/pre\u003e \n\u003cp\u003e 當訪問/myapp/latest/comments/會得到 feed\u0026nbsp;−\u003cbr\u003e \u003cimg src=\"https://asset.1ju.org/cmsstatic/django-rss-1.jpg\" alt=\"Django RSS\"\u003e \u003c/p\u003e \n\u003cp\u003e 當點擊其中的一個用戶名都會得到:/myapp/comment/comment_id\u0026nbsp;在您的評論視圖定義之前,會得到\u0026nbsp;−\u003cbr\u003e \u003cimg src=\"https://asset.1ju.org/cmsstatic/django-rss-2.jpg\" alt=\"Django RSS\"\u003e \u003c/p\u003e \n\u003cp\u003e 因此,定義一個RSS源是\u0026nbsp;Feed\u0026nbsp;類的子類,並確保這些URL(一個用於訪問feed,一個用於訪問feed元素)的定義。\u0026nbsp;正如評論,這可以連接到您的應用程序的任何模型。 \u003c/p\u003e \n\u003cdiv\u003e \n \u003cbr\u003e \n\u003c/div\u003e \n\u003cbr\u003e"])</script><script>self.__next_f.push([1,"2a:T8ce,"])</script><script>self.__next_f.push([1,"Django帶有聚合feed生成框架。有了它,你可以創建RSS或Atom只需繼承django.contrib.syndication.views.Feed類。\n\n讓我們創建一個訂閱源的應用程序。\n\nfrom django.contrib.syndication.views import Feed\nfrom django.contrib.comments import Comment\nfrom django.core.urlresolvers import reverse\n\nclass DreamrealCommentsFeed(Feed):\n title = \"Dreamreal's comments\"\n link = \"/drcomments/\"\n description = \"Updates on new comments on Dreamreal entry.\"\n\n def items(self):\n return Comment.objects.all().order\\_by(\"-submit\\_date\")\\[:5\\]\n\t\t\n def item\\_title(self, item):\n return item.user\\_name\n\t\t\n def item\\_description(self, item):\n return item.comment\n\t\t\n def item\\_link(self, item):\n return reverse('comment', kwargs = {'object\\_pk':item.pk}) \n\n* 在feed類, title, link 和 description 屬性對應標準RSS 的\u003ctitle\u003e, \u003clink\u003e 和 \u003cdescription\u003e元素。\n \n* 條目方法返回應該進入feed的item的元素。在我們的示例中是最後五個註釋。\n \n\n現在,我們有feed,並添加評論在視圖views.py,以顯示我們的評論−\n\nfrom django.contrib.comments import Comment\n\ndef comment(request, object\\_pk):\n mycomment = Comment.objects.get(object\\_pk = object\\_pk)\n text = '\u003cstrong\u003eUser :\u003c/strong\u003e %s \u003cp\u003e'%mycomment.user\\_name\u003c/p\u003e\n text += '\u003cstrong\u003eComment :\u003c/strong\u003e %s \u003cp\u003e'%mycomment.comment\u003c/p\u003e\n return HttpResponse(text) \n\n我們還需要一些網址在myapp urls.py中映射 −\n\nfrom myapp.feeds import DreamrealCommentsFeed\nfrom django.conf.urls import patterns, url\n\nurlpatterns += patterns('',\n url(r'^latest/comments/', DreamrealCommentsFeed()),\n url(r'^comment/(?P\\\\w+)/', 'comment', name = 'comment'),\n) \n\n當訪問/myapp/latest/comments/會得到 feed − \n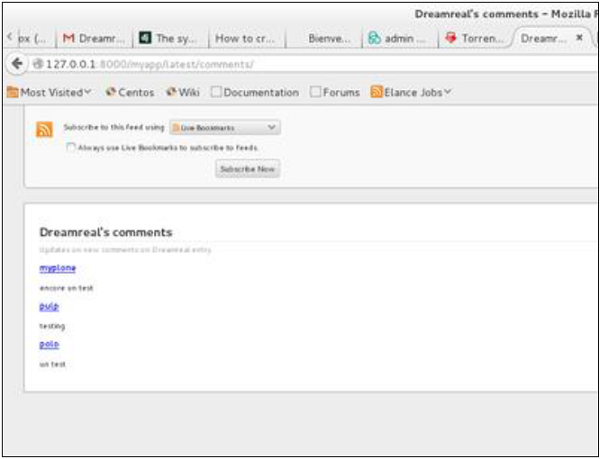\n\n當點擊其中的一個用戶名都會得到:/myapp/comment/comment\\_id 在您的評論視圖定義之前,會得到 − \n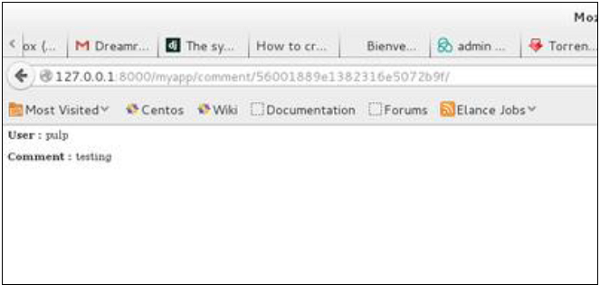\n\n因此,定義一個RSS源是 Feed 類的子類,並確保這些URL(一個用於訪問feed,一個用於訪問feed元素)的定義。 正如評論,這可以連接到您的應用程序的任何模型。"])</script><script>self.__next_f.push([1,"2b:Taa6,"])</script><script>self.__next_f.push([1,"\u003cp\u003eDjango帶有聚合feed生成框架。有了它,你可以創建RSS或Atom只需繼承django.contrib.syndication.views.Feed類。\u003c/p\u003e\n\u003cp\u003e讓我們創建一個訂閱源的應用程序。\u003c/p\u003e\n\u003cp\u003efrom django.contrib.syndication.views import Feed\u003cbr\u003efrom django.contrib.comments import Comment\u003cbr\u003efrom django.core.urlresolvers import reverse\u003c/p\u003e\n\u003cp\u003eclass DreamrealCommentsFeed(Feed):\u003cbr\u003e title = \u0026quot;Dreamreal\u0026#39;s comments\u0026quot;\u003cbr\u003e link = \u0026quot;/drcomments/\u0026quot;\u003cbr\u003e description = \u0026quot;Updates on new comments on Dreamreal entry.\u0026quot;\u003c/p\u003e\n\u003cp\u003e def items(self):\u003cbr\u003e return Comment.objects.all().order_by(\u0026quot;-submit_date\u0026quot;)[:5]\u003c/p\u003e\n\u003cp\u003e def item_title(self, item):\u003cbr\u003e return item.user_name\u003c/p\u003e\n\u003cp\u003e def item_description(self, item):\u003cbr\u003e return item.comment\u003c/p\u003e\n\u003cp\u003e def item_link(self, item):\u003cbr\u003e return reverse(\u0026#39;comment\u0026#39;, kwargs = {\u0026#39;object_pk\u0026#39;:item.pk}) \u003c/p\u003e\n\u003cul\u003e\n\u003cli\u003e\u003cp\u003e 在feed類, title, link 和 description 屬性對應標準RSS 的\u003ctitle\u003e, \u003clink\u003e 和 \u003cdescription\u003e元素。\u003c/p\u003e\n\u003c/li\u003e\n\u003cli\u003e\u003cp\u003e 條目方法返回應該進入feed的item的元素。在我們的示例中是最後五個註釋。\u003c/p\u003e\n\u003c/li\u003e\n\u003c/ul\u003e\n\u003cp\u003e現在,我們有feed,並添加評論在視圖views.py,以顯示我們的評論−\u003c/p\u003e\n\u003cp\u003efrom django.contrib.comments import Comment\u003c/p\u003e\n\u003cp\u003edef comment(request, object_pk):\u003cbr\u003e mycomment = Comment.objects.get(object_pk = object_pk)\u003cbr\u003e text = \u0026#39;\u003cstrong\u003eUser :\u003c/strong\u003e %s \u003cp\u003e\u0026#39;%mycomment.user_name\u003c/p\u003e\u003cbr\u003e text += \u0026#39;\u003cstrong\u003eComment :\u003c/strong\u003e %s \u003cp\u003e\u0026#39;%mycomment.comment\u003c/p\u003e\u003cbr\u003e return HttpResponse(text) \u003c/p\u003e\n\u003cp\u003e我們還需要一些網址在myapp urls.py中映射 −\u003c/p\u003e\n\u003cp\u003efrom myapp.feeds import DreamrealCommentsFeed\u003cbr\u003efrom django.conf.urls import patterns, url\u003c/p\u003e\n\u003cp\u003eurlpatterns += patterns(\u0026#39;\u0026#39;,\u003cbr\u003e url(r\u0026#39;^latest/comments/\u0026#39;, DreamrealCommentsFeed()),\u003cbr\u003e url(r\u0026#39;^comment/(?P\\w+)/\u0026#39;, \u0026#39;comment\u0026#39;, name = \u0026#39;comment\u0026#39;),\u003cbr\u003e) \u003c/p\u003e\n\u003cp\u003e當訪問/myapp/latest/comments/會得到 feed −\u003cbr\u003e\n \u003cimg src=https://asset.1ju.org/cmsstatic/django-rss-1.jpg loading='lazy' alt=Django RSS class='my-8 w-full relative rounded-sm object-cover shadow-lg' /\u003e\n\u003c/p\u003e\n\u003cp\u003e當點擊其中的一個用戶名都會得到:/myapp/comment/comment_id 在您的評論視圖定義之前,會得到 −\u003cbr\u003e\n \u003cimg src=https://asset.1ju.org/cmsstatic/django-rss-2.jpg loading='lazy' alt=Django RSS class='my-8 w-full relative rounded-sm object-cover shadow-lg' /\u003e\n\u003c/p\u003e\n\u003cp\u003e因此,定義一個RSS源是 Feed 類的子類,並確保這些URL(一個用於訪問feed,一個用於訪問feed元素)的定義。 正如評論,這可以連接到您的應用程序的任何模型。\u003c/p\u003e\n"])</script><script>self.__next_f.push([1,"2e:Taa6,"])</script><script>self.__next_f.push([1,"\u003cp\u003eDjango帶有聚合feed生成框架。有了它,你可以創建RSS或Atom只需繼承django.contrib.syndication.views.Feed類。\u003c/p\u003e\n\u003cp\u003e讓我們創建一個訂閱源的應用程序。\u003c/p\u003e\n\u003cp\u003efrom django.contrib.syndication.views import Feed\u003cbr\u003efrom django.contrib.comments import Comment\u003cbr\u003efrom django.core.urlresolvers import reverse\u003c/p\u003e\n\u003cp\u003eclass DreamrealCommentsFeed(Feed):\u003cbr\u003e title = \u0026quot;Dreamreal\u0026#39;s comments\u0026quot;\u003cbr\u003e link = \u0026quot;/drcomments/\u0026quot;\u003cbr\u003e description = \u0026quot;Updates on new comments on Dreamreal entry.\u0026quot;\u003c/p\u003e\n\u003cp\u003e def items(self):\u003cbr\u003e return Comment.objects.all().order_by(\u0026quot;-submit_date\u0026quot;)[:5]\u003c/p\u003e\n\u003cp\u003e def item_title(self, item):\u003cbr\u003e return item.user_name\u003c/p\u003e\n\u003cp\u003e def item_description(self, item):\u003cbr\u003e return item.comment\u003c/p\u003e\n\u003cp\u003e def item_link(self, item):\u003cbr\u003e return reverse(\u0026#39;comment\u0026#39;, kwargs = {\u0026#39;object_pk\u0026#39;:item.pk}) \u003c/p\u003e\n\u003cul\u003e\n\u003cli\u003e\u003cp\u003e 在feed類, title, link 和 description 屬性對應標準RSS 的\u003ctitle\u003e, \u003clink\u003e 和 \u003cdescription\u003e元素。\u003c/p\u003e\n\u003c/li\u003e\n\u003cli\u003e\u003cp\u003e 條目方法返回應該進入feed的item的元素。在我們的示例中是最後五個註釋。\u003c/p\u003e\n\u003c/li\u003e\n\u003c/ul\u003e\n\u003cp\u003e現在,我們有feed,並添加評論在視圖views.py,以顯示我們的評論−\u003c/p\u003e\n\u003cp\u003efrom django.contrib.comments import Comment\u003c/p\u003e\n\u003cp\u003edef comment(request, object_pk):\u003cbr\u003e mycomment = Comment.objects.get(object_pk = object_pk)\u003cbr\u003e text = \u0026#39;\u003cstrong\u003eUser :\u003c/strong\u003e %s \u003cp\u003e\u0026#39;%mycomment.user_name\u003c/p\u003e\u003cbr\u003e text += \u0026#39;\u003cstrong\u003eComment :\u003c/strong\u003e %s \u003cp\u003e\u0026#39;%mycomment.comment\u003c/p\u003e\u003cbr\u003e return HttpResponse(text) \u003c/p\u003e\n\u003cp\u003e我們還需要一些網址在myapp urls.py中映射 −\u003c/p\u003e\n\u003cp\u003efrom myapp.feeds import DreamrealCommentsFeed\u003cbr\u003efrom django.conf.urls import patterns, url\u003c/p\u003e\n\u003cp\u003eurlpatterns += patterns(\u0026#39;\u0026#39;,\u003cbr\u003e url(r\u0026#39;^latest/comments/\u0026#39;, DreamrealCommentsFeed()),\u003cbr\u003e url(r\u0026#39;^comment/(?P\\w+)/\u0026#39;, \u0026#39;comment\u0026#39;, name = \u0026#39;comment\u0026#39;),\u003cbr\u003e) \u003c/p\u003e\n\u003cp\u003e當訪問/myapp/latest/comments/會得到 feed −\u003cbr\u003e\n \u003cimg src=https://asset.1ju.org/cmsstatic/django-rss-1.jpg loading='lazy' alt=Django RSS class='my-8 w-full relative rounded-sm object-cover shadow-lg' /\u003e\n\u003c/p\u003e\n\u003cp\u003e當點擊其中的一個用戶名都會得到:/myapp/comment/comment_id 在您的評論視圖定義之前,會得到 −\u003cbr\u003e\n \u003cimg src=https://asset.1ju.org/cmsstatic/django-rss-2.jpg loading='lazy' alt=Django RSS class='my-8 w-full relative rounded-sm object-cover shadow-lg' /\u003e\n\u003c/p\u003e\n\u003cp\u003e因此,定義一個RSS源是 Feed 類的子類,並確保這些URL(一個用於訪問feed,一個用於訪問feed元素)的定義。 正如評論,這可以連接到您的應用程序的任何模型。\u003c/p\u003e\n"])</script><script>self.__next_f.push([1,"30:Ta39,"])</script><script>self.__next_f.push([1,"\u003cdiv\u003e\n Django帶有聚合feed生成框架。有了它,你可以創建RSS或Atom只需繼承django.contrib.syndication.views.Feed類。 \n\u003c/div\u003e \n\u003cp\u003e 讓我們創建一個訂閱源的應用程序。 \u003c/p\u003e \n\u003cpre\u003efrom django.contrib.syndication.views import Feed\r\nfrom django.contrib.comments import Comment\r\nfrom django.core.urlresolvers import reverse\r\n\r\nclass DreamrealCommentsFeed(Feed):\r\n title = \"Dreamreal's comments\"\r\n link = \"/drcomments/\"\r\n description = \"Updates on new comments on Dreamreal entry.\"\r\n\r\n def items(self):\r\n return Comment.objects.all().order_by(\"-submit_date\")[:5]\r\n\t\t\r\n def item_title(self, item):\r\n return item.user_name\r\n\t\t\r\n def item_description(self, item):\r\n return item.comment\r\n\t\t\r\n def item_link(self, item):\r\n return reverse('comment', kwargs = {'object_pk':item.pk})\u0026nbsp;\u003c/pre\u003e \n\u003cul\u003e \n \u003cli\u003e \u003cp\u003e 在feed類,\u0026nbsp;title,\u0026nbsp;link\u0026nbsp;和\u0026nbsp;description\u0026nbsp;屬性對應標準RSS\u0026nbsp;的\u0026lt;title\u0026gt;,\u0026nbsp;\u0026lt;link\u0026gt;\u0026nbsp;和\u0026nbsp;\u0026lt;description\u0026gt;元素。 \u003c/p\u003e \u003c/li\u003e \n \u003cli\u003e \u003cp\u003e 條目方法返回應該進入feed的item的元素。在我們的示例中是最後五個註釋。 \u003c/p\u003e \u003c/li\u003e \n\u003c/ul\u003e \n\u003cp\u003e 現在,我們有feed,並添加評論在視圖views.py,以顯示我們的評論− \u003c/p\u003e \n\u003cpre\u003efrom django.contrib.comments import Comment\r\n\r\ndef comment(request, object_pk):\r\n mycomment = Comment.objects.get(object_pk = object_pk)\r\n text = '\u0026lt;strong\u0026gt;User :\u0026lt;/strong\u0026gt; %s \u0026lt;p\u0026gt;'%mycomment.user_name\u0026lt;/p\u0026gt;\r\n text += '\u0026lt;strong\u0026gt;Comment :\u0026lt;/strong\u0026gt; %s \u0026lt;p\u0026gt;'%mycomment.comment\u0026lt;/p\u0026gt;\r\n return HttpResponse(text)\u0026nbsp;\u003c/pre\u003e \n\u003cp\u003e 我們還需要一些網址在myapp\u0026nbsp;urls.py中映射\u0026nbsp;− \u003c/p\u003e \n\u003cpre\u003efrom myapp.feeds import DreamrealCommentsFeed\r\nfrom django.conf.urls import patterns, url\r\n\r\nurlpatterns += patterns('',\r\n url(r'^latest/comments/', DreamrealCommentsFeed()),\r\n url(r'^comment/(?P\\w+)/', 'comment', name = 'comment'),\r\n)\u0026nbsp;\u003c/pre\u003e \n\u003cp\u003e 當訪問/myapp/latest/comments/會得到 feed\u0026nbsp;−\u003cbr\u003e \u003cimg src=\"https://asset.1ju.org/cmsstatic/django-rss-1.jpg\" alt=\"Django RSS\"\u003e \u003c/p\u003e \n\u003cp\u003e 當點擊其中的一個用戶名都會得到:/myapp/comment/comment_id\u0026nbsp;在您的評論視圖定義之前,會得到\u0026nbsp;−\u003cbr\u003e \u003cimg src=\"https://asset.1ju.org/cmsstatic/django-rss-2.jpg\" alt=\"Django RSS\"\u003e \u003c/p\u003e \n\u003cp\u003e 因此,定義一個RSS源是\u0026nbsp;Feed\u0026nbsp;類的子類,並確保這些URL(一個用於訪問feed,一個用於訪問feed元素)的定義。\u0026nbsp;正如評論,這可以連接到您的應用程序的任何模型。 \u003c/p\u003e \n\u003cdiv\u003e \n \u003cbr\u003e \n\u003c/div\u003e \n\u003cbr\u003e"])</script><script>self.__next_f.push([1,"31:T8ce,"])</script><script>self.__next_f.push([1,"Django帶有聚合feed生成框架。有了它,你可以創建RSS或Atom只需繼承django.contrib.syndication.views.Feed類。\n\n讓我們創建一個訂閱源的應用程序。\n\nfrom django.contrib.syndication.views import Feed\nfrom django.contrib.comments import Comment\nfrom django.core.urlresolvers import reverse\n\nclass DreamrealCommentsFeed(Feed):\n title = \"Dreamreal's comments\"\n link = \"/drcomments/\"\n description = \"Updates on new comments on Dreamreal entry.\"\n\n def items(self):\n return Comment.objects.all().order\\_by(\"-submit\\_date\")\\[:5\\]\n\t\t\n def item\\_title(self, item):\n return item.user\\_name\n\t\t\n def item\\_description(self, item):\n return item.comment\n\t\t\n def item\\_link(self, item):\n return reverse('comment', kwargs = {'object\\_pk':item.pk}) \n\n* 在feed類, title, link 和 description 屬性對應標準RSS 的\u003ctitle\u003e, \u003clink\u003e 和 \u003cdescription\u003e元素。\n \n* 條目方法返回應該進入feed的item的元素。在我們的示例中是最後五個註釋。\n \n\n現在,我們有feed,並添加評論在視圖views.py,以顯示我們的評論−\n\nfrom django.contrib.comments import Comment\n\ndef comment(request, object\\_pk):\n mycomment = Comment.objects.get(object\\_pk = object\\_pk)\n text = '\u003cstrong\u003eUser :\u003c/strong\u003e %s \u003cp\u003e'%mycomment.user\\_name\u003c/p\u003e\n text += '\u003cstrong\u003eComment :\u003c/strong\u003e %s \u003cp\u003e'%mycomment.comment\u003c/p\u003e\n return HttpResponse(text) \n\n我們還需要一些網址在myapp urls.py中映射 −\n\nfrom myapp.feeds import DreamrealCommentsFeed\nfrom django.conf.urls import patterns, url\n\nurlpatterns += patterns('',\n url(r'^latest/comments/', DreamrealCommentsFeed()),\n url(r'^comment/(?P\\\\w+)/', 'comment', name = 'comment'),\n) \n\n當訪問/myapp/latest/comments/會得到 feed − \n\n\n當點擊其中的一個用戶名都會得到:/myapp/comment/comment\\_id 在您的評論視圖定義之前,會得到 − \n\n\n因此,定義一個RSS源是 Feed 類的子類,並確保這些URL(一個用於訪問feed,一個用於訪問feed元素)的定義。 正如評論,這可以連接到您的應用程序的任何模型。"])</script><script>self.__next_f.push([1,"32:Taa6,"])</script><script>self.__next_f.push([1,"\u003cp\u003eDjango帶有聚合feed生成框架。有了它,你可以創建RSS或Atom只需繼承django.contrib.syndication.views.Feed類。\u003c/p\u003e\n\u003cp\u003e讓我們創建一個訂閱源的應用程序。\u003c/p\u003e\n\u003cp\u003efrom django.contrib.syndication.views import Feed\u003cbr\u003efrom django.contrib.comments import Comment\u003cbr\u003efrom django.core.urlresolvers import reverse\u003c/p\u003e\n\u003cp\u003eclass DreamrealCommentsFeed(Feed):\u003cbr\u003e title = \u0026quot;Dreamreal\u0026#39;s comments\u0026quot;\u003cbr\u003e link = \u0026quot;/drcomments/\u0026quot;\u003cbr\u003e description = \u0026quot;Updates on new comments on Dreamreal entry.\u0026quot;\u003c/p\u003e\n\u003cp\u003e def items(self):\u003cbr\u003e return Comment.objects.all().order_by(\u0026quot;-submit_date\u0026quot;)[:5]\u003c/p\u003e\n\u003cp\u003e def item_title(self, item):\u003cbr\u003e return item.user_name\u003c/p\u003e\n\u003cp\u003e def item_description(self, item):\u003cbr\u003e return item.comment\u003c/p\u003e\n\u003cp\u003e def item_link(self, item):\u003cbr\u003e return reverse(\u0026#39;comment\u0026#39;, kwargs = {\u0026#39;object_pk\u0026#39;:item.pk}) \u003c/p\u003e\n\u003cul\u003e\n\u003cli\u003e\u003cp\u003e 在feed類, title, link 和 description 屬性對應標準RSS 的\u003ctitle\u003e, \u003clink\u003e 和 \u003cdescription\u003e元素。\u003c/p\u003e\n\u003c/li\u003e\n\u003cli\u003e\u003cp\u003e 條目方法返回應該進入feed的item的元素。在我們的示例中是最後五個註釋。\u003c/p\u003e\n\u003c/li\u003e\n\u003c/ul\u003e\n\u003cp\u003e現在,我們有feed,並添加評論在視圖views.py,以顯示我們的評論−\u003c/p\u003e\n\u003cp\u003efrom django.contrib.comments import Comment\u003c/p\u003e\n\u003cp\u003edef comment(request, object_pk):\u003cbr\u003e mycomment = Comment.objects.get(object_pk = object_pk)\u003cbr\u003e text = \u0026#39;\u003cstrong\u003eUser :\u003c/strong\u003e %s \u003cp\u003e\u0026#39;%mycomment.user_name\u003c/p\u003e\u003cbr\u003e text += \u0026#39;\u003cstrong\u003eComment :\u003c/strong\u003e %s \u003cp\u003e\u0026#39;%mycomment.comment\u003c/p\u003e\u003cbr\u003e return HttpResponse(text) \u003c/p\u003e\n\u003cp\u003e我們還需要一些網址在myapp urls.py中映射 −\u003c/p\u003e\n\u003cp\u003efrom myapp.feeds import DreamrealCommentsFeed\u003cbr\u003efrom django.conf.urls import patterns, url\u003c/p\u003e\n\u003cp\u003eurlpatterns += patterns(\u0026#39;\u0026#39;,\u003cbr\u003e url(r\u0026#39;^latest/comments/\u0026#39;, DreamrealCommentsFeed()),\u003cbr\u003e url(r\u0026#39;^comment/(?P\\w+)/\u0026#39;, \u0026#39;comment\u0026#39;, name = \u0026#39;comment\u0026#39;),\u003cbr\u003e) \u003c/p\u003e\n\u003cp\u003e當訪問/myapp/latest/comments/會得到 feed −\u003cbr\u003e\n \u003cimg src=https://asset.1ju.org/cmsstatic/django-rss-1.jpg loading='lazy' alt=Django RSS class='my-8 w-full relative rounded-sm object-cover shadow-lg' /\u003e\n\u003c/p\u003e\n\u003cp\u003e當點擊其中的一個用戶名都會得到:/myapp/comment/comment_id 在您的評論視圖定義之前,會得到 −\u003cbr\u003e\n \u003cimg src=https://asset.1ju.org/cmsstatic/django-rss-2.jpg loading='lazy' alt=Django RSS class='my-8 w-full relative rounded-sm object-cover shadow-lg' /\u003e\n\u003c/p\u003e\n\u003cp\u003e因此,定義一個RSS源是 Feed 類的子類,並確保這些URL(一個用於訪問feed,一個用於訪問feed元素)的定義。 正如評論,這可以連接到您的應用程序的任何模型。\u003c/p\u003e\n"])</script><script>self.__next_f.push([1,"33:Tba3,"])</script><script>self.__next_f.push([1,"\u003cdiv\u003e \n \u003cdiv\u003e\n Django是一個高層次的 Python\u0026nbsp;Web 框架,它是一個鼓勵快速開發和乾淨,實用的框架設計。Django可以更容易地快速構建更好的Web應用程序,並且它使用更少的代碼。 \n \u003c/div\u003e \n\u003c/div\u003e \n\u003cdiv\u003e \n \u003cp\u003e \u003cstrong\u003e注意\u003c/strong\u003e\u0026nbsp;−\u0026nbsp;Django是Django 軟件基金會的一個註冊商標,並在BSD許可證授權。 \u003c/p\u003e \n \u003ch2\u003e Django的歷史 \u003c/h2\u003e \n \u003cul\u003e \n \u003cli\u003e \u003cp\u003e 2003\u0026nbsp;−\u0026nbsp;開始時,由Adrian\u0026nbsp;Holovaty和Simon\u0026nbsp;Willison\u0026nbsp;將其作爲勞倫斯雜誌\u0026nbsp;-\u0026nbsp;世界報紙的一個內部項目。 \u003c/p\u003e \u003c/li\u003e \n \u003cli\u003e \u003cp\u003e 2005\u0026nbsp;−\u0026nbsp;把它命名爲Django發佈2005年7月,在爵士吉他手Django Reinhardt 之後。 \u003c/p\u003e \u003c/li\u003e \n \u003cli\u003e \u003cp\u003e 2005\u0026nbsp;−\u0026nbsp;成熟到可以處理多個高流量網站。 \u003c/p\u003e \u003c/li\u003e \n \u003cli\u003e \u003cp\u003e 當前\u0026nbsp;−\u0026nbsp;Django是由世界各地的貢獻者來開發的一個開源項目。 \u003c/p\u003e \u003c/li\u003e \n \u003c/ul\u003e \n \u003ch2\u003e \n \u003cdiv\u003e\n Django的設計理念 \n \u003c/div\u003e \u003c/h2\u003e \n \u003cp\u003e Django自帶了以下設計原則\u0026nbsp;− \u003c/p\u003e \n \u003cul\u003e \n \u003cli\u003e \u003cp\u003e \u003cstrong\u003e鬆耦合\u003c/strong\u003e\u0026nbsp;−\u0026nbsp;Django的目的是使其堆棧中的每個元素獨立於其他。 \u003c/p\u003e \u003c/li\u003e \n \u003cli\u003e \u003cp\u003e \u003cstrong\u003e較少編碼\u003c/strong\u003e\u0026nbsp;−\u0026nbsp;較少代碼,所以能迅速的開發。 \u003c/p\u003e \u003c/li\u003e \n \u003cli\u003e \u003cp\u003e \u003cstrong\u003e不必再重複(DRY)\u0026nbsp;\u003c/strong\u003e−\u0026nbsp;一切都應只在一個地方,而不是一次又一次地重複來開發它。 \u003c/p\u003e \u003c/li\u003e \n \u003cli\u003e \u003cp\u003e \u003cstrong\u003e更快的開發\u003c/strong\u003e\u0026nbsp;−\u0026nbsp;Django的理念是盡一切所能,便於超高速開發。 \u003c/p\u003e \u003c/li\u003e \n \u003cli\u003e \u003cp\u003e \u003cstrong\u003e乾淨的設計\u003c/strong\u003e\u0026nbsp;−\u0026nbsp;Django嚴格維護一個乾淨的設計在其自己的代碼,並可以很容易地遵循最佳Web開發實踐。 \u003c/p\u003e \u003c/li\u003e \n \u003c/ul\u003e \n \u003ch2\u003e \n \u003cdiv\u003e\n Django的優勢 \n \u003c/div\u003e \u003c/h2\u003e \n \u003cdiv\u003e\n 下面是使用\u0026nbsp;Django\u0026nbsp;列出一些優勢- \n \u003c/div\u003e \n \u003cul\u003e \n \u003cli\u003e \u003cp\u003e \u003cstrong\u003e對象關係映射(ORM)支持\u003c/strong\u003e\u0026nbsp;−\u0026nbsp;Django提供數據模型和數據庫引擎之間的橋樑,\u0026nbsp;並支持大量的數據庫系統,包括MySQL,\u0026nbsp;Oracle,\u0026nbsp;Postgres等等。在Django中還支持通過Django-nonrel\u0026nbsp;支持\u0026nbsp;NoSQL 數據庫。 \u003c/p\u003e \n \u003cdiv\u003e\n 現在,唯一的NoSQL數據庫方面支持是MongoDB和谷歌應用程序引擎。 \n \u003c/div\u003e \u003c/li\u003e \n \u003cli\u003e \u003cp\u003e \u003cstrong\u003e多種語言支持\u003c/strong\u003e\u0026nbsp;−\u0026nbsp;Django通過其內置的國際化系統支持多語種網站。所以,可以開發支持多國語言的網站。 \u003c/p\u003e \u003c/li\u003e \n \u003cli\u003e \u003cp\u003e \u003cstrong\u003e框架支持\u0026nbsp;\u003c/strong\u003e−\u0026nbsp;Django內置了對Ajax,RSS,緩存和其他各種框架的支持。 \u003c/p\u003e \u003c/li\u003e \n \u003cli\u003e \u003cp\u003e \u003cstrong\u003e管理GUI\u0026nbsp;\u003c/strong\u003e−\u0026nbsp;Django提供用於管理活動的一個很好的用戶界面。 \u003c/p\u003e \u003c/li\u003e \n \u003cli\u003e \u003cp\u003e \u003cstrong\u003e開發環境\u003c/strong\u003e\u0026nbsp;−\u0026nbsp;Django自帶了一個輕量級的Web服務器,方便終端到終端應用的開發和測試。 \u003c/p\u003e \u003c/li\u003e \n \u003c/ul\u003e \n\u003c/div\u003e \n\u003cbr\u003e"])</script><script>self.__next_f.push([1,"34:T18b9,"])</script><script>self.__next_f.push([1,"\u003cdiv\u003e \n \u003cdiv\u003e\n Django開發環境安裝和設置包括Python,Django,和數據庫系統。由於Django處理Web應用程序,這裏值得一提的是,你需也需要設置一個Web服務器。 \n \u003c/div\u003e \n\u003c/div\u003e \n\u003cdiv\u003e \n \u003ch2\u003e 第1步\u0026nbsp;-\u0026nbsp;安裝Python \u003c/h2\u003e \n \u003cp\u003e Django是用100%純Python代碼編寫,所以需要在你的系統上安裝Python。最新Django的版本需要Python2.6.5或高於2.6.x分支或2.7.3或高於2.7.x\u0026nbsp;的分支,本教程中我們使用的是 Python2.7 和 Django-1.9.1。 \u003c/p\u003e \n \u003cp\u003e 如果是在最新的 Linux 或 Mac\u0026nbsp;OS\u0026nbsp;X,在這些系統可能已經安裝了Python。可以通過在命令提示符下鍵入命令:python\u0026nbsp;來驗證它。如果你看到類似下面這樣的輸出,那麼說明Python已經安裝了。 \u003c/p\u003e \n \u003cpre\u003e$ python\r\nPython 2.7.5 (default, Jun 17 2014, 18:11:42)\r\n[GCC 4.8.2 20140120 (Red Hat 4.8.2-16)] on linux2\u0026nbsp;\u003c/pre\u003e \n \u003cp\u003e 否則,你可以從下面的鏈接下載最新版本安裝Python:\u0026nbsp;\u003ca href=\"https://www.python.org/downloads/\"\u003ehttp://www.python.org/download\u003c/a\u003e. 下面是對應的版本: \u003c/p\u003e \n \u003ctable\u003e \n \u003ctbody\u003e \n \u003ctr\u003e \n \u003cth\u003e Django 版本 \u003c/th\u003e \n \u003cth\u003e Python 版本 \u003c/th\u003e \n \u003c/tr\u003e \n \u003c/tbody\u003e \n \u003ctbody\u003e \n \u003ctr\u003e \n \u003ctd\u003e 1.8 \u003c/td\u003e \n \u003ctd\u003e 2.7, 3.2 (until the end of 2016), 3.3, 3.4, 3.5 \u003c/td\u003e \n \u003c/tr\u003e \n \u003ctr\u003e \n \u003ctd\u003e \u003cstrong\u003e1.9, 1.10\u003c/strong\u003e \u003c/td\u003e \n \u003ctd\u003e \u003cstrong\u003e2.7, 3.4, 3.5\u003c/strong\u003e \u003c/td\u003e \n \u003c/tr\u003e \n \u003c/tbody\u003e \n \u003c/table\u003e \n \u003ch2\u003e \u003c/h2\u003e \n \u003ch2\u003e 第2步\u0026nbsp;-\u0026nbsp;安裝的Django \u003c/h2\u003e \n \u003cp\u003e 安裝Django是很容易的,但需要其安裝的步驟取決於您的操作系統。因爲Python是一種與平臺無關的語言,Django有一個包它可工作在任何地方,而不管您的操作系統。 \u003c/p\u003e \n \u003cp\u003e 您可以從該鏈接下載 Django 的最新版本:\u003ca href=\"https://www.djangoproject.com/download/\"\u003ehttp://www.djangoproject.com/download\u003c/a\u003e. \u003c/p\u003e \n \u003cp\u003e 注:本教程是基於 Window7 64bit 來作實例開發。 \u003c/p\u003e \n \u003ch3\u003e \n \u003cdiv\u003e\n UNIX/Linux和Mac\u0026nbsp;OS\u0026nbsp;X安裝 \n \u003c/div\u003e \u003c/h3\u003e \n \u003cp\u003e 如果你運行的是Linux或Mac\u0026nbsp;OS系統,那麼可以有兩種方式來安裝Django\u0026nbsp;− \u003c/p\u003e \n \u003cul\u003e \n \u003cli\u003e \n \u003cdiv\u003e\n 可以使用包管理器的操作系統可以使用\u0026nbsp;easy_install\u0026nbsp;或\u0026nbsp;pip\u0026nbsp;安裝。 \n \u003c/div\u003e \u003c/li\u003e \n \u003cli\u003e \n \u003cdiv\u003e\n 在手動安裝之前您手動下載的官方壓縮包。 \n \u003c/div\u003e \u003c/li\u003e \n \u003c/ul\u003e \n \u003cp\u003e 我們將介紹第二個選項作爲第一個,看你的操作系統類型。\u0026nbsp;如果你決定按照第一種選擇,那麼需要注意的是\u0026nbsp;Django\u0026nbsp;安裝的版本。 \u003c/p\u003e \n \u003cdiv\u003e\n 比方說,你從上面的鏈接下載了壓縮包,它應該是類似這樣\u0026nbsp;Django\u0026nbsp;x.xx.tar.gz: \n \u003c/div\u003e \n \u003cdiv\u003e\n 解壓並安裝。 \n \u003c/div\u003e \n \u003cpre\u003e$ tar xzvf Django-x.xx.tar.gz\r\n$ cd Django-x.xx\r\n$ sudo python setup.py install\u0026nbsp;\u003c/pre\u003e \n \u003cp\u003e 您可以通過運行下面的這個命令來測試你的安裝\u0026nbsp;− \u003c/p\u003e \n \u003cpre\u003e$ django-admin.py --version\r\u003c/pre\u003e \n \u003cdiv\u003e\n 如果你看到打印在屏幕上的當前Django版本,那麼說明一切都設置好了。 \n \u003c/div\u003e \n \u003cdiv\u003e\n 注\u0026nbsp;-\u0026nbsp;對於某些版本的Django\u0026nbsp;它將\u0026nbsp;django-admin\u0026nbsp;的「.py」\u0026nbsp;刪除。 \n \u003c/div\u003e \n \u003ch3\u003e \n \u003cdiv\u003e\n Windows安裝 \n \u003c/div\u003e \u003c/h3\u003e \n \u003cdiv\u003e\n 本教程我們以Window系統來講解演示實例,假設 Django 壓縮和Python安裝在計算機上。 \n \u003c/div\u003e \n \u003cdiv\u003e\n 首先,路徑驗證。 \n \u003c/div\u003e \n \u003cp\u003e 在某些版本的Windows(Windows7)中,可能需要保證Path系統變量的路徑如下,C:\\Python27\\;C:\\Python27\\Lib\\site-packages\\django\\bin\\\u0026nbsp;,\u0026nbsp;當然這取決於你的Python版本。 \u003c/p\u003e \n \u003cdiv\u003e\n 然後,提取和安裝Django,這裏我們放到目錄\u0026nbsp;C:\\Python27\\Django-1.9.1 \n \u003c/div\u003e \n \u003cpre\u003e\u003cspan\u003ec:\\Python27\\Django-1.9.1\u0026gt;\u003c/span\u003e\u003c/pre\u003e \n \u003cdiv\u003e\n 接下來,安裝\u0026nbsp;Django\u0026nbsp;需要運行下面的命令,你在窗口需要管理員權限來執行Shell\u0026nbsp;命令\u0026nbsp;「cmd」\u0026nbsp;- \n \u003c/div\u003e \n \u003cpre\u003e\u003cspan\u003eC:\\Python27\\Django-1.9.1\u0026gt;\u003c/span\u003epython setup.py install\u0026nbsp;\u003c/pre\u003e \n \u003cp\u003e 經過一段時間後,所顯示的結果如下圖所示: \u003c/p\u003e \n \u003cp\u003e \u003cimg src=\"https://asset.1ju.org/cmsstatic/django-1.png\" alt=\"Django開發環境安裝配置\"\u003e \u003c/p\u003e \n \u003cp\u003e 要測試你的安裝,打開命令提示符,然後鍵入以下命令− \u003c/p\u003e \n \u003cpre\u003ec:\\\u0026gt;django-admin.py --version\r\u003c/pre\u003e \n \u003cdiv\u003e\n 如果你看到 Django 的當前版本顯示在屏幕上,那麼一切設置都 OK 了。 \n \u003c/div\u003e \n \u003cp\u003e \u003cstrong\u003e或者\u003c/strong\u003e \u003c/p\u003e \n \u003cdiv\u003e\n 發出\u0026nbsp;「cmd」\u0026nbsp;提示符,然後鍵入python,然後 - \n \u003c/div\u003e \n \u003cpre\u003ec:\\\u0026gt; python\r\n\u0026gt;\u0026gt;\u0026gt; import django\r\n\u0026gt;\u0026gt;\u0026gt; print django.get_version()\r\u003c/pre\u003e \n \u003cimg src=\"https://asset.1ju.org/cmsstatic/django-2.png\" alt=\"Django開發環境安裝配置\"\u003e \n \u003cstrong\u003e\u003cbr\u003e \u003c/strong\u003e \n \u003ch2\u003e \u003cstrong\u003e第3步\u0026nbsp;-\u0026nbsp;數據庫安裝\u003c/strong\u003e \u003c/h2\u003e \n \u003cdiv\u003e\n Django支持幾種主要的數據庫引擎,可以根據你的要求。 \n \u003c/div\u003e \n \u003cul\u003e \n \u003cli\u003e \u003ca href=\"http://www.mysql.com/\"\u003eMySQL (http://www.mysql.com/)\u003c/a\u003e \u003c/li\u003e \n \u003cli\u003e \u003ca href=\"http://www.postgresql.org/\"\u003ePostgreSQL (http://www.postgresql.org/)\u003c/a\u003e \u003c/li\u003e \n \u003cli\u003e \u003ca href=\"http://www.sqlite.org/\"\u003eSQLite 3 (http://www.sqlite.org/)\u003c/a\u003e \u003c/li\u003e \n \u003cli\u003e \u003ca href=\"http://www.oracle.com/index.html\"\u003eOracle (http://www.oracle.com/)\u003c/a\u003e \u003c/li\u003e \n \u003cli\u003e \u003ca href=\"https://django-mongodb-engine.readthedocs.org/en/latest/\"\u003eMongoDb (https://django-mongodb-engine.readthedocs.org)\u003c/a\u003e \u003c/li\u003e \n \u003cli\u003e \u003ca href=\"https://cloud.google.com/appengine/articles/django-nonrel\"\u003eGoogleAppEngine Datastore (https://cloud.google.com/appengine/articles/django-nonrel)\u003c/a\u003e \u003c/li\u003e \n \u003c/ul\u003e \n \u003cdiv\u003e\n 可以參考相應的文檔,以安裝和配置您選擇的數據庫。 \n \u003c/div\u003e \n \u003cdiv\u003e\n 注\u0026nbsp;-\u0026nbsp;第5和第6是NoSQL數據庫。 \n \u003c/div\u003e \n \u003ch2\u003e \u003cstrong\u003e第4步\u0026nbsp;-\u0026nbsp;Web服務器\u003c/strong\u003e \u003c/h2\u003e \n \u003cp\u003e Django自帶了一個輕量級的Web服務器,用於開發和測試應用程序。此服務器預配置支持 Django 相關工作,更重要的是它會在開發人員對其修改代碼保存後重新啓動。 \u003c/p\u003e \n \u003cp\u003e 然而,Django支持Apache和其他流行的Web服務器,如:lighttpd。\u0026nbsp;我們將討論在這兩個不同的實例在後續章節。 \u003c/p\u003e \n\u003c/div\u003e \n\u003cbr\u003e"])</script><script>self.__next_f.push([1,"35:T1057,"])</script><script>self.__next_f.push([1,"\u003cdiv\u003e \n \u003cdiv\u003e\n 現在我們已經安裝了Django,讓我們開始使用它。\u0026nbsp;在Django中,每個要創建Web應用程序稱爲項目;\u0026nbsp;一個項目是應用程序的總和。應用程序是一組依託於MVC模式的代碼文件。\u0026nbsp;作爲例子,讓我們要建立一個網站,該網站是我們的項目,論壇,新聞,聯繫方式的應用程序。\u0026nbsp;這種結構使得移動的項目之間的應用更容易,因爲每一個應用程序都是獨立的。 \n \u003c/div\u003e \n\u003c/div\u003e \n\u003cdiv\u003e \n \u003ch2\u003e \n \u003cdiv\u003e\n 創建項目 \n \u003c/div\u003e \u003c/h2\u003e \n \u003cp\u003e 無論您是在Windows或Linux,只是得到一個終端或一個命令提示符並導航至要創建項目的位置,然後執行下面的代碼\u0026nbsp;− \u003c/p\u003e \n \u003cpre\u003e\u003cspan\u003ec:\\\u0026gt; \u003c/span\u003edjango-admin startproject myproject\u0026nbsp;\u003c/pre\u003e \n \u003cp\u003e 這將創建一個「myproject」文件夾結構如下− \u003c/p\u003e \n \u003cpre\u003emyproject/\r\n manage.py\r\n myproject/\r\n __init__.py\r\n settings.py\r\n urls.py\r\n wsgi.py\r\u003c/pre\u003e \n \u003ch2\u003e \n \u003cdiv\u003e\n 項目結構 \n \u003c/div\u003e \u003c/h2\u003e \n \u003cp\u003e 「myproject」文件夾只是你的項目的容器,它實際上包含了兩個元素\u0026nbsp;− \u003c/p\u003e \n \u003cul\u003e \n \u003cli\u003e \u003cp\u003e manage.py\u0026nbsp;−\u0026nbsp;文件是一種項目本地\u0026nbsp;django-admin\u0026nbsp;通過命令行與項目交互(啓動開發服務器,同步數據庫...)。通過 manage.py 可以瞭解可使用的代碼\u0026nbsp;− \u003c/p\u003e \u003c/li\u003e \n \u003c/ul\u003e \n \u003cpre\u003eC:\u0026gt; python manage.py help\r\u003c/pre\u003e \n \u003cul\u003e \n \u003cli\u003e \u003cp\u003e \u0026nbsp;「myproject」 子目錄中\u0026nbsp;−\u0026nbsp;此文件夾是項目的實際Python包。它包含四個文件\u0026nbsp;− \u003c/p\u003e \n \u003cul\u003e \n \u003cli\u003e \u003cp\u003e __init__.py\u0026nbsp;−\u0026nbsp;只對於Python,處理這個文件夾的包。 \u003c/p\u003e \u003c/li\u003e \n \u003cli\u003e \u003cp\u003e settings.py\u0026nbsp;−\u0026nbsp;正如名稱所示,用於項目設置。 \u003c/p\u003e \u003c/li\u003e \n \u003cli\u003e \u003cp\u003e urls.py\u0026nbsp;−\u0026nbsp;項目創建的各個環節和要調用的函數。項目的所有Toc。 \u003c/p\u003e \u003c/li\u003e \n \u003cli\u003e \u003cp\u003e wsgi.py\u0026nbsp;−\u0026nbsp;如果需要部署項目在 WSGI 上。 \u003c/p\u003e \u003c/li\u003e \n \u003c/ul\u003e \u003c/li\u003e \n \u003c/ul\u003e \n \u003ch2\u003e \n \u003cdiv\u003e\n 設置項目 \n \u003c/div\u003e \u003c/h2\u003e \n \u003cp\u003e 您的項目是建立在子文件夾\u0026nbsp;myproject/settings.py。以下是可能需要設置一些重要的選項\u0026nbsp;- \u003c/p\u003e \n \u003cpre\u003eDEBUG = True\u0026nbsp;\u003c/pre\u003e \n \u003cp\u003e 此選項如上看到的,你的項目是否處於調試模式或沒有。\u0026nbsp;調試模式可以讓您獲得有關項目的錯誤的詳細信息。線上的項目千萬不要將其設置爲「True」。然而,這必須設置爲「True」,如果想Django服務器處理靜態文件。它一般使用的是開發模式。 \u003c/p\u003e \n \u003cpre\u003eDATABASES = {\r\n 'default': {\r\n 'ENGINE': 'django.db.backends.sqlite3',\r\n 'NAME': 'database.sql',\r\n 'USER': '',\r\n 'PASSWORD': '',\r\n 'HOST': '',\r\n 'PORT': '',\r\n }\r\n}\u0026nbsp;\u003c/pre\u003e \n \u003cp\u003e 數據庫設置在「Database」字典。上面的例子是 SQLite 引擎。如前面所述,Django 也支持− \u003c/p\u003e \n \u003cul\u003e \n \u003cli\u003e MySQL (django.db.backends.mysql) \u003c/li\u003e \n \u003cli\u003e PostGreSQL (django.db.backends.postgresql_psycopg2) \u003c/li\u003e \n \u003cli\u003e Oracle (django.db.backends.oracle) and NoSQL DB \u003c/li\u003e \n \u003cli\u003e MongoDB (django_mongodb_engine) \u003c/li\u003e \n \u003c/ul\u003e \n \u003cdiv\u003e\n 在設置任何新引擎,確保你安裝了正確的 DB 驅動程序。 \n \u003c/div\u003e \n \u003cp\u003e 還可以設置其他選項,如:TIME_ZONE, LANGUAGE_CODE, TEMPLATE… \u003c/p\u003e \n \u003cdiv\u003e\n 現在,您的項目創建和配置,確保它能工作\u0026nbsp;- \n \u003c/div\u003e \n \u003cpre\u003e\u003cspan\u003ec:\\myproject\u0026gt; \u003c/span\u003e\u003cspan\u003epython manage.py runserver\u003c/span\u003e\u003c/pre\u003e \n \u003cdiv\u003e\n 這裏將獲得像上運行上面的代碼如下\u0026nbsp;- \n \u003cbr\u003e \n \u003cpre class=\"prettyprint lang-bsh\"\u003eC:\\myproject\u0026gt;python manage.py runserver\r\nPerforming system checks...\r\nSystem check identified no issues (0 silenced).\r\nYou have unapplied migrations; your app may not work properly until they are app\r\nlied.\r\nRun 'python manage.py migrate' to apply them.\r\nJanuary 23, 2016 - 09:08:32\r\nDjango version 1.9.1, using settings 'myproject.settings'\r\nStarting development server at http://127.0.0.1:8000/ \r\nQuit the server with CTRL-BREAK.\u003c/pre\u003e \n \u003c/div\u003e \n\u003c/div\u003e \n\u003cdiv\u003e \n \u003cimg src=\"https://asset.1ju.org/cmsstatic/django-3.png\" alt=\"Django創建工程\"\u003e \n \u003cbr\u003e \n\u003c/div\u003e \n\u003cbr\u003e"])</script><script>self.__next_f.push([1,"36:T7d9,"])</script><script>self.__next_f.push([1,"\u003cdiv\u003e \n \u003cdiv\u003e\n 一個項目是許多應用的總和。每個應用程序有一個客觀並可重複使用到另一個項目,像在網站上的聯繫表單可以是一個應用程序,並且可以重複使用到其它應用。看到它作爲項目的一個模塊。 \n \u003c/div\u003e \n\u003c/div\u003e \n\u003cdiv\u003e \n \u003ch2\u003e \n \u003cdiv\u003e\n 創建應用程序 \n \u003c/div\u003e \u003c/h2\u003e \n \u003cp\u003e 我們假設在項目文件夾。在我們有主項目「myproject」文件夾,並在一級文件夾有一個文件:manage.py\u0026nbsp;,執行以下命令 − \u003c/p\u003e \n \u003cpre\u003e\u003cspan\u003eC:\\myproject\u0026gt; \u003c/span\u003epython manage.py startapp myapp\u0026nbsp;\u003c/pre\u003e \n \u003cp\u003e 剛剛創建的\u0026nbsp;myapp\u0026nbsp;應用程序類似於項目,Django創建\u0026nbsp;「myapp」\u0026nbsp;文件夾中的應用程序結構如下\u0026nbsp;− \u003c/p\u003e \n \u003cpre\u003emyapp/\r\n __init__.py\r\n admin.py\r\n models.py\r\n tests.py\r\n views.py\r\u003c/pre\u003e \n \u003cul\u003e \n \u003cli\u003e \u003cp\u003e \u003cstrong\u003e__init__.py\u003c/strong\u003e\u0026nbsp;−\u0026nbsp;只是爲了確保\u0026nbsp;python\u0026nbsp;作爲包處理此文件夾。 \u003c/p\u003e \u003c/li\u003e \n \u003cli\u003e \u003cp\u003e \u003cstrong\u003eadmin.py\u003c/strong\u003e\u0026nbsp;−\u0026nbsp;此文件幫助您在管理界面中修改應用程序。 \u003c/p\u003e \u003c/li\u003e \n \u003cli\u003e \u003cp\u003e \u003cstrong\u003emodels.py\u003c/strong\u003e\u003cstrong\u003e\u0026nbsp;\u003c/strong\u003e−\u0026nbsp;這是存儲所有的應用程序的模型。 \u003c/p\u003e \u003c/li\u003e \n \u003cli\u003e \u003cp\u003e \u003cstrong\u003etests.py\u003c/strong\u003e\u0026nbsp;−\u0026nbsp;這是單元測試。 \u003c/p\u003e \u003c/li\u003e \n \u003cli\u003e \u003cp\u003e \u003cstrong\u003eviews.py\u003c/strong\u003e\u003cstrong\u003e\u0026nbsp;\u003c/strong\u003e−\u0026nbsp;這是應用程序視圖。 \u003c/p\u003e \u003c/li\u003e \n \u003c/ul\u003e \n \u003ch2\u003e \n \u003cdiv\u003e\n 獲取項目來了解應用程序 \n \u003c/div\u003e \u003c/h2\u003e \n \u003cp\u003e 在這個階段,我們有「myapp」這個應用程序,現在我們需要註冊它到 Django項目「myproject」。要做到這一點,在你的項目中(添加應用程序名稱)到 settings.py 文件更新 INSTALLED_APPS 元組\u0026nbsp;- \u003c/p\u003e \n \u003cpre\u003eINSTALLED_APPS = (\r\n 'django.contrib.admin',\r\n 'django.contrib.auth',\r\n 'django.contrib.contenttypes',\r\n 'django.contrib.sessions',\r\n 'django.contrib.messages',\r\n 'django.contrib.staticfiles',\r\n 'myapp',\r\n)\u003c/pre\u003e \n\u003c/div\u003e \n\u003cbr\u003e"])</script><script>self.__next_f.push([1,"37:T135e,"])</script><script>self.__next_f.push([1,"\u003cdiv\u003e \n \u003cdiv\u003e \n \u003cspan\u003eDjango爲管理活動提供隨時可以使用的用戶界面。\u003c/span\u003e \n \u003cspan\u003e我們都知道,管理界面對於一個Web項目是十分重要的。\u003c/span\u003e \n \u003cspan\u003eDjango根據您的項目模型自動生成管理界面。\u003c/span\u003e \n \u003c/div\u003e \n\u003c/div\u003e \n\u003cdiv\u003e \n \u003ch2\u003e \n \u003cdiv\u003e\n 啓動管理界面 \n \u003c/div\u003e \u003c/h2\u003e \n \u003cp\u003e 管理界面依賴於 django.contrib 模塊。若需它工作,需要確保一些模塊是否導入在\u0026nbsp;myproject/settings.py\u0026nbsp;文件中的INSTALLED_APPS和MIDDLEWARE_CLASSES元組。 \u003c/p\u003e \n \u003cdiv\u003e\n 對於 INSTALLED_APPS 確保有\u0026nbsp;- \n \u003c/div\u003e \n \u003cpre\u003eINSTALLED_APPS = (\r\n 'django.contrib.admin',\r\n 'django.contrib.auth',\r\n 'django.contrib.contenttypes',\r\n 'django.contrib.sessions',\r\n 'django.contrib.messages',\r\n 'django.contrib.staticfiles',\r\n 'myapp',\r\n)\r\u003c/pre\u003e \n \u003cp\u003e 對於 MIDDLEWARE_CLASSES 有− \u003c/p\u003e \n \u003cpre\u003eMIDDLEWARE_CLASSES = (\r\n 'django.contrib.sessions.middleware.SessionMiddleware',\r\n 'django.middleware.common.CommonMiddleware',\r\n 'django.middleware.csrf.CsrfViewMiddleware',\r\n 'django.contrib.auth.middleware.AuthenticationMiddleware',\r\n 'django.contrib.messages.middleware.MessageMiddleware',\r\n 'django.middleware.clickjacking.XFrameOptionsMiddleware',\r\n)\r\u003c/pre\u003e \n \u003cdiv\u003e\n 在啓動服務器,我們來訪問管理界面,可能還需要啓動數據庫\u0026nbsp;- \n \u003c/div\u003e \n \u003cpre\u003ec:\\myproject\u0026gt; python manage.py syncdb\u0026nbsp;\u003c/pre\u003e \n \u003cp\u003e syncdb將創建必要的表,或根據您的數據庫類型的集合,以及必要的管理界面來運行。\u0026nbsp;即使你不是一個超級用戶,系統會提示創建一個。 \u003c/p\u003e \n \u003cp\u003e 如果你已經有一個超級用戶或忘記了,可以用下面的代碼來直接創建一個\u0026nbsp;− \u003c/p\u003e \n \u003cpre\u003e\u003cspan\u003ec:\\myproject\u0026gt;\u003c/span\u003e python manage.py createsuperuser\u0026nbsp;\u003c/pre\u003e \n \u003cp\u003e 現在就開始啓動管理界面,我們需要確保已經爲管理界面配置URL。打開 myproject/url.py,應該有這樣的東西\u0026nbsp;− \u003c/p\u003e \n \u003cpre class=\"prettyprint lang-bsh\"\u003e\"\"\"myproject URL Configuration\r\nThe `urlpatterns` list routes URLs to views. For more information please see:\r\n https://docs.djangoproject.com/en/1.9/topics/http/urls/ \r\nExamples:\r\nFunction views\r\n 1. Add an import: from my_app import views\r\n 2. Add a URL to urlpatterns: url(r'^$', views.home, name='home')\r\nClass-based views\r\n 1. Add an import: from other_app.views import Home\r\n 2. Add a URL to urlpatterns: url(r'^$', Home.as_view(), name='home')\r\nIncluding another URLconf\r\n 1. Import the include() function: from django.conf.urls import url, include\r\n 2. Add a URL to urlpatterns: url(r'^blog/', include('blog.urls'))\r\n\"\"\"\r\nfrom django.conf.urls import url\r\nfrom django.contrib import admin\r\nurlpatterns = [\r\n url(r'^admin/', admin.site.urls),\r\n]\u003c/pre\u003e \n \u003cp\u003e \u003cbr\u003e \u003c/p\u003e \n \u003cdiv\u003e \n \u003cdiv\u003e\n 整個執行命令過程: \n \u003cbr\u003e \n \u003cpre class=\"prettyprint lang-bsh\"\u003e# 創建必要的數據庫表,並初始化相關數據\r\nC:\\myproject\u0026gt;python manage.py migrate\r\nOperations to perform:\r\n Apply all migrations: admin, contenttypes, auth, sessions\r\nRunning migrations:\r\n Rendering model states... DONE\r\n Applying contenttypes.0001_initial... OK\r\n Applying auth.0001_initial... OK\r\n Applying admin.0001_initial... OK\r\n Applying admin.0002_logentry_remove_auto_add... OK\r\n Applying contenttypes.0002_remove_content_type_name... OK\r\n Applying auth.0002_alter_permission_name_max_length... OK\r\n Applying auth.0003_alter_user_email_max_length... OK\r\n Applying auth.0004_alter_user_username_opts... OK\r\n Applying auth.0005_alter_user_last_login_null... OK\r\n Applying auth.0006_require_contenttypes_0002... OK\r\n Applying auth.0007_alter_validators_add_error_messages... OK\r\n Applying sessions.0001_initial... OK\r\nC:\\myproject\u0026gt;python manage.py createsuperuser\r\nUsername (leave blank to use 'administrator'): admin\r\nEmail address: admin@yiibai.com \r\nPassword:\r\nPassword (again):\r\nThis password is too short. It must contain at least 8 characters.\r\nThis password is too common.\r\nThis password is entirely numeric.\r\nPassword:\r\nPassword (again):\r\nSuperuser created successfully.\r\nC:\\myproject\u0026gt;\u003c/pre\u003e \n \u003c/div\u003e \n \u003c/div\u003e \n \u003cdiv\u003e\n 現在,只需使用下面的命令運行啓動服務器。 \n \u003c/div\u003e \n \u003cpre\u003e\u003cspan\u003ec:\\myproject\u0026gt;\u003c/span\u003e python manage.py runserver\u0026nbsp;\u003c/pre\u003e \n \u003cp\u003e 管理界面如下URL,應該是可以訪問:http://127.0.0.1:8000/admin/ \u003c/p\u003e \n \u003cimg src=\"https://asset.1ju.org/cmsstatic/django-4.png\" alt=\"Django管理員界面\"\u003e \n \u003cbr\u003e \n \u003cp\u003e 使用超級用戶帳號登陸,會看到如下界面\u0026nbsp;− \u003c/p\u003e \n \u003cimg src=\"https://asset.1ju.org/cmsstatic/django-5.png\" alt=\"Django管理員界面\"\u003e \n \u003cbr\u003e \n \u003cp\u003e 這個界面可以讓我們管理 Django 中的組和用戶,以及所有在應用程序中註冊的模型。這個界面使您能夠至少做到「CRUD」(創建,讀取,更新,刪除)模型操作。 \u003c/p\u003e \n \u003cdiv\u003e \n \u003cspan\u003e\u003cbr\u003e \u003c/span\u003e \n \u003c/div\u003e \n\u003c/div\u003e \n\u003cbr\u003e"])</script><script>self.__next_f.push([1,"38:T7bc,"])</script><script>self.__next_f.push([1,"\u003cdiv\u003e \n \u003cdiv\u003e\n 視圖功能,或簡稱\"view\",是一個簡單的Python函數,它接受一個Web請求,並返回一個Web響應。此響應可以是 Web頁的HTML內容,或重定向,或404錯誤,或XML文檔,或圖像/片等。例如:使用視圖創建頁面,請注意需要將一個視圖關聯到一個URL,並把它看作一個網頁。 \n \u003c/div\u003e \n\u003c/div\u003e \n\u003cdiv\u003e \n \u003cdiv\u003e\n 在Django中,視圖必須在應用程序的\u0026nbsp;views.py\u0026nbsp;文件中創建。 \n \u003c/div\u003e \n \u003ch2\u003e 簡單的視圖 \u003c/h2\u003e \n \u003cp\u003e 我們將在 myapp\u0026nbsp;創建一個簡單的視圖顯示:\u0026nbsp;\"welcome to yiibai !\" \u003c/p\u003e \n \u003cp\u003e 查看如下的視圖 − \u003c/p\u003e \n \u003cpre\u003efrom django.http import HttpResponse\r\n\r\ndef hello(request):\r\n text = \"\"\"\u0026lt;h1\u0026gt;welcome to yiibai !\u0026lt;/h1\u0026gt;\"\"\"\r\n return HttpResponse(text)\u0026nbsp;\u003c/pre\u003e \n \u003cp\u003e 在這個視圖中,我們使用 HttpResponse 呈現 HTML(你可能已經注意到了,我們將HTML硬編碼在視圖中)。\u0026nbsp;在這個視圖我們只是需要把它映射到一個URL(這將在即將到來的章節中討論)的頁面。 \u003c/p\u003e \n \u003cp\u003e 我們使用 HttpResponse 在渲染視圖 HTML 之前。\u0026nbsp;這不是渲染網頁的最佳方式。Django支持MVT模式,從而先渲染視圖,Django\u0026nbsp;-\u0026nbsp;MVT這是我們需要的− \u003c/p\u003e \n \u003cp\u003e 一個模板文件: myapp/templates/hello.html \u003c/p\u003e \n \u003cp\u003e 現在,我們的視圖內容如下\u0026nbsp;− \u003c/p\u003e \n \u003cpre\u003efrom django.shortcuts import render\r\n\r\ndef hello(request):\r\n return render(request, \"myapp/template/hello.html\", {})\r\u003c/pre\u003e \n \u003cdiv\u003e\n 視圖還可以接受的參數\u0026nbsp;- \n \u003c/div\u003e \n \u003cpre\u003efrom django.http import HttpResponse\r\n\r\ndef hello(request, number):\r\n text = \"\u0026lt;h1\u0026gt;welcome to my app number %s!\u0026lt;/h1\u0026gt;\"% number\r\n return HttpResponse(text)\u0026nbsp;\u003c/pre\u003e \n \u003cp\u003e 當鏈接到一個網址,頁面會顯示作爲參數傳遞的數值。\u0026nbsp;注意,參數將通過URL(在下一章節中討論)傳遞。 \u003c/p\u003e \n \u003cdiv\u003e \n \u003cspan\u003e\u003cbr\u003e \u003c/span\u003e \n \u003c/div\u003e \n\u003c/div\u003e \n\u003cbr\u003e"])</script><script>self.__next_f.push([1,"39:T2221,"])</script><script>self.__next_f.push([1,"現在,我們有一個工作視圖在前面的章節中解釋。我們希望通過一個URL來訪問該視圖。\u0026nbsp;Django有他自己\u0026nbsp;URL映射的方式,現在我們來編輯項目中的\u0026nbsp;url.py\u0026nbsp;文件(myproject/url.py)完成。url.py\u0026nbsp;文件內容看起來如下: \n\u003cdiv\u003e \n \u003cpre\u003efrom django.conf.urls import patterns, include, url\r\nfrom django.contrib import admin\r\nadmin.autodiscover()\r\n\r\nurlpatterns = patterns('',\r\n #Examples\r\n #url(r'^$', 'myproject.view.home', name = 'home'),\r\n #url(r'^blog/', include('blog.urls')),\r\n\r\n url(r'^admin', include(admin.site.urls)),\r\n)\u0026nbsp;\u003c/pre\u003e \n \u003cp\u003e 當用戶在您的網絡應用程序發起一個網頁的請求,Django控制器會接管通過url.py文件來尋找相應的視圖,然後返回HTML響應或如果沒有找到則返回404未找到錯誤。最重要的是「urlpatterns」\u0026nbsp;元組。這就是定義URL和視圖之間的映射。一個映射的URL模式就像一個元組\u0026nbsp;− \u003c/p\u003e \n \u003cpre\u003efrom django.conf.urls import patterns, include, url\r\nfrom django.contrib import admin\r\nadmin.autodiscover()\r\n\r\nurlpatterns = patterns('',\r\n #Examples\r\n #url(r'^$', 'myproject.view.home', name = 'home'),\r\n #url(r'^blog/', include('blog.urls')),\r\n\r\n url(r'^admin', include(admin.site.urls)),\r\n url(r'^hello/', 'myapp.views.hello', name = 'hello'),\r\n)\u0026nbsp;\u003c/pre\u003e \n \u003cp\u003e 標記行映射URL\u0026nbsp;\"/home\"\u0026nbsp;到\u0026nbsp;myapp/\u0026nbsp;view.py文件中創建的Hello視圖。正如你看到上面的映射是由三個要素\u0026nbsp;- \u003c/p\u003e \n \u003cul\u003e \n \u003cli\u003e \u003cp\u003e 模式−\u0026nbsp;一個正則表達式匹配以URL予以解決和映射。\u0026nbsp;能夠與python\u0026nbsp;「re」模塊工作一切都符合的模式(非常有用在你想通過URL來傳遞參數時)。 \u003c/p\u003e \u003c/li\u003e \n \u003cli\u003e \u003cp\u003e python到視圖的路徑−在你導入模塊時相同。 \u003c/p\u003e \u003c/li\u003e \n \u003cli\u003e \u003cp\u003e 名稱−爲了執行URL反轉,需要使用URL模式的命名來執行上面示例。這樣做以後,啓動服務器,通過以下URL訪問您的視圖:http://127.0.0.1/hello \u003c/p\u003e \u003c/li\u003e \n \u003c/ul\u003e \n \u003ch2\u003e 整理網址 \u003c/h2\u003e \n \u003cp\u003e 到目前爲止,我們已經創建了「myprojects/url.py」文件的URL,然而,正如前面關於Django說明,創建一個應用程序,最好是能夠重複使用在不同的項目中應用。\u0026nbsp;這樣就可以很容易地看到的問題是什麼,如果要保存所有網址中在「projecturl.py」文件中。\u0026nbsp;所以,最好的做法是創建每個應用程序的「url.py」,並把它列入我們的主項目 url.py 文件(包括在我們的管理界面管理的 URL 之前)。\u003cbr\u003e \u003cimg src=\"https://asset.1ju.org/cmsstatic/django-url-1.jpg\" alt=\"Django URL映射\"\u003e \u003c/p\u003e \n \u003ch2\u003e \n \u003cdiv\u003e\n 它是如何做的呢? \n \u003c/div\u003e \u003c/h2\u003e \n \u003cp\u003e 我們需要使用下面的代碼來創建一個\u0026nbsp;urls.py\u0026nbsp;文件在 myapp 文件夾中(myapp/urls.py)\u0026nbsp;− \u003c/p\u003e \n \u003cpre\u003efrom django.conf.urls import patterns, include, url\r\n\r\nurlpatterns = patterns('', url(r'^hello/', 'myapp.views.hello', name = 'hello'),)\r\u003c/pre\u003e \n \u003cdiv\u003e\n myproject/urls.py\u0026nbsp;將變更爲以下- \n \u003c/div\u003e \n \u003cpre\u003efrom django.conf.urls import patterns, include, url\r\nfrom django.contrib import admin\r\nadmin.autodiscover()\r\n\r\nurlpatterns = patterns('',\r\n #Examples\r\n #url(r'^$', 'myproject.view.home', name = 'home'),\r\n #url(r'^blog/', include('blog.urls')),\r\n\r\n url(r'^admin', include(admin.site.urls)),\r\n url(r'^myapp/', include(myapp.urls)),\r\n)\u0026nbsp;\u003c/pre\u003e \n \u003cp\u003e 我們已經包括了\u0026nbsp;myapp\u0026nbsp;應用程序的所有URL。這是通過訪問\u0026nbsp;home.html\u0026nbsp;爲\u0026nbsp;「/hello」,現在是\u0026nbsp;「/myapp/hello」\u0026nbsp;,這是 Web應用程序的更好和更容易理解的結構。 \u003c/p\u003e \n \u003cp\u003e 再創建一個視圖文件:C:\\myproject\\templates\\myapp\\hello.html,其內容如下: \u003c/p\u003e \n \u003cpre class=\"prettyprint lang-html\"\u003e\u0026lt;html lang=\"en\"\u0026gt;\r\n\u0026lt;head\u0026gt;\r\n \u0026lt;meta http-equiv=\"content-type\" content=\"text/html; charset=utf-8\"\u0026gt;\r\n \u0026lt;title\u0026gt;Hello \u0026lt;/title\u0026gt;\r\n \u0026lt;meta name=\"robots\" content=\"NONE,NOARCHIVE\"\u0026gt;\r\n \u0026lt;/style\u0026gt;\r\n\u0026lt;/head\u0026gt;\r\n \u0026lt;body\u0026gt;\r\n \u0026lt;h2\u0026gt;Welcome to Yiibai .\u0026lt;/h2\u0026gt;\r\n \u0026lt;p\u0026gt;This is my first Django App\u0026lt;/p\u0026gt;\r\n \u0026lt;body\u0026gt;\r\n\u0026lt;/html\u0026gt;\u003c/pre\u003e \n \u003cp\u003e \u003cbr\u003e \u003c/p\u003e \n \u003cp\u003e 注:如果出錯找不到視圖文件請參考:\u003ca href=\"http://www.zhihu.com/question/36065560\"\u003ehttp://www.zhihu.com/question/36065560\u003c/a\u003e\u003cbr\u003e \u003cimg src=\"https://asset.1ju.org/cmsstatic/django-url-1.png\" alt=\"Django URL映射\"\u003e \u003c/p\u003e \n \u003cp\u003e 現在讓我們想象一下在\u0026nbsp;myapp\u0026nbsp;的\u0026nbsp;「morning」 的另一個視圖,我們希望它在映射myapp/url.py,we will then change our myapp/url.py to − \u003c/p\u003e \n \u003cpre\u003efrom django.conf.urls import patterns, include, url\r\n\r\nurlpatterns = patterns('',\r\n url(r'^hello/', 'myapp.views.hello', name = 'hello'),\r\n url(r'^morning/', 'myapp.views.morning', name = 'morning'),\r\n)\u0026nbsp;\u003c/pre\u003e \n \u003cp\u003e 這可以被重構爲\u0026nbsp;− \u003c/p\u003e \n \u003cpre\u003efrom django.conf.urls import patterns, include, url\r\n\r\nurlpatterns = patterns('myapp.views',\r\n url(r'^hello/', 'hello', name = 'hello'),\r\n url(r'^morning/', 'morning', name = 'morning'),)\u0026nbsp;\u003c/pre\u003e \n \u003cp\u003e 正如你所看到的,我們現在使用\u0026nbsp;urlpatterns\u0026nbsp;元組的第一個元素。當你想改變應用程序的名稱時,這非常有用。\u003cbr\u003e \u003cimg src=\"https://asset.1ju.org/cmsstatic/django-url-2.jpg\" alt=\"Django URL映射\"\u003e \u003c/p\u003e \n \u003ch2\u003e \u003c/h2\u003e \n \u003ch2\u003e 發送參數到視圖 \u003c/h2\u003e \n \u003cp\u003e 現在我們知道如何映射URL,如何組織他們,現在就讓我們來看看如何將參數傳遞給視圖。一個經典的文章例子(您要訪問文章到「/articles/article_id」)。 \u003c/p\u003e \n \u003cp\u003e 傳遞參數是通過URL模式正則表達式捕捉它們完成的。如果我們有類似以下的視圖\u0026nbsp;「myapp/view.py」 \u003c/p\u003e \n \u003cpre\u003efrom django.shortcuts import render\r\nfrom django.http import HttpResponse\r\n\r\ndef hello(request):\r\n return render(request, \"hello.html\", {})\r\n\r\ndef viewArticle(request, articleId):\r\n text = \"Displaying article Number : %s\"%articleId\r\n return HttpResponse(text)\u0026nbsp;\u003c/pre\u003e \n \u003cp\u003e 我們想把它映射放在myapp/urls.py\u0026nbsp;,所以我們可以通過\u0026nbsp;「/myapp/article/articleId」\u0026nbsp;訪問,\u0026nbsp;我們需要在下列\u0026nbsp;「myapp/urls.py」 定義− \u003c/p\u003e \n \u003cpre class=\"prettyprint lang-py\"\u003efrom django.conf.urls import url\r\nfrom . import views\r\nurlpatterns = [\r\n url(r'^hello', views.hello, name='hello'),\r\n url(r'^article/(\\d+)/', views.viewArticle, name = 'article'), \r\n url(r'^$', views.index, name='index'),\r\n]\u003c/pre\u003e \n \u003cp\u003e \u003cbr\u003e \u003c/p\u003e \n \u003cp\u003e 當Django會看到URL:\u0026nbsp;「/myapp/article/42」\u0026nbsp;,它將傳遞參數'42'到viewArticle視圖,在瀏覽器中,應該得到以下結果\u0026nbsp;-\u003cbr\u003e \u003cimg src=\"https://asset.1ju.org/cmsstatic/django-url-2.png\" alt=\"Django URL映射\"\u003e \u003c/p\u003e \n \u003cp\u003e 注意,參數的順序這裏是很重要的。假設我們希望查看一年中某個一個月的文章列表,現在添加一個 viewArticles 視圖。 view.py 代碼變爲\u0026nbsp;- \u003c/p\u003e \n \u003cpre\u003efrom django.shortcuts import render\r\nfrom django.http import HttpResponse\r\n\r\ndef hello(request):\r\n return render(request, \"hello.html\", {})\r\n\r\ndef viewArticle(request, articleId):\r\n text = \"Displaying article Number : %s\"%articleId\r\n return HttpResponse(text)\r\n\r\ndef viewArticles(request, month, year):\r\n text = \"Displaying articles of : %s/%s\"%(year, month)\r\n return HttpResponse(text)\u0026nbsp;\u003c/pre\u003e \n \u003cp\u003e 相應的 myapp/urls.py\u0026nbsp;文件看起來如下\u0026nbsp;− \u003c/p\u003e \n \u003cpre\u003efrom django.conf.urls import patterns, include, url\r\n\r\nurlpatterns = patterns('myapp.views',\r\n url(r'^hello/', 'hello', name = 'hello'),\r\n url(r'^morning/', 'morning', name = 'morning'),\r\n url(r'^article/(\\d+)/', 'viewArticle', name = 'article'),\r\n url(r'^articles/(\\d{2})/(\\d{4})', 'viewArticles', name = 'articles'),)\r\u003c/pre\u003e \n \u003cdiv\u003e\n 現在,當您訪問\u0026nbsp;「 \n \u003ca href=\"https://asset.1ju.org/myapp/articles/12/2015/\"\u003ehttps://asset.1ju.org/myapp/articles/12/2015/\u003c/a\u003e」,會得到'Displaying\u0026nbsp;articles\u0026nbsp;of:\u0026nbsp;2015/12'\u0026nbsp;,但如果轉換參數,將不能得到相同的結果。 \n \u003cbr\u003e \n \u003cimg src=\"https://asset.1ju.org/cmsstatic/django-url-3.png\" alt=\"Django URL映射\"\u003e \n \u003cbr\u003e \n \u003c/div\u003e \n \u003cdiv\u003e\n 爲避免這種情況,有可能一個URL參數會鏈接到視圖參數。因此\u0026nbsp;url.py\u0026nbsp;將成爲\u0026nbsp;- \n \u003c/div\u003e \n \u003cpre\u003efrom django.conf.urls import patterns, include, url\r\n\r\nurlpatterns = patterns('myapp.views',\r\n url(r'^hello/', 'hello', name = 'hello'),\r\n url(r'^morning/', 'morning', name = 'morning'),\r\n url(r'^article/(\\d+)/', 'viewArticle', name = 'article'),\r\n url(r'^articles/(?P\\d{2})/(?P\\d{4})', 'viewArticles', name = 'articles'),)\u003c/pre\u003e \n\u003c/div\u003e \n\u003cbr\u003e"])</script><script>self.__next_f.push([1,"3a:T1802,"])</script><script>self.__next_f.push([1,"\u003cdiv\u003e \n \u003cdiv\u003e\n Django能夠單獨分開 Python 和 HTML,Python代碼/變量進入視圖和HTML模板。\u0026nbsp;連接這兩個,Django依賴於渲染函數和Django模板語言。 \n \u003c/div\u003e \n\u003c/div\u003e \n\u003cdiv\u003e \n \u003ch2\u003e \n \u003cdiv\u003e\n 渲染函數 \n \u003c/div\u003e \u003c/h2\u003e \n \u003cp\u003e 這個函數有三個參數\u0026nbsp;− \u003c/p\u003e \n \u003cul\u003e \n \u003cli\u003e \u003cp\u003e 請求− 初始化請求 \u003c/p\u003e \u003c/li\u003e \n \u003cli\u003e \u003cp\u003e 模板路徑\u0026nbsp;−\u0026nbsp;這是相對於在項目 settings.py 文件的變量到 TEMPLATE_DIRS 選項的路徑。 \u003c/p\u003e \u003c/li\u003e \n \u003cli\u003e \u003cp\u003e 參數字典\u0026nbsp;−\u0026nbsp;字典包含所需的模板中的所有變量。這個變量可以創建或者可以使用\u0026nbsp;locals()\u0026nbsp;通過在視圖中聲明的所有局部變量。 \u003c/p\u003e \u003c/li\u003e \n \u003c/ul\u003e \n \u003ch2\u003e \n \u003cdiv\u003e\n Django模板語言(DTL) \n \u003c/div\u003e \u003c/h2\u003e \n \u003cdiv\u003e\n Django模板引擎提供了一個小型的語言來定義應用程序面向用戶的層。 \n \u003c/div\u003e \n \u003ch3\u003e \n \u003cdiv\u003e\n 顯示變量 \n \u003c/div\u003e \u003c/h3\u003e \n \u003cp\u003e 變量顯示如下:{{variable}}.\u0026nbsp;模板由視圖在渲染(render)函數的第三個參數發送的變量來替換變量。讓我們改變 hello.html 顯示當天的日期 : \u003c/p\u003e \n \u003cp\u003e hello.html \u003c/p\u003e \n \u003cpre\u003e\u0026lt;html\u0026gt; \r\n \u0026lt;body\u0026gt;\r\n Hello World!!!\u0026lt;p\u0026gt;Today is {{today}}\u0026lt;/p\u0026gt;\r\n \u0026lt;/body\u0026gt; \r\n\u0026lt;/html\u0026gt;\r\u003c/pre\u003e \n \u003cdiv\u003e\n 然後,我們的視圖將改變爲 - \n \u003c/div\u003e \n \u003cpre\u003edef hello(request):\r\n today = datetime.datetime.now().date()\r\n return render(request, \"hello.html\", {\"today\" : today})\u0026nbsp;\u003c/pre\u003e \n \u003cp\u003e 現在,我們將得到下面的輸出在訪問URL\u0026nbsp;/myapp/hello\u0026nbsp;之後− \u003c/p\u003e \n \u003cpre\u003eHello World!!!\r\nToday is Sept. 11, 2015\u0026nbsp;\u003c/pre\u003e \n \u003cp\u003e 正如你可能已經注意到,如果變量不是一個字符串,Django會使用__str__方法來顯示它;並以同樣的原則,你可以訪問對象的屬性,就像在Python中使用的一樣。例如:如果我們想顯示日期的年份,這裏的變量是:\u0026nbsp;{{today.year}}. \u003c/p\u003e \n \u003ch2\u003e 過濾器 \u003c/h2\u003e \n \u003cp\u003e 它們可以幫助您顯示修改的變量。過濾器的結構如下所示:\u0026nbsp;{{var|filters}}. \u003c/p\u003e \n \u003cp\u003e 一個簡單的實例\u0026nbsp;− \u003c/p\u003e \n \u003cul\u003e \n \u003cli\u003e \u003cp\u003e {{string|truncatewords:80}}\u0026nbsp;−\u0026nbsp;過濾器將截斷字符串,所以只看到前80個字符。 \u003c/p\u003e \u003c/li\u003e \n \u003cli\u003e \u003cp\u003e {{string|lower}}\u0026nbsp;− 轉換字符爲小寫 \u003c/p\u003e \u003c/li\u003e \n \u003cli\u003e \u003cp\u003e {{string|escape|linebreaks}}\u0026nbsp;−\u0026nbsp;轉義字符串內容,然後換行轉換爲標籤。 \u003c/p\u003e \u003c/li\u003e \n \u003c/ul\u003e \n \u003cdiv\u003e\n 還可以設置默認的變量。 \n \u003c/div\u003e \n \u003ch2\u003e 標籤 \u003c/h2\u003e \n \u003cp\u003e 標籤可以執行以下操作:if 條件,for循環,模板繼承以及更多。 \u003c/p\u003e \n \u003ch3\u003e if標籤 \u003c/h3\u003e \n \u003cp\u003e 就像在Python中,你可以使用if,else和elif在模板中\u0026nbsp;− \u003c/p\u003e \n \u003cpre\u003e\u0026lt;html\u0026gt;\r\n \u0026lt;body\u0026gt;\r\n \r\n Hello World!!!\u0026lt;p\u0026gt;Today is {{today}}\u0026lt;/p\u0026gt;\r\n We are\r\n {% if today.day == 1 %}\r\n \r\n the first day of month.\r\n {% elif today == 30 %}\r\n \r\n the last day of month.\r\n {% else %}\r\n \r\n I don't know.\r\n {%endif%}\r\n \r\n \u0026lt;/body\u0026gt;\r\n\u0026lt;/html\u0026gt;\r\u003c/pre\u003e \n \u003cdiv\u003e\n 在這個新的模板,根據當天的日期,該模板將呈現這個值。 \n \u003c/div\u003e \n \u003ch3\u003e for標籤 \u003c/h3\u003e \n \u003cp\u003e 就像'if',我們有\u0026nbsp;'for'\u0026nbsp;標籤,這些完全像在Python中一樣使用它們。讓我們改變\u0026nbsp;hello視圖列表發送到我們的模板\u0026nbsp;− \u003c/p\u003e \n \u003cpre\u003edef hello(request):\r\n today = datetime.datetime.now().date()\r\n \r\n daysOfWeek = ['Mon', 'Tue', 'Wed', 'Thu', 'Fri', 'Sat', 'Sun']\r\n return render(request, \"hello.html\", {\"today\" : today, \"days_of_week\" : daysOfWeek})\u0026nbsp;\u003c/pre\u003e \n \u003cp\u003e 該模板用來顯示列表\u0026nbsp;{{ for }} − \u003c/p\u003e \n \u003cpre\u003e\u0026lt;html\u0026gt;\r\n \u0026lt;body\u0026gt;\r\n \r\n Hello World!!!\u0026lt;p\u0026gt;Today is {{today}}\u0026lt;/p\u0026gt;\r\n We are\r\n {% if today.day == 1 %}\r\n \r\n the first day of month.\r\n {% elif today == 30 %}\r\n \r\n the last day of month.\r\n {% else %}\r\n \r\n I don't know.\r\n {%endif%}\r\n \r\n \u0026lt;p\u0026gt;\r\n {% for day in days_of_week %}\r\n {{day}}\r\n \u0026lt;/p\u0026gt;\r\n\t\t\r\n {% endfor %}\r\n \r\n \u0026lt;/body\u0026gt;\r\n\u0026lt;/html\u0026gt;\u0026nbsp;\u003c/pre\u003e \n \u003cp\u003e 我們應該得到輸出的內容如下\u0026nbsp;− \u003c/p\u003e \n \u003cpre\u003eHello World!!!\r\nToday is Sept. 11, 2015\r\nWe are I don't know.\r\nMon\r\nTue\r\nWed\r\nThu\r\nFri\r\nSat\r\nSun\r\u003c/pre\u003e \n \u003ch3\u003e \n \u003cdiv\u003e\n 塊和擴展標籤 \n \u003c/div\u003e \u003c/h3\u003e \n \u003cp\u003e 模板系統是不完整模板繼承。當您設計模板的含義,子模板會根據自己的需要填寫一個主模板,就像一個頁面中所選選項卡可能需要一個特殊的CSS。 \u003c/p\u003e \n \u003cdiv\u003e\n 讓我們修改\u0026nbsp;hello.html\u0026nbsp;模板來從 main_template.html 繼承。 \n \u003c/div\u003e \n \u003cp\u003e main_template.html \u003c/p\u003e \n \u003cpre\u003e\u0026lt;html\u0026gt;\r\n \u0026lt;head\u0026gt; \r\n \u0026lt;title\u0026gt;\r\n {% block title %}Page Title{% endblock %}\r\n \u0026lt;/title\u0026gt; \r\n \u0026lt;/head\u0026gt;\r\n\t\r\n \u0026lt;body\u0026gt; \r\n {% block content %}\r\n Body content\r\n {% endblock %} \r\n \u0026lt;/body\u0026gt;\r\n\u0026lt;/html\u0026gt;\r\u003c/pre\u003e \n \u003cp\u003e hello.html \u003c/p\u003e \n \u003cpre\u003e{% extends \"main_template.html\" %}\r\n{% block title %}My Hello Page{% endblock %}\r\n{% block content %}\r\n\r\nHello World!!!\u0026lt;p\u0026gt;Today is {{today}}\u0026lt;/p\u0026gt;\r\nWe are\r\n{% if today.day == 1 %}\r\n\r\nthe first day of month.\r\n{% elif today == 30 %}\r\n\r\nthe last day of month.\r\n{% else %}\r\n\r\nI don't know.\r\n{%endif%}\r\n\r\n\u0026lt;p\u0026gt;\r\n {% for day in days_of_week %}\r\n {{day}}\r\n\u0026lt;/p\u0026gt;\r\n\r\n{% endfor %}\r\n{% endblock %}\r\u003c/pre\u003e \n \u003cp\u003e 在上面的示例,\u0026nbsp;在調用 /myapp/hello,我們仍然會得到相同的結果和以前一樣,但現在我們靠的是擴展,並不用重構代碼-− \u003c/p\u003e \n \u003cp\u003e 在 main_template.html 我們定義使用標籤塊。標題欄塊將包含頁面標題,以及內容塊將在頁面主內容。在Home.html中使用擴展繼承來自main_template.html,那麼我們使用上面塊定義(內容和標題)。 \u003c/p\u003e \n \u003ch3\u003e 註釋標籤 \u003c/h3\u003e \n \u003cp\u003e 註釋標籤用來模板定義註釋,不是HTML註釋,它們將不會出現在HTML頁面。它可以是一個文件或只是註釋一行代碼。 \u003c/p\u003e \n\u003c/div\u003e \n\u003cbr\u003e"])</script><script>self.__next_f.push([1,"3b:T1b81,"])</script><script>self.__next_f.push([1,"\u003cdiv\u003e\n 模型是表示我們的數據庫表或集合類,並且其中所述類的每個屬性是表或集合的字段。模型是在\u0026nbsp;app/models.py\u0026nbsp;中定義(在我們的例子中是:myapp/models.py) \n\u003c/div\u003e \n\u003cdiv\u003e \n \u003ch2\u003e \u003c/h2\u003e \n \u003ch2\u003e 創建模型 \u003c/h2\u003e \n \u003cp\u003e 下面是創建一個\u0026nbsp;Dreamreal\u0026nbsp;模型實例\u0026nbsp;− \u003c/p\u003e \n \u003cpre\u003efrom django.db import models\r\n\r\nclass Dreamreal(models.Model):\r\n\r\n website = models.CharField(max_length = 50)\r\n mail = models.CharField(max_length = 50)\r\n name = models.CharField(max_length = 50)\r\n phonenumber = models.IntegerField()\r\n\r\n class Meta:\r\n db_table = \"dreamreal\"\r\u003c/pre\u003e \n \u003cdiv\u003e\n 每一個模型繼承自django.db.models.Model。 \n \u003c/div\u003e \n \u003cdiv\u003e\n 我們類有4個屬性(3\u0026nbsp;CharField和1個整數),這將是表中的字段。 \n \u003c/div\u003e \n \u003cp\u003e Meta類與db_table屬性可以讓我們定義的實際表或集合名稱。Django會自動命名錶或集合:myapp_modelName.\u0026nbsp;這個類將強制表的名稱。 \u003c/p\u003e \n \u003cp\u003e 在 django.db.models 更多的字段的類型,你可以瞭解更多關於他們的URL: \u003c/p\u003e \n \u003cp\u003e \u003ca href=\"https://docs.djangoproject.com/en/1.5/ref/models/fields/#field-types\"\u003ehttps://docs.djangoproject.com/en/1.5/ref/models/fields/#field-types\u003c/a\u003e \u003c/p\u003e \n \u003cp\u003e 在創建模型後需要 Django 產生實際的數據庫\u0026nbsp;− \u003c/p\u003e \n \u003cpre\u003e$python manage.py syncdb\u0026nbsp;\u003c/pre\u003e \n \u003ch2\u003e 操作數據(CRUD) \u003c/h2\u003e \n \u003cp\u003e 讓我們創建一個「crudops」的視圖,看看如何能夠在模型上做的CRUD操作。\u0026nbsp;現在\u0026nbsp;myapp/views.py 然後將看起來像\u0026nbsp;− \u003c/p\u003e \n \u003cp\u003e myapp/views.py \u003c/p\u003e \n \u003cpre\u003efrom myapp.models import Dreamreal\r\nfrom django.http import HttpResponse\r\n\r\ndef crudops(request):\r\n #Creating an entry\r\n \r\n dreamreal = Dreamreal(\r\n website = \"www.polo.com\", mail = \"sorex@polo.com\", \r\n name = \"sorex\", phonenumber = \"002376970\"\r\n )\r\n \r\n dreamreal.save()\r\n \r\n #Read ALL entries\r\n objects = Dreamreal.objects.all()\r\n res ='Printing all Dreamreal entries in the DB : \u0026lt;br\u0026gt;'\r\n \r\n for elt in objects:\r\n res += elt.name+\"\u0026lt;br\u0026gt;\"\r\n \r\n #Read a specific entry:\r\n sorex = Dreamreal.objects.get(name = \"sorex\")\r\n res += 'Printing One entry \u0026lt;br\u0026gt;'\r\n res += sorex.name\r\n \r\n #Delete an entry\r\n res += '\u0026lt;br\u0026gt; Deleting an entry \u0026lt;br\u0026gt;'\r\n sorex.delete()\r\n \r\n #Update\r\n dreamreal = Dreamreal(\r\n website = \"www.polo.com\", mail = \"sorex@polo.com\", \r\n name = \"sorex\", phonenumber = \"002376970\"\r\n )\r\n \r\n dreamreal.save()\r\n res += 'Updating entry\u0026lt;br\u0026gt;'\r\n \r\n dreamreal = Dreamreal.objects.get(name = 'sorex')\r\n dreamreal.name = 'thierry'\r\n dreamreal.save()\r\n \r\n return HttpResponse(res)\r\u003c/pre\u003e \n \u003ch3\u003e \u003c/h3\u003e \n \u003ch2\u003e 其他數據操作 \u003c/h2\u003e \n \u003cp\u003e 讓我們來探討可以對模型做的其他操作。\u0026nbsp;需要注意的是 CRUD 操作都做對模型的實例,現在我們將直接表示模型類的工作。 \u003c/p\u003e \n \u003cdiv\u003e\n 讓我們創建一個「datamanipulation」視圖在\u0026nbsp;myapp/views.py \n \u003c/div\u003e \n \u003cpre\u003efrom myapp.models import Dreamreal\r\nfrom django.http import HttpResponse\r\n\r\ndef datamanipulation(request):\r\n res = ''\r\n \r\n #Filtering data:\r\n qs = Dreamreal.objects.filter(name = \"paul\")\r\n res += \"Found : %s results\u0026lt;br\u0026gt;\"%len(qs)\r\n \r\n #Ordering results\r\n qs = Dreamreal.objects.order_by(\"name\")\r\n \r\n for elt in qs:\r\n res += elt.name + '\u0026lt;br\u0026gt;'\r\n \r\n return HttpResponse(res)\r\u003c/pre\u003e \n \u003ch2\u003e \u003c/h2\u003e \n \u003ch2\u003e 鏈接模型 \u003c/h2\u003e \n \u003cp\u003e Django ORM提供3種方式來鏈接模型\u0026nbsp;− \u003c/p\u003e \n \u003cp\u003e 我們將在這裏看到的第一示例是一個一對多的關係。正如在上面的例子中看到的,一個公司可以有多個在線網站。定義這種關係是通過使用 django.db.models.ForeignKey 完成\u0026nbsp;- \u003c/p\u003e \n \u003cp\u003e myapp/models.py \u003c/p\u003e \n \u003cpre\u003efrom django.db import models\r\n\r\nclass Dreamreal(models.Model):\r\n website = models.CharField(max_length = 50)\r\n mail = models.CharField(max_length = 50)\r\n name = models.CharField(max_length = 50)\r\n phonenumber = models.IntegerField()\r\n online = models.ForeignKey('Online', default = 1)\r\n \r\n class Meta:\r\n db_table = \"dreamreal\"\r\n\r\nclass Online(models.Model):\r\n domain = models.CharField(max_length = 30)\r\n \r\n class Meta:\r\n db_table = \"online\"\r\u003c/pre\u003e \n \u003cdiv\u003e\n 可以更新myapp/models.py,正如你看到的,我們添加了一個在線模式,並鏈接到\u0026nbsp;Dreamreal模型。 \n \u003c/div\u003e \n \u003cp\u003e 讓我們來看看如何通過\u0026nbsp;manage.py\u0026nbsp;shell\u0026nbsp;執行所有工作\u0026nbsp;− \u003c/p\u003e \n \u003cp\u003e 首先讓我們來測試\u0026nbsp;Django\u0026nbsp;shell創建一些公司(Dreamreal項)− \u003c/p\u003e \n \u003cpre\u003e$python manage.py shell\r\n\r\n\u0026gt;\u0026gt;\u0026gt; from myapp.models import Dreamreal, Online\r\n\u0026gt;\u0026gt;\u0026gt; dr1 = Dreamreal()\r\n\u0026gt;\u0026gt;\u0026gt; dr1.website = 'company1.com'\r\n\u0026gt;\u0026gt;\u0026gt; dr1.name = 'company1'\r\n\u0026gt;\u0026gt;\u0026gt; dr1.mail = 'contact@company1'\r\n\u0026gt;\u0026gt;\u0026gt; dr1.phonenumber = '12345'\r\n\u0026gt;\u0026gt;\u0026gt; dr1.save()\r\n\u0026gt;\u0026gt;\u0026gt; dr2 = Dreamreal()\r\n\u0026gt;\u0026gt;\u0026gt; dr1.website = 'company2.com'\r\n\u0026gt;\u0026gt;\u0026gt; dr2.website = 'company2.com'\r\n\u0026gt;\u0026gt;\u0026gt; dr2.name = 'company2'\r\n\u0026gt;\u0026gt;\u0026gt; dr2.mail = 'contact@company2'\r\n\u0026gt;\u0026gt;\u0026gt; dr2.phonenumber = '56789'\r\n\u0026gt;\u0026gt;\u0026gt; dr2.save()\u0026nbsp;\u003c/pre\u003e \n \u003cspan\u003e \u003cp\u003e 現在有一些代管網域\u0026nbsp;− \u003c/p\u003e \u003cpre\u003e\u0026gt;\u0026gt;\u0026gt; on1 = Online()\r\n\u0026gt;\u0026gt;\u0026gt; on1.company = dr1\r\n\u0026gt;\u0026gt;\u0026gt; on1.domain = \"site1.com\"\r\n\u0026gt;\u0026gt;\u0026gt; on2 = Online()\r\n\u0026gt;\u0026gt;\u0026gt; on2.company = dr1\r\n\u0026gt;\u0026gt;\u0026gt; on2.domain = \"site2.com\"\r\n\u0026gt;\u0026gt;\u0026gt; on3 = Online()\r\n\u0026gt;\u0026gt;\u0026gt; on3.domain = \"site3.com\"\r\n\u0026gt;\u0026gt;\u0026gt; dr2 = Dreamreal.objects.all()[2]\r\n\u0026gt;\u0026gt;\u0026gt; on3.company = dr2\r\n\u0026gt;\u0026gt;\u0026gt; on1.save()\r\n\u0026gt;\u0026gt;\u0026gt; on2.save()\r\n\u0026gt;\u0026gt;\u0026gt; on3.save()\u0026nbsp;\u003c/pre\u003e \u003c/span\u003e \n \u003cspan\u003e \u003cp\u003e 從在線域訪問託管公司(Dreamreal項)的屬性是很簡單的\u0026nbsp;− \u003c/p\u003e \u003cpre\u003e\u0026gt;\u0026gt;\u0026gt; on1.company.name\u0026nbsp;\u003c/pre\u003e \u003c/span\u003e \n \u003cspan\u003e \u003cp\u003e 如果想知道公司Dreamreal主辦的所有網上域名,我們將使用代碼\u0026nbsp;− \u003c/p\u003e \u003cpre\u003e\u0026gt;\u0026gt;\u0026gt; dr1.online_set.all()\u0026nbsp;\u003c/pre\u003e \u003c/span\u003e \n \u003cp\u003e 爲了得到一個QuerySet,請注意,所有的操作方法,我們以前見過(filter, all, exclude, order_by....) \u003c/p\u003e \n \u003cp\u003e 也可以訪問進行過濾操作鏈接模型屬性,比方說,想獲得的所有在線域所在Dreamreal名稱包含「company」- \u003c/p\u003e \n \u003cspan\u003e \u003cpre\u003e\u0026gt;\u0026gt;\u0026gt; Online.objects.filter(company__name__contains = 'company'\u0026nbsp;\u003c/pre\u003e \u003c/span\u003e \n \u003cp\u003e \u003cstrong\u003e注\u0026nbsp;\u003c/strong\u003e-\u0026nbsp;那種查詢只支持SQL數據庫。\u0026nbsp;它不會對非關係數據庫工作,其中連接不存在,並有兩個「_」。 \u003c/p\u003e \n \u003cp\u003e 但是,這不是鏈接模型的唯一方法,也有OneToOneField,這保證了兩個對象之間的關係是唯一的鏈接關係。如果使用了OneToOneField在上面的例子中,這將意味着只有一個在線條目對應於每個Dreamreal條目。 \u003c/p\u003e \n \u003cdiv\u003e\n 最後一個,ManyToManyField 表之間(NN)的關係這些都是基於SQL的數據庫。 \n \u003c/div\u003e \n \u003cdiv\u003e \n \u003cbr\u003e \n \u003c/div\u003e \n\u003c/div\u003e \n\u003cbr\u003e"])</script><script>self.__next_f.push([1,"3c:Tf7b,"])</script><script>self.__next_f.push([1,"頁面重定向在Web應用程序有很多原因是必要的。您可能希望將用戶重定向到另一個頁面,當一個特定的動作發生,或者有錯誤的情況下。例如,當用戶登錄網站,他經常被重定向到他的主頁或個人的儀表板。在Django中,定向使用「redirect」的方法來實現。 \n\u003cdiv\u003e \n \u003cdiv\u003e\n 在「redirect」方法需要作爲參數:URL要被重定向到的字符串的視圖名字。 \n \u003c/div\u003e \n \u003cp\u003e myapp/views\u0026nbsp;到現在爲止如下所示\u0026nbsp;− \u003c/p\u003e \n \u003cpre\u003edef hello(request):\r\n today = datetime.datetime.now().date()\r\n daysOfWeek = ['Mon', 'Tue', 'Wed', 'Thu', 'Fri', 'Sat', 'Sun']\r\n return render(request, \"hello.html\", {\"today\" : today, \"days_of_week\" : daysOfWeek})\r\n\t\r\ndef viewArticle(request, articleId):\r\n \"\"\" A view that display an article based on his ID\"\"\"\r\n text = \"Displaying article Number : %s\" %articleId\r\n return HttpResponse(text)\r\n\t\r\ndef viewArticles(request, year, month):\r\n text = \"Displaying articles of : %s/%s\"%(year, month)\r\n return HttpResponse(text)\u0026nbsp;\u003c/pre\u003e \n \u003cp\u003e 讓我們修改hello,以重定向到\u0026nbsp;djangoproject.com\u0026nbsp;,以及\u0026nbsp;viewArticle\u0026nbsp;重定向到我們內部的\u0026nbsp;'/myapp/articles'。myapp/view.py將修改爲如下:\u0026nbsp; \u003c/p\u003e \n \u003cpre\u003efrom django.shortcuts import render, redirect\r\nfrom django.http import HttpResponse\r\nimport datetime\r\n\r\n# Create your views here.\r\ndef hello(request):\r\n today = datetime.datetime.now().date()\r\n daysOfWeek = ['Mon', 'Tue', 'Wed', 'Thu', 'Fri', 'Sat', 'Sun']\r\n return redirect(\"https://www.djangoproject.com\")\r\n\t\r\ndef viewArticle(request, articleId):\r\n \"\"\" A view that display an article based on his ID\"\"\"\r\n text = \"Displaying article Number : %s\" %articleId\r\n return redirect(viewArticles, year = \"2045\", month = \"02\")\r\n\t\r\ndef viewArticles(request, year, month):\r\n text = \"Displaying articles of : %s/%s\"%(year, month)\r\n return HttpResponse(text)\u0026nbsp;\u003c/pre\u003e \n \u003cp\u003e 在上面的例子中,我們首先從Django導入重定向(redirect)。快捷方式並重定向到Django的官方網站上,我們只需使用完整URL到「redirect」方法作爲字符串,在第二例子(在viewArticle視圖)'redirect'方法取視圖名字和它的參數作爲參數。 \u003c/p\u003e \n \u003cdiv\u003e\n 訪問/myapp/hello,會顯示如下的屏幕- \n \u003cbr\u003e \n \u003cimg src=\"https://asset.1ju.org/cmsstatic/django-2.jpg\" alt=\"Django頁面重定向\"\u003e \n \u003cbr\u003e \n \u003c/div\u003e \n \u003cdiv\u003e\n 並訪問\u0026nbsp;/myapp/article/42,會給出下面的屏幕- \n \u003cbr\u003e \n \u003cimg src=\"https://asset.1ju.org/cmsstatic/django-3.jpg\" alt=\"Django頁面重定向\"\u003e \n \u003cbr\u003e \n \u003c/div\u003e \n \u003cp\u003e 也可以指定「redirect」是否是暫時的還是永久性的,加入permanent\u0026nbsp;=\u0026nbsp;True參數。用戶看到不會有什麼區別,但這些都是細節,搜索引擎網站排名時考慮到。 \u003c/p\u003e \n \u003cp\u003e 我們在url.py定義「name」參數在映射URL時− \u003c/p\u003e \n \u003cpre\u003eurl(r'^articles/(?P\\d{2})/(?P\\d{4})/', 'viewArticles', name = 'articles'),\u0026nbsp;\u003c/pre\u003e \n \u003cp\u003e 該名稱(這裏的文章)可以被用作「redirect」方法的實參,那麼 viewArticle 重定向可以修改 - \u003c/p\u003e \n \u003cpre\u003edef viewArticle(request, articleId):\r\n \"\"\" A view that display an article based on his ID\"\"\"\r\n text = \"Displaying article Number : %s\" %articleId\r\n return redirect(viewArticles, year = \"2045\", month = \"02\")\r\u003c/pre\u003e \n \u003cp\u003e 修改爲\u0026nbsp;− \u003c/p\u003e \n \u003cpre\u003edef viewArticle(request, articleId):\r\n \"\"\" A view that display an article based on his ID\"\"\"\r\n text = \"Displaying article Number : %s\" %articleId\r\n return redirect(articles, year = \"2045\", month = \"02\")\u0026nbsp;\u003c/pre\u003e \n \u003cp\u003e \u003cstrong\u003e注\u003c/strong\u003e\u0026nbsp;-\u0026nbsp;還有一個函數生成 URL; 它是用在相同的方式重定向;\u0026nbsp;「reverse」方法(django.core.urlresolvers.reverse)。這個函數不返回HttpResponseRedirect對象,而僅僅包含URL和任何傳入的參數編譯視圖的字符串。 \u003c/p\u003e \n \u003cdiv\u003e \n \u003cspan\u003e\u003cbr\u003e \u003c/span\u003e \n \u003c/div\u003e \n\u003c/div\u003e \n\u003cbr\u003e"])</script><script>self.__next_f.push([1,"3d:T2696,"])</script><script>self.__next_f.push([1,"\u003cdiv\u003e \n \u003cdiv\u003e\n Django提供了一個現成的,易於使用發送電子郵件的輕型引擎。類似Python,你需要導入 smtplib。在Django中只需要導入django.core.mail。\u0026nbsp;要發送電子郵件,編輯項目settings.py文件,並設置下列選項\u0026nbsp;− \n \u003c/div\u003e \n\u003c/div\u003e \n\u003cdiv\u003e \n \u003cul\u003e \n \u003cli\u003e \u003cp\u003e \u003cstrong\u003eEMAIL_HOST\u003c/strong\u003e\u0026nbsp;− smtp 服務器 \u003c/p\u003e \u003c/li\u003e \n \u003cli\u003e \u003cp\u003e \u003cstrong\u003eEMAIL_HOST_USER\u003c/strong\u003e\u0026nbsp;−\u0026nbsp;登錄憑證SMTP服務器 \u003c/p\u003e \u003c/li\u003e \n \u003cli\u003e \u003cp\u003e \u003cstrong\u003eEMAIL_HOST_PASSWORD\u003c/strong\u003e\u0026nbsp;−\u0026nbsp;SMTP服務器密碼憑證 \u003c/p\u003e \u003c/li\u003e \n \u003cli\u003e \u003cp\u003e \u003cstrong\u003eEMAIL_PORT\u003c/strong\u003e\u0026nbsp;− smtp服務器端口 \u003c/p\u003e \u003c/li\u003e \n \u003cli\u003e \u003cp\u003e \u003cstrong\u003eEMAIL_USE_TLS\u003c/strong\u003e 或 \u003cstrong\u003e_SSL\u003c/strong\u003e\u0026nbsp;−\u0026nbsp;如果設置爲True則爲安全連接。 \u003c/p\u003e \u003c/li\u003e \n \u003c/ul\u003e \n \u003ch2\u003e 發送一個簡單的電子郵件 \u003c/h2\u003e \n \u003cdiv\u003e\n 讓我們創建一個「sendSimpleEmail」視圖發送一個簡單的電子郵件。 \n \u003c/div\u003e \n \u003cpre\u003efrom django.core.mail import send_mail\r\nfrom django.http import HttpResponse\r\n\r\ndef sendSimpleEmail(request,emailto):\r\n res = send_mail(\"hello paul\", \"comment tu vas?\", \"paul@yiibai.com\", [emailto])\r\n return HttpResponse('%s'%res)\u0026nbsp;\u003c/pre\u003e \n \u003cp\u003e 這裏是 send_mail 參數的細節\u0026nbsp;− \u003c/p\u003e \n \u003cul\u003e \n \u003cli\u003e \u003cp\u003e \u003cstrong\u003esubject\u0026nbsp;\u003c/strong\u003e− E-mail 標題 \u003c/p\u003e \u003c/li\u003e \n \u003cli\u003e \u003cp\u003e \u003cstrong\u003emessage\u003c/strong\u003e\u0026nbsp;− E-mail 主題內容 \u003c/p\u003e \u003c/li\u003e \n \u003cli\u003e \u003cp\u003e \u003cstrong\u003efrom_email\u003c/strong\u003e\u0026nbsp;− E-mail 發送方 \u003c/p\u003e \u003c/li\u003e \n \u003cli\u003e \u003cp\u003e \u003cstrong\u003erecipient_list\u0026nbsp;\u003c/strong\u003e−\u0026nbsp;接收者的電子郵件地址列表 \u003c/p\u003e \u003c/li\u003e \n \u003cli\u003e \u003cp\u003e \u003cstrong\u003efail_silently\u003c/strong\u003e\u0026nbsp;−\u0026nbsp;布爾,如果是false,send_mail將在出現錯誤時引發異常 \u003c/p\u003e \u003c/li\u003e \n \u003cli\u003e \u003cp\u003e \u003cstrong\u003eauth_user\u003c/strong\u003e\u0026nbsp;−\u0026nbsp;用戶登錄,如果不在\u0026nbsp;settings.py\u0026nbsp;中設置 \u003c/p\u003e \u003c/li\u003e \n \u003cli\u003e \u003cp\u003e \u003cstrong\u003eauth_password\u003c/strong\u003e\u0026nbsp;−\u0026nbsp;用戶密碼,如果不在 settings.py 設置 \u003c/p\u003e \u003c/li\u003e \n \u003cli\u003e \u003cp\u003e \u003cstrong\u003econnection\u003c/strong\u003e\u0026nbsp;− E-mail\u0026nbsp;後端 \u003c/p\u003e \u003c/li\u003e \n \u003cli\u003e \u003cp\u003e \u003cstrong\u003ehtml_message\u003c/strong\u003e\u0026nbsp;−\u0026nbsp;(Django1.7中新增功能),如果存在的話,該郵件將爲\u0026nbsp;multipart/alternative。 \u003c/p\u003e \u003c/li\u003e \n \u003c/ul\u003e \n \u003cdiv\u003e\n 讓我們訪問我們視圖的網址\u0026nbsp;- \n \u003c/div\u003e \n \u003cpre\u003efrom django.conf.urls import patterns, url\r\n\r\nurlpatterns = paterns('myapp.views', url(r'^simpleemail/(?P\u0026lt;emailto\u0026gt;\r\n [\\w.%+-]+@[A-Za-z0-9.-]+\\.[A-Za-z]{2,4})/', \r\n 'sendSimpleEmail' , name = 'sendSimpleEmail'),)\u0026nbsp;\u003c/pre\u003e \n \u003cp\u003e 所以,在訪問 /myapp/simpleemail/\u003ca href=\"mailto:polo@gmail.com\"\u003epolo@gmail.com\u003c/a\u003e/\u0026nbsp;的時候,會進入以下頁面\u0026nbsp;−\u003cbr\u003e \u003cimg src=\"https://asset.1ju.org/cmsstatic/djangoe-mail-1.jpg\" alt=\"Django發送E-mail\"\u003e \u003c/p\u003e \n \u003ch2\u003e \u003c/h2\u003e \n \u003ch2\u003e 發送帶有 send_mass_mail 多個郵件 \u003c/h2\u003e \n \u003cp\u003e 方法返回的消息成功傳遞的數量。\u0026nbsp;這與 send_mail\u0026nbsp;一樣但需要一個額外的參數;\u0026nbsp;datatuple,我們 sendMassEmail 視圖爲− \u003c/p\u003e \n \u003cpre\u003efrom django.core.mail import send_mass_mail\r\nfrom django.http import HttpResponse\r\n\r\ndef sendMassEmail(request,emailto):\r\n msg1 = ('subject 1', 'message 1', 'polo@polo.com', [emailto1])\r\n msg2 = ('subject 2', 'message 2', 'polo@polo.com', [emailto2])\r\n res = send_mass_mail((msg1, msg2), fail_silently = False)\r\n return HttpResponse('%\u003cb\u003es\u003c/b\u003e'%res)\u0026nbsp;\u003c/pre\u003e \n \u003cp\u003e 讓我們創建訪問我們的視圖網址\u0026nbsp;− \u003c/p\u003e \n \u003cpre\u003efrom django.conf.urls import patterns, url\r\n\r\nurlpatterns = paterns('myapp.views', url(r'^massEmail/(?P\u0026lt;emailto1\u0026gt;\r\n [\\w.%+-]+@[A-Za-z0-9.-]+\\.[A-Za-z]{2,4})/(?P\u0026lt;emailto2\u0026gt;\r\n [\\w.%+-]+@[A-Za-z0-9.-]+\\.[A-Za-z]{2,4})', 'sendMassEmail' , name = 'sendMassEmail'),)\r\u003c/pre\u003e \n \u003cp\u003e 當我們訪問 /myapp/massemail/polo@gmail.com/sorex@gmail.com/, 我們得到 −\u003cbr\u003e \u003cimg src=\"https://asset.1ju.org/cmsstatic/djangoe-mail-2.jpg\" alt=\"Django發送E-mail\"\u003e \u003c/p\u003e \n \u003cp\u003e send_mass_mail 參數詳細如下 − \u003c/p\u003e \n \u003cul\u003e \n \u003cli\u003e \u003cp\u003e \u003cstrong\u003edatatuples\u003c/strong\u003e\u003cstrong\u003e\u0026nbsp;\u003c/strong\u003e−\u0026nbsp;元組,每個元素都是像\u0026nbsp;(subject, message, from_email, recipient_list) \u003c/p\u003e \u003c/li\u003e \n \u003cli\u003e \u003cp\u003e \u003cstrong\u003efail_silently\u003c/strong\u003e\u0026nbsp;−\u0026nbsp;布爾,如果爲false,send_mail將在出現錯誤時引發異常 \u003c/p\u003e \u003c/li\u003e \n \u003cli\u003e \u003cp\u003e \u003cstrong\u003eauth_user\u003c/strong\u003e\u0026nbsp;−\u0026nbsp;用戶登錄,如果不在 settings.py 設置 \u003c/p\u003e \u003c/li\u003e \n \u003cli\u003e \u003cp\u003e \u003cstrong\u003eauth_password\u003c/strong\u003e\u0026nbsp;−\u0026nbsp;用戶密碼,如果不在 settings.py 中設置 \u003c/p\u003e \u003c/li\u003e \n \u003cli\u003e \u003cp\u003e \u003cstrong\u003econnection\u003c/strong\u003e\u0026nbsp;− E-mail\u0026nbsp;後端 \u003c/p\u003e \u003c/li\u003e \n \u003c/ul\u003e \n \u003cdiv\u003e\n 正如你可以在上面的圖片看到,兩條消息已成功發送。 \n \u003c/div\u003e \n \u003cp\u003e 注\u0026nbsp;-\u0026nbsp;在這個例子中,我們使用Python的smtpd\u0026nbsp;debuggingserver,可以使用下面命令啓動\u0026nbsp;− \u003c/p\u003e \n \u003cpre\u003e$python -m smtpd -n -c DebuggingServer localhost:1025\r\u003c/pre\u003e \n \u003cdiv\u003e\n 這意味着所有已發送的郵件將被打印在stdout和虛擬服務器運行在localhost:1025。 \n \u003c/div\u003e \n \u003cdiv\u003e\n 發送使用mail_admins和mail_managers方法電子郵件給管理員和管理人員 \n \u003c/div\u003e \n \u003cp\u003e 這些方法發送電子郵件給網站管理員作爲settings.py文件的ADMINS選項定義,網站管理人員在settings.py文件MANAGERS項中定義。假設我們的ADMINS和MANAGERS的看起來如下- \u003c/p\u003e \n \u003cp\u003e \u003cstrong\u003eADMINS\u003c/strong\u003e\u003cstrong\u003e\u0026nbsp;\u003c/strong\u003e= (('polo', 'polo@polo.com'),) \u003c/p\u003e \n \u003cp\u003e \u003cstrong\u003eMANAGERS\u003c/strong\u003e\u0026nbsp;= (('popoli', 'popoli@polo.com'),) \u003c/p\u003e \n \u003cpre\u003efrom django.core.mail import mail_admins\r\nfrom django.http import HttpResponse\r\n\r\ndef sendAdminsEmail(request):\r\n res = mail_admins('my subject', 'site is going down.')\r\n return HttpResponse('\u003cb\u003e%s\u003c/b\u003e'%res)\r\u003c/pre\u003e \n \u003cdiv\u003e\n 上面的代碼將發送一封電子郵件,在ADMINS部分定義的每個管理員。 \n \u003c/div\u003e \n \u003cpre\u003efrom django.core.mail import mail_managers\r\nfrom django.http import HttpResponse\r\n\r\ndef sendManagersEmail(request):\r\n res = mail_managers('my subject 2', 'Change date on the site.')\r\n return HttpResponse('\u003cb\u003e%s\u003c/b\u003e'%res)\r\u003c/pre\u003e \n \u003cdiv\u003e\n 上面的代碼會發郵件到MANAGERS\u0026nbsp;部分定義的每個管理員。 \n \u003c/div\u003e \n \u003cp\u003e 參數詳細信息\u0026nbsp;− \u003c/p\u003e \n \u003cul\u003e \n \u003cli\u003e \u003cp\u003e \u003cstrong\u003eSubject\u003c/strong\u003e\u0026nbsp;− E-mail 標題. \u003c/p\u003e \u003c/li\u003e \n \u003cli\u003e \u003cp\u003e \u003cstrong\u003emessage\u003c/strong\u003e\u0026nbsp;− E-mail 主題. \u003c/p\u003e \u003c/li\u003e \n \u003cli\u003e \u003cp\u003e \u003cstrong\u003efail_silently\u003c/strong\u003e\u0026nbsp;−\u0026nbsp;布爾,如果爲false,send_mail將在出現錯誤時引發異常 \u003c/p\u003e \u003c/li\u003e \n \u003cli\u003e \u003cp\u003e \u003cstrong\u003econnection\u003c/strong\u003e\u0026nbsp;− E-mail後端. \u003c/p\u003e \u003c/li\u003e \n \u003cli\u003e \u003cp\u003e \u003cstrong\u003ehtml_message\u003c/strong\u003e\u0026nbsp;−\u0026nbsp;(Django1.7中新增功能),如果存在的話,該郵件將爲\u0026nbsp;multipart/alternative。 \u003c/p\u003e \u003c/li\u003e \n \u003c/ul\u003e \n \u003ch2\u003e 發送HTML E-mail \u003c/h2\u003e \n \u003cdiv\u003e\n 在Django\u0026gt;=1.7發送HTML消息一樣簡單\u0026nbsp;- \n \u003c/div\u003e \n \u003cpre\u003efrom django.core.mail import send_mail\r\n\r\nfrom django.http import HttpResponse\r\n res = send_mail(\"hello paul\", \"comment tu vas?\", \"paul@polo.com\", \r\n [\"polo@gmail.com\"], html_message=\")\r\u003c/pre\u003e \n \u003cdiv\u003e\n 這將產生一個 multipart/alternative 的郵件。 \n \u003c/div\u003e \n \u003cp\u003e 但對於 Django\u0026lt;1.7 發送HTML郵件是通過 django.core.mail.mailMessage 類來完成,然後調用「send」對象− \u003c/p\u003e \n \u003cdiv\u003e\n 讓我們創建一個「sendHTMLEmail」視圖來發送HTML電子郵件。 \n \u003c/div\u003e \n \u003cpre\u003efrom django.core.mail import EmailMessage\r\nfrom django.http import HttpResponse\r\n\r\ndef sendHTMLEmail(request , emailto):\r\n html_content = \"\u0026lt;strong\u0026gt;Comment tu vas?\u0026lt;/strong\u0026gt;\"\r\n email = EmailMessage(\"my subject\", html_content, \"paul@polo.com\", [emailto])\r\n email.content_subtype = \"html\"\r\n res = email.send()\r\n return HttpResponse('\u003cb\u003e%s\u003c/b\u003e'%res)\u0026nbsp;\u003c/pre\u003e \n \u003cp\u003e 參數的詳細信息的電子郵件消息創建類\u0026nbsp;− \u003c/p\u003e \n \u003cul\u003e \n \u003cli\u003e \u003cp\u003e \u003cstrong\u003eSubject\u003c/strong\u003e\u0026nbsp;− E-mail 標題. \u003c/p\u003e \u003c/li\u003e \n \u003cli\u003e \u003cp\u003e \u003cstrong\u003emessage\u003c/strong\u003e\u0026nbsp;− E-mail 在HTML主體. \u003c/p\u003e \u003c/li\u003e \n \u003cli\u003e \u003cp\u003e \u003cstrong\u003efrom_email\u003c/strong\u003e\u0026nbsp;− E-mail 發送方. \u003c/p\u003e \u003c/li\u003e \n \u003cli\u003e \u003cp\u003e \u003cstrong\u003eto\u003c/strong\u003e\u0026nbsp;−\u0026nbsp;接收者的電子郵件地址列表。 \u003c/p\u003e \u003c/li\u003e \n \u003cli\u003e \u003cp\u003e \u003cstrong\u003ebcc\u003c/strong\u003e\u0026nbsp;−\u0026nbsp;「密件抄送」收件人的電子郵件地址列表。 \u003c/p\u003e \u003c/li\u003e \n \u003cli\u003e \u003cp\u003e \u003cstrong\u003econnection\u003c/strong\u003e\u0026nbsp;− E-mail 後端. \u003c/p\u003e \u003c/li\u003e \n \u003c/ul\u003e \n \u003cp\u003e 讓我們創建訪問視圖網址\u0026nbsp;− \u003c/p\u003e \n \u003cpre\u003efrom django.conf.urls import patterns, url\r\n\r\nurlpatterns = paterns('myapp.views', url(r'^htmlemail/(?P\u0026lt;emailto\u0026gt;\r\n [\\w.%+-]+@[A-Za-z0-9.-]+\\.[A-Za-z]{2,4})/', \r\n 'sendHTMLEmail' , name = 'sendHTMLEmail'),)\r\u003c/pre\u003e \n \u003cp\u003e 當我們訪問 /myapp/htmlemail/polo@gmail.com, 會得到以下內容 −\u003cbr\u003e \u003cimg src=\"https://asset.1ju.org/cmsstatic/djangoe-mail-3.jpg\" alt=\"Django發送E-mail\"\u003e \u003c/p\u003e \n \u003ch2\u003e \u003c/h2\u003e \n \u003ch2\u003e 發送帶附件的電子郵件 \u003c/h2\u003e \n \u003cdiv\u003e\n 這是通過使用所述EmailMessage對象上的「attach」方法進行。 \n \u003c/div\u003e \n \u003cp\u003e 一個視圖用於發送一封電子郵件,附件如下\u0026nbsp;− \u003c/p\u003e \n \u003cpre\u003efrom django.core.mail import EmailMessage\r\nfrom django.http import HttpResponse\r\n\r\ndef sendEmailWithAttach(request, emailto):\r\n html_content = \"\u003cb\u003eComment tu vas?\u003c/b\u003e\"\r\n email = EmailMessage(\"my subject\", html_content, \"paul@polo.com\", emailto])\r\n email.content_subtype = \"html\"\r\n \r\n fd = open('manage.py', 'r')\r\n email.attach('manage.py', fd.read(), 'text/plain')\r\n \r\n res = email.send()\r\n return HttpResponse('\u003cb\u003e%s\u003c/b\u003e'%res)\u0026nbsp;\u003c/pre\u003e \n \u003cp\u003e 在附件中的詳細參數\u0026nbsp;− \u003c/p\u003e \n \u003cul\u003e \n \u003cli\u003e \u003cp\u003e \u003cstrong\u003efilename\u003c/strong\u003e\u0026nbsp;−\u0026nbsp;附加的文件的名稱 \u003c/p\u003e \u003c/li\u003e \n \u003cli\u003e \u003cp\u003e \u003cstrong\u003econtent\u003c/strong\u003e\u0026nbsp;−\u0026nbsp;該文件的內容,以附加。 \u003c/p\u003e \u003c/li\u003e \n \u003cli\u003e \u003cp\u003e \u003cstrong\u003emimetype\u003c/strong\u003e\u0026nbsp;−\u0026nbsp;附件的內容MIME類型。 \u003c/p\u003e \u003c/li\u003e \n \u003c/ul\u003e \n\u003c/div\u003e \n\u003cbr\u003e"])</script><script>self.__next_f.push([1,"3e:T113f,"])</script><script>self.__next_f.push([1,"\u003cdiv\u003e \n \u003cdiv\u003e\n 在某些情況下編寫視圖代碼,正如我們所看到前面工作真的很繁重。想象一下,只需要一個靜態頁面或列表頁。\u0026nbsp;Django還提供了一種簡單的方法來設置這些簡單的視圖被稱爲通用視圖。 \n \u003c/div\u003e \n\u003c/div\u003e \n\u003cdiv\u003e \n \u003cp\u003e 不同於傳統的視圖,一般的視圖是一個類但沒有函數。Django還提供了一組類 django.views.generic 通用視圖,以及每一個普通視圖是這些類或從它們中的一個類繼承的。 \u003c/p\u003e \n \u003cp\u003e 有10+泛型類− \u003c/p\u003e \n \u003cpre\u003e\u0026gt;\u0026gt;\u0026gt; import django.views.generic\r\n\u0026gt;\u0026gt;\u0026gt; dir(django.views.generic)\r\n\r\n['ArchiveIndexView', 'CreateView', 'DateDetailView', 'DayArchiveView', \r\n 'DeleteView', 'DetailView', 'FormView', 'GenericViewError', 'ListView', \r\n 'MonthArchiveView', 'RedirectView', 'TemplateView', 'TodayArchiveView', \r\n 'UpdateView', 'View', 'WeekArchiveView', 'YearArchiveView', '__builtins__', \r\n '__doc__', '__file__', '__name__', '__package__', '__path__', 'base', 'dates', \r\n 'detail', 'edit', 'list']\r\u003c/pre\u003e \n \u003cdiv\u003e\n 你可以使用通用視圖。讓我們來看一些例子來看看它是如何工作的。 \n \u003c/div\u003e \n \u003ch2\u003e 靜態網頁 \u003c/h2\u003e \n \u003cdiv\u003e\n 讓我們從「static.html」模板發佈靜態頁面。 \n \u003c/div\u003e \n \u003cp\u003e 我們的 static.html − \u003c/p\u003e \n \u003cpre\u003e\u0026lt;html\u0026gt;\r\n \u0026lt;body\u0026gt; \r\n This is a static page!!! \r\n \u0026lt;/body\u0026gt;\r\n\u0026lt;/html\u0026gt;\u0026nbsp;\u003c/pre\u003e \n \u003cp\u003e 如果我們這樣做,按以前學過的方式,我們將不得不改變 myapp/views.py\u0026nbsp;− \u003c/p\u003e \n \u003cpre\u003efrom django.shortcuts import render\r\n\r\ndef static(request):\r\n return render(request, 'static.html', {})\u0026nbsp;\u003c/pre\u003e \n \u003cp\u003e myapp/urls.py 如下\u0026nbsp;− \u003c/p\u003e \n \u003cpre\u003efrom django.conf.urls import patterns, url\r\n\r\nurlpatterns = patterns(\"myapp.views\", url(r'^static/', 'static', name = 'static'),)\u0026nbsp;\u003c/pre\u003e \n \u003cp\u003e 最好的辦法就是使用通用視圖。對於這一點,我們的 myapp/views.py 將變成爲\u0026nbsp;− \u003c/p\u003e \n \u003cpre\u003efrom django.views.generic import TemplateView\r\n\r\nclass StaticView(TemplateView):\r\n template_name = \"static.html\"\u0026nbsp;\u003c/pre\u003e \n \u003cp\u003e 而我們的 myapp/urls.py 將如下\u0026nbsp;− \u003c/p\u003e \n \u003cpre\u003efrom myapp.views import StaticView\r\nfrom django.conf.urls import patterns\r\n\r\nurlpatterns = patterns(\"myapp.views\", (r'^static/$', StaticView.as_view()),)\u0026nbsp;\u003c/pre\u003e \n \u003cp\u003e 當訪問\u0026nbsp;/myapp/static\u0026nbsp;將得到\u0026nbsp;−\u003cbr\u003e \u003cimg src=\"https://asset.1ju.org/cmsstatic/django-4.jpg\" alt=\"Django通用視圖\"\u003e \u003c/p\u003e \n \u003cp\u003e 出於同樣的結果,我們也可以,執行下列操作\u0026nbsp;− \u003c/p\u003e \n \u003cul\u003e \n \u003cli\u003e 不需要修改 views.py \u003c/li\u003e \n \u003cli\u003e \n \u003cdiv\u003e\n 更改url.py文件爲 - \n \u003c/div\u003e \u003c/li\u003e \n \u003c/ul\u003e \n \u003cpre\u003efrom django.views.generic import TemplateView\r\nfrom django.conf.urls import patterns, url\r\n\r\nurlpatterns = patterns(\"myapp.views\",\r\n url(r'^static/',TemplateView.as_view(template_name = 'static.html')),)\r\u003c/pre\u003e \n \u003cdiv\u003e\n 正如你所看到的,只需要改變url.py文件中的第二個方法。 \n \u003c/div\u003e \n \u003ch3\u003e \u003c/h3\u003e \n \u003ch2\u003e 從數據庫列表和顯示數據 \u003c/h2\u003e \n \u003cp\u003e 我們要列出所有條目在Dreamreal模型。這樣使用ListView通用視圖類變得容易。編輯url.py文件,並對其進行更新 - \u003c/p\u003e \n \u003cpre\u003efrom django.views.generic import ListView\r\nfrom django.conf.urls import patterns, url\r\n\r\nurlpatterns = patterns(\r\n \"myapp.views\", url(r'^dreamreals/', ListView.as_view(model = Dreamreal, \r\n template_name = \"dreamreal_list.html\")),\r\n)\u0026nbsp;\u003c/pre\u003e \n \u003cp\u003e 重要的是要注意,在這一點上是變量通由通用視圖到模板爲object_list。如果你想自己的名字,將需要一個 context_object_name 參數添加到as_view方法。然後 url.py 成爲\u0026nbsp;- \u003c/p\u003e \n \u003cpre\u003efrom django.views.generic import ListView\r\nfrom django.conf.urls import patterns, url\r\n\r\nurlpatterns = patterns(\"myapp.views\",\r\n url(r'^dreamreals/', ListView.as_view(\r\n template_name = \"dreamreal_list.html\")),\r\n model = Dreamreal, context_object_name = 」dreamreals_objects」 ,)\u0026nbsp;\u003c/pre\u003e \n \u003cp\u003e 然後關聯的模板將成爲\u0026nbsp;− \u003c/p\u003e \n \u003cpre\u003e{% extends \"main_template.html\" %}\r\n{% block content %}\r\nDreamreals:\u0026lt;p\u0026gt;\r\n{% for dr in object_list %}\r\n{{dr.name}}\u0026lt;/p\u0026gt;\r\n{% endfor %}\r\n{% endblock %}\u0026nbsp;\u003c/pre\u003e \n \u003cp\u003e 訪問 /myapp/dreamreals/ 將產生如下頁面\u0026nbsp;−\u003cbr\u003e \u003cimg src=\"https://asset.1ju.org/cmsstatic/django-5.jpg\" alt=\"Django通用視圖\"\u003e \u003c/p\u003e \n\u003c/div\u003e \n\u003cbr\u003e"])</script><script>self.__next_f.push([1,"3f:T1751,"])</script><script>self.__next_f.push([1,"\u003cdiv\u003e \n \u003cdiv\u003e\n 在Django創建表單,類似於創建一個模型。\u0026nbsp;在這裏,我們只需要從Django的類並繼承此類屬性表單字段。讓我們在myapp文件夾中添加forms.py文件包含我們的應用程序的表單。我們將創建一個登錄表單。 \n \u003c/div\u003e \n\u003c/div\u003e \n\u003cdiv\u003e \n \u003cp\u003e \u003cstrong\u003emyapp/forms.py\u003c/strong\u003e \u003c/p\u003e \n \u003cpre\u003e#-*- coding: utf-8 -*-\r\nfrom django import forms\r\n\r\nclass LoginForm(forms.Form):\r\n user = forms.CharField(max_length = 100)\r\n password = forms.CharField(widget = forms.PasswordInput())\u0026nbsp;\u003c/pre\u003e \n \u003cp\u003e 由上可見,字段類型可以利用「widget」的參數到HTML渲染;\u0026nbsp;在我們的例子中,我們要隱藏密碼,不會顯示。在我們的例子中,想要隱藏密碼而不用顯示。\u0026nbsp;日期輸入是DateInput,CheckboxInput是複選框等等。 \u003c/p\u003e \n \u003ch2\u003e \n \u003cdiv\u003e\n 在視圖中使用表單 \n \u003c/div\u003e \u003c/h2\u003e \n \u003cp\u003e 有兩種HTTP請求,它們分別是GET和POST。在Django,作爲參數傳遞到視圖請求對象有一個屬性叫作「方法」,其中請求的類型被設置,並通過POST傳遞的所有數據可以經由request.POST字典進行訪問。 \u003c/p\u003e \n \u003cp\u003e 讓我們在\u0026nbsp;myapp/views.py\u0026nbsp;創建一個登錄視圖\u0026nbsp;− \u003c/p\u003e \n \u003cpre\u003e#-*- coding: utf-8 -*-\r\nfrom myapp.forms import LoginForm\r\n\r\ndef login(request):\r\n username = \"not logged in\"\r\n \r\n if request.method == \"POST\":\r\n #Get the posted form\r\n MyLoginForm = LoginForm(request.POST)\r\n \r\n if MyLoginForm.is_valid():\r\n username = MyLoginForm.cleaned_data['username']\r\n else:\r\n MyLoginForm = Loginform()\r\n\t\t\r\n return render(request, 'loggedin.html', {\"username\" : username})\u0026nbsp;\u003c/pre\u003e \n \u003cp\u003e 該視圖將通過\u0026nbsp;loggedin.html\u0026nbsp;登錄顯示錶單結果。\u0026nbsp;爲了測試它,我們首先需要登錄表單模板。讓我們把它命名爲:login.html。 \u003c/p\u003e \n \u003cpre\u003e\u0026lt;html\u0026gt;\r\n \u0026lt;body\u0026gt;\r\n \r\n \u0026lt;form name = \"form\" action = \"{% url \"myapp.views.login\" %}\" \r\n method = \"POST\" \u0026gt;{% csrf_token %}\r\n \r\n \u0026lt;div style = \"max-width:470px;\"\u0026gt;\r\n \u0026lt;center\u0026gt; \r\n \u0026lt;input type = \"text\" style = \"margin-left:20%;\" \r\n placeholder = \"Identifiant\" name = \"username\" /\u0026gt;\r\n \u0026lt;/center\u0026gt;\r\n \u0026lt;/div\u0026gt;\r\n\t\t\t\r\n \u0026lt;br\u0026gt;\r\n \r\n \u0026lt;div style = \"max-width:470px;\"\u0026gt;\r\n \u0026lt;center\u0026gt;\r\n \u0026lt;input type = \"password\" style = \"margin-left:20%;\" \r\n placeholder = \"password\" name = \"password\" /\u0026gt;\r\n \u0026lt;/center\u0026gt;\r\n \u0026lt;/div\u0026gt;\r\n\t\t\t\r\n \u0026lt;br\u0026gt;\r\n \r\n \u0026lt;div style = \"max-width:470px;\"\u0026gt;\r\n \u0026lt;center\u0026gt; \r\n \r\n \u0026lt;button style = \"border:0px; background-color:#4285F4; margin-top:8%;\r\n height:35px; width:80%;margin-left:19%;\" type = \"submit\" \r\n value = \"Login\" \u0026gt;\r\n \u0026lt;strong\u0026gt;Login\u0026lt;/strong\u0026gt;\r\n \u0026lt;/button\u0026gt;\r\n \r\n \u0026lt;/center\u0026gt;\r\n \u0026lt;/div\u0026gt;\r\n \r\n \u0026lt;/form\u0026gt;\r\n \r\n \u0026lt;/body\u0026gt;\r\n\u0026lt;/html\u0026gt;\u0026nbsp;\u003c/pre\u003e \n \u003cp\u003e 模板將顯示一個登錄表單,併發布結果我們上面登錄查看。您可能已經注意到模板,這只是爲了防止您網站上的跨站請求僞造(CSRF)攻擊的標籤。 \u003c/p\u003e \n \u003cpre\u003e{% csrf_token %}\r\u003c/pre\u003e \n \u003cdiv\u003e\n 當擁有了登錄模板後,我們需要將表格處理後呈現 loggedin.html 模板。 \n \u003c/div\u003e \n \u003cpre\u003e\u0026lt;html\u0026gt;\r\n \r\n \u0026lt;body\u0026gt;\r\n You are : \u0026lt;strong\u0026gt;{{username}}\u0026lt;/strong\u0026gt;\r\n \u0026lt;/body\u0026gt;\r\n \r\n\u0026lt;/html\u0026gt;\u0026nbsp;\u003c/pre\u003e \n \u003cp\u003e 現在,我們只需要URLs對來開始:\u0026nbsp;myapp/urls.py \u003c/p\u003e \n \u003cpre\u003efrom django.conf.urls import patterns, url\r\nfrom django.views.generic import TemplateView\r\n\r\nurlpatterns = patterns('myapp.views',\r\n url(r'^connection/',TemplateView.as_view(template_name = 'login.html')),\r\n url(r'^login/', 'login', name = 'login'))\u0026nbsp;\u003c/pre\u003e \n \u003cp\u003e 當訪問\"/myapp/connection\",我們會得到 login.html 模板顯示如下−\u003cbr\u003e \u003cimg src=\"https://asset.1ju.org/cmsstatic/django-6.jpg\" alt=\"Django表單處理\"\u003e \u003c/p\u003e \n \u003cp\u003e 上面的表格提交後,格式是有效的。在我們的例子中一定要填寫兩個字段,得到以下結果\u0026nbsp;−\u003cbr\u003e \u003cimg src=\"https://asset.1ju.org/cmsstatic/django-7.jpg\" alt=\"Django表單處理\"\u003e \u003c/p\u003e \n \u003cp\u003e 如果您的用戶名是polo,並且如果忘記了密碼。會收到以下消息\u0026nbsp;−\u003cbr\u003e \u003cimg src=\"https://asset.1ju.org/cmsstatic/django-8.jpg\" alt=\"Django表單處理\"\u003e \u003c/p\u003e \n \u003ch3\u003e \n \u003cdiv\u003e\n 用我們自己的表單驗證 \n \u003c/div\u003e \u003c/h3\u003e \n \u003cp\u003e 在上面的例子中,驗證表單爲\u0026nbsp;− \u003c/p\u003e \n \u003cpre\u003eMyLoginForm.is_valid()\u0026nbsp;\u003c/pre\u003e \n \u003cp\u003e 我們只用Django的自我形式驗證引擎,在例子中只是確保這個字段是必需的。現在讓我們嘗試以確保嘗試登錄的用戶是存在於我們的數據庫作爲Dreamreal項。\u0026nbsp;對於這一點,改變 myapp/forms.py 爲\u0026nbsp;− \u003c/p\u003e \n \u003cpre\u003e#-*- coding: utf-8 -*-\r\nfrom django import forms\r\nfrom myapp.models import Dreamreal\r\n\r\nclass LoginForm(forms.Form):\r\n user = forms.CharField(max_length = 100)\r\n password = forms.CharField(widget = forms.PasswordInput())\r\n\r\n def clean_message(self):\r\n username = self.cleaned_data.get(\"username\")\r\n dbuser = Dreamreal.objects.filter(name = username)\r\n \r\n if not dbuser:\r\n raise forms.ValidationError(\"User does not exist in our db!\")\r\n return username\u0026nbsp;\u003c/pre\u003e \n \u003cp\u003e 現在,調用「is_valid」方法之後,我們將獲得正確的輸出,僅當用戶是在我們的數據庫。如果想查詢表單字段,僅僅通過添加一個以「clean_」開頭方法,字段名稱對應到表單類字段。\u0026nbsp;引發一個\u0026nbsp;forms.ValidationError\u0026nbsp;錯誤是很重要的。 \u003c/p\u003e \n \u003cdiv\u003e \n \u003cspan\u003e\u003cbr\u003e \u003c/span\u003e \n \u003c/div\u003e \n\u003c/div\u003e \n\u003cbr\u003e"])</script><script>self.__next_f.push([1,"40:T1428,"])</script><script>self.__next_f.push([1,"\u003cdiv\u003e\n 對於Web應用程序,以便能夠上傳文件(資料圖片,歌曲,PDF格式,文字......),它通常是很有用的。讓我們在這一節中來討論如何使用Django上傳文件。 \n\u003c/div\u003e \n\u003cdiv\u003e \n \u003ch2\u003e \n \u003cdiv\u003e\n 上傳圖片 \n \u003c/div\u003e \u003c/h2\u003e \n \u003cp\u003e 在開始開發圖片上傳之前,請確保Python的圖像庫(PIL)已經安裝。現在來說明上傳圖片,讓我們創建一個配置文件格式,在 myapp/forms.py\u0026nbsp;- \u003c/p\u003e \n \u003cpre\u003e#-*- coding: utf-8 -*-\r\nfrom django import forms\r\n\r\nclass ProfileForm(forms.Form):\r\n name = forms.CharField(max_length = 100)\r\n picture = forms.ImageFields()\u0026nbsp;\u003c/pre\u003e \n \u003cp\u003e 正如你所看到的,這裏的主要區別僅僅是 forms.ImageField。ImageField字段將確保上傳的文件是一個圖像。如果不是,格式驗證將失敗。 \u003c/p\u003e \n \u003cdiv\u003e\n 現在,讓我們創建一個\u0026nbsp;「Profile」\u0026nbsp;模型,以保存上傳的資料。在\u0026nbsp;myapp/models.py\u0026nbsp;- \n \u003c/div\u003e \n \u003cpre\u003efrom django.db import models\r\n\r\nclass Profile(models.Model):\r\n name = models.CharField(max_length = 50)\r\n picture = models.ImageField(upload_to = 'pictures')\r\n\r\n class Meta:\r\n db_table = \"profile\"\u0026nbsp;\u003c/pre\u003e \n \u003cp\u003e 正如所看到的模型,ImageField\u0026nbsp;使用強制性參數:upload_to.\u0026nbsp;這表示硬盤驅動器,圖像保存所在的地方。注意,該參數將被添加到 settings.py文件中定義的MEDIA_ROOT選項。 \u003c/p\u003e \n \u003cdiv\u003e\n 現在我們有表單和模型,讓我們來創建視圖,在 myapp/\u0026nbsp;views.py\u0026nbsp;- \n \u003c/div\u003e \n \u003cpre\u003e#-*- coding: utf-8 -*-\r\nfrom myapp.forms import ProfileForm\r\nfrom myapp.models import Profile\r\n\r\ndef SaveProfile(request):\r\n saved = False\r\n \r\n if request.method == \"POST\":\r\n #Get the posted form\r\n MyProfileForm = ProfileForm(request.POST, request.FILES)\r\n \r\n if MyProfileForm.is_valid():\r\n profile = Profile()\r\n profile.name = MyProfileForm.cleaned_data[\"name\"]\r\n profile.picture = MyProfileForm.cleaned_data[\"picture\"]\r\n profile.save()\r\n saved = True\r\n else:\r\n MyProfileForm = Profileform()\r\n\t\t\r\n return render(request, 'saved.htmll', locals())\u0026nbsp;\u003c/pre\u003e \n \u003cp\u003e 這部分不要錯過,創建一個ProfileForm 並做了一些修改,添加了第二個參數:request.FILES.\u0026nbsp;如果不通過表單驗證會失敗,給一個消息,說該圖片是空的。 \u003c/p\u003e \n \u003cp\u003e 現在,我們只需要saved.htmll模板和profile.htmll模板,表單和重定向頁面− \u003c/p\u003e \n \u003cp\u003e myapp/templates/saved.htmll\u0026nbsp;− \u003c/p\u003e \n \u003cpre\u003e\u0026lt;html\u0026gt;\r\n \u0026lt;body\u0026gt;\r\n \r\n {% if saved %}\r\n \u0026lt;strong\u0026gt;Your profile was saved.\u0026lt;/strong\u0026gt;\r\n {% endif %}\r\n \r\n {% if not saved %}\r\n \u0026lt;strong\u0026gt;Your profile was not saved.\u0026lt;/strong\u0026gt;\r\n {% endif %}\r\n \r\n \u0026lt;/body\u0026gt;\r\n\u0026lt;/html\u0026gt;\r\u003c/pre\u003e \n \u003cp\u003e myapp/templates/profile.htmll\u0026nbsp;− \u003c/p\u003e \n \u003cpre\u003e\u0026lt;html\u0026gt;\r\n \u0026lt;body\u0026gt;\r\n \r\n \u0026lt;form name = \"form\" enctype = \"multipart/form-data\" \r\n action = \"{% url \"myapp.views.SaveProfile\" %}\" method = \"POST\" \u0026gt;{% csrf_token %}\r\n \r\n \u0026lt;div style = \"max-width:470px;\"\u0026gt;\r\n \u0026lt;center\u0026gt; \r\n \u0026lt;input type = \"text\" style = \"margin-left:20%;\" \r\n placeholder = \"Name\" name = \"name\" /\u0026gt;\r\n \u0026lt;/center\u0026gt;\r\n \u0026lt;/div\u0026gt;\r\n\t\t\t\r\n \u0026lt;br\u0026gt;\r\n \r\n \u0026lt;div style = \"max-width:470px;\"\u0026gt;\r\n \u0026lt;center\u0026gt; \r\n \u0026lt;input type = \"file\" style = \"margin-left:20%;\" \r\n placeholder = \"Picture\" name = \"picture\" /\u0026gt;\r\n \u0026lt;/center\u0026gt;\r\n \u0026lt;/div\u0026gt;\r\n\t\t\t\r\n \u0026lt;br\u0026gt;\r\n \r\n \u0026lt;div style = \"max-width:470px;\"\u0026gt;\r\n \u0026lt;center\u0026gt; \r\n \r\n \u0026lt;button style = \"border:0px;background-color:#4285F4; margin-top:8%; \r\n height:35px; width:80%; margin-left:19%;\" type = \"submit\" value = \"Login\" \u0026gt;\r\n \u0026lt;strong\u0026gt;Login\u0026lt;/strong\u0026gt;\r\n \u0026lt;/button\u0026gt;\r\n \r\n \u0026lt;/center\u0026gt;\r\n \u0026lt;/div\u0026gt;\r\n \r\n \u0026lt;/form\u0026gt;\r\n \r\n \u0026lt;/body\u0026gt;\r\n\u0026lt;/html\u0026gt;\u0026nbsp;\u003c/pre\u003e \n \u003cp\u003e 接下來,我們需要配對網址以開始:\u0026nbsp;myapp/urls.py \u003c/p\u003e \n \u003cpre\u003efrom django.conf.urls import patterns, url\r\nfrom django.views.generic import TemplateView\r\n\r\nurlpatterns = patterns(\r\n 'myapp.views', url(r'^profile/',TemplateView.as_view(\r\n template_name = 'profile.htmll')), url(r'^saved/', 'SaveProfile', name = 'saved')\r\n)\u0026nbsp;\u003c/pre\u003e \n \u003cp\u003e 當訪問\"/myapp/profile\",我們會得到下面 profile.htmll 模板顯示\u0026nbsp;−\u003cbr\u003e \u003cimg src=\"https://asset.1ju.org/cmsstatic/django-9.jpg\" alt=\"Django上傳文件\"\u003e \u003c/p\u003e \n \u003cp\u003e 在格式提交後,已保存的模板將顯示如下\u0026nbsp;−\u003cbr\u003e \u003cimg src=\"https://asset.1ju.org/cmsstatic/django-10.jpg\" alt=\"Django上傳文件\"\u003e \u003c/p\u003e \n \u003cdiv\u003e\n 這裏我們只講解圖片上傳示例,但如果想上傳其他類型的文件,只需更換\u0026nbsp;ImageField\u0026nbsp;在這兩個模型及 FileField 表單。 \n \u003c/div\u003e \n \u003cdiv\u003e \n \u003cbr\u003e \n \u003c/div\u003e \n\u003c/div\u003e \n\u003cbr\u003e"])</script><script>self.__next_f.push([1,"41:T7c7,"])</script><script>self.__next_f.push([1,"\u003cdiv\u003e \n \u003cdiv\u003e\n 到目前爲止,在我們的例子中,都是使用\u0026nbsp;Django\u0026nbsp;開發的web服務器。但這種服務器只是用於測試和不適合生產環境。一旦程序發佈投入生產,就需要如Apache,Nginx等一個真正的服務器,我們在這一節中討論Apache的配置。 \n \u003c/div\u003e \n\u003c/div\u003e \n\u003cdiv\u003e \n \u003cp\u003e 服務Django應用程序是通過Apache使用mod_wsgi的完成。\u0026nbsp;因此,第一件事情就是要確保你已經安裝了Apache和mod_wsgi。請記住,當我們創建我們的項目,項目結構它看起來應該如下所示 - \u003c/p\u003e \n \u003cpre\u003emyproject/\r\n manage.py\r\n myproject/\r\n __init__.py\r\n settings.py\r\n urls.py\r\n wsgi.py\r\u003c/pre\u003e \n \u003cdiv\u003e\n wsgi.py文件是一個考慮Django和Apache之間的聯繫和處理。 \n \u003c/div\u003e \n \u003cp\u003e 比方說,我們希望分享項目(myproject)在Apache中。\u0026nbsp;我們只需要設置Apache來訪問這個文件夾。假設我們把myproject的文件夾在\u0026nbsp;\"/var/www/html\".\u0026nbsp;在此階段,訪問該項目將經由\u0026nbsp;\u003ca href=\"http://127.0.0.1/myproject\"\u003ehttp://127.0.0.1/myproject\u003c/a\u003e\u0026nbsp;來完成。\u0026nbsp;這將導致Apache\u0026nbsp;列出文件夾顯示如在下面的快照。\u003cbr\u003e \u003cimg src=\"https://asset.1ju.org/cmsstatic/django-apache-1.jpg\" alt=\"Django Apache配置\"\u003e \u003c/p\u003e \n \u003cp\u003e 可以看出,Apache不需要處理Django的東西。\u0026nbsp;對於需要處理的,需要在Apache的httpd.conf配置。\u0026nbsp;於是打開httpd.conf並添加以下行\u0026nbsp;− \u003c/p\u003e \n \u003cpre\u003eWSGIScriptAlias / /var/www/html/myproject/myproject/wsgi.py\r\nWSGIPythonPath /var/www/html/myproject/\r\n\r\n\u0026lt;Directory /var/www/html/myproject/\u0026gt;\r\n \u0026lt;Files wsgi.py\u0026gt;\r\n Order deny,allow\r\n Allow from all\r\n \u0026lt;/Files\u0026gt;\r\n\u0026lt;/Directory\u0026gt;\u0026nbsp;\u003c/pre\u003e \n \u003cp\u003e 如果可以訪問登錄頁面:\u0026nbsp;http://127.0.0.1/myapp/connection,\u0026nbsp;你將看到如下頁面\u0026nbsp;-\u003cbr\u003e \u003cimg src=\"https://asset.1ju.org/cmsstatic/django-apache-2.jpg\" alt=\"Django Apache配置\"\u003e \u003c/p\u003e \n\u003c/div\u003e \n\u003cbr\u003e"])</script><script>self.__next_f.push([1,"42:Td85,"])</script><script>self.__next_f.push([1,"\u003cdiv\u003e \n \u003cdiv\u003e\n 有時候,可能要按您的Web應用程序的要求存儲訪問者一些數據在每個站點。始終牢記,那cookies被保存在客戶端,並根據您的客戶端瀏覽器的安全級別,設置cookie\u0026nbsp;存活的時間,有時候可能不需要。 \n \u003c/div\u003e \n\u003c/div\u003e \n\u003cdiv\u003e \n \u003cp\u003e 爲了說明在Django如何cookie處理,讓我們創建一個使用之前創建的登錄功能的系統。\u0026nbsp;系統將讓你登錄爲時間x分鐘,在此時間之後,應用程序將會自動註銷你的登陸信息。 \u003c/p\u003e \n \u003cdiv\u003e\n 對於這一點,需要設置兩個cookie:last_connection和username。 \n \u003c/div\u003e \n \u003cp\u003e 首先,讓我們改變登錄視圖以存儲用戶名和last_connection\u0026nbsp;cookies\u0026nbsp;− \u003c/p\u003e \n \u003cpre\u003efrom django.template import RequestContext\r\n\r\ndef login(request):\r\n username = \"not logged in\"\r\n \r\n if request.method == \"POST\":\r\n #Get the posted form\r\n MyLoginForm = LoginForm(request.POST)\r\n \r\n if MyLoginForm.is_valid():\r\n username = MyLoginForm.cleaned_data['username']\r\n else:\r\n MyLoginForm = LoginForm()\r\n \r\n response = render_to_response(request, 'loggedin.html', {\"username\" : username}, \r\n context_instance = RequestContext(request))\r\n \r\n response.set_cookie('last_connection', datetime.datetime.now())\r\n response.set_cookie('username', datetime.datetime.now())\r\n\t\r\n return response\u0026nbsp;\u003c/pre\u003e \n \u003cp\u003e 正如在上面這個視圖,設置cookie是調用setcookie方法完成的,而不是請求響應的,\u0026nbsp;還要注意所有Cookie的值是作爲字符串返回的。 \u003c/p\u003e \n \u003cp\u003e 讓我們爲登錄表單創建一個FormView,我們將不會顯示的表單,如果Cookie設置並且在10秒內\u0026nbsp;− \u003c/p\u003e \n \u003cpre\u003edef formView(request):\r\n if 'username' in request.COOKIES and 'last_connection' in request.COOKIES:\r\n username = request.COOKIES['username']\r\n \r\n last_connection = request.COOKIES['last_connection']\r\n last_connection_time = datetime.datetime.strptime(last_connection[:-7], \r\n \"%Y-%m-%d %H:%M:%S\")\r\n \r\n if (datetime.datetime.now() - last_connection_time).seconds \u0026lt; 10:\r\n return render(request, 'loggedin.html', {\"username\" : username})\r\n else:\r\n return render(request, 'login.html', {})\r\n\t\t\t\r\n else:\r\n return render(request, 'login.html', {})\u0026nbsp;\u003c/pre\u003e \n \u003cp\u003e 可以在\u0026nbsp;formView\u0026nbsp;視圖上訪問您設置Cookie,通過請求COOKIES類屬性(字典)完成。 \u003c/p\u003e \n \u003cp\u003e 現在修改url.py文件更改URL,配對新的視圖\u0026nbsp;− \u003c/p\u003e \n \u003cpre\u003efrom django.conf.urls import patterns, url\r\nfrom django.views.generic import TemplateView\r\n\r\nurlpatterns = patterns('myapp.views',\r\n url(r'^connection/','formView', name = 'loginform'),\r\n url(r'^login/', 'login', name = 'login'))\r\u003c/pre\u003e \n \u003cdiv\u003e\n 當訪問\u0026nbsp;/myapp/connection,您將進入以下頁面- \n \u003cbr\u003e \n \u003cimg src=\"https://asset.1ju.org/cmsstatic/django-cookies-1.jpg\" alt=\"Django Cookies處理\"\u003e \n \u003cbr\u003e \n \u003c/div\u003e \n \u003cdiv\u003e\n 提交後會重定向到以下界面\u0026nbsp;- \n \u003cbr\u003e \n \u003cimg src=\"https://asset.1ju.org/cmsstatic/django-cookies-2.jpg\" alt=\"Django Cookies處理\"\u003e \n \u003cbr\u003e \n \u003c/div\u003e \n \u003cp\u003e 現在,如果你在10秒內訪問\u0026nbsp;/myapp/connection\u0026nbsp;一遍,\u0026nbsp;會得到直接重定向到第二個屏幕。如果你再次訪問\u0026nbsp;/myapp/connection\u0026nbsp;超出這個範圍,將會得到的登錄表單(屏幕1)。 \u003c/p\u003e \n \u003cdiv\u003e \n \u003cspan\u003e\u003cbr\u003e \u003c/span\u003e \n \u003c/div\u003e \n\u003c/div\u003e \n\u003cbr\u003e"])</script><script>self.__next_f.push([1,"43:T1441,"])</script><script>self.__next_f.push([1,"\u003cdiv\u003e \n \u003cdiv\u003e\n 如前所述,我們可以在Web應用程序客戶端使用Cookie來存儲大量的有用數據。\u0026nbsp;我們在此之前已經看到了可以使用客戶端的cookie存儲各種數據,在Web應用程序這是非常有用的。這就導致了很多要保存數據的重要性和一些安全漏洞問題。 \n \u003c/div\u003e \n\u003c/div\u003e \n\u003cdiv\u003e \n \u003cp\u003e 出於安全原因,Django有一個會話框架來處理Cookies。\u0026nbsp;會話用於抽象的接收和發送cookie,數據保存在服務器端(如數據庫),而客戶端的cookie只是有識別會話ID。會話也有助於避免在用戶瀏覽器設置爲「不接受」cookies行爲。 \u003c/p\u003e \n \u003ch2\u003e \n \u003cdiv\u003e\n 設置會話 \n \u003c/div\u003e \u003c/h2\u003e \n \u003cp\u003e 在Django中,使會話在項目 settings.py 完成,通過添加一些行到MIDDLEWARE_CLASSES和INSTALLED_APPS選項。這應該在創建項目完成,但它總是很容易知道,所以MIDDLEWARE_CLASSES應該類似如下\u0026nbsp;− \u003c/p\u003e \n \u003cpre\u003e'django.contrib.sessions.middleware.SessionMiddleware'\r\u003c/pre\u003e \n \u003cdiv\u003e\n INSTALLED_APPS應該有\u0026nbsp;- \n \u003c/div\u003e \n \u003cpre\u003e'django.contrib.sessions'\u0026nbsp;\u003c/pre\u003e \n \u003cp\u003e 默認情況下,Django在數據庫保存會話信息(表django_session中或集合),但可以用其他的方式類似配置的引擎存儲的信息:在文件中或在緩存中。 \u003c/p\u003e \n \u003cdiv\u003e\n 當會話啓用,每個請求(在Django任何針對第一個參數)有一個會話(字典)屬性。 \n \u003c/div\u003e \n \u003cp\u003e 讓我們創建一個簡單的示例,看看如何創建和保存會話。我們之前已經建立了一個簡單的登錄系統(見Django的表單處理的章節和Django的Cookies處理一章)。讓我們保存用戶名在cookie。因此如果不註銷,訪問我們的登錄頁面時,你不會看到登錄表單。\u0026nbsp;在Django通過保存Cookie在服務器端,使用cookies處理更加安全。 \u003c/p\u003e \n \u003cdiv\u003e\n 對於這一點,首先讓我們改變登錄代碼以保存username 在服務器端- \n \u003c/div\u003e \n \u003cpre\u003edef login(request):\r\n username = 'not logged in'\r\n \r\n if request.method == 'POST':\r\n MyLoginForm = LoginForm(request.POST)\r\n \r\n if MyLoginForm.is_valid():\r\n username = MyLoginForm.cleaned_data['username']\r\n request.session['username'] = username\r\n else:\r\n MyLoginForm = LoginForm()\r\n\t\t\t\r\n return render(request, 'loggedin.html', {\"username\" : username}\r\u003c/pre\u003e \n \u003cdiv\u003e\n 那麼讓我們來創建視圖對應登錄表單的視圖,如果cookie設置將不會顯示錶單\u0026nbsp;- \n \u003c/div\u003e \n \u003cpre\u003edef formView(request):\r\n if request.session.has_key('username'):\r\n username = request.session['username']\r\n return render(request, 'loggedin.html', {\"username\" : username})\r\n else:\r\n return render(request, 'login.html', {})\u0026nbsp;\u003c/pre\u003e \n \u003cp\u003e 現在,讓我們修改url.py文件並更改URL,因此配對新視圖\u0026nbsp;− \u003c/p\u003e \n \u003cpre\u003efrom django.conf.urls import patterns, url\r\nfrom django.views.generic import TemplateView\r\n\r\nurlpatterns = patterns('myapp.views',\r\n url(r'^connection/','formView', name = 'loginform'),\r\n url(r'^login/', 'login', name = 'login'))\u0026nbsp;\u003c/pre\u003e \n \u003cp\u003e 當訪問\u0026nbsp;/myapp/connection,將能看到如下頁面−\u003cbr\u003e \u003cimg src=\"https://asset.1ju.org/cmsstatic/django-session-1.jpg\" alt=\"Django Session會話\"\u003e \u003c/p\u003e \n \u003cdiv\u003e\n 你會被重定向到下面的頁面\u0026nbsp;- \n \u003cbr\u003e \n \u003cimg src=\"https://asset.1ju.org/cmsstatic/django-session-2.jpg\" alt=\"Django Session會話\"\u003e \n \u003cbr\u003e \n \u003c/div\u003e \n \u003cdiv\u003e\n 現在,如果您嘗試再次訪問/myapp/connection,它會直接重定向到第二個屏幕。 \n \u003c/div\u003e \n \u003cdiv\u003e\n 讓我們創建一個簡單的註銷視圖,用於清除Cookie。 \n \u003c/div\u003e \n \u003cpre\u003edef logout(request):\r\n try:\r\n del request.session['username']\r\n except:\r\n pass\r\n return HttpResponse(\"\u0026lt;strong\u0026gt;You are logged out.\u0026lt;/strong\u0026gt;\")\r\u003c/pre\u003e \n \u003cdiv\u003e\n 並在 myapp/url.py 中配對 URL 註銷 \n \u003c/div\u003e \n \u003cpre\u003eurl(r'^logout/', 'logout', name = 'logout'),\r\u003c/pre\u003e \n \u003cdiv\u003e\n 現在,如果訪問/myapp/logout,將得到如下頁面- \n \u003cbr\u003e \n \u003cimg src=\"https://asset.1ju.org/cmsstatic/django-session-3.jpg\" alt=\"Django Session會話\"\u003e \n \u003cbr\u003e \n \u003c/div\u003e \n \u003cdiv\u003e\n 如果再次訪問\u0026nbsp;/myapp/connection\u0026nbsp;,將會得到的登錄表單(屏幕1)。 \n \u003c/div\u003e \n \u003ch3\u003e \n \u003cdiv\u003e\n 可能使用會話的一些動作 \n \u003c/div\u003e \u003c/h3\u003e \n \u003cp\u003e 我們已經看到如何存儲和訪問會話,下面是一個很好的瞭解請求的會話屬性還有其他一些有用的操作,如\u0026nbsp;- \u003c/p\u003e \n \u003cul\u003e \n \u003cli\u003e \u003cp\u003e \u003cstrong\u003eset_expiry (\u003c/strong\u003e\u003cstrong\u003evalue\u003c/strong\u003e\u003cstrong\u003e)\u003c/strong\u003e\u0026nbsp;−\u0026nbsp;設置會話的過期時間 \u003c/p\u003e \u003c/li\u003e \n \u003cli\u003e \u003cp\u003e \u003cstrong\u003eget_expiry_age()\u003c/strong\u003e\u0026nbsp;−\u0026nbsp;返回直到會話過期的秒數 \u003c/p\u003e \u003c/li\u003e \n \u003cli\u003e \u003cp\u003e \u003cstrong\u003eget_expiry_date()\u003c/strong\u003e\u0026nbsp;−\u0026nbsp;返回本會話將到期的日期 \u003c/p\u003e \u003c/li\u003e \n \u003cli\u003e \u003cp\u003e \u003cstrong\u003eclear_expired()\u003c/strong\u003e\u0026nbsp;−\u0026nbsp;從會話中刪除過期的會話存儲 \u003c/p\u003e \u003c/li\u003e \n \u003cli\u003e \u003cp\u003e \u003cstrong\u003eget_expire_at_browser_close()\u003c/strong\u003e\u003cstrong\u003e\u0026nbsp;\u003c/strong\u003e−\u0026nbsp;返回true或false,具體取決於用戶的會話cookie是否已過期在用戶的Web瀏覽器關閉時 \u003c/p\u003e \u003c/li\u003e \n \u003c/ul\u003e \n\u003c/div\u003e \n\u003cbr\u003e"])</script><script>self.__next_f.push([1,"44:T17b9,"])</script><script>self.__next_f.push([1,"\u003cdiv\u003e \n \u003cdiv\u003e\n 若要緩存一些昂貴的計算結果,\u0026nbsp;下一次你需要它時不需要再執行它。以下是解釋緩存如何工作的僞代碼− \n \u003c/div\u003e \n\u003c/div\u003e \n\u003cdiv\u003e \n \u003cpre\u003egiven a URL, try finding that page in the cache\r\n\r\nif the page is in the cache:\r\n return the cached page\r\nelse:\r\n generate the page\r\n save the generated page in the cache (for next time)\r\n return the generated page\u0026nbsp;\u003c/pre\u003e \n \u003cp\u003e Django提供了自己的緩存系統,可以讓您保存動態網頁,爲了避免在需要時重新計算它們。Django緩存架構的優點是,讓你緩存\u0026nbsp;- \u003c/p\u003e \n \u003cul\u003e \n \u003cli\u003e \n \u003cdiv\u003e\n 特定視圖的輸出 \n \u003c/div\u003e \u003c/li\u003e \n \u003cli\u003e \n \u003cdiv\u003e\n 模板的一部分 \n \u003c/div\u003e \u003c/li\u003e \n \u003cli\u003e \n \u003cdiv\u003e\n 整個網站 \n \u003c/div\u003e \u003c/li\u003e \n \u003c/ul\u003e \n \u003cp\u003e 要使用在Django中使用高速緩存,首先要做的是設置在那裏的緩存會保存下來。高速緩存框架提供了不同的可能性\u0026nbsp;-\u0026nbsp;高速緩存可以被保存在數據庫中,關於文件系統,或直接在內存中。可在項目的 settings.py 文件設置完成。 \u003c/p\u003e \n \u003ch2\u003e 在數據庫設置緩存 \u003c/h2\u003e \n \u003cdiv\u003e\n 只需在項目settings.py文件添加如下- \n \u003c/div\u003e \n \u003cpre\u003eCACHES = {\r\n 'default': {\r\n 'BACKEND': 'django.core.cache.backends.db.DatabaseCache',\r\n 'LOCATION': 'my_table_name',\r\n }\r\n}\u0026nbsp;\u003c/pre\u003e \n \u003cp\u003e 對於這項工作,並完成設置,我們需要創建高速緩存表「my_table_name」。對於這一點,需要做到以下幾點\u0026nbsp;- \u003c/p\u003e \n \u003cpre\u003epython manage.py createcachetable\r\u003c/pre\u003e \n \u003ch2\u003e \n \u003cdiv\u003e\n 在文件系統設置高速緩存 \n \u003c/div\u003e \u003c/h2\u003e \n \u003cdiv\u003e\n 只需在項目settings.py文件添加如下- \n \u003c/div\u003e \n \u003cpre\u003eCACHES = {\r\n 'default': {\r\n 'BACKEND': 'django.core.cache.backends.filebased.FileBasedCache',\r\n 'LOCATION': '/var/tmp/django_cache',\r\n }\r\n}\r\u003c/pre\u003e \n \u003ch2\u003e \n \u003cdiv\u003e\n 設置緩存在內存中 \n \u003c/div\u003e \u003c/h2\u003e \n \u003cdiv\u003e\n 這是緩存的最有效的方法,你可以使用它這取決於Python綁定庫選擇了內存高速緩存,如下列選項之一\u0026nbsp;- \n \u003c/div\u003e \n \u003cpre\u003eCACHES = {\r\n 'default': {\r\n 'BACKEND': 'django.core.cache.backends.memcached.MemcachedCache',\r\n 'LOCATION': '127.0.0.1:11211',\r\n }\r\n}\r\u003c/pre\u003e \n \u003cp\u003e \u003cb\u003e或\u003c/b\u003e \u003c/p\u003e \n \u003cpre\u003eCACHES = {\r\n 'default': {\r\n 'BACKEND': 'django.core.cache.backends.memcached.MemcachedCache',\r\n 'LOCATION': 'unix:/tmp/memcached.sock',\r\n }\r\n}\r\u003c/pre\u003e \n \u003ch2\u003e \n \u003cdiv\u003e\n 緩存整個網站 \n \u003c/div\u003e \u003c/h2\u003e \n \u003cp\u003e 使用高速緩存在Django的最簡單的方法就是緩存整個網站。這可以通過編輯項目settings.py的MIDDLEWARE_CLASSES選項來完成。以下需要添加到選項- \u003c/p\u003e \n \u003cpre\u003eMIDDLEWARE_CLASSES += (\r\n 'django.middleware.cache.UpdateCacheMiddleware',\r\n 'django.middleware.common.CommonMiddleware',\r\n 'django.middleware.cache.FetchFromCacheMiddleware',\r\n)\r\u003c/pre\u003e \n \u003cdiv\u003e\n 請注意,這裏的順序是很重要的,更新應在獲取中間件之前。 \n \u003c/div\u003e \n \u003cdiv\u003e\n 然後在同一個文件,還需要設置\u0026nbsp;- \n \u003c/div\u003e \n \u003cpre\u003eCACHE_MIDDLEWARE_ALIAS – The cache alias to use for storage.\r\nCACHE_MIDDLEWARE_SECONDS – The number of seconds each page should be cached.\r\u003c/pre\u003e \n \u003ch2\u003e \n \u003cdiv\u003e\n 緩存視圖 \n \u003c/div\u003e \u003c/h2\u003e \n \u003cp\u003e 如果不想緩存整個網站,可以緩存特定視圖。這可通過使用附帶 Django 的 cache_page 修飾符完成。我們要緩存視圖viewArticles的結果- \u003c/p\u003e \n \u003cpre\u003efrom django.views.decorators.cache import cache_page\r\n\r\n@cache_page(60 * 15)\r\n\r\ndef viewArticles(request, year, month):\r\n text = \"Displaying articles of : %s/%s\"%(year, month)\r\n return HttpResponse(text)\u0026nbsp;\u003c/pre\u003e \n \u003cp\u003e 正如你所看到 cache_page 是您希望視圖結果被緩存的需要的秒數(參數)。在上面的例子中,結果將會緩存 15 分鐘。 \u003c/p\u003e \n \u003cdiv\u003e\n 注\u0026nbsp;-\u0026nbsp;正如我們之前看到的上述視圖是映射到\u0026nbsp;- \n \u003c/div\u003e \n \u003cpre\u003eurlpatterns = patterns('myapp.views',\r\n url(r'^articles/(?P\u0026lt;month\u0026gt;\\d{2})/(?P\u0026lt;year\u0026gt;\\d{4})/', 'viewArticles', name = 'articles'),)\u0026nbsp;\u003c/pre\u003e \n \u003cp\u003e 由於URL使用參數,每一個不同的調用將被單獨地執行緩存。例如,請求 /myapp/articles/02/2007\u0026nbsp;將分別緩存到\u0026nbsp;/myapp/articles/03/2008。 \u003c/p\u003e \n \u003cp\u003e 緩存一個視圖也可以直接在url.py文件中完成。接着下面有相同的結果與上所述。只要編輯 myapp/url.py 文件並更改(以上)的相關映射URL爲 - \u003c/p\u003e \n \u003cpre\u003eurlpatterns = patterns('myapp.views',\r\n url(r'^articles/(?P\u0026lt;month\u0026gt;\\d{2})/(?P\u0026lt;year\u0026gt;\\d{4})/', \r\n cache_page(60 * 15)('viewArticles'), name = 'articles'),)\r\u003c/pre\u003e \n \u003cdiv\u003e\n 當然,它不再需要myapp/views.py。 \n \u003c/div\u003e \n \u003ch2\u003e \n \u003cdiv\u003e\n 緩存模板片段 \n \u003c/div\u003e \u003c/h2\u003e \n \u003cdiv\u003e\n 也可以緩存模板的一部分,這是通過使用\u0026nbsp;cache\u0026nbsp;標籤進行的。讓我們把\u0026nbsp;hello.html\u0026nbsp;模板修改\u0026nbsp;- \n \u003c/div\u003e \n \u003cpre\u003e{% extends \"main_template.html\" %}\r\n{% block title %}My Hello Page{% endblock %}\r\n{% block content %}\r\n\r\nHello World!!!\u0026lt;p\u0026gt;Today is {{today}}\u0026lt;/p\u0026gt;\r\nWe are\r\n{% if today.day == 1 %}\r\n\r\nthe first day of month.\r\n{% elif today == 30 %}\r\n\r\nthe last day of month.\r\n{% else %}\r\n\r\nI don't know.\r\n{%endif%}\r\n\r\n\u0026lt;p\u0026gt;\r\n {% for day in days_of_week %}\r\n {{day}}\r\n\u0026lt;/p\u0026gt;\r\n\r\n{% endfor %}\r\n{% endblock %}\r\u003c/pre\u003e \n \u003cdiv\u003e\n 緩存內容塊模板將成爲\u0026nbsp;- \n \u003c/div\u003e \n \u003cpre\u003e{% load cache %}\r\n{% extends \"main_template.html\" %}\r\n{% block title %}My Hello Page{% endblock %}\r\n{% cache 500 content %}\r\n{% block content %}\r\n\r\nHello World!!!\u0026lt;p\u0026gt;Today is {{today}}\u0026lt;/p\u0026gt;\r\nWe are\r\n{% if today.day == 1 %}\r\n\r\nthe first day of month.\r\n{% elif today == 30 %}\r\n\r\nthe last day of month.\r\n{% else %}\r\n\r\nI don't know.\r\n{%endif%}\r\n\r\n\u0026lt;p\u0026gt;\r\n {% for day in days_of_week %}\r\n {{day}}\r\n\u0026lt;/p\u0026gt;\r\n\r\n{% endfor %}\r\n{% endblock %}\r\n{% endcache %}\u0026nbsp;\u003c/pre\u003e \n \u003cp\u003e 正如你可以在上面看到,緩存標籤將需要2個參數\u0026nbsp;−\u0026nbsp;想要的塊被緩存(秒)以及名稱提供給緩存片段。 \u003c/p\u003e \n\u003c/div\u003e \n\u003cbr\u003e"])</script><script>self.__next_f.push([1,"45:Ta39,"])</script><script>self.__next_f.push([1,"\u003cdiv\u003e\n Django帶有聚合feed生成框架。有了它,你可以創建RSS或Atom只需繼承django.contrib.syndication.views.Feed類。 \n\u003c/div\u003e \n\u003cp\u003e 讓我們創建一個訂閱源的應用程序。 \u003c/p\u003e \n\u003cpre\u003efrom django.contrib.syndication.views import Feed\r\nfrom django.contrib.comments import Comment\r\nfrom django.core.urlresolvers import reverse\r\n\r\nclass DreamrealCommentsFeed(Feed):\r\n title = \"Dreamreal's comments\"\r\n link = \"/drcomments/\"\r\n description = \"Updates on new comments on Dreamreal entry.\"\r\n\r\n def items(self):\r\n return Comment.objects.all().order_by(\"-submit_date\")[:5]\r\n\t\t\r\n def item_title(self, item):\r\n return item.user_name\r\n\t\t\r\n def item_description(self, item):\r\n return item.comment\r\n\t\t\r\n def item_link(self, item):\r\n return reverse('comment', kwargs = {'object_pk':item.pk})\u0026nbsp;\u003c/pre\u003e \n\u003cul\u003e \n \u003cli\u003e \u003cp\u003e 在feed類,\u0026nbsp;title,\u0026nbsp;link\u0026nbsp;和\u0026nbsp;description\u0026nbsp;屬性對應標準RSS\u0026nbsp;的\u0026lt;title\u0026gt;,\u0026nbsp;\u0026lt;link\u0026gt;\u0026nbsp;和\u0026nbsp;\u0026lt;description\u0026gt;元素。 \u003c/p\u003e \u003c/li\u003e \n \u003cli\u003e \u003cp\u003e 條目方法返回應該進入feed的item的元素。在我們的示例中是最後五個註釋。 \u003c/p\u003e \u003c/li\u003e \n\u003c/ul\u003e \n\u003cp\u003e 現在,我們有feed,並添加評論在視圖views.py,以顯示我們的評論− \u003c/p\u003e \n\u003cpre\u003efrom django.contrib.comments import Comment\r\n\r\ndef comment(request, object_pk):\r\n mycomment = Comment.objects.get(object_pk = object_pk)\r\n text = '\u0026lt;strong\u0026gt;User :\u0026lt;/strong\u0026gt; %s \u0026lt;p\u0026gt;'%mycomment.user_name\u0026lt;/p\u0026gt;\r\n text += '\u0026lt;strong\u0026gt;Comment :\u0026lt;/strong\u0026gt; %s \u0026lt;p\u0026gt;'%mycomment.comment\u0026lt;/p\u0026gt;\r\n return HttpResponse(text)\u0026nbsp;\u003c/pre\u003e \n\u003cp\u003e 我們還需要一些網址在myapp\u0026nbsp;urls.py中映射\u0026nbsp;− \u003c/p\u003e \n\u003cpre\u003efrom myapp.feeds import DreamrealCommentsFeed\r\nfrom django.conf.urls import patterns, url\r\n\r\nurlpatterns += patterns('',\r\n url(r'^latest/comments/', DreamrealCommentsFeed()),\r\n url(r'^comment/(?P\\w+)/', 'comment', name = 'comment'),\r\n)\u0026nbsp;\u003c/pre\u003e \n\u003cp\u003e 當訪問/myapp/latest/comments/會得到 feed\u0026nbsp;−\u003cbr\u003e \u003cimg src=\"https://asset.1ju.org/cmsstatic/django-rss-1.jpg\" alt=\"Django RSS\"\u003e \u003c/p\u003e \n\u003cp\u003e 當點擊其中的一個用戶名都會得到:/myapp/comment/comment_id\u0026nbsp;在您的評論視圖定義之前,會得到\u0026nbsp;−\u003cbr\u003e \u003cimg src=\"https://asset.1ju.org/cmsstatic/django-rss-2.jpg\" alt=\"Django RSS\"\u003e \u003c/p\u003e \n\u003cp\u003e 因此,定義一個RSS源是\u0026nbsp;Feed\u0026nbsp;類的子類,並確保這些URL(一個用於訪問feed,一個用於訪問feed元素)的定義。\u0026nbsp;正如評論,這可以連接到您的應用程序的任何模型。 \u003c/p\u003e \n\u003cdiv\u003e \n \u003cbr\u003e \n\u003c/div\u003e \n\u003cbr\u003e"])</script><script>self.__next_f.push([1,"46:T196c,"])</script><script>self.__next_f.push([1,"\u003cdiv\u003e \n \u003cdiv\u003e\n Ajax基本上是集成到一起,以減少頁負載數量的技術的組合。我們通常使用Ajax來緩解的最終用戶體驗。在Django使用Ajax可以直接使用Ajax庫如jQuery或其它來完成。比方說,想使用jQuery,那麼你需要下載並服務於庫服務器通過Apache或其他服務器。然後用它在模板,就像開發一個基於Ajax的應用程序。 \n \u003c/div\u003e \n\u003c/div\u003e \n\u003cdiv\u003e \n \u003cp\u003e Django使用 Ajax 另一種方法是使用Django的Ajax框架。\u0026nbsp;最常用的是django-dajax,這是一個強大的工具,能夠輕鬆異步表示邏輯和超快速開發Web應用程序,使用Python和幾乎不需要 JavaScript 源代碼。它支持四種最流行的js框架:Prototype,\u0026nbsp;jQuery,\u0026nbsp;Dojo\u0026nbsp;和MooTools \u003c/p\u003e \n \u003ch2\u003e 使用Django-dajax \u003c/h2\u003e \n \u003cp\u003e 首先要做的就是安裝\u0026nbsp;django-dajax。這可以通過使用easy_install\u0026nbsp;或\u0026nbsp;pid\u0026nbsp;進行− \u003c/p\u003e \n \u003cpre\u003e$ pip install django_dajax\r\n$ easy_install django_dajax\u0026nbsp;\u003c/pre\u003e \n \u003cp\u003e 這將自動安裝django-dajaxice,按django-dajaxice要求。然後,我們需要配置Ajax和dajaxice。 \u003c/p\u003e \n \u003cp\u003e 添加 dajax 和 dajaxice 在 settings.py\u0026nbsp;的\u0026nbsp;INSTALLED_APPS選擇項目\u0026nbsp;− \u003c/p\u003e \n \u003cpre\u003eINSTALLED_APPS += (\r\n 'dajaxice',\r\n 'dajax'\r\n)\u0026nbsp;\u003c/pre\u003e \n \u003cp\u003e \u003cspan\u003e確保在同一個 settings.py 文件,則有以下\u003c/span\u003e\u0026nbsp;− \u003c/p\u003e \n \u003cpre\u003eTEMPLATE_LOADERS = (\r\n 'django.template.loaders.filesystem.Loader',\r\n 'django.template.loaders.app_directories.Loader',\r\n 'django.template.loaders.eggs.Loader',\r\n)\r\n\r\nTEMPLATE_CONTEXT_PROCESSORS = (\r\n 'django.contrib.auth.context_processors.auth',\r\n 'django.core.context_processors.debug',\r\n 'django.core.context_processors.i18n',\r\n 'django.core.context_processors.media',\r\n 'django.core.context_processors.static',\r\n 'django.core.context_processors.request',\r\n 'django.contrib.messages.context_processors.messages'\r\n)\r\n\r\nSTATICFILES_FINDERS = (\r\n 'django.contrib.staticfiles.finders.FileSystemFinder',\r\n 'django.contrib.staticfiles.finders.AppDirectoriesFinder',\r\n 'dajaxice.finders.DajaxiceFinder',\r\n)\r\n\r\nDAJAXICE_MEDIA_PREFIX = 'dajaxice'\u0026nbsp;\u003c/pre\u003e \n \u003cp\u003e 現在打開\u0026nbsp;myapp/url.py文件,確保有以下設置dajax\u0026nbsp;URL和加載dajax靜態js文件\u0026nbsp;− \u003c/p\u003e \n \u003cpre\u003efrom dajaxice.core import dajaxice_autodiscover, dajaxice_config\r\nfrom django.contrib.staticfiles.urls import staticfiles_urlpatterns\r\nfrom django.conf import settings\r\n\r\nThen dajax urls:\r\n\r\nurlpatterns += patterns('',\r\n url(r'^%s/' % settings.DAJAXICE_MEDIA_PREFIX, include('dajaxice.urls')),)\r\n\t\r\nurlpatterns += staticfiles_urlpatterns()\r\u003c/pre\u003e \n \u003cdiv\u003e\n 我們創建一個基於Dreamreal模型來存儲它一個簡單的表格,使用Ajax(指無刷新)。 \n \u003c/div\u003e \n \u003cdiv\u003e\n 首先,我們需要在\u0026nbsp;myapp/form.py\u0026nbsp;的\u0026nbsp;Dreamreal\u0026nbsp;表單。 \n \u003c/div\u003e \n \u003cpre\u003eclass DreamrealForm(forms.Form):\r\n website = forms.CharField(max_length = 100)\r\n name = forms.CharField(max_length = 100)\r\n phonenumber = forms.CharField(max_length = 50)\r\n email = forms.CharField(max_length = 100)\u0026nbsp;\u003c/pre\u003e \n \u003cp\u003e 然後,我們需要在應用程序的ajax.py文件:\u0026nbsp;myapp/ajax.py.\u0026nbsp;這裏是相關的邏輯,我們把將表單保存,然後返回彈出顯示結果 - \u003c/p\u003e \n \u003cpre\u003efrom dajaxice.utils import deserialize_form\r\nfrom myapp.form import DreamrealForm\r\nfrom dajax.core import Dajax\r\nfrom myapp.models import Dreamreal\r\n\r\n@dajaxice_register\r\ndef send_form(request, form):\r\n dajax = Dajax()\r\n form = DreamrealForm(deserialize_form(form))\r\n \r\n if form.is_valid():\r\n dajax.remove_css_class('#my_form input', 'error')\r\n dr = Dreamreal()\r\n dr.website = form.cleaned_data.get('website')\r\n dr.name = form.cleaned_data.get('name')\r\n dr.phonenumber = form.cleaned_data.get('phonenumber')\r\n dr.save()\r\n \r\n dajax.alert(\"Dreamreal Entry %s was successfully saved.\" % \r\n form.cleaned_data.get('name'))\r\n else:\r\n dajax.remove_css_class('#my_form input', 'error')\r\n for error in form.errors:\r\n dajax.add_css_class('#id_%s' % error, 'error')\r\n\t\t\t\r\n return dajax.json()\r\u003c/pre\u003e \n \u003cdiv\u003e\n 現在,讓我們創建 dreamreal.html 模板,裏面有需要的表單 - \n \u003c/div\u003e \n \u003cpre\u003e\u0026lt;html\u0026gt;\r\n \u0026lt;head\u0026gt;\u0026lt;/head\u0026gt;\r\n \u0026lt;body\u0026gt;\r\n \r\n \u0026lt;form action = \"\" method = \"post\" id = \"my_form\" accept-charset = \"utf-8\"\u0026gt;\r\n {{ form.as_p }}\r\n \u0026lt;p\u0026gt;\u0026lt;input type = \"button\" value = \"Send\" onclick = \"send_form();\"\u0026gt;\u0026lt;/p\u0026gt;\r\n \u0026lt;/form\u0026gt;\r\n \r\n \u0026lt;/body\u0026gt;\r\n\u0026lt;/html\u0026gt;\u0026nbsp;\u003c/pre\u003e \n \u003cp\u003e 補充一點,在模板視圖:myapp/views.py − \u003c/p\u003e \n \u003cpre\u003edef dreamreal(request):\r\n form = DreamrealForm()\r\n return render(request, 'dreamreal.html', locals())\u0026nbsp;\u003c/pre\u003e \n \u003cp\u003e 添加相應的網址:myapp/urls.py − \u003c/p\u003e \n \u003cpre\u003eurl(r'^dreamreal/', 'dreamreal', name = 'dreamreal'),\u0026nbsp;\u003c/pre\u003e \n \u003cp\u003e 現在添加必要的代碼在模板中,以使\u0026nbsp;Ajax\u0026nbsp;工作− \u003c/p\u003e \n \u003cp\u003e 在文件中頂部添加 - \u003c/p\u003e \n \u003cpre\u003e{% load static %}\r\n{% load dajaxice_templatetags %}\r\u003c/pre\u003e \n \u003cdiv\u003e\n 在dreamreal.html模板的\u0026lt;head\u0026gt;部分添加\u0026nbsp;- \n \u003c/div\u003e \n \u003cp\u003e 我們使用 JQuery 庫對於本例,所以加上以下代碼\u0026nbsp;− \u003c/p\u003e \n \u003cpre\u003e\u0026lt;script src = \"{% static '/static/jquery-1.11.3.min.js' %}\" \r\n type = \"text/javascript\" charset = \"utf-8\"\u0026gt;\u0026lt;/script\u0026gt;\r\n\u0026lt;script src = \"{% static '/static/dajax/jquery.dajax.core.js' %}\"\u0026gt;\u0026lt;/script\u0026gt;\u0026nbsp;\u003c/pre\u003e \n \u003cp\u003e 點擊將會調用 Ajax 函數− \u003c/p\u003e \n \u003cpre\u003e\u0026lt;script\u0026gt;\r\n\r\n function send_form(){\r\n Dajaxice.myapp.send_form(Dajax.process,{'form':$('#my_form').serialize(true)});\r\n }\r\n\u0026lt;/script\u0026gt;\u0026nbsp;\u003c/pre\u003e \n \u003cp\u003e 請注意,需要在靜態文件目錄添入\u0026nbsp;「jquery-1.11.3.min.js」,也是\u0026nbsp;jquery.dajax.core.js。\u0026nbsp;爲了確保所有 dajax 靜態文件的靜態目錄服務,運行\u0026nbsp;- \u003c/p\u003e \n \u003cpre\u003e$python manage.py collectstatic\r\u003c/pre\u003e \n \u003cdiv\u003e\n 注\u0026nbsp;-\u0026nbsp;有時 jquery.dajax.core.js 可以缺失,如果出現這種情況,只需下載源代碼並把它放在靜態文件夾中。 \n \u003c/div\u003e \n \u003cp\u003e 訪問將能看到下面的畫面,\u0026nbsp;/myapp/dreamreal/ −\u003cbr\u003e \u003cimg src=\"https://asset.1ju.org/cmsstatic/django-ajax-1.jpg\" alt=\"Django Ajax應用\"\u003e \u003c/p\u003e \n \u003cp\u003e 在提交後,將得到以下顯示畫面\u0026nbsp;−\u003cbr\u003e \u003cimg src=\"https://asset.1ju.org/cmsstatic/django-ajax-2.jpg\" alt=\"Django Ajax應用\"\u003e \u003c/p\u003e \n \u003cbr\u003e \n\u003c/div\u003e \n\u003cbr\u003e"])</script><script>self.__next_f.push([1,"47:T409d,"])</script><script>self.__next_f.push([1,"\u003ch2\u003e 快速安裝 \u003c/h2\u003e \n\u003cp\u003e 在使用Django之前,我們需要把它先安裝好。我們這裏有一個完整的安裝指南,涵蓋了所有的可能性;\u0026nbsp;本指南將引導您通過簡單的,最小化安裝。 \u003c/p\u003e \n\u003cp\u003e Windows 安裝參考:\u003ca href=\"https://docs.djangoproject.com/en/1.9/howto/windows/\"\u003ehttps://docs.djangoproject.com/en/1.9/howto/windows/\u003c/a\u003e \u003c/p\u003e \n\u003cdiv\u003e \n \u003ch2\u003e 安裝Python \u003c/h2\u003e \n \u003cp\u003e 作爲一個Python\u0026nbsp;Web框架,Django 需要 Python 環境的支持。Python中包括一個輕量級的數據庫:SQLite,所以我們不會需要建立數據庫。 \u003c/p\u003e \n \u003cdiv\u003e\n 獲得 Python 的最新版本在以下網址: \n \u003ca href=\"https://www.python.org/download/\"\u003ehttps://www.python.org/download/\u003c/a\u003e\u0026nbsp;或選擇你對應操作系統的軟件包管理器。 \n \u003c/div\u003e \n \u003cdiv\u003e\n 可以驗證Python是否安裝,通過從shell\u0026nbsp;鍵入python;\u0026nbsp;應該看到類似這樣輸出結果: \n \u003c/div\u003e \n \u003cdiv\u003e \n \u003cpre\u003ePython 3.4.x\r\n[GCC 4.x] on linux\r\nType \"help\", \"copyright\", \"credits\" or \"license\" for more information.\r\n\u0026gt;\u0026gt;\u0026gt;\u003cspan\u003e\u003c/span\u003e\u003c/pre\u003e \n \u003c/div\u003e \n\u003c/div\u003e \n\u003cdiv\u003e \n \u003ch2\u003e 配置數據庫 \u003c/h2\u003e \n \u003cp\u003e 如果想使用像PostgreSQL,MySQL和Oracle這些一個「大」數據庫引擎工作。要安裝這樣的數據庫,請查閱\u003ca href=\"https://docs.djangoproject.com/en/1.9/topics/install/#database-installation\"\u003e數據庫的安裝信息\u003c/a\u003e。 \u003c/p\u003e \n\u003c/div\u003e \n\u003cdiv\u003e \n \u003ch2\u003e \u003c/h2\u003e \n \u003ch2\u003e 刪除所有舊版本的Django \u003c/h2\u003e \n \u003cp\u003e 如果您是從舊版本升級安裝Django的等方面,需要\u003ca href=\"https://docs.djangoproject.com/en/1.9/topics/install/#removing-old-versions-of-django\"\u003e安裝新版本前卸載舊版本的Django\u003c/a\u003e。 \u003c/p\u003e \n\u003c/div\u003e \n\u003cdiv\u003e \n \u003ch2\u003e 安裝Django \u003c/h2\u003e \n \u003cdiv\u003e\n 一般使用三個簡單的選項來安裝Django: \n \u003c/div\u003e \n \u003cul\u003e \n \u003cli\u003e 安裝由\u003ca href=\"https://docs.djangoproject.com/en/1.9/misc/distributions/\"\u003e操作系統分配提供的一個Django版本\u003c/a\u003e。\u0026nbsp;這是最快的選擇對於那些有分發Django的操作系統。 \u003c/li\u003e \n \u003cli\u003e \n \u003cdiv\u003e\n 安裝 \n \u003ca href=\"https://docs.djangoproject.com/en/1.9/topics/install/#installing-official-release\"\u003e官方發佈版本\u003c/a\u003e。這是大多數用戶的最佳方法。 \n \u003c/div\u003e \u003c/li\u003e \n \u003cli\u003e 安裝最新開發版本。此選項是那些想要最新的,並且不怕新代碼有BUG的愛好者。您可能會遇到在開發新版本遇到bug,並報告給他們以幫助Django的發展。另外,第三方軟件包版本在開發版本不太可能比最新的穩定版本兼容。 \u003c/li\u003e \n \u003c/ul\u003e \n \u003cdiv\u003e \n \u003ch3\u003e 安裝Windows \u003c/h3\u003e \n \u003cdiv\u003e\n 我們假設你的 Django 存檔並且\u0026nbsp;Python\u0026nbsp;安裝在計算機上,當前的最新版本是:1.9.1,可通過以下網址下載: \n \u003ca href=\"https://www.djangoproject.com/download/\"\u003ehttps://www.djangoproject.com/download/\u003c/a\u003e \n \u003c/div\u003e \n \u003cdiv\u003e\n 首先,路徑驗證。 \n \u003c/div\u003e \n \u003cp\u003e 在某些版本的Windows(Windows\u0026nbsp;7)中,需要確保 Path 系統變量的路徑如下:C:\\Python27\\;C:\\Python27\\Lib\\site-packages\\django\\bin\\\u0026nbsp;在裏面,當然這取決於你的Python版本。 \u003c/p\u003e \n \u003cdiv\u003e\n 然後,提取和安裝Django,這裏我們把解壓到\u0026nbsp;C:\\Python27\\ \n \u003c/div\u003e \n \u003cdiv\u003e \n \u003cimg src=\"https://asset.1ju.org/cmsstatic/django-6.png\" alt=\"Django快速入門\"\u003e \n \u003c/div\u003e \n \u003cp\u003e 接下來,通過運行以下命令,在windows\u0026nbsp;shell\u0026nbsp;「cmd」\u0026nbsp;可能需要管理權限來安裝Django\u0026nbsp;− \u003c/p\u003e \n \u003cpre\u003e\u003cspan\u003eC:\\Python27\\Django-1.9.1\u003c/span\u003e\u003cspan\u003e\u0026gt;python setup.py install\u0026nbsp;\u003c/span\u003e\u003c/pre\u003e \n \u003cp\u003e 要測試你的安裝,打開命令提示符,從 shell 輸入Python可以看到。然後在Python提示符,嘗試導入Django: \u003c/p\u003e \n \u003c/div\u003e \n\u003c/div\u003e \n\u003cdiv\u003e \n \u003cpre\u003e\u0026gt;\u0026gt;\u0026gt; import django\r\n\u0026gt;\u0026gt;\u0026gt; print(django.get_version())\r\n1.9.1\u003cspan\u003e\u003c/span\u003e\u003c/pre\u003e \n \u003cdiv\u003e\n 這就算安裝完成了。接下來我們要進入開發的第一步。 \n \u003c/div\u003e \n \u003cp\u003e \u003c/p\u003e \n \u003ch2\u003e 開發第一個Django app \u003c/h2\u003e \n \u003cdiv\u003e\n 讓我們開始創建一個Web應用程序並一步步地學習。 \n \u003c/div\u003e \n \u003cdiv\u003e\n 在本教程中,將引導您完成創建一個基本的民意調查 (poll) 的應用。 \n \u003c/div\u003e \n \u003cdiv\u003e\n 這將包括兩部分: \n \u003c/div\u003e \n \u003cul\u003e \n \u003cli\u003e \n \u003cdiv\u003e\n 一個公共網站,讓人們在上面查看投票和投票。 \n \u003c/div\u003e \u003c/li\u003e \n \u003cli\u003e \n \u003cdiv\u003e\n 一個網站管理,您可以添加,更改和刪除投票。 \n \u003c/div\u003e \u003c/li\u003e \n \u003c/ul\u003e \n \u003cdiv\u003e\n 假設你的 Django 已經安裝完成。可以確認 Django\u0026nbsp;安裝和版本,運行以下命令: \n \u003c/div\u003e \n \u003cdiv\u003e \n \u003cdiv\u003e \n \u003cpre\u003e\u003cspan\u003e$\u003c/span\u003e python -c \u003cspan\u003e\"import django; print(django.get_version())\"\u0026nbsp;\u0026nbsp;\u003c/span\u003e\u003cspan\u003e\u003c/span\u003e\u003c/pre\u003e \n \u003c/div\u003e \n \u003c/div\u003e \n \u003cp\u003e 如果安裝 Django,你應該看到安裝的版本。如果還未安裝會得到一個錯誤提示:\u0026nbsp;「No module named django」。 \u003c/p\u003e \n \u003cp\u003e 本教程是使用 Django1.9和Python2.7或更高版本編寫的。如果Django的版本不匹配,您可以通過使用版本切換 Django 版本,或者 Django 更新到最新版本。如果還在使用Python2.7,則需要稍微調整代碼,如在註釋中描述。 \u003c/p\u003e \n \u003ch2\u003e 創建一個項目 \u003c/h2\u003e \n \u003cp\u003e 如果第一次使用Django,必須採取一些初始設置。也就是說,需要自動生成一些代碼,建立一個Django項目\u0026nbsp;-\u0026nbsp;設置Django實例的集合,包括數據庫配置,Django 特定選項和特定應用程序設置。 \u003c/p\u003e \n \u003cdiv\u003e\n 在命令行,cd 到你想要存儲代碼目錄,比如,這裏我創建項目的地方是:C:\\Python7\\ ,然後運行以下命令: \n \u003c/div\u003e \n \u003cdiv\u003e \n \u003cdiv\u003e \n \u003cpre\u003e\u003cspan\u003e\u003cb\u003eC:\\python27\u0026gt; \u003c/b\u003e\u003c/span\u003e\u003cspan\u003edjango-admin startproject mysite\u003cspan\u003e\u003c/span\u003e\u003c/span\u003e\u003c/pre\u003e \n \u003c/div\u003e \n \u003c/div\u003e \n \u003cdiv\u003e\n 這將在 C:\\python17下創建 mysite 目錄。如下圖: \n \u003c/div\u003e \n \u003cdiv\u003e \n \u003cimg src=\"https://asset.1ju.org/cmsstatic/django-7.png\" alt=\"Django快速入門\"\u003e \n \u003cbr\u003e \n \u003c/div\u003e \n \u003cdiv\u003e\n 讓我們來看看 startproject 命令創建的目錄結構: \n \u003c/div\u003e \n \u003cdiv\u003e \n \u003cdiv\u003e \n \u003cdiv\u003e \n \u003cpre\u003emysite/\r\n manage.py\r\n mysite/\r\n __init__.py\r\n settings.py\r\n urls.py\r\n wsgi.py\u003cspan\u003e\u003c/span\u003e\u003c/pre\u003e \n \u003c/div\u003e \n \u003c/div\u003e \n \u003cp\u003e 對上面這些文件的簡要說明: \u003c/p\u003e \n \u003cul\u003e \n \u003cli\u003e \n \u003cdiv\u003e\n 在\u0026nbsp;mysite/ 根目錄上級僅僅是一個容器項目。對於Django它的名字隨意,可以將其重命名爲任何你喜歡的。 \n \u003c/div\u003e \u003c/li\u003e \n \u003cli\u003e manage.py:\u0026nbsp;一個命令行工具,可以讓您以各種方式與Django項目進行交互。你可以閱讀所有關於manage.py 在\u0026nbsp;\u003ca href=\"https://docs.djangoproject.com/en/1.9/ref/django-admin/\"\u003edjango-admin和manage.py 的細節\u003c/a\u003e。 \u003c/li\u003e \n \u003cli\u003e 內部\u0026nbsp;mysite/目錄是實際項目的Python包。它的名字是你需要使用導入裏面的任何Python包的名稱(例如mysite.urls)。 \u003c/li\u003e \n \u003cli\u003e mysite/__init__.py:\u0026nbsp;一個空文件,該文件告訴Python這個目錄應該作爲一個Python包。 \u003c/li\u003e \n \u003cli\u003e mysite/settings.py:\u0026nbsp;設置/配置這個Django項目。\u0026nbsp;Django的設置,會告訴你如何設置工作。 \u003c/li\u003e \n \u003cli\u003e mysite/urls.py:\u0026nbsp;該 URL 聲明這個Django項目; 類似Django網站的一個「表的內容」。 \u003c/li\u003e \n \u003cli\u003e mysite/wsgi.py:\u0026nbsp;一個WSGI兼容Web服務器的入口點,以滿足您的項目需要。 \u003c/li\u003e \n \u003c/ul\u003e \n \u003c/div\u003e \n \u003cdiv\u003e\n 開發服務器 \n \u003c/div\u003e \n \u003ch2\u003e \u003c/h2\u003e \n \u003cdiv\u003e\n 讓我們來驗證你的Django項目工程。更改到外mysite的目錄,如果你有沒有準備好,並運行以下命令: \n \u003c/div\u003e \n \u003cdiv\u003e \n \u003cdiv\u003e \n \u003cpre\u003e\u003cspan\u003e\u003cb\u003eC:\\python27\\mysite\u0026gt;\u003c/b\u003e\u003c/span\u003e\u003cspan\u003e python manage.py runserver\u003cspan\u003e\u003c/span\u003e\u003c/span\u003e\u003c/pre\u003e \n \u003c/div\u003e \n \u003c/div\u003e \n \u003cdiv\u003e\n 你會看到在命令行下面的輸出: \n \u003c/div\u003e \n \u003cpre\u003ePerforming system checks...\r\n\r\nSystem check identified no issues (0 silenced).\r\n\r\nYou have unapplied migrations; your app may not work properly until they are applied.\r\nRun 'python manage.py migrate' to apply them.\r\n\r\nJanuary 24, 2016 - 15:50:53\r\nDjango version 1.9, using settings 'mysite.settings'\r\nStarting development server at \u003ca href=\"http://127.0.0.1:8000/\"\u003ehttp://127.0.0.1:8000/\u003c/a\u003e Quit the server with CONTROL-C.\u003c/pre\u003e \n \u003cp\u003e 你已經啓動Django開發服務器,它是用Python寫的純粹一個輕量級的Web服務器。我們已經包含在 Django 中了,所以你可以很快開發東西了,而不必處理配置生產服務器\u0026nbsp;-\u0026nbsp;如:Apache 。 \u003c/p\u003e \n \u003cp\u003e 需要注意的是:不要在任何類似生產環境中使用此服務器。它的目的只是用於開發(我們是在使用Web框架,而不是Web服務器的業務。) \u003c/p\u003e \n \u003cdiv\u003e\n 現在,服務器的運行,請使用Web瀏覽器訪問: \n \u003ca href=\"http://127.0.0.1:8000/\"\u003ehttp://127.0.0.1:8000/\u003c/a\u003e。會看到一個「Welcome\u0026nbsp;to\u0026nbsp;Django」頁面。這表示它安裝成功了! \n \u003cbr\u003e \n \u003cimg src=\"https://asset.1ju.org/cmsstatic/django-8.png\" alt=\"Django快速入門\"\u003e \n \u003cbr\u003e \n \u003c/div\u003e \n \u003cdiv\u003e \n \u003cdiv\u003e\n 默認情況下 runserver 命令啓動就在內部IP開發服務器的端口 8000。 \n \u003c/div\u003e \n \u003cdiv\u003e\n 如果你想改變服務器的端口,將它作爲命令行參數。例如,下面這個命令會在服務器8080端口運行: \n \u003c/div\u003e \n \u003cdiv\u003e \n \u003cpre\u003e\u003cspan\u003e$\u003c/span\u003e python manage.py runserver 8080\u003cspan\u003e\u003c/span\u003e\u003c/pre\u003e \n \u003c/div\u003e \n \u003cdiv\u003e\n 如果想改變服務器的IP,傳遞給它端口。(如果你想暴露在其他計算機或網絡上工作)所有公網IP聽,使用以下方法: \n \u003c/div\u003e \n \u003cdiv\u003e \n \u003cpre\u003e\u003cspan\u003e$\u003c/span\u003e python manage.py runserver 0.0.0.0:8000\u003c/pre\u003e \n \u003c/div\u003e \n \u003c/div\u003e \n \u003ch2\u003e 創建Polls app \u003c/h2\u003e \n \u003cdiv\u003e\n 現在的「project」\u0026nbsp;-\u0026nbsp;設置完畢後就開始可以工作了。 \n \u003c/div\u003e \n \u003cp\u003e 在Django寫的每個應用程序包含一個Python包,遵循一定的約定。\u0026nbsp;Django提供了一個實用程序,自動生成一個應用程序的基本目錄結構,這樣就可以專注於寫代碼而不是建立目錄。 \u003c/p\u003e \n \u003cdiv\u003e\n 應用程序可以在Python路徑中的任何地方。在本教程中,我們將創建投票程序在 manage.py 文件同級目錄中,以便它可以被導入作爲自己的頂層模塊,而不是 mysite 的一個子模塊。 \n \u003c/div\u003e \n \u003cdiv\u003e\n 在創建應用程序前,確保你在 manage.py\u0026nbsp;同一個目錄中並鍵入以下命令: \n \u003c/div\u003e \n \u003cdiv\u003e \n \u003cdiv\u003e \n \u003cpre\u003e\u003cspan\u003e\u003cb\u003eC:\\python27\\mysite\u0026gt;\u003c/b\u003e\u003c/span\u003e\u003cspan\u003e python manage.py startapp polls\u003cspan\u003e\u003c/span\u003e\u003c/span\u003e\u003c/pre\u003e \n \u003c/div\u003e \n \u003c/div\u003e \n \u003cdiv\u003e\n 這將創建一個目錄polls,這是目錄結構是這樣的: \n \u003c/div\u003e \n \u003cdiv\u003e \n \u003cdiv\u003e \n \u003cpre\u003epolls/\r\n __init__.py\r\n admin.py\r\n apps.py\r\n migrations/\r\n __init__.py\r\n models.py\r\n tests.py\r\n views.py\u003cspan\u003e\u003c/span\u003e\u003c/pre\u003e \n \u003c/div\u003e \n \u003c/div\u003e \n \u003cdiv\u003e\n 這個目錄結構中的\u0026nbsp;poll\u0026nbsp;應用程序。 \n \u003c/div\u003e \n \u003ch2\u003e 編寫視圖代碼 \u003c/h2\u003e \n \u003cdiv\u003e\n 現在我們來編寫的第一個視圖。打開文件polls/views.py,把下面的Python代碼放入裏面: \n \u003c/div\u003e \n \u003cdiv\u003e \n \u003cdiv\u003e\n polls/views.py \n \u003c/div\u003e \n \u003cdiv\u003e \n \u003cpre\u003e\u003cspan\u003efrom \u003c/span\u003e\u003cspan\u003edjango.http \u003c/span\u003e\u003cspan\u003eimport\u003c/span\u003e HttpResponse \u003cspan\u003edef \u003c/span\u003e\u003cspan\u003eindex\u003c/span\u003e(request): \u003cspan\u003ereturn\u003c/span\u003e HttpResponse(\u003cspan\u003e\"Hello, world. You're at the polls index.\"\u003c/span\u003e)\u003c/pre\u003e \n \u003c/div\u003e \n \u003c/div\u003e \n \u003cdiv\u003e\n 這是 Django 最簡單的視圖。要調用這個視圖還需要把它映射到一個URL\u0026nbsp;-\u0026nbsp;對於這一點,我們需要 URL 配置。 \n \u003c/div\u003e \n \u003cdiv\u003e\n 要在polls\u0026nbsp;目錄創建URL配置,創建一個名爲\u0026nbsp;urls.py\u0026nbsp;文件,現在您的應用程序目錄應該是這樣的: \n \u003c/div\u003e \n \u003cdiv\u003e \n \u003cdiv\u003e \n \u003cpre\u003epolls/\r\n __init__.py\r\n admin.py\r\n apps.py\r\n migrations/\r\n __init__.py\r\n models.py\r\n tests.py\r\n urls.py\r\n views.py\u003cspan\u003e\u003c/span\u003e\u003c/pre\u003e \n \u003c/div\u003e \n \u003c/div\u003e \n \u003cdiv\u003e\n polls/urls.py文件包含以下代碼: \n \u003c/div\u003e \n \u003cdiv\u003e \n \u003cdiv\u003e\n polls/urls.py \n \u003c/div\u003e \n \u003cdiv\u003e \n \u003cpre\u003e\u003cspan\u003efrom \u003c/span\u003e\u003cspan\u003edjango.conf.urls \u003c/span\u003e\u003cspan\u003eimport\u003c/span\u003e url \u003cspan\u003efrom \u003c/span\u003e\u003cspan\u003e. \u003c/span\u003e\u003cspan\u003eimport\u003c/span\u003e views\r\n\r\nurlpatterns \u003cspan\u003e=\u003c/span\u003e [\r\n url(\u003cspan\u003er'^$'\u003c/span\u003e, views\u003cspan\u003e.\u003c/span\u003eindex, name\u003cspan\u003e=\u003c/span\u003e\u003cspan\u003e'index'\u003c/span\u003e),\r\n]\u003c/pre\u003e \n \u003c/div\u003e \n \u003c/div\u003e \n \u003cp\u003e 下一步驟是讓 polls.urls 模塊指向該ROOT_URLCONF。在\u0026nbsp;mysite/urls.py 中,\u0026nbsp;增加導入\u0026nbsp;django.conf.urls.include\u0026nbsp;並插入\u0026nbsp;include()\u0026nbsp;在URL模式列表中,所以這裏有: \u003c/p\u003e \n \u003cdiv\u003e \n \u003cdiv\u003e\n mysite/urls.py \n \u003c/div\u003e \n \u003cdiv\u003e \n \u003cpre\u003e\u003cspan\u003efrom \u003c/span\u003e\u003cspan\u003edjango.conf.urls \u003c/span\u003e\u003cspan\u003eimport\u003c/span\u003e include, url \u003cspan\u003efrom \u003c/span\u003e\u003cspan\u003edjango.contrib \u003c/span\u003e\u003cspan\u003eimport\u003c/span\u003e admin\r\n\r\nurlpatterns \u003cspan\u003e=\u003c/span\u003e [\r\n url(\u003cspan\u003er'^polls/'\u003c/span\u003e, include(\u003cspan\u003e'polls.urls'\u003c/span\u003e)),\r\n url(\u003cspan\u003er'^admin/'\u003c/span\u003e, admin\u003cspan\u003e.\u003c/span\u003esite\u003cspan\u003e.\u003c/span\u003eurls),\r\n]\u003c/pre\u003e \n \u003c/div\u003e \n \u003c/div\u003e \n \u003cdiv\u003e\n 現在已經連接索引視圖到URL配置。讓我們來驗證它結果,運行以下命令: \n \u003c/div\u003e \n \u003cdiv\u003e \n \u003cdiv\u003e \n \u003cpre\u003e\u003cspan\u003eC:\\Python27\\mysite\u0026gt;\u003c/span\u003e python manage.py runserver\u0026nbsp;\u0026nbsp;\u003cspan\u003e\u003c/span\u003e\u003c/pre\u003e \n \u003c/div\u003e \n \u003c/div\u003e \n \u003cp\u003e 在瀏覽器中打開\u003ca href=\"https://asset.1ju.org/polls/\"\u003ehttps://asset.1ju.org/polls/\u003c/a\u003e,應該看到如下文字顯示:\u0026nbsp;「Hello, world. You’re at the polls index.」,\u0026nbsp;在\u0026nbsp;index\u0026nbsp;視圖中所定義。\u003cbr\u003e \u003cimg src=\"https://asset.1ju.org/cmsstatic/django-9.png\" alt=\"Django快速入門\"\u003e \u003c/p\u003e \n \u003cp\u003e url()函數傳遞四個參數,兩個必需的:regex\u0026nbsp;和\u0026nbsp;view,以及兩個可選:kwargs\u0026nbsp;和\u0026nbsp;name。 \u003c/p\u003e \n \u003cdiv\u003e \n \u003ch3\u003e \u003ca href=\"https://docs.djangoproject.com/en/1.9/ref/urls/#django.conf.urls.url\"\u003eurl()\u003c/a\u003e\u0026nbsp;參數: regex \u003c/h3\u003e \n \u003cp\u003e 術語「regex」是一種常用的縮寫形式,意思是「正則表達式」,這是一個語法字符串匹配模式,或在我們的示例中是URL模式。Django從第一個正則表達式開始,並使得其遍歷列表,比對每一個正則表達式的請求的URL,直到它找到一個匹配。 \u003c/p\u003e \n \u003cp\u003e 請注意,這些正則表達式不搜索GET和POST參數,或者域名。例如,在一個請求https://www.example.com/myapp/,\u0026nbsp;URLconf 會尋找myapp/.在一個請求\u0026nbsp;https://www.example.com/myapp/?page=3,\u0026nbsp;URLconf 還將尋找\u0026nbsp;myapp/. \u003c/p\u003e \n \u003cp\u003e 如果需要使用正則表達式的幫助,請參見維基百科的條目和\u0026nbsp;\u003ca href=\"https://docs.python.org/3/library/re.html#module-re\"\u003ere\u0026nbsp;\u003c/a\u003e模塊的文檔。\u0026nbsp;然而在實踐中,你並不需要成爲正則表達式的專家,因爲只需要知道如何捕捉簡單的模式。事實上,複雜的正則表達式可以查找性能較差,所以你可能不依賴於正則表達式的全部功能。 \u003c/p\u003e \n \u003cp\u003e 最後,一個關於性能的事項需要了解:這些正則表達式編譯首次URL配置模塊被加載。它們是超級的快(只要查找東西不是太複雜 - 如上所述)。 \u003c/p\u003e \n \u003c/div\u003e \n \u003cdiv\u003e \n \u003ch3\u003e \u003ca href=\"https://docs.djangoproject.com/en/1.9/ref/urls/#django.conf.urls.url\"\u003eurl()\u003c/a\u003e\u0026nbsp;參數: view \u003c/h3\u003e \n \u003cp\u003e 當 Django 找到正則表達式匹配,Django調用指定的視圖函數,使用\u0026nbsp;HTTP 請求對象作爲第一個參數,從正則表達式「捕獲」的其他參數作爲其它的值。\u0026nbsp;正則表達式使用簡單的捕捉,值傳遞是通過位置參數;如果使用名爲捕捉,值傳遞關鍵字參數。我們將給出一個例子。 \u003c/p\u003e \n \u003c/div\u003e \n \u003cdiv\u003e \n \u003ch3\u003e \u003ca href=\"https://docs.djangoproject.com/en/1.9/ref/urls/#django.conf.urls.url\"\u003eurl()\u003c/a\u003e\u0026nbsp;參數: kwargs \u003c/h3\u003e \n \u003cdiv\u003e\n 任意關鍵字參數可以通過在字典中的目標視圖。在本教程我們不打算使用Django的這一特點。 \n \u003c/div\u003e \n \u003c/div\u003e \n \u003cp\u003e \u003cbr\u003e \u003c/p\u003e \n \u003ch3\u003e \u003ca href=\"https://docs.djangoproject.com/en/1.9/ref/urls/#django.conf.urls.url\"\u003eurl()\u003c/a\u003e\u0026nbsp;argument: name \u003c/h3\u003e \n \u003cp\u003e 命名網址可以參考它,明確地從其他地方在Django\u0026nbsp;-\u0026nbsp;尤其是模板。\u0026nbsp;這種強大的功能可讓您進行全局更改到項目的URL模式,而只需要修改一個文件。接下來我們學習如何在 Django 使用數據功能。\u003cbr\u003e \u003cbr\u003e 快速入門系列教程: \u003c/p\u003e \n \u003cp\u003e 2 - Django快速入門-數據庫模型 \u003c/p\u003e \n \u003cp\u003e \u003cspan\u003e3 -\u0026nbsp;\u003c/span\u003eDjango快速入門-視圖\u003cbr\u003e \u003cspan\u003e\u003c/span\u003e\u003cspan\u003e4 -\u0026nbsp;\u003c/span\u003eDjango快速入門-表單\u003cbr\u003e \u003cspan\u003e\u003c/span\u003e \u003c/p\u003e \n \u003cp\u003e \u003cbr\u003e \u003c/p\u003e \n \u003cp\u003e\u003c/p\u003e \n\u003c/div\u003e \n\u003cbr\u003e"])</script><script>self.__next_f.push([1,"48:T5ad3,"])</script><script>self.__next_f.push([1,"本系列教程第一部分已經講完了。在上一個教程的基礎上,在這一講中我們將建立數據庫,創建第一個模型,並使用一個 Django\u0026nbsp;快速自動生成的管理站點。 \n\u003cdiv\u003e \n \u003cdiv\u003e \n \u003ch2\u003e 數據庫配置 \u003c/h2\u003e \n \u003cdiv\u003e\n 現在,打開mysite/settings.py。Django設置模塊級的變量與正常的Python模塊一樣。 \n \u003c/div\u003e \n \u003cp\u003e 默認情況下,配置使用SQLite。如果你是數據庫新手,或者想嘗試學習Django,這是最簡單的選擇。SQLite包含在Python,所以不需要安裝任何東西來支持你的數據庫。當開始你的第一個真正的項目,可能需要使用更強大的數據庫如:PostgreSQL,MySQL等,可以配置數據庫切換就可以了。 \u003c/p\u003e \n \u003cdiv\u003e\n 如果你想使用其他數據庫,請安裝相應的數據庫綁定,並更改以下鍵在數據庫中「默認」的配置項,以適合您的數據庫連接設置: \n \u003c/div\u003e \n \u003cul\u003e \n \u003cli\u003e \u003ca href=\"https://docs.djangoproject.com/en/1.9/ref/settings/#std:setting-DATABASE-ENGINE\"\u003eENGINE\u003c/a\u003e\u0026nbsp;– 輸入'django.db.backends.sqlite3',\u0026nbsp;'django.db.backends.postgresql','django.db.backends.mysql',或'django.db.backends.oracle' \u003c/li\u003e \n \u003cli\u003e \u003ca href=\"https://docs.djangoproject.com/en/1.9/ref/settings/#std:setting-NAME\"\u003eNAME\u003c/a\u003e\u0026nbsp;–\u0026nbsp;數據庫的名稱。如果使用SQLite,數據庫會在您的計算機上創建文件;在這種情況下,名稱應該是完整的絕對路徑的文件,包括文件名。默認值爲 os.path.join(BASE_DIR,「db.sqlite3」),將存儲在您的項目目錄中的文件。 \u003c/li\u003e \n \u003c/ul\u003e \n \u003cp\u003e 如果你不使用SQLite作爲數據庫,而使用其他設置,如USER,\u0026nbsp;PASSWORD,\u0026nbsp;和\u0026nbsp;HOST\u0026nbsp;必須加入。欲瞭解更多詳細信息,請參閱用於\u003ca href=\"https://docs.djangoproject.com/en/1.9/ref/settings/#std:setting-DATABASES\"\u003e數據庫的參考文檔\u003c/a\u003e。 \u003c/p\u003e \n \u003cdiv\u003e\n 當你編輯\u0026nbsp;mysite/settings.py,時區設置TIME_ZONE。 \n \u003c/div\u003e \n \u003cp\u003e 此外,請注意,在該文件的頂部的 INSTALLED_APPS 設置。它包含了很多在本Django示例中激活的所有 Django 的應用程序的名稱。\u0026nbsp;應用程序可以在多個項目中使用,你可以打包給別人並在他們的項目分發使用。 \u003c/p\u003e \n \u003cdiv\u003e\n 默認情況下,INSTALLED_APPS包含以下內容的應用程序,這些都使用 Django : \n \u003c/div\u003e \n \u003cul\u003e \n \u003cli\u003e \u003ca href=\"https://docs.djangoproject.com/en/1.9/ref/contrib/admin/#module-django.contrib.admin\"\u003edjango.contrib.admin\u003c/a\u003e\u0026nbsp;–\u0026nbsp;管理站點,這裏會很快使用它 \u003c/li\u003e \n \u003cli\u003e \u003ca href=\"https://docs.djangoproject.com/en/1.9/topics/auth/#module-django.contrib.auth\"\u003edjango.contrib.auth\u003c/a\u003e\u0026nbsp;–\u0026nbsp;認證系統 \u003c/li\u003e \n \u003cli\u003e \u003ca href=\"https://docs.djangoproject.com/en/1.9/ref/contrib/contenttypes/#module-django.contrib.contenttypes\"\u003edjango.contrib.contenttypes\u003c/a\u003e\u0026nbsp;–\u0026nbsp;一個框架,內容類型 \u003c/li\u003e \n \u003cli\u003e \u003ca href=\"https://docs.djangoproject.com/en/1.9/topics/http/sessions/#module-django.contrib.sessions\"\u003edjango.contrib.sessions\u003c/a\u003e\u0026nbsp;–\u0026nbsp;會話框架 \u003c/li\u003e \n \u003cli\u003e \u003ca href=\"https://docs.djangoproject.com/en/1.9/ref/contrib/messages/#module-django.contrib.messages\"\u003edjango.contrib.messages\u003c/a\u003e\u0026nbsp;–\u0026nbsp;消息傳遞框架 \u003c/li\u003e \n \u003cli\u003e \u003ca href=\"https://docs.djangoproject.com/en/1.9/ref/contrib/staticfiles/#module-django.contrib.staticfiles\"\u003edjango.contrib.staticfiles\u003c/a\u003e\u0026nbsp;–\u0026nbsp;一個框架用來管理靜態文件 \u003c/li\u003e \n \u003c/ul\u003e \n \u003cdiv\u003e\n 這些應用包括默認,作爲一個方便常見的例子。 \n \u003c/div\u003e \n \u003cp\u003e 其中的一些應用程序使用至少一個數據庫表,所以我們需要在數據庫中創建的表纔可以使用它們。要做到這一點,運行以下命令: \u003c/p\u003e \n \u003cpre class=\"prettyprint lang-bsh\"\u003eC:\\Python27\\mysite\u0026gt;python manage.py migrate\r\nOperations to perform:\r\n Apply all migrations: admin, contenttypes, auth, sessions\r\nRunning migrations:\r\n Rendering model states... DONE\r\n Applying contenttypes.0001_initial... OK\r\n Applying auth.0001_initial... OK\r\n Applying admin.0001_initial... OK\r\n Applying admin.0002_logentry_remove_auto_add... OK\r\n Applying contenttypes.0002_remove_content_type_name... OK\r\n Applying auth.0002_alter_permission_name_max_length... OK\r\n Applying auth.0003_alter_user_email_max_length... OK\r\n Applying auth.0004_alter_user_username_opts... OK\r\n Applying auth.0005_alter_user_last_login_null... OK\r\n Applying auth.0006_require_contenttypes_0002... OK\r\n Applying auth.0007_alter_validators_add_error_messages... OK\r\n Applying sessions.0001_initial... OK\r\n\r\nC:\\Python27\\mysite\u0026gt;\u003c/pre\u003e \n \u003cdiv\u003e \n \u003c/div\u003e \n \u003cp\u003e migrate\u0026nbsp;命令着眼於INSTALLED_APPS設置並創建根據您的 mysite/settings.py 文件數據庫設置,並隨應用程序數據庫遷移任何數據庫表(我們將在以後的教程討論)。你會看到每個適用移植的消息。\u0026nbsp;如果有興趣,運行命令行在你的數據庫客戶端,列如類型\\dt\u0026nbsp;(PostgreSQL),\u0026nbsp;SHOW\u0026nbsp;TABLES;\u0026nbsp;(MySQL),\u0026nbsp;.schema\u0026nbsp;(SQLite),\u0026nbsp;或\u0026nbsp;SELECT\u0026nbsp;TABLE_NAME\u0026nbsp;FROMUSER_TABLES;\u0026nbsp;(Oracle)\u0026nbsp;以顯示Django所創建的表。 \u003c/p\u003e \n \u003c/div\u003e \n \u003cdiv\u003e \n \u003ch2\u003e 創建模型 \u003c/h2\u003e \n \u003cdiv\u003e\n 現在,我們將定義模型\u0026nbsp;-\u0026nbsp;本質上數據庫進行設計,使用其他元數據。 \n \u003c/div\u003e \n \u003cp\u003e 在我們的簡單調查的應用程序,我們將創建兩個模型:Question\u0026nbsp;和\u0026nbsp;Choice。Question有一個問題標題和發佈日期。Choice有兩個字段:選擇文本和票數。每個選項都與一個問題關聯。 \u003c/p\u003e \n \u003cdiv\u003e\n 這些概念由簡單的Python類來表示。編輯 polls/models.py 文件,所以\u0026nbsp; \n \u003cspan\u003epolls/models.py\u0026nbsp;\u003c/span\u003e看起來是這樣的: \n \u003c/div\u003e \n \u003cdiv\u003e \n \u003cpre class=\"prettyprint lang-py\"\u003efrom django.db import models\r\n\r\nclass Question(models.Model):\r\n question_text = models.CharField(max_length=200)\r\n pub_date = models.DateTimeField('date published')\r\n\r\nclass Choice(models.Model):\r\n question = models.ForeignKey(Question, on_delete=models.CASCADE)\r\n choice_text = models.CharField(max_length=200)\r\n votes = models.IntegerField(default=0)\u003c/pre\u003e \n \u003c/div\u003e \n \u003cp\u003e 該代碼是直接的。每個模型是django.db.models.Model類的子類。\u0026nbsp;每個模型具有許多類變量,每一個在模型變量與數據庫表的字段關聯。 \u003c/p\u003e \n \u003cp\u003e 每個字段由\u0026nbsp;Field\u0026nbsp;類實例表示\u0026nbsp;–\u0026nbsp;例如,CharField表示字符型字段,DateTimeField表示日期時間字段。這告訴Django 每個字段保存的數據類型。 \u003c/p\u003e \n \u003cp\u003e 每個Field實例(例如,question_text或pub_date)的名稱是字段的名稱,這是機器友好的格式。在Python代碼中使用這個值,數據庫將使用它作爲列名。 \u003c/p\u003e \n \u003cdiv\u003e\n 字段也可以有不同的可選參數;在本示例中,我們已經將票數的默認值設置爲0。 \n \u003c/div\u003e \n \u003cp\u003e 最後,需要注意的是關係的定義,這裏使用了外鍵。這告訴 Django 每個選項關聯一個問題。\u0026nbsp;Django支持所有常見的數據庫關係:多對一,多對多以及一對之一。 \u003c/p\u003e \n \u003c/div\u003e \n \u003cdiv\u003e \n \u003ch2\u003e \n \u003cdiv\u003e\n 激活模型 \n \u003c/div\u003e \u003c/h2\u003e \n \u003cdiv\u003e\n 模型代碼很小,但表示了 Django 的很多信息。有了它 Django 可以: \n \u003c/div\u003e \n \u003cul\u003e \n \u003cli\u003e \n \u003cdiv\u003e\n 爲這個應用程序創建數據庫(CREATE\u0026nbsp;TABLE語句) \n \u003c/div\u003e \u003c/li\u003e \n \u003cli\u003e 創建訪問\u0026nbsp;Question\u0026nbsp;和\u0026nbsp;Choice對象的Python數據庫訪問API \u003c/li\u003e \n \u003c/ul\u003e \n \u003cdiv\u003e\n 但首先我們需要告訴\u0026nbsp;polls\u0026nbsp;項安裝了的應用程序。 \n \u003c/div\u003e \n \u003cdiv\u003e\n 再次編輯\u0026nbsp;mysite/settings.py\u0026nbsp;文件,並更改INSTALLED_APPS設置包含字符串「polls.apps.PollsConfig」。結果如下所示: \n \u003c/div\u003e \n \u003cdiv\u003e\n mysite/settings.py文件內容如下: \n \u003cbr\u003e \n \u003cpre class=\"prettyprint lang-py\"\u003eINSTALLED_APPS = [\r\n 'polls.apps.PollsConfig',\r\n 'django.contrib.admin',\r\n 'django.contrib.auth',\r\n 'django.contrib.contenttypes',\r\n 'django.contrib.sessions',\r\n 'django.contrib.messages',\r\n 'django.contrib.staticfiles',\r\n]\u003c/pre\u003e \n \u003c/div\u003e \n \u003cdiv\u003e \n \u003c/div\u003e \n \u003cdiv\u003e\n 現在Django知道\u0026nbsp;polls\u0026nbsp;投票程序。讓我們運行另一個命令: \n \u003cbr\u003e \n \u003cpre class=\"prettyprint lang-py\"\u003eC:\\Python27\\mysite\u0026gt;python manage.py makemigrations polls\r\nMigrations for 'polls':\r\n 0001_initial.py:\r\n - Create model Choice\r\n - Create model Question\r\n - Add field question to choice\r\n\r\nC:\\Python27\\mysite\u0026gt;\u003c/pre\u003e \n \u003c/div\u003e \n \u003cdiv\u003e \n \u003c/div\u003e \n \u003cdiv\u003e\n 通過運行makemigrations,告訴Django你已經做了模型一些改動(在這種情況下,已經是最新的了),並且你想更改存儲作爲一個移植。 \n \u003c/div\u003e \n \u003cp\u003e 遷移是Django怎麼存儲您更改的模型(由你的數據庫架構決定)- 它們只是在磁盤上的文件。您如果喜歡可以讀取移植新的模型,它在文件\u0026nbsp;polls/migrations/0001_initial.py。你不會希望Django每一次都讀取它們,不過將它們設計成人可編輯的,你要知道Django是如何變化的並手動調整。 \u003c/p\u003e \n \u003cp\u003e 還有將運行migrations,自動管理數據庫模式(表)命令\u0026nbsp;-\u0026nbsp;這就是所謂的遷移,讓我們看看SQL瞭解移植運行。\u0026nbsp;sqlmigrate 命令將移植名稱返回SQL顯示: \u003c/p\u003e \n \u003cdiv\u003e \n \u003cpre\u003e\u003cspan\u003e$\u003c/span\u003e python manage.py sqlmigrate polls 0001\u003cspan\u003e\u003c/span\u003e\u003c/pre\u003e \n \u003c/div\u003e \n \u003cdiv\u003e\n 應該看到類似下面的東西(我們已經重新格式化它的可讀性): \n \u003cbr\u003e \n \u003cpre class=\"prettyprint lang-py\"\u003eC:\\Python27\\mysite\u0026gt;python manage.py sqlmigrate polls 0001\r\nBEGIN;\r\n--\r\n-- Create model Choice\r\n--\r\nCREATE TABLE \"polls_choice\" (\"id\" integer NOT NULL PRIMARY KEY AUTOINCREMENT, \"c\r\nhoice_text\" varchar(200) NOT NULL, \"votes\" integer NOT NULL);\r\n--\r\n-- Create model Question\r\n--\r\nCREATE TABLE \"polls_question\" (\"id\" integer NOT NULL PRIMARY KEY AUTOINCREMENT,\r\n\"question_text\" varchar(200) NOT NULL, \"pub_date\" datetime NOT NULL);\r\n--\r\n-- Add field question to choice\r\n--\r\nALTER TABLE \"polls_choice\" RENAME TO \"polls_choice__old\";\r\nCREATE TABLE \"polls_choice\" (\"id\" integer NOT NULL PRIMARY KEY AUTOINCREMENT, \"c\r\nhoice_text\" varchar(200) NOT NULL, \"votes\" integer NOT NULL, \"question_id\" integ\r\ner NOT NULL REFERENCES \"polls_question\" (\"id\"));\r\nINSERT INTO \"polls_choice\" (\"choice_text\", \"votes\", \"id\", \"question_id\") SELECT\r\n\"choice_text\", \"votes\", \"id\", NULL FROM \"polls_choice__old\";\r\nDROP TABLE \"polls_choice__old\";\r\nCREATE INDEX \"polls_choice_7aa0f6ee\" ON \"polls_choice\" (\"question_id\");\r\n\r\nCOMMIT;\r\n\r\nC:\\Python27\\mysite\u0026gt;\u003c/pre\u003e \n \u003c/div\u003e \n \u003cdiv\u003e \n \u003c/div\u003e \n \u003cp\u003e 遷移命令將所有還沒有被應用的遷移(Django跟蹤哪些是使用數據庫中的一個特殊的表名爲django_migrations應用)運行它們在數據庫中\u0026nbsp;-\u0026nbsp;基本上是,將使用模型在數據庫模式的變化同步。 \u003c/p\u003e \n \u003c/div\u003e \n \u003cp\u003e \u003cbr\u003e \u003c/p\u003e \n \u003ch2\u003e 使用API \u003c/h2\u003e \n \u003cdiv\u003e\n 現在,讓我們進入交互式 Python\u0026nbsp;shell \u0026nbsp;和 Django 所提供的API\u0026nbsp;。要調用Python命令行,請使用以下命令: \n \u003cbr\u003e \n \u003cpre class=\"prettyprint lang-py\"\u003eC:\\Python27\\mysite\u0026gt;python manage.py shell\r\nPython 2.7.10 (default, May 23 2015, 09:44:00) [MSC v.1500 64 bit (AMD64)] on wi\r\nn32\r\nType \"help\", \"copyright\", \"credits\" or \"license\" for more information.\r\n(InteractiveConsole)\r\n\u0026gt;\u0026gt;\u0026gt;\u003c/pre\u003e \n \u003c/div\u003e \n \u003cdiv\u003e \n \u003c/div\u003e \n \u003cp\u003e 只需鍵入「python」\u0026nbsp;來代替,因爲manage.py設置DJANGO_SETTINGS_MODULE環境變量,這給Django\u0026nbsp;Python\u0026nbsp;導入路徑到\u0026nbsp;mysite/settings.py文件。 \u003c/p\u003e \n \u003cpre class=\"prettyprint lang-py\"\u003e\u0026gt;\u0026gt;\u0026gt; import django\r\n\u0026gt;\u0026gt;\u0026gt; django.setup()\u003c/pre\u003e \n \u003cpre class=\"prettyprint lang-py\"\u003e\u0026gt;\u0026gt;\u0026gt; from polls.models import Question, Choice # Import the model classes we just wrote.\r\n\r\n# No questions are in the system yet.\r\n\u0026gt;\u0026gt;\u0026gt; Question.objects.all()\r\n[]\r\n\r\n# Create a new Question.\r\n# Support for time zones is enabled in the default settings file, so\r\n# Django expects a datetime with tzinfo for pub_date. Use timezone.now()\r\n# instead of datetime.datetime.now() and it will do the right thing.\r\n\u0026gt;\u0026gt;\u0026gt; from django.utils import timezone\r\n\u0026gt;\u0026gt;\u0026gt; q = Question(question_text=\"What's new?\", pub_date=timezone.now())\r\n\r\n# Save the object into the database. You have to call save() explicitly.\r\n\u0026gt;\u0026gt;\u0026gt; q.save()\r\n\r\n# Now it has an ID. Note that this might say \"1L\" instead of \"1\", depending\r\n# on which database you're using. That's no biggie; it just means your\r\n# database backend prefers to return integers as Python long integer\r\n# objects.\r\n\u0026gt;\u0026gt;\u0026gt; q.id\r\n1\r\n\r\n# Access model field values via Python attributes.\r\n\u0026gt;\u0026gt;\u0026gt; q.question_text\r\n\"What's new?\"\r\n\u0026gt;\u0026gt;\u0026gt; q.pub_date\r\ndatetime.datetime(2012, 2, 26, 13, 0, 0, 775217, tzinfo=\u0026lt;UTC\u0026gt;)\r\n\r\n# Change values by changing the attributes, then calling save().\r\n\u0026gt;\u0026gt;\u0026gt; q.question_text = \"What's up?\"\r\n\u0026gt;\u0026gt;\u0026gt; q.save()\r\n\r\n# objects.all() displays all the questions in the database.\r\n\u0026gt;\u0026gt;\u0026gt; Question.objects.all()\r\n[\u0026lt;Question: Question object\u0026gt;]\u003c/pre\u003e 這裏需要等待一會兒.\u0026nbsp;\u0026lt;Question:\u0026nbsp;Question\u0026nbsp;object\u0026gt;完全是這個對象的無用表示。讓我們來解決這個問題:通過編輯Question模型(在polls/models.py\u0026nbsp;文件),並添加一個__str__()\u0026nbsp;方法到這兩個Question\u0026nbsp;和\u0026nbsp;Choice\u0026nbsp;模型: \n \u003cspan\u003epolls/models.py文件內容如下:\u003cbr\u003e \u003cpre class=\"prettyprint lang-py\"\u003efrom django.db import models\r\nfrom django.utils.encoding import python_2_unicode_compatible\r\n\r\n@python_2_unicode_compatible # only if you need to support Python 2\r\nclass Question(models.Model):\r\n # ...\r\n def __str__(self):\r\n return self.question_text\r\n\r\n@python_2_unicode_compatible # only if you need to support Python 2\r\nclass Choice(models.Model):\r\n # ...\r\n def __str__(self):\r\n return self.choice_text\u003c/pre\u003e \u003c/span\u003e \n \u003cdiv\u003e \n \u003c/div\u003e \n \u003cdiv\u003e\n 添加\u0026nbsp;__str__()\u0026nbsp;方法是非常重要的,使用交互式提示處理添加到模型中,不僅爲自己方便,也是因爲對象的表示用於整個 Django 自動生成管理。 \n \u003c/div\u003e \n \u003cp\u003e 注意,這些都是正常的Python方法。讓我們添加一個自定義的方法,這裏只是爲了演示:polls/models.py \u003c/p\u003e \n \u003cp\u003e \u003cbr\u003e \u003c/p\u003e \n \u003cpre class=\"prettyprint lang-py\"\u003eimport datetime\r\n\r\nfrom django.db import models\r\nfrom django.utils import timezone\r\n\r\n\r\nclass Question(models.Model):\r\n # ...\r\n def was_published_recently(self):\r\n return self.pub_date \u0026gt;= timezone.now() - datetime.timedelta(days=1)\u003c/pre\u003e \n \u003cdiv\u003e \n \u003c/div\u003e \n \u003cp\u003e 注意這裏增加\u0026nbsp;import\u0026nbsp;datetime\u0026nbsp;和from\u0026nbsp;django.utils\u0026nbsp;import\u0026nbsp;timezon,引用Python的標準的datetime模塊和Django的時區相關的實用程序在django.utils.timezone,如果不熟悉在Python的時區處理,可以閱讀\u003ca href=\"https://docs.djangoproject.com/en/1.9/topics/i18n/timezones/\"\u003e時區支持文檔\u003c/a\u003e。 \u003c/p\u003e \n \u003cdiv\u003e\n 保存這些修改,並再次運行\u0026nbsp;python\u0026nbsp;manage.py\u0026nbsp;shell\u0026nbsp;啓動一個新的Python交互shell: \n \u003cbr\u003e \n \u003cpre class=\"prettyprint lang-py\"\u003e\u0026gt;\u0026gt;\u0026gt; from polls.models import Question, Choice\r\n\r\n# Make sure our __str__() addition worked.\r\n\u0026gt;\u0026gt;\u0026gt; Question.objects.all()\r\n[\u0026lt;Question: What's up?\u0026gt;]\r\n\r\n# Django provides a rich database lookup API that's entirely driven by\r\n# keyword arguments.\r\n\u0026gt;\u0026gt;\u0026gt; Question.objects.filter(id=1)\r\n[\u0026lt;Question: What's up?\u0026gt;]\r\n\u0026gt;\u0026gt;\u0026gt; Question.objects.filter(question_text__startswith='What')\r\n[\u0026lt;Question: What's up?\u0026gt;]\r\n\r\n# Get the question that was published this year.\r\n\u0026gt;\u0026gt;\u0026gt; from django.utils import timezone\r\n\u0026gt;\u0026gt;\u0026gt; current_year = timezone.now().year\r\n\u0026gt;\u0026gt;\u0026gt; Question.objects.get(pub_date__year=current_year)\r\n\u0026lt;Question: What's up?\u0026gt;\r\n\r\n# Request an ID that doesn't exist, this will raise an exception.\r\n\u0026gt;\u0026gt;\u0026gt; Question.objects.get(id=2)\r\nTraceback (most recent call last):\r\n ...\r\nDoesNotExist: Question matching query does not exist.\r\n\r\n# Lookup by a primary key is the most common case, so Django provides a\r\n# shortcut for primary-key exact lookups.\r\n# The following is identical to Question.objects.get(id=1).\r\n\u0026gt;\u0026gt;\u0026gt; Question.objects.get(pk=1)\r\n\u0026lt;Question: What's up?\u0026gt;\r\n\r\n# Make sure our custom method worked.\r\n\u0026gt;\u0026gt;\u0026gt; q = Question.objects.get(pk=1)\r\n\u0026gt;\u0026gt;\u0026gt; q.was_published_recently()\r\nTrue\r\n\r\n# Give the Question a couple of Choices. The create call constructs a new\r\n# Choice object, does the INSERT statement, adds the choice to the set\r\n# of available choices and returns the new Choice object. Django creates\r\n# a set to hold the \"other side\" of a ForeignKey relation\r\n# (e.g. a question's choice) which can be accessed via the API.\r\n\u0026gt;\u0026gt;\u0026gt; q = Question.objects.get(pk=1)\r\n\r\n# Display any choices from the related object set -- none so far.\r\n\u0026gt;\u0026gt;\u0026gt; q.choice_set.all()\r\n[]\r\n\r\n# Create three choices.\r\n\u0026gt;\u0026gt;\u0026gt; q.choice_set.create(choice_text='Not much', votes=0)\r\n\u0026lt;Choice: Not much\u0026gt;\r\n\u0026gt;\u0026gt;\u0026gt; q.choice_set.create(choice_text='The sky', votes=0)\r\n\u0026lt;Choice: The sky\u0026gt;\r\n\u0026gt;\u0026gt;\u0026gt; c = q.choice_set.create(choice_text='Just hacking again', votes=0)\r\n\r\n# Choice objects have API access to their related Question objects.\r\n\u0026gt;\u0026gt;\u0026gt; c.question\r\n\u0026lt;Question: What's up?\u0026gt;\r\n\r\n# And vice versa: Question objects get access to Choice objects.\r\n\u0026gt;\u0026gt;\u0026gt; q.choice_set.all()\r\n[\u0026lt;Choice: Not much\u0026gt;, \u0026lt;Choice: The sky\u0026gt;, \u0026lt;Choice: Just hacking again\u0026gt;]\r\n\u0026gt;\u0026gt;\u0026gt; q.choice_set.count()\r\n3\r\n\r\n# The API automatically follows relationships as far as you need.\r\n# Use double underscores to separate relationships.\r\n# This works as many levels deep as you want; there's no limit.\r\n# Find all Choices for any question whose pub_date is in this year\r\n# (reusing the 'current_year' variable we created above).\r\n\u0026gt;\u0026gt;\u0026gt; Choice.objects.filter(question__pub_date__year=current_year)\r\n[\u0026lt;Choice: Not much\u0026gt;, \u0026lt;Choice: The sky\u0026gt;, \u0026lt;Choice: Just hacking again\u0026gt;]\r\n\r\n# Let's delete one of the choices. Use delete() for that.\r\n\u0026gt;\u0026gt;\u0026gt; c = q.choice_set.filter(choice_text__startswith='Just hacking')\r\n\u0026gt;\u0026gt;\u0026gt; c.delete()\u003c/pre\u003e \n \u003c/div\u003e \n \u003cdiv\u003e \n \u003ch2\u003e 介紹 Django管理 \u003c/h2\u003e \n \u003cdiv\u003e \n \u003ch3\u003e \n \u003cdiv\u003e\n 創建一個管理員用戶 \n \u003c/div\u003e \u003c/h3\u003e \n \u003cdiv\u003e\n 首先,我們需要創建可以登錄到管理界面的用戶。運行以下命令: \n \u003c/div\u003e \n \u003cdiv\u003e \n \u003cpre\u003e\u003cspan\u003e\u003cb\u003ec:\\python27\\mysite\u0026gt;\u003c/b\u003e\u003c/span\u003e python manage.py createsuperuser\u003cspan\u003e\u003c/span\u003e\u003c/pre\u003e \n \u003c/div\u003e \n \u003cdiv\u003e\n 輸入你想要的用戶名(隨便一個),然後按Enter。 \n \u003c/div\u003e \n \u003cdiv\u003e \n \u003cpre\u003eUsername: admin\u003cspan\u003e\u003c/span\u003e\u003c/pre\u003e \n \u003c/div\u003e \n \u003cdiv\u003e\n 然後,將提示輸入電子郵件地址(隨便一個): \n \u003c/div\u003e \n \u003cdiv\u003e \n \u003cpre\u003eEmail address: admin@yiibai.com\u003cspan\u003e\u003c/span\u003e\u003c/pre\u003e \n \u003c/div\u003e \n \u003cdiv\u003e\n 最後一步是要輸入密碼。它會要求輸入密碼兩次,第二次爲第一的確認。 \n \u003c/div\u003e \n \u003cdiv\u003e \n \u003cpre\u003ePassword: **********\r\nPassword (again): *********\r\nSuperuser created successfully.\u003cspan\u003e\u003c/span\u003e\u003c/pre\u003e \n \u003c/div\u003e \n \u003c/div\u003e \n \u003cdiv\u003e \n \u003ch3\u003e \n \u003cdiv\u003e\n 啓動開發服務器 \n \u003c/div\u003e \u003c/h3\u003e \n \u003cdiv\u003e\n Django管理站點默認激活。讓我們啓動開發服務器,並探索它。 \n \u003c/div\u003e \n \u003cdiv\u003e\n 如果服務器未運行,啓動它,如下所示: \n \u003c/div\u003e \n \u003cdiv\u003e \n \u003cpre\u003ec:\\python27\\mysite\u0026gt;python manage.py runserver\u003cspan\u003e\u003c/span\u003e\u003c/pre\u003e \n \u003c/div\u003e \n \u003cp\u003e 現在,打開Web瀏覽器,進入「/admin/」\u0026nbsp;本地域名-\u0026nbsp;例如,\u0026nbsp;\u003ca href=\"http://127.0.0.1:8000/admin/\"\u003ehttp://127.0.0.1:8000/admin/\u003c/a\u003e\u0026nbsp;\u0026nbsp;應該看到管理員登錄界面:\u003cbr\u003e \u003cimg src=\"https://asset.1ju.org/cmsstatic/django-10.png\" alt=\"Django快速入門-數據庫模型\"\u003e \u003c/p\u003e \n \u003cp\u003e 由於移在默認情況下開啓,登錄屏幕可能會顯示在你自己的語言,\u0026nbsp;由於翻譯在默認情況下開啓,登錄屏幕可能會顯示在你自己的語言, \u003c/p\u003e \n \u003c/div\u003e \n \u003cdiv\u003e \n \u003ch3\u003e \n \u003cdiv\u003e\n 輸入管理員網站 \n \u003c/div\u003e \u003c/h3\u003e \n \u003cdiv\u003e\n 現在,嘗試與在上一步中創建的超級用戶帳號登錄。應該會看到 Django 管理的首頁: \n \u003cbr\u003e \n \u003cimg src=\"https://asset.1ju.org/cmsstatic/django-11.png\" alt=\"Django快速入門-數據庫模型\"\u003e \n \u003cbr\u003e \n \u003c/div\u003e \n \u003cdiv\u003e\n 你應該看到一些可編輯內容:組和用戶。它們由django.contrib.auth,Django的認證框架提供。 \n \u003c/div\u003e \n \u003c/div\u003e \n \u003cdiv\u003e \n \u003ch3\u003e \n \u003cdiv\u003e\n 修改poll\u0026nbsp;管理程序 \n \u003c/div\u003e \u003c/h3\u003e \n \u003cdiv\u003e\n poll應用程序在哪裏?它不會顯示在管理索引頁面上。 \n \u003c/div\u003e \n \u003cp\u003e 只有一件事要做:我們需要告訴管理員這個Question對象有一個管理界面。要做到這一點,打開 polls/admin.py文件,並修改它如下:\u003cspan\u003e\u003cbr\u003e \u003c/span\u003e \u003c/p\u003e \n \u003cpre class=\"prettyprint lang-py\"\u003efrom django.contrib import admin\r\n\r\nfrom .models import Question\r\n\r\nadmin.site.register(Question)\u003c/pre\u003e \n \u003cp\u003e \u003cbr\u003e \u003c/p\u003e \n \u003cdiv\u003e \n \u003c/div\u003e \n \u003c/div\u003e \n \u003cdiv\u003e \n \u003ch3\u003e \n \u003cdiv\u003e\n 瀏覽管理功能 \n \u003c/div\u003e \u003c/h3\u003e \n \u003cdiv\u003e\n 現在,我們已經註冊Question,Django知道它應該在管理主頁面上顯示: \n \u003cbr\u003e \n \u003cimg src=\"https://asset.1ju.org/cmsstatic/django-12.png\" alt=\"Django快速入門-數據庫模型\"\u003e \n \u003cbr\u003e \n \u003c/div\u003e \n \u003cp\u003e 點擊「Questions」。現在,在「change\u0026nbsp;list」頁面查看問題。該頁面顯示數據庫中的所有問題,並允許您選擇其中一個進行更改。還有我們先前創建的問題:\u003cbr\u003e \u003cimg src=\"https://asset.1ju.org/cmsstatic/django-13.png\" alt=\"Django快速入門-數據庫模型\"\u003e \u003c/p\u003e \n \u003cdiv\u003e\n 點擊「What's new?」這個問題進行編輯: \n \u003cbr\u003e \n \u003cimg src=\"https://asset.1ju.org/cmsstatic/django-14.png\" alt=\"Django快速入門-數據庫模型\"\u003e \n \u003cbr\u003e \n \u003c/div\u003e \n \u003cdiv\u003e\n 需要注意的事項在這裏列出: \n \u003c/div\u003e \n \u003cul\u003e \n \u003cli\u003e \n \u003cdiv\u003e\n 表單是從問題(Question)模型自動產生。 \n \u003c/div\u003e \u003c/li\u003e \n \u003cli\u003e \n \u003cdiv\u003e\n 不同型號的字段類型(DateTimeField,CharField)對應相應的HTML輸入部件。每個字段類型知道自己在Django管理中如何顯示。 \n \u003c/div\u003e \u003c/li\u003e \n \u003cli\u003e 每個DateTimeField字段得到 JavaScript 快捷方式。日期得到一個「Today」的快捷方式並且彈出日曆,並多次獲得了「Now」快捷方式並彈出窗口,列出了常用的輸入時間。 \u003c/li\u003e \n \u003c/ul\u003e \n \u003cp\u003e 修改「Date\u0026nbsp;published」點擊「Today」和「Now」快捷方式。然後點擊「Save\u0026nbsp;and\u0026nbsp;continue\u0026nbsp;editing.」,然後點擊「History」在右上角。你會看到一個頁面,列出通過Django管理到這個對象的所有變化,修改人用戶名和時間戳:\u003cbr\u003e \u003cimg src=\"https://asset.1ju.org/cmsstatic/django-15.png\" alt=\"Django快速入門-數據庫模型\"\u003e\u003cbr\u003e 代碼下載:\u003ca href=\"http://pan.baidu.com/s/1jGR3wDg\"\u003ehttp://pan.baidu.com/s/1jGR3wDg\u003c/a\u003e \u003c/p\u003e \n \u003c/div\u003e \n \u003c/div\u003e \n\u003c/div\u003e \n\u003cbr\u003e"])</script><script>self.__next_f.push([1,"49:T3b29,"])</script><script>self.__next_f.push([1,"\u003cdiv\u003e\n 視圖是一個網頁「類型」在Django應用程序,提供特定的功能,並且具有特定的模板。例如,在一個博客的應用程序,可能有以下幾個視圖: \n\u003c/div\u003e \n\u003cdiv\u003e \n \u003cdiv\u003e \n \u003cul\u003e \n \u003cli\u003e \n \u003cdiv\u003e\n 博客首頁\u0026nbsp;-\u0026nbsp;顯示最後的幾個文章。 \n \u003c/div\u003e \u003c/li\u003e \n \u003cli\u003e \n \u003cdiv\u003e\n 進入「detail」頁面-\u0026nbsp;對單個項目永久鏈接頁面。 \n \u003c/div\u003e \u003c/li\u003e \n \u003cli\u003e \n \u003cdiv\u003e\n 年存檔頁\u0026nbsp;-\u0026nbsp;顯示所有在給定年份各月的條目。 \n \u003c/div\u003e \u003c/li\u003e \n \u003cli\u003e \n \u003cdiv\u003e\n 月存檔頁\u0026nbsp;-\u0026nbsp;顯示所有給定月份各天的所有項。 \n \u003c/div\u003e \u003c/li\u003e \n \u003cli\u003e \n \u003cdiv\u003e\n 天存檔頁\u0026nbsp;-\u0026nbsp;顯示某一天所有條目。 \n \u003c/div\u003e \u003c/li\u003e \n \u003cli\u003e \n \u003cdiv\u003e\n 評論操作\u0026nbsp;-\u0026nbsp;處理髮布評論的一個給定輸入。 \n \u003c/div\u003e \u003c/li\u003e \n \u003c/ul\u003e \n \u003cdiv\u003e\n 在我們的\u0026nbsp;poll\u0026nbsp;應用程序,有以下四個視圖: \n \u003c/div\u003e \n \u003cul\u003e \n \u003cli\u003e \n \u003cdiv\u003e\n 問題的「index」頁-\u0026nbsp;顯示最後幾個問題。 \n \u003c/div\u003e \u003c/li\u003e \n \u003cli\u003e \n \u003cdiv\u003e\n 問題的「detail」頁\u0026nbsp;-\u0026nbsp;顯示一個問題文本,沒有結果但有一個表單用來投票。 \n \u003c/div\u003e \u003c/li\u003e \n \u003cli\u003e \n \u003cdiv\u003e\n 問題的「results」頁面\u0026nbsp;-\u0026nbsp;顯示結果一個特定問題。 \n \u003c/div\u003e \u003c/li\u003e \n \u003cli\u003e \n \u003cdiv\u003e\n 投票操作\u0026nbsp;-\u0026nbsp;處理投票在一個特定的問題進行具體選擇。 \n \u003c/div\u003e \u003c/li\u003e \n \u003c/ul\u003e \n \u003cp\u003e 在Django中,網頁和其他內容由視圖提供。每個視圖由一個簡單的Python函數來表示(或方法,基於類的視圖)。Django會選擇一個視圖通過考察多數民衆贊成請求的URL(準確地說,在域名之後URL的一部分)。 \u003c/p\u003e \n \u003cp\u003e 一個URL模式是一個簡單的URL的一般形式\u0026nbsp;-\u0026nbsp;例如:/newsarchive/\u0026lt;year\u0026gt;/\u0026lt;month\u0026gt;/. \u003c/p\u003e \n \u003c/div\u003e \n \u003cdiv\u003e \n \u003ch2\u003e \n \u003cdiv\u003e\n 編寫更多的視圖 \n \u003c/div\u003e \u003c/h2\u003e \n \u003cdiv\u003e\n 現在,讓我們添加一些視圖在\u0026nbsp;polls/views.py。這些視圖略有不同,因爲他們需要一個參數: \n \u003cbr\u003e \n \u003cpre class=\"prettyprint lang-py\"\u003edef detail(request, question_id):\r\n return HttpResponse(\"You're looking at question %s.\" % question_id)\r\n\r\ndef results(request, question_id):\r\n response = \"You're looking at the results of question %s.\"\r\n return HttpResponse(response % question_id)\r\n\r\ndef vote(request, question_id):\r\n return HttpResponse(\"You're voting on question %s.\" % question_id)\u003c/pre\u003e \n \u003c/div\u003e \n \u003cdiv\u003e \n \u003c/div\u003e \n \u003cdiv\u003e\n 這些新的視圖加入到\u0026nbsp;polls.urls\u0026nbsp;模塊中如下的 url() 調用,polls/urls.py文件中的代碼如下: \n \u003cbr\u003e \n \u003cpre class=\"prettyprint lang-py\"\u003efrom django.conf.urls import url\r\n\r\nfrom . import views\r\n\r\nurlpatterns = [\r\n # ex: /polls/\r\n url(r'^$', views.index, name='index'),\r\n # ex: /polls/5/\r\n url(r'^(?P\u0026lt;question_id\u0026gt;[0-9]+)/$', views.detail, name='detail'),\r\n # ex: /polls/5/results/\r\n url(r'^(?P\u0026lt;question_id\u0026gt;[0-9]+)/results/$', views.results, name='results'),\r\n # ex: /polls/5/vote/\r\n url(r'^(?P\u0026lt;question_id\u0026gt;[0-9]+)/vote/$', views.vote, name='vote'),\r\n]\u003c/pre\u003e \n \u003c/div\u003e \n \u003cdiv\u003e \n \u003c/div\u003e \n \u003cp\u003e \u003cspan\u003e您可以在瀏覽器打開「/polls/34/」。它會運行detail()方法,並顯示任何提供的URL內容。\u003c/span\u003e\u0026nbsp;再次嘗試訪問 「/polls/34/results/」 and 「/polls/34/vote/」 \u0026nbsp;–\u0026nbsp;\u003cspan\u003e這將顯示佔位符結果和投票頁面。\u003c/span\u003e \u003c/p\u003e \n \u003cp\u003e \u003cspan\u003einclude() 可以很容易包含入插件和網址。\u003c/span\u003e\u003cspan\u003e因爲polls是在它們自己的URL配置(polls/urls.py),它們可以放置在「/polls/」,\u003c/span\u003e\u003cspan\u003e或\u0026nbsp;「/fun_polls/」,或在「/content/polls/」,或任何其它路徑的根,應用程序仍然可以工作。\u003c/span\u003e \u003c/p\u003e \n \u003cdiv\u003e\n 下面是如果用戶進入「/polls/34/」,在這個系統會發生什麼: \n \u003c/div\u003e \n \u003cul\u003e \n \u003cli\u003e \u003cp\u003e \u003cspan\u003eDjango會找到匹配\u003c/span\u003e'^polls/' \u003c/p\u003e \u003c/li\u003e \n \u003cli\u003e \u003cp\u003e \u003cspan\u003e然後,Django會去掉匹配的文本(\"polls/\"),併發送剩餘的文本\u0026nbsp;\u003c/span\u003e–\u0026nbsp;\"34/\"\u0026nbsp;–\u0026nbsp;\u003cspan\u003e到'polls.urls'URL配置用於進一步處理相匹配\u003c/span\u003e\u003cspan\u003e\u0026nbsp;\u003c/span\u003er'^(?P\u0026lt;question_id\u0026gt;[0-9]+)/$'\u003cspan\u003e從而調用detail()\u0026nbsp;視圖,如下所示:\u003c/span\u003e \u003c/p\u003e \n \u003cdiv\u003e \n \u003cpre\u003edetail(request=\u0026lt;HttpRequest object\u0026gt;, question_id='34')\u003cspan\u003e\u003c/span\u003e\u003c/pre\u003e \n \u003c/div\u003e \u003c/li\u003e \n \u003c/ul\u003e \n \u003cp\u003e question_id='34'\u0026nbsp;是來自\u0026nbsp;(?P\u0026lt;question_id\u0026gt;[0-9]+)的一部分,\u003cspan\u003e用周圍的模式括號「捕捉」匹配該模式文本,並將其作爲參數傳遞給視圖函數;\u003c/span\u003e\u003cspan\u003e\u0026nbsp;\u0026nbsp;\u003c/span\u003e?P\u0026lt;question_id\u0026gt;\u003cspan\u003e\u0026nbsp;\u003c/span\u003e\u003cspan\u003e定義了將被用來識別所述匹配的模式的名稱;\u003c/span\u003e\u003cspan\u003e\u0026nbsp; 以及\u003c/span\u003e[0-9]+\u003cspan\u003e\u0026nbsp;\u003c/span\u003e\u003cspan\u003e正則表達式匹配一個數字序列(在一個數字)。\u003c/span\u003e \u003c/p\u003e \n \u003cp\u003e \u003cspan\u003e由於URL模式是正則表達式,可以使用它來做一些事情,沒有任何限制。而且也沒有必要添加URL爲.html\u003c/span\u003e\u0026nbsp;–\u0026nbsp;\u003cspan\u003e除非你想,在這種情況下,你可以這樣做:\u003c/span\u003e \u003c/p\u003e \n \u003cdiv\u003e \n \u003cpre\u003eurl(r'^polls/latest\\.html$', views.index),\u003c/pre\u003e \n \u003c/div\u003e \n \u003c/div\u003e \n \u003cdiv\u003e \n \u003ch2\u003e \n \u003cdiv\u003e\n 編寫視圖實現功能 \n \u003c/div\u003e \u003c/h2\u003e \n \u003cp\u003e 每個視圖負責做兩件事情之一:返回包含所請求的頁面內容的 HttpResponse 對象,或拋出一個異常,如HTTP 404。\u0026nbsp;修改polls/views.py文件代碼如下: \u003c/p\u003e \n \u003cpre class=\"prettyprint lang-py\"\u003efrom django.http import HttpResponse\r\n\r\nfrom .models import Question\r\n\r\ndef index(request):\r\n latest_question_list = Question.objects.order_by('-pub_date')[:5]\r\n output = ', '.join([q.question_text for q in latest_question_list])\r\n return HttpResponse(output)\r\n\r\n# Leave the rest of the views (detail, results, vote) unchanged\u003c/pre\u003e \n \u003cdiv\u003e \n \u003c/div\u003e \n \u003cp\u003e 在這裏有一個問題就,通過:網頁設計是硬編碼在視圖中。如果想改變頁面的樣子,必須編輯這個 Python 代碼。因此,讓我們使用 Django 模板系統通過創建視圖可以使用模板來分開Python 的代碼。\u003cspan\u003epolls/templates/polls/index.html\u0026nbsp;\u003c/span\u003e\u003cspan\u003e將下面的代碼:\u003c/span\u003e \u003c/p\u003e \n \u003cpre class=\"prettyprint lang-html\"\u003e{% if latest_question_list %}\r\n \u0026lt;ul\u0026gt;\r\n {% for question in latest_question_list %}\r\n \u0026lt;li\u0026gt;\u0026lt;a href=\"/polls/{{ question.id }}/\"\u0026gt;{{ question.question_text }}\u0026lt;/a\u0026gt;\u0026lt;/li\u0026gt;\r\n {% endfor %}\r\n \u0026lt;/ul\u0026gt;\r\n{% else %}\r\n \u0026lt;p\u0026gt;No polls are available.\u0026lt;/p\u0026gt;\r\n{% endif %}\u003c/pre\u003e \n \u003cdiv\u003e \n \u003c/div\u003e \n \u003cp\u003e 現在我們來更新首頁視圖 polls/views.py使用以下模板(代碼): \u003c/p\u003e \n \u003cpre class=\"prettyprint lang-py\"\u003efrom django.http import HttpResponse\r\nfrom django.template import loader\r\n\r\nfrom .models import Question\r\n\r\ndef index(request):\r\n latest_question_list = Question.objects.order_by('-pub_date')[:5]\r\n template = loader.get_template('polls/index.html')\r\n context = {\r\n 'latest_question_list': latest_question_list,\r\n }\r\n return HttpResponse(template.render(context, request))\u003c/pre\u003e \n \u003cdiv\u003e \n \u003c/div\u003e \n \u003cp\u003e 該代碼加載模板調用polls/index.html,然後傳遞給它的上下文。上下文是一個字典以Python對象映射模板變量名。現在訪問URL(http://127.0.0.1:8000/polls/)查看結果 : \u003c/p\u003e \n \u003cp\u003e \u003cimg src=\"https://asset.1ju.org/cmsstatic/django-16.png\" alt=\"Django快速入門-視圖\"\u003e \u003c/p\u003e \n \u003cdiv\u003e \n \u003ch3\u003e 快捷方式:\u0026nbsp;\u003ca href=\"https://docs.djangoproject.com/en/1.9/topics/http/shortcuts/#django.shortcuts.render\"\u003erender()\u003c/a\u003e \u003c/h3\u003e \n \u003cp\u003e 這是一個非常習慣用法來加載模板,填充上下文中和渲染模板的結果返回一個HttpResponse對象。Django提供了一個捷徑。下面是完整的index() 視圖,改寫polls/views.py爲: \u003c/p\u003e \n \u003cpre class=\"prettyprint lang-py\"\u003efrom django.shortcuts import render\r\n\r\nfrom .models import Question\r\n\r\ndef index(request):\r\n latest_question_list = Question.objects.order_by('-pub_date')[:5]\r\n context = {'latest_question_list': latest_question_list}\r\n return render(request, 'polls/index.html', context)\u003c/pre\u003e \n \u003cdiv\u003e \n \u003c/div\u003e \n \u003cdiv\u003e\n 請注意,當在各個視圖做到了這一點,我們不再需要導入加載器和HttpResponse對象(想保留HttpResponse,如果仍然有短截\u0026nbsp;detail,\u0026nbsp;results,\u0026nbsp;和\u0026nbsp;vote\u0026nbsp;方法。 \n \u003c/div\u003e \n \u003c/div\u003e \n \u003c/div\u003e \n \u003ch2\u003e 引發404錯誤 \u003c/h2\u003e \n \u003cp\u003e 現在,讓我們來解決這個問題詳細視圖 - 顯示爲給定的民意調查問題文本的頁面。這裏添加視圖代碼(polls/views.py): \u003c/p\u003e \n \u003cpre class=\"prettyprint lang-py\"\u003efrom django.http import Http404\r\nfrom django.shortcuts import render\r\n\r\nfrom .models import Question\r\n# ...\r\ndef detail(request, question_id):\r\n try:\r\n question = Question.objects.get(pk=question_id)\r\n except Question.DoesNotExist:\r\n raise Http404(\"Question does not exist\")\r\n return render(request, 'polls/detail.html', {'question': question})\u003c/pre\u003e \n \u003cdiv\u003e \n \u003c/div\u003e \n \u003cp\u003e 注意這裏:視圖引發HTTP404異常,如果與請求ID的問題並不存在。 \u003c/p\u003e \n \u003cp\u003e 我們將討論可以把 polls/detail.html 在後面做一些修改,但如果想快速使用上面的例子,polls/templates/polls/detail.html\u0026nbsp;文件只需包含: \u003c/p\u003e \n \u003cdiv\u003e \n \u003cpre\u003e{{question}}\u003c/pre\u003e \n \u003c/div\u003e \n \u003cp\u003e \u003cimg src=\"https://asset.1ju.org/cmsstatic/django-17.png\" alt=\"Django快速入門-視圖\"\u003e\u003cbr\u003e 引發 404\u0026nbsp;錯誤,現在我們請求一個不存在問題,如:http://127.0.0.1:8000/polls/100/,顯示結果如下: \u003c/p\u003e \n \u003cp\u003e \u003cimg src=\"https://asset.1ju.org/cmsstatic/django-18.png\" alt=\"Django快速入門-視圖\"\u003e \u003c/p\u003e \n \u003cdiv\u003e \n \u003ch3\u003e 快捷方式:\u0026nbsp;\u003ca href=\"https://docs.djangoproject.com/en/1.9/topics/http/shortcuts/#django.shortcuts.get_object_or_404\"\u003eget_object_or_404()\u003c/a\u003e \u003c/h3\u003e \n \u003cp\u003e 如果對象不存在的一個非常習慣用法使用get()並引發HTTP404錯誤。Django提供了一個捷徑。下面是 detail() 視圖,\u003cspan\u003epolls/views.py\u0026nbsp;\u003c/span\u003e改寫: \u003c/p\u003e \n \u003cpre class=\"prettyprint lang-py\"\u003efrom django.shortcuts import get_object_or_404, render\r\n\r\nfrom .models import Question\r\n# ...\r\ndef detail(request, question_id):\r\n question = get_object_or_404(Question, pk=question_id)\r\n return render(request, 'polls/detail.html', {'question': question})\u003c/pre\u003e get_object_or_404()函數接受一個Django模型作爲第一個參數和關鍵字任意參數數量,它傳遞到模型管理的 get()函數。 \n \u003cp\u003e \u003ca href=\"https://docs.djangoproject.com/en/1.9/topics/http/shortcuts/#django.shortcuts.get_object_or_404\"\u003e\u003c/a\u003e如果對象不存在將引發HTTP404。 \u003c/p\u003e \n \u003cp\u003e 還有一個get_list_or_404()函數,它的工作原理就像get_object_or_404()- 除了使用 filter()而不是get()方法。如果列表是空的它會引起HTTP404。 \u003c/p\u003e \n \u003c/div\u003e \n \u003cdiv\u003e \n \u003ch2\u003e 使用模板系統 \u003c/h2\u003e \n \u003cp\u003e 回到我們的 polls\u0026nbsp;應用程序\u0026nbsp;detail()\u0026nbsp;視圖。由於上下文變量的問題,這裏的 polls/detail.html\u0026nbsp;模板看起來是這樣的: \u003c/p\u003e \n \u003cpre class=\"prettyprint lang-html\"\u003e\u0026lt;h1\u0026gt;{{ question.question_text }}\u0026lt;/h1\u0026gt;\r\n\u0026lt;ul\u0026gt;\r\n{% for choice in question.choice_set.all %}\r\n \u0026lt;li\u0026gt;{{ choice.choice_text }}\u0026lt;/li\u0026gt;\r\n{% endfor %}\r\n\u0026lt;/ul\u0026gt;\u003c/pre\u003e \n \u003cdiv\u003e \n \u003c/div\u003e \n \u003cp\u003e 模板系統採用點查詢語法來訪問變量屬性。在這個例子\u0026nbsp;{{question.question_text }},第一個Django確實在question對象字典查找。 如果找不到,它再嘗試屬性查詢 – 如果屬性查找失敗,它會嘗試一個列表索引查找。\u003cbr\u003e 現在測試我們上面編寫的代碼,在瀏覽器中打開:http://127.0.0.1:8000/polls/5/ 得到結果如下:\u003cbr\u003e \u003cimg src=\"https://asset.1ju.org/cmsstatic/django-19.png\" alt=\"Django快速入門-視圖\"\u003e \u003c/p\u003e \n \u003c/div\u003e \n \u003cdiv\u003e \n \u003ch2\u003e 刪除模板硬編碼網址 \u003c/h2\u003e \n \u003cp\u003e 請記住,當我們在 polls/index.html 鏈接到一個問題,鏈接被硬編碼的部分是這樣的: \u003c/p\u003e \n \u003cdiv\u003e \n \u003cpre\u003e\u0026lt;li\u0026gt;\u0026lt;ahref=\"/polls/{{question.id}}/\"\u0026gt;{{question.question_text}}\u0026lt;/a\u0026gt;\u0026lt;/li\u0026gt;\u003c/pre\u003e \n \u003c/div\u003e \n \u003cp\u003e 使用此硬編碼,緊密耦合的方法的問題是:它在更改項目的URL用了很多模板。不過,既然 polls.urls模塊中定義名稱參數url() 函數,您可以通過使用 {% url %}模板刪除標籤在URL配置中定義的特定URL路徑的依賴: \u003c/p\u003e \n \u003cdiv\u003e \n \u003cpre\u003e\u0026lt;li\u0026gt;\u0026lt;ahref=\"{%url'detail'question.id%}\"\u0026gt;{{question.question_text}}\u0026lt;/a\u0026gt;\u0026lt;/li\u0026gt;\u003c/pre\u003e \n \u003c/div\u003e \n \u003cp\u003e 這種工作方式是通過爲polls.urls模塊中指定查找的URL定義。可以準確地看到'detail'的URL名稱定義如下: \u003c/p\u003e \n \u003cpre class=\"prettyprint lang-py\"\u003e...\r\n# the 'name' value as called by the {% url %} template tag\r\nurl(r'^(?P\u0026lt;question_id\u0026gt;[0-9]+)/$', views.detail, name='detail'),\r\n...\u003c/pre\u003e \n \u003cdiv\u003e \n \u003c/div\u003e \n \u003cp\u003e 如果你想要把投票詳細視圖的URL更改成其它的,也許像\u0026nbsp;polls/specifics/12/\u0026nbsp;取代在模板(或templates),需要在\u0026nbsp;polls/urls.py\u0026nbsp;改變它: \u003c/p\u003e \n \u003cpre class=\"prettyprint lang-py\"\u003e...\r\n# added the word 'specifics'\r\nurl(r'^specifics/(?P\u0026lt;question_id\u0026gt;[0-9]+)/$', views.detail, name='detail'),\r\n...\u003c/pre\u003e \n \u003cdiv\u003e \n \u003c/div\u003e \n \u003c/div\u003e \n \u003cdiv\u003e \n \u003ch2\u003e 命名空間URL名稱 \u003c/h2\u003e \n \u003cp\u003e 本教程項目只有一個應用程序 - polls。在實際的Django項目中,可能有五個,十個,二十個或更多的應用程序。Django\u0026nbsp;如何區分它們的URL的名稱? 例如,投票應用程序有一個詳細視圖,因此可能會在一個博客的同一個項目也有相同的應用程序。如何使用 {% url %} 模板標籤讓Django知道創建一個URL哪些應用有這樣視圖? \u003c/p\u003e \n \u003cp\u003e 答案就是將命名空間添加到URLconf。在polls/urls.py文件,繼續前進,添加應用程序名稱設置應用程序命名空間,打開\u0026nbsp;polls/urls.py: \u003c/p\u003e \n \u003cpre class=\"prettyprint lang-py\"\u003efrom django.conf.urls import url\r\n\r\nfrom . import views\r\n\r\napp_name = 'polls'\r\nurlpatterns = [\r\n url(r'^$', views.index, name='index'),\r\n url(r'^(?P\u0026lt;question_id\u0026gt;[0-9]+)/$', views.detail, name='detail'),\r\n url(r'^(?P\u0026lt;question_id\u0026gt;[0-9]+)/results/$', views.results, name='results'),\r\n url(r'^(?P\u0026lt;question_id\u0026gt;[0-9]+)/vote/$', views.vote, name='vote'),\r\n]\u003c/pre\u003e \n \u003cdiv\u003e \n \u003c/div\u003e \n \u003cp\u003e 現在修改 polls/index.html 模板,打開\u0026nbsp;polls/templates/polls/index.html\u0026nbsp;文件添加以下代碼: \u003c/p\u003e \n \u003cdiv\u003e \n \u003cpre\u003e\u0026lt;li\u0026gt;\u0026lt;ahref=\"{%url'detail'question.id%}\"\u0026gt;{{question.question_text}}\u0026lt;/a\u0026gt;\u0026lt;/li\u0026gt;\u003c/pre\u003e \n \u003c/div\u003e \n \u003cp\u003e 使其指向在命名空間 detail\u0026nbsp;視圖,打開 polls/templates/polls/index.html 文件如下: \u003c/p\u003e \n \u003cdiv\u003e \n \u003cpre\u003e\u0026lt;li\u0026gt;\u0026lt;ahref=\"{%url'polls:detail'question.id%}\"\u0026gt;{{question.question_text}}\u0026lt;/a\u0026gt;\u0026lt;/li\u0026gt;\u003c/pre\u003e \n \u003c/div\u003e \n \u003c/div\u003e \n\u003c/div\u003e 代碼下載: \n\u003ca href=\"http://pan.baidu.com/s/1o7iWsWi\"\u003ehttp://pan.baidu.com/s/1o7iWsWi\u003c/a\u003e \n\u003cbr\u003e"])</script><script>self.__next_f.push([1,"4a:T23a3,"])</script><script>self.__next_f.push([1,"\u003cdiv\u003e\n 在上一節的教程中,我們介紹了Django的視圖,並編寫了一個簡單的實例。本小節我們將學習網絡投票應用程序,並將側重於簡單的表單處理,以最少代碼代碼量來實現。 \n\u003c/div\u003e \n\u003cdiv\u003e \n \u003cdiv\u003e \n \u003ch2\u003e \u003c/h2\u003e \n \u003ch2\u003e 編寫一個簡單的表單 \u003c/h2\u003e \n \u003cdiv\u003e\n 讓我們更新\u0026nbsp;poll\u0026nbsp;detail 模板(「polls/detail.html」)\u0026nbsp;,從上個教程,在模板\u0026nbsp;polls/templates/polls/detail.html\u0026nbsp;包含一個HTML\u0026lt;form\u0026gt;元素: \n \u003cbr\u003e \n \u003cpre class=\"prettyprint lang-html\"\u003e\u0026lt;h1\u0026gt;{{ question.question_text }}\u0026lt;/h1\u0026gt;\r\n\r\n{% if error_message %}\u0026lt;p\u0026gt;\u0026lt;strong\u0026gt;{{ error_message }}\u0026lt;/strong\u0026gt;\u0026lt;/p\u0026gt;{% endif %}\r\n\r\n\u0026lt;form action=\"{% url 'polls:vote' question.id %}\" method=\"post\"\u0026gt;\r\n{% csrf_token %}\r\n{% for choice in question.choice_set.all %}\r\n \u0026lt;input type=\"radio\" name=\"choice\" id=\"choice{{ forloop.counter }}\" value=\"{{ choice.id }}\" /\u0026gt;\r\n \u0026lt;label for=\"choice{{ forloop.counter }}\"\u0026gt;{{ choice.choice_text }}\u0026lt;/label\u0026gt;\u0026lt;br /\u0026gt;\r\n{% endfor %}\r\n\u0026lt;input type=\"submit\" value=\"Vote\" /\u0026gt;\r\n\u0026lt;/form\u0026gt;\u003c/pre\u003e \n \u003c/div\u003e \n \u003cp\u003e 簡要介紹: \u003c/p\u003e \n \u003cul\u003e \n \u003cli\u003e 上面的模板顯示每個問題選擇一個單選按鈕。每個單選按鈕的值相聯問題的選擇編號。每個單選按鈕的名稱是「choice」。這意味着,當有人選擇了其中一個單選按鈕並提交表單,它會發送POST數據choice=#,其中#是被選擇的選擇的ID。這是HTML表單的基本概念。 \u003c/li\u003e \n \u003cli\u003e 我們設置表單的動作\u0026nbsp;{%\u0026nbsp;url\u0026nbsp;'polls:vote'\u0026nbsp;question.id\u0026nbsp;%}, 以及設置 method=\"post\". 使用 method=\"post\"\u0026nbsp;(相對於\u0026nbsp;method=\"get\") 是非常重要的,因爲提交此表將改變服務器端數據的行爲。當創建一個改變數據服務器端表單形式,使用\u0026nbsp;method=\"post\". 這篇文章並不是只針對 Django; 這是一個很好的 Web 開發實踐。 \u003c/li\u003e \n \u003cli\u003e forloop.counter表示表單標籤通過多少次循環了 \u003c/li\u003e \n \u003cli\u003e 因爲我們正在創建一個POST形式(可以有修改數據的影響),我們需要擔心跨站點請求僞造。但是也不必擔心,因爲Django自帶了保護對抗的一個非常容易使用的系統。總之,這是針對內部URL所有的POST形式應該使用{%csrf_token%}模板標籤。 \u003c/li\u003e \n \u003c/ul\u003e \n \u003cp\u003e 現在,讓我們創建一個處理提交的數據的一個 Django 視圖。 \u003c/p\u003e \n \u003cdiv\u003e\n polls/urls.py文件內容如下: \n \u003c/div\u003e \n \u003cdiv\u003e \n \u003cpre\u003eurl(r'^(?P\u0026lt;question_id\u0026gt;[0-9]+)/vote/$', views.vote, name='vote'), \u003c/pre\u003e \n \u003c/div\u003e \n \u003cp\u003e 我們還創建了一個虛擬實現 vote() 函數。現在創建一個實用的版本。添加到以下代碼到文件 polls/views.py: \u003c/p\u003e \n \u003cdiv\u003e\n polls/views.py 文件的內容如下: \n \u003cbr\u003e \n \u003cpre class=\"prettyprint lang-py\"\u003efrom django.shortcuts import get_object_or_404, render\r\nfrom django.http import HttpResponseRedirect, HttpResponse\r\nfrom django.core.urlresolvers import reverse\r\n\r\nfrom .models import Choice, Question\r\n# ...\r\ndef vote(request, question_id):\r\n question = get_object_or_404(Question, pk=question_id)\r\n try:\r\n selected_choice = question.choice_set.get(pk=request.POST['choice'])\r\n except (KeyError, Choice.DoesNotExist):\r\n # Redisplay the question voting form.\r\n return render(request, 'polls/detail.html', {\r\n 'question': question,\r\n 'error_message': \"You didn't select a choice.\",\r\n })\r\n else:\r\n selected_choice.votes += 1\r\n selected_choice.save()\r\n # Always return an HttpResponseRedirect after successfully dealing\r\n # with POST data. This prevents data from being posted twice if a\r\n # user hits the Back button.\r\n return HttpResponseRedirect(reverse('polls:results', args=(question.id,)))\u003c/pre\u003e \n \u003c/div\u003e \n \u003cp\u003e 此代碼包含還沒有在本教程中涉及幾個東西: \u003c/p\u003e \n \u003cul\u003e \n \u003cli\u003e \u003cp\u003e request.POST是一個類似於字典的對象,使您可以通過鍵名訪問提交的數據。在這種情況下,request.POST['choice'] 返回被選擇的choice的ID,作爲字符串。 request.POST的值總是字符串。\u0026nbsp; \u003c/p\u003e \u003cp\u003e 注意:Django還提供 request.GET 以相同的方式訪問 GET數據\u0026nbsp; – 但我們明確使用 request.POST 在我們的代碼,以確保數據只能通過POST調用修改。 \u003c/p\u003e \u003c/li\u003e \n \u003cli\u003e \u003cp\u003e 如果POST數據未提供choice,request.POST['choice']將引發KeyError異常。上面的代碼檢查KeyError異常和錯誤消息顯示問題的表單,如果沒有給出\u0026nbsp;\u003cspan\u003echoice\u003c/span\u003e。 \u003c/p\u003e \u003c/li\u003e \n \u003cli\u003e \u003cp\u003e 選擇choice計數遞增後,代碼返回 HttpResponse 重定向,而不是一個正常的 HttpResponse。HttpResponseRedirect 需要一個參數:用戶將被重定向到URL(請參閱下面-我們如何構建在這種情況下的URL)。 \u003c/p\u003e \u003cp\u003e 如上Python的註釋所指出的,應該總是在 POST 數據處理成功\u003cspan\u003e後\u003c/span\u003e返回一個HttpResponse重定向。 \u003c/p\u003e \u003c/li\u003e \n \u003cli\u003e \u003cp\u003e 在本例中我們使用的是 HttpResponseRedirect 構造reverse()函數。此函數有助於避免硬編碼URL在視圖中。這是因爲我們想通過控制並指向該視圖的URL模式的可變部分的視圖的名稱。在這種情況下,使用 URLconf 配置使 reverse()調用返回字符串如: \u003c/p\u003e \n \u003cdiv\u003e \n \u003cpre\u003e'/polls/3/results/'\u003c/pre\u003e \n \u003c/div\u003e \u003cp\u003e 其中3是question.id的值。然後,這個重定向的URL將調用「results」視圖中顯示的最後一頁。 \u003c/p\u003e \u003c/li\u003e \n \u003c/ul\u003e \n \u003cp\u003e 現在訪問網址:http://127.0.0.1:8000/polls/1/ 得到結果如下所示:\u003cbr\u003e \u003cimg src=\"https://asset.1ju.org/cmsstatic/django-20.png\" alt=\"Django快速入門-表單\"\u003e\u003cbr\u003e 當有人在一個問題投票後,vote() 視圖重定向到該問題的結果頁面。讓我們編寫這個視圖(polls/views.py): \u003c/p\u003e \n \u003cpre class=\"prettyprint lang-py\"\u003efrom django.shortcuts import get_object_or_404, render\r\n\r\ndef results(request, question_id):\r\n question = get_object_or_404(Question, pk=question_id)\r\n return render(request, 'polls/results.html', {'question': question})\u003c/pre\u003e \n \u003cp\u003e 現在,創建一個 polls/results.html (polls/templates/polls/results.html)模板: \u003c/p\u003e \n \u003cpre class=\"prettyprint lang-html\"\u003e\u0026lt;h2\u0026gt;{{ question.question_text }}\u0026lt;/h2\u0026gt;\r\n\r\n\u0026lt;ul\u0026gt;\r\n{% for choice in question.choice_set.all %}\r\n \u0026lt;li\u0026gt;{{ choice.choice_text }} -- {{ choice.votes }} vote{{ choice.votes|pluralize }}\u0026lt;/li\u0026gt;\r\n{% endfor %}\r\n\u0026lt;/ul\u0026gt;\r\n\r\n\u0026lt;a href=\"{% url 'polls:detail' question.id %}\"\u0026gt;Vote again?\u0026lt;/a\u0026gt;\u003c/pre\u003e \n \u003cp\u003e 現在,在瀏覽器中打開 /polls/1/ 並表決的問題。應該會被每次投票時看到更新結果頁。如果您提交表單不選擇一個選項,應該看到錯誤消息。\u003cbr\u003e 選擇選項,提交後顯示如下結果:\u003cbr\u003e \u003cimg src=\"https://asset.1ju.org/cmsstatic/django-21.png\" alt=\"Django快速入門-表單\"\u003e \u003c/p\u003e \n \u003c/div\u003e \n \u003cdiv\u003e \n \u003ch2\u003e 使用通用視圖:更少的代碼更好 \u003c/h2\u003e \n \u003cdiv\u003e \n \u003ch3\u003e 修改URL配置 \u003c/h3\u003e \n \u003cp\u003e 首先,打開 polls/urls.py 並修改如下: \u003c/p\u003e \n \u003cpre class=\"prettyprint lang-py\"\u003efrom django.conf.urls import url\r\n\r\nfrom . import views\r\n\r\napp_name = 'polls'\r\nurlpatterns = [\r\n url(r'^$', views.IndexView.as_view(), name='index'),\r\n url(r'^(?P\u0026lt;pk\u0026gt;[0-9]+)/$', views.DetailView.as_view(), name='detail'),\r\n url(r'^(?P\u0026lt;pk\u0026gt;[0-9]+)/results/$', views.ResultsView.as_view(), name='results'),\r\n url(r'^(?P\u0026lt;question_id\u0026gt;[0-9]+)/vote/$', views.vote, name='vote'),\r\n]\u003c/pre\u003e \n \u003cp\u003e 請注意,第二和第三模式的正則表達式匹配的模式名稱已經從\u0026lt;question_id\u0026gt;改變爲\u0026lt;to\u0026gt;。 \u003c/p\u003e \n \u003c/div\u003e \n \u003cdiv\u003e \n \u003ch3\u003e 修改視圖 \u003c/h3\u003e \n \u003cp\u003e 接下來,我們要刪除舊的 index, detail, 和 results 視圖使用Django通用視圖代替。要做到這一點,打開 polls/views.py 文件並修改它如下: \u003c/p\u003e \n \u003cpre class=\"prettyprint lang-py\"\u003efrom django.shortcuts import get_object_or_404, render\r\nfrom django.http import HttpResponseRedirect\r\nfrom django.core.urlresolvers import reverse\r\nfrom django.views import generic\r\n\r\nfrom .models import Choice, Question\r\n\r\n\r\nclass IndexView(generic.ListView):\r\n template_name = 'polls/index.html'\r\n context_object_name = 'latest_question_list'\r\n\r\n def get_queryset(self):\r\n \"\"\"Return the last five published questions.\"\"\"\r\n return Question.objects.order_by('-pub_date')[:5]\r\n\r\n\r\nclass DetailView(generic.DetailView):\r\n model = Question\r\n template_name = 'polls/detail.html'\r\n\r\n\r\nclass ResultsView(generic.DetailView):\r\n model = Question\r\n template_name = 'polls/results.html'\r\n\r\n\r\ndef vote(request, question_id):\r\n ... # same as above\u003c/pre\u003e \n \u003cp\u003e 剩下的你自己發揮了,包教不包會,請參考:\u003ca href=\"https://docs.djangoproject.com/en/1.9/intro/tutorial04/\"\u003ehttps://docs.djangoproject.com/en/1.9/intro/tutorial04/\u003c/a\u003e \u003c/p\u003e \n \u003c/div\u003e \n \u003c/div\u003e \n\u003c/div\u003e 代碼下載: \n\u003ca href=\"http://pan.baidu.com/s/1bt4efW\"\u003ehttp://pan.baidu.com/s/1bt4efW\u003c/a\u003e \n\u003cbr\u003e"])</script><script>self.__next_f.push([1,"d:[\"$\",\"div\",null,{\"className\":\"page-content\",\"children\":[\"$\",\"div\",null,{\"className\":\"container\",\"children\":[\"$\",\"div\",null,{\"className\":\"row\",\"children\":[[\"$\",\"$L10\",null,{\"tutorial\":{\"state\":\"published\",\"_id\":\"59fd91bd1e18b40005abaaa4\",\"key\":\"django\",\"indexUrl\":\"index\",\"parent\":\"59fd91bd1e18b40005abaaa3\",\"description\":\"Django是用python語言寫的開源web開發框架,它鼓勵快速開發,並遵循MVC設計。Django的主要目的是簡便、快速的開發數據庫驅動的網站。\",\"url\":\"django\",\"name\":\"Django教學\",\"__v\":0,\"sections\":[{\"order\":0,\"_id\":\"59fd91bd1e18b40005abaaa5\",\"isDefault\":false,\"name\":\"Django教程\",\"sortedPosts\":[{\"order\":0,\"_id\":\"5fcf8cf0d5dd8e00183d7fa7\",\"post\":{\"meta\":{\"description\":\"Django是用python語言寫的開源web開發框架,它鼓勵快速開發,並遵循MVC設計。Django的主要目的是簡便、快速的開發數據庫驅動的網站。\",\"keywords\":\"Django教程,Django,教程\"},\"content\":{\"extended\":\"\u003cp\u003eDjango是一個Python Web框架。像最現代的框架,\u003cstrong\u003eDjango\u003c/strong\u003e支持MVC模式。首先讓我們來看看什麼是模型 - 視圖 - 控制器(MVC)模式,然後我們將看看Django特有的模型 - 視圖 - 模板(MVC)模式。\u003c/p\u003e \\n\u003cp\u003e\u003cstrong\u003e快速入門系列教程:\u003c/strong\u003e\u003c/p\u003e \\n\u003cp\u003e1 - Django快速入門-環境安裝\u003cbr\u003e2 - Django快速入門-數據庫模型\u003cbr\u003e3 - Django快速入門-視圖\u003cbr\u003e4 - Django快速入門-表單\u003c/p\u003e \\n\u003cp\u003eMVC模式\u003cbr\u003e在談到應用程序提供用戶界面(Web或桌面),我們通常講 MVC 架構。顧名思義,MVC模式是基於三個部分組成:模型,視圖和控制器。 查看MVC教程以瞭解更多。\u003c/p\u003e \\n\u003cp\u003eDJANGO MVC - MVT模式\u003cbr\u003e模型 - 視圖- 模板(MVT)與MVC略有不同。實際上這兩個模式之間的主要區別是,Django它本身處理控制器部分(軟件代碼,其控制模型和視圖之間的相互作用),留給我們模板。模板是混合 HTML文件的Django模板語言(DTL)。\u003c/p\u003e \\n\u003cp\u003e下圖說明了每個MVT模式的組件相互交互,以服務用戶請求 −\u003cbr\u003e\u003cimg src=\\\"https://asset.1ju.org/cmsstatic/django-1.jpg\\\" alt=\\\"Django教程\\\"\u003e\u003c/p\u003e \\n\u003cp\u003e開發人員提供模型,視圖和模板,然後只需將它映射到一個URL,然後\u003cstrong\u003eDjango\u003c/strong\u003e就可以確實神奇地服務用戶了。\u003c/p\u003e \\n\u003cbr\u003e\"},\"state\":\"published\",\"views\":1484,\"order\":0,\"_id\":\"59fd91bd1e18b40005abaaa6\",\"key\":\"index-54\",\"url\":\"index\",\"tutorial\":\"59fd91bd1e18b40005abaaa4\",\"section\":\"59fd91bd1e18b40005abaaa5\",\"title\":\"Django教學\",\"author\":\"59fa8cb8a31fb7001009c4bb\",\"publishedDate\":\"2017-11-04T10:09:01.684Z\",\"__v\":0,\"updatedAt\":\"2020-10-13T08:27:20.160Z\"}},{\"order\":2,\"_id\":\"5fcf8cf0d5dd8e00183d7fa8\",\"post\":{\"meta\":{\"description\":\"Django是一個高層次的 PythonWeb 框架,它是一個鼓勵快速開發和乾淨,實用的框架設計。Django可以更容易地快速構建更好的Web應用程序,並且它使用更少的代碼。 注意−Django是Django 軟件基\",\"keywords\":\"Django,基礎\"},\"content\":{\"extended\":\"$11\"},\"state\":\"published\",\"views\":875,\"order\":2,\"_id\":\"59fd91be1e18b40005abaaa7\",\"key\":\"django-basics\",\"url\":\"django-basics\",\"tutorial\":\"59fd91bd1e18b40005abaaa4\",\"section\":\"59fd91bd1e18b40005abaaa5\",\"title\":\"Django基礎\",\"author\":\"59fa8cb8a31fb7001009c4bb\",\"publishedDate\":\"2017-11-04T10:09:02.024Z\",\"__v\":0,\"updatedAt\":\"2020-11-02T02:21:05.675Z\"}},{\"order\":3,\"_id\":\"5fcf8cf0d5dd8e00183d7fa9\",\"post\":{\"meta\":{\"description\":\"Django開發環境安裝和設置包括Python,Django,和數據庫系統。由於Django處理Web應用程序,這裏值得一提的是,你需也需要設置一個Web服務器。 第1步-安裝Python Django是用100%純Python代碼編寫\",\"keywords\":\"Django,開發環境,安裝配置\"},\"content\":{\"extended\":\"$12\"},\"state\":\"published\",\"views\":1350,\"order\":3,\"_id\":\"59fd91be1e18b40005abaaa8\",\"key\":\"django-environment\",\"url\":\"django-environment\",\"tutorial\":\"59fd91bd1e18b40005abaaa4\",\"section\":\"59fd91bd1e18b40005abaaa5\",\"title\":\"Django開發環境安裝配置\",\"author\":\"59fa8cb8a31fb7001009c4bb\",\"publishedDate\":\"2017-11-04T10:09:02.693Z\",\"__v\":0,\"updatedAt\":\"2020-11-02T02:25:07.110Z\"}},{\"order\":4,\"_id\":\"5fcf8cf0d5dd8e00183d7faa\",\"post\":{\"meta\":{\"description\":\"現在我們已經安裝了Django,讓我們開始使用它。在Django中,每個要創建Web應用程序稱爲項目;一個項目是應用程序的總和。應用程序是一組依託於MVC模式的代碼文件。作爲例子,讓我們要\",\"keywords\":\"Django,創建工程\"},\"content\":{\"extended\":\"$13\"},\"state\":\"published\",\"views\":810,\"order\":4,\"_id\":\"59fd91bf1e18b40005abaaa9\",\"key\":\"django-creating-project\",\"url\":\"django-creating-project\",\"tutorial\":\"59fd91bd1e18b40005abaaa4\",\"section\":\"59fd91bd1e18b40005abaaa5\",\"title\":\"Django創建工程\",\"author\":\"59fa8cb8a31fb7001009c4bb\",\"publishedDate\":\"2017-11-04T10:09:03.114Z\",\"__v\":0,\"updatedAt\":\"2020-11-02T02:30:10.962Z\"}},{\"order\":5,\"_id\":\"5fcf8cf0d5dd8e00183d7fab\",\"post\":{\"meta\":{\"description\":\"一個項目是許多應用的總和。每個應用程序有一個客觀並可重複使用到另一個項目,像在網站上的聯繫表單可以是一個應用程序,並且可以重複使用到其它應用。看到它作爲項目的一個\",\"keywords\":\"Django,生命週期\"},\"content\":{\"extended\":\"$14\"},\"state\":\"published\",\"views\":827,\"order\":5,\"_id\":\"59fd91bf1e18b40005abaaaa\",\"key\":\"django-apps-life-cycle\",\"url\":\"django-apps-life-cycle\",\"tutorial\":\"59fd91bd1e18b40005abaaa4\",\"section\":\"59fd91bd1e18b40005abaaa5\",\"title\":\"Django生命週期\",\"author\":\"59fa8cb8a31fb7001009c4bb\",\"publishedDate\":\"2017-11-04T10:09:03.381Z\",\"__v\":0,\"updatedAt\":\"2020-11-02T02:30:57.331Z\"}},{\"order\":6,\"_id\":\"5fcf8cf0d5dd8e00183d7fac\",\"post\":{\"meta\":{\"description\":\"Django爲管理活動提供隨時可以使用的用戶界面。 我們都知道,管理界面對於一個Web項目是十分重要的。 Django根據您的項目模型自動生成管理界面。 啓動管理界面 管理界面依賴於 djan\",\"keywords\":\"Django,管理員,界面\"},\"content\":{\"extended\":\"$15\"},\"state\":\"published\",\"views\":654,\"order\":6,\"_id\":\"59fd91c01e18b40005abaaab\",\"key\":\"django-admin-interface\",\"url\":\"django-admin-interface\",\"tutorial\":\"59fd91bd1e18b40005abaaa4\",\"section\":\"59fd91bd1e18b40005abaaa5\",\"title\":\"Django管理員界面\",\"author\":\"59fa8cb8a31fb7001009c4bb\",\"publishedDate\":\"2017-11-04T10:09:04.099Z\",\"__v\":0,\"updatedAt\":\"2020-11-02T02:33:19.660Z\"}},{\"order\":7,\"_id\":\"5fcf8cf0d5dd8e00183d7fad\",\"post\":{\"meta\":{\"description\":\"視圖功能,或簡稱\",\"keywords\":\"Django,視圖\"},\"content\":{\"extended\":\"$16\"},\"state\":\"published\",\"views\":722,\"order\":7,\"_id\":\"59fd91c01e18b40005abaaac\",\"key\":\"django-creating-views\",\"url\":\"django-creating-views\",\"tutorial\":\"59fd91bd1e18b40005abaaa4\",\"section\":\"59fd91bd1e18b40005abaaa5\",\"title\":\"Django創建視圖\",\"author\":\"59fa8cb8a31fb7001009c4bb\",\"publishedDate\":\"2017-11-04T10:09:04.365Z\",\"__v\":0,\"updatedAt\":\"2020-11-02T02:35:14.537Z\"}},{\"order\":8,\"_id\":\"5fcf8cf0d5dd8e00183d7fae\",\"post\":{\"meta\":{\"description\":\"現在,我們有一個工作視圖在前面的章節中解釋。我們希望通過一個URL來訪問該視圖。Django有他自己URL映射的方式,現在我們來編輯項目中的url.py文件(myproject/url.py)完成。url.py文件內\",\"keywords\":\"Django,URL,映射\"},\"content\":{\"extended\":\"$17\"},\"state\":\"published\",\"views\":906,\"order\":8,\"_id\":\"59fd91c11e18b40005abaaad\",\"key\":\"django-url-mapping\",\"url\":\"django-url-mapping\",\"tutorial\":\"59fd91bd1e18b40005abaaa4\",\"section\":\"59fd91bd1e18b40005abaaa5\",\"title\":\"Django URL映射\",\"author\":\"59fa8cb8a31fb7001009c4bb\",\"publishedDate\":\"2017-11-04T10:09:05.400Z\",\"__v\":0,\"updatedAt\":\"2020-11-02T01:38:28.165Z\"}},{\"order\":9,\"_id\":\"5fcf8cf0d5dd8e00183d7faf\",\"post\":{\"meta\":{\"description\":\"Django能夠單獨分開 Python 和 HTML,Python代碼/變量進入視圖和HTML模板。連接這兩個,Django依賴於渲染函數和Django模板語言。 渲染函數 這個函數有三個參數− 請求− 初始化請求 模板路徑\",\"keywords\":\"Django,模板,系統\"},\"content\":{\"extended\":\"$18\"},\"state\":\"published\",\"views\":575,\"order\":9,\"_id\":\"59fd91c11e18b40005abaaae\",\"key\":\"django-template-system\",\"url\":\"django-template-system\",\"tutorial\":\"59fd91bd1e18b40005abaaa4\",\"section\":\"59fd91bd1e18b40005abaaa5\",\"title\":\"Django模板系統\",\"author\":\"59fa8cb8a31fb7001009c4bb\",\"publishedDate\":\"2017-11-04T10:09:05.665Z\",\"__v\":0,\"updatedAt\":\"2020-11-02T02:47:10.942Z\"}},{\"order\":10,\"_id\":\"5fcf8cf0d5dd8e00183d7fb0\",\"post\":{\"meta\":{\"description\":\"模型是表示我們的數據庫表或集合類,並且其中所述類的每個屬性是表或集合的字段。模型是在app/models.py中定義(在我們的例子中是:myapp/models.py) 創建模型 下面是創建一個Dreamreal模\",\"keywords\":\"Django,模型\"},\"content\":{\"extended\":\"$19\"},\"state\":\"published\",\"views\":658,\"order\":10,\"_id\":\"59fd91c11e18b40005abaaaf\",\"key\":\"django-models\",\"url\":\"django-models\",\"tutorial\":\"59fd91bd1e18b40005abaaa4\",\"section\":\"59fd91bd1e18b40005abaaa5\",\"title\":\"Django模型\",\"author\":\"59fa8cb8a31fb7001009c4bb\",\"publishedDate\":\"2017-11-04T10:09:05.969Z\",\"__v\":0,\"updatedAt\":\"2020-11-02T05:50:56.759Z\"}},{\"order\":11,\"_id\":\"5fcf8cf0d5dd8e00183d7fb1\",\"post\":{\"meta\":{\"description\":\"頁面重定向在Web應用程序有很多原因是必要的。您可能希望將用戶重定向到另一個頁面,當一個特定的動作發生,或者有錯誤的情況下。例如,當用戶登錄網站,他經常被重定向到他的\",\"keywords\":\"Django,頁面,重定向\"},\"content\":{\"extended\":\"$1a\"},\"state\":\"published\",\"views\":600,\"order\":11,\"_id\":\"59fd91c21e18b40005abaab0\",\"key\":\"django-page-redirection\",\"url\":\"django-page-redirection\",\"tutorial\":\"59fd91bd1e18b40005abaaa4\",\"section\":\"59fd91bd1e18b40005abaaa5\",\"title\":\"Django頁面重定向\",\"author\":\"59fa8cb8a31fb7001009c4bb\",\"publishedDate\":\"2017-11-04T10:09:06.488Z\",\"__v\":0,\"updatedAt\":\"2020-10-13T08:27:20.063Z\"}},{\"order\":12,\"_id\":\"5fcf8cf0d5dd8e00183d7fb2\",\"post\":{\"meta\":{\"description\":\"Django提供了一個現成的,易於使用發送電子郵件的輕型引擎。類似Python,你需要導入 smtplib。在Django中只需要導入django.core.mail。要發送電子郵件,編輯項目settings.py文件,並設置下列選\",\"keywords\":\"Django,發送E-mail\"},\"content\":{\"extended\":\"$1b\"},\"state\":\"published\",\"views\":1634,\"order\":12,\"_id\":\"59fd91c31e18b40005abaab1\",\"key\":\"django-sending-emails\",\"url\":\"django-sending-emails\",\"tutorial\":\"59fd91bd1e18b40005abaaa4\",\"section\":\"59fd91bd1e18b40005abaaa5\",\"title\":\"Django發送E-mail\",\"author\":\"59fa8cb8a31fb7001009c4bb\",\"publishedDate\":\"2017-11-04T10:09:07.315Z\",\"__v\":0,\"updatedAt\":\"2020-10-13T08:27:20.054Z\"}},{\"order\":13,\"_id\":\"5fcf8cf0d5dd8e00183d7fb3\",\"post\":{\"meta\":{\"description\":\"在某些情況下編寫視圖代碼,正如我們所看到前面工作真的很繁重。想象一下,只需要一個靜態頁面或列表頁。Django還提供了一種簡單的方法來設置這些簡單的視圖被稱爲通用視圖。\",\"keywords\":\"Django,通用,視圖\"},\"content\":{\"extended\":\"$1c\"},\"state\":\"published\",\"views\":728,\"order\":13,\"_id\":\"59fd91c31e18b40005abaab2\",\"key\":\"django-generic-views\",\"url\":\"django-generic-views\",\"tutorial\":\"59fd91bd1e18b40005abaaa4\",\"section\":\"59fd91bd1e18b40005abaaa5\",\"title\":\"Django通用視圖\",\"author\":\"59fa8cb8a31fb7001009c4bb\",\"publishedDate\":\"2017-11-04T10:09:07.932Z\",\"__v\":0,\"updatedAt\":\"2020-10-13T08:27:20.038Z\"}},{\"order\":14,\"_id\":\"5fcf8cf0d5dd8e00183d7fb4\",\"post\":{\"meta\":{\"description\":\"在Django創建表單,類似於創建一個模型。在這裏,我們只需要從Django的類並繼承此類屬性表單字段。讓我們在myapp文件夾中添加forms.py文件包含我們的應用程序的表單。我們將創建一個登\",\"keywords\":\"Django,表單處理,表單\"},\"content\":{\"extended\":\"$1d\"},\"state\":\"published\",\"views\":795,\"order\":14,\"_id\":\"59fd91c41e18b40005abaab3\",\"key\":\"django-form-processing\",\"url\":\"django-form-processing\",\"tutorial\":\"59fd91bd1e18b40005abaaa4\",\"section\":\"59fd91bd1e18b40005abaaa5\",\"title\":\"Django表單處理\",\"author\":\"59fa8cb8a31fb7001009c4bb\",\"publishedDate\":\"2017-11-04T10:09:08.686Z\",\"__v\":0,\"updatedAt\":\"2020-10-13T08:27:20.031Z\"}},{\"order\":15,\"_id\":\"5fcf8cf0d5dd8e00183d7fb5\",\"post\":{\"meta\":{\"description\":\"對於Web應用程序,以便能夠上傳文件(資料圖片,歌曲,PDF格式,文字......),它通常是很有用的。讓我們在這一節中來討論如何使用Django上傳文件。 上傳圖片 在開始開發圖片上傳之\",\"keywords\":\"Django,上傳文件\"},\"content\":{\"extended\":\"$1e\"},\"state\":\"published\",\"views\":1194,\"order\":15,\"_id\":\"59fd91c61e18b40005abaab4\",\"key\":\"django-file-uploading\",\"url\":\"django-file-uploading\",\"tutorial\":\"59fd91bd1e18b40005abaaa4\",\"section\":\"59fd91bd1e18b40005abaaa5\",\"title\":\"Django上傳文件\",\"author\":\"59fa8cb8a31fb7001009c4bb\",\"publishedDate\":\"2017-11-04T10:09:10.008Z\",\"__v\":0,\"updatedAt\":\"2020-10-13T08:27:20.024Z\"}},{\"order\":16,\"_id\":\"5fcf8cf0d5dd8e00183d7fb6\",\"post\":{\"meta\":{\"description\":\"到目前爲止,在我們的例子中,都是使用Django開發的web服務器。但這種服務器只是用於測試和不適合生產環境。一旦程序發佈投入生產,就需要如Apache,Nginx等一個真正的服務器,我們\",\"keywords\":\"Djang,Apache配置\"},\"content\":{\"extended\":\"$1f\"},\"state\":\"published\",\"views\":664,\"order\":16,\"_id\":\"59fd91c61e18b40005abaab5\",\"key\":\"django-apache-setup\",\"url\":\"django-apache-setup\",\"tutorial\":\"59fd91bd1e18b40005abaaa4\",\"section\":\"59fd91bd1e18b40005abaaa5\",\"title\":\"Django Apache配置\",\"author\":\"59fa8cb8a31fb7001009c4bb\",\"publishedDate\":\"2017-11-04T10:09:10.605Z\",\"__v\":0,\"updatedAt\":\"2020-10-13T08:27:20.017Z\"}},{\"order\":17,\"_id\":\"5fcf8cf0d5dd8e00183d7fb7\",\"post\":{\"meta\":{\"description\":\"有時候,可能要按您的Web應用程序的要求存儲訪問者一些數據在每個站點。始終牢記,那cookies被保存在客戶端,並根據您的客戶端瀏覽器的安全級別,設置cookie存活的時間,有時候可能\",\"keywords\":\"Django,Cookies處理,Cookies\"},\"content\":{\"extended\":\"$20\"},\"state\":\"published\",\"views\":585,\"order\":17,\"_id\":\"59fd91c71e18b40005abaab6\",\"key\":\"django-cookies-handling\",\"url\":\"django-cookies-handling\",\"tutorial\":\"59fd91bd1e18b40005abaaa4\",\"section\":\"59fd91bd1e18b40005abaaa5\",\"title\":\"Django Cookies處理\",\"author\":\"59fa8cb8a31fb7001009c4bb\",\"publishedDate\":\"2017-11-04T10:09:11.186Z\",\"__v\":0,\"updatedAt\":\"2020-10-13T08:27:20.012Z\"}},{\"order\":18,\"_id\":\"5fcf8cf0d5dd8e00183d7fb8\",\"post\":{\"meta\":{\"description\":\"如前所述,我們可以在Web應用程序客戶端使用Cookie來存儲大量的有用數據。我們在此之前已經看到了可以使用客戶端的cookie存儲各種數據,在Web應用程序這是非常有用的。這就導致了很\",\"keywords\":\"Django,Session,會話\"},\"content\":{\"extended\":\"$21\"},\"state\":\"published\",\"views\":602,\"order\":18,\"_id\":\"59fd91c71e18b40005abaab7\",\"key\":\"django-sessions\",\"url\":\"django-sessions\",\"tutorial\":\"59fd91bd1e18b40005abaaa4\",\"section\":\"59fd91bd1e18b40005abaaa5\",\"title\":\"Django Session會話\",\"author\":\"59fa8cb8a31fb7001009c4bb\",\"publishedDate\":\"2017-11-04T10:09:11.979Z\",\"__v\":0,\"updatedAt\":\"2020-10-13T08:27:20.006Z\"}},{\"order\":19,\"_id\":\"5fcf8cf0d5dd8e00183d7fb9\",\"post\":{\"meta\":{\"description\":\"若要緩存一些昂貴的計算結果,下一次你需要它時不需要再執行它。以下是解釋緩存如何工作的僞代碼− given a URL, try finding that page in the cacheif the page is in the cache: return the cached pageels\",\"keywords\":\"Django,緩存\"},\"content\":{\"extended\":\"$22\"},\"state\":\"published\",\"views\":765,\"order\":19,\"_id\":\"59fd91c81e18b40005abaab8\",\"key\":\"django-caching\",\"url\":\"django-caching\",\"tutorial\":\"59fd91bd1e18b40005abaaa4\",\"section\":\"59fd91bd1e18b40005abaaa5\",\"title\":\"Django緩存\",\"author\":\"59fa8cb8a31fb7001009c4bb\",\"publishedDate\":\"2017-11-04T10:09:12.245Z\",\"__v\":0,\"updatedAt\":\"2020-10-13T08:27:19.997Z\"}},{\"order\":20,\"_id\":\"5fcf8cf0d5dd8e00183d7fba\",\"post\":{\"meta\":{\"description\":\"Django帶有聚合feed生成框架。有了它,你可以創建RSS或Atom只需繼承django.contrib.syndication.views.Feed類。 讓我們創建一個訂閱源的應用程序。 from django.contrib.syndication.views import Feedfrom django.\",\"keywords\":\"Django,RSS\"},\"content\":{\"extended\":\"$23\"},\"state\":\"published\",\"views\":561,\"order\":20,\"_id\":\"59fd91c91e18b40005abaab9\",\"key\":\"django-rss\",\"url\":\"django-rss\",\"tutorial\":\"59fd91bd1e18b40005abaaa4\",\"section\":\"59fd91bd1e18b40005abaaa5\",\"title\":\"Django RSS\",\"author\":\"59fa8cb8a31fb7001009c4bb\",\"publishedDate\":\"2017-11-04T10:09:13.372Z\",\"__v\":0,\"updatedAt\":\"2020-10-13T08:27:19.990Z\"}},{\"order\":21,\"_id\":\"5fcf8cf0d5dd8e00183d7fbb\",\"post\":{\"meta\":{\"description\":\"Ajax基本上是集成到一起,以減少頁負載數量的技術的組合。我們通常使用Ajax來緩解的最終用戶體驗。在Django使用Ajax可以直接使用Ajax庫如jQuery或其它來完成。比方說,想使用jQuery,那麼\",\"keywords\":\"Django,Ajax\"},\"content\":{\"extended\":\"$24\"},\"state\":\"published\",\"views\":1930,\"order\":21,\"_id\":\"59fd91ca1e18b40005abaaba\",\"key\":\"django-ajax\",\"url\":\"django-ajax\",\"tutorial\":\"59fd91bd1e18b40005abaaa4\",\"section\":\"59fd91bd1e18b40005abaaa5\",\"title\":\"Django Ajax應用\",\"author\":\"59fa8cb8a31fb7001009c4bb\",\"publishedDate\":\"2017-11-04T10:09:14.091Z\",\"__v\":0,\"updatedAt\":\"2020-10-13T08:27:19.983Z\"}},{\"order\":22,\"_id\":\"5fcf8cf0d5dd8e00183d7fbc\",\"post\":{\"meta\":{\"description\":\"快速安裝 在使用Django之前,我們需要把它先安裝好。我們這裏有一個完整的安裝指南,涵蓋了所有的可能性;本指南將引導您通過簡單的,最小化安裝。 Windows 安裝參考: https://docs.dj\",\"keywords\":\"Django,快速入門\"},\"content\":{\"extended\":\"$25\"},\"state\":\"published\",\"views\":885,\"order\":22,\"_id\":\"59fd91cb1e18b40005abaabb\",\"key\":\"django-quick-start-first-step\",\"url\":\"django-quick-start-first-step\",\"tutorial\":\"59fd91bd1e18b40005abaaa4\",\"section\":\"59fd91bd1e18b40005abaaa5\",\"title\":\"Django快速入門\",\"author\":\"59fa8cb8a31fb7001009c4bb\",\"publishedDate\":\"2017-11-04T10:09:15.145Z\",\"__v\":0,\"updatedAt\":\"2020-10-13T08:27:19.971Z\"}},{\"order\":23,\"_id\":\"5fcf8cf0d5dd8e00183d7fbd\",\"post\":{\"meta\":{\"description\":\"本系列教程第一部分已經講完了。在上一個教程的基礎上,在這一講中我們將建立數據庫,創建第一個模型,並使用一個 Django快速自動生成的管理站點。 數據庫配置 現在,打開mysite\",\"keywords\":\"Django,快速入門,數據庫,模型\"},\"content\":{\"extended\":\"$26\"},\"state\":\"published\",\"views\":745,\"order\":23,\"_id\":\"59fd91cc1e18b40005abaabc\",\"key\":\"quick-start-django-model\",\"url\":\"quick-start-django-model\",\"tutorial\":\"59fd91bd1e18b40005abaaa4\",\"section\":\"59fd91bd1e18b40005abaaa5\",\"title\":\"Django快速入門-數據庫模型\",\"author\":\"59fa8cb8a31fb7001009c4bb\",\"publishedDate\":\"2017-11-04T10:09:16.723Z\",\"__v\":0,\"updatedAt\":\"2020-10-13T08:27:19.929Z\"}},{\"order\":24,\"_id\":\"5fcf8cf0d5dd8e00183d7fbe\",\"post\":{\"meta\":{\"description\":\"視圖是一個網頁「類型」在Django應用程序,提供特定的功能,並且具有特定的模板。例如,在一個博客的應用程序,可能有以下幾個視圖: 博客首頁-顯示最後的幾個文章。 進入「det\",\"keywords\":\"Django,快速入門,視圖\"},\"content\":{\"extended\":\"$27\"},\"state\":\"published\",\"views\":572,\"order\":24,\"_id\":\"59fd91cd1e18b40005abaabd\",\"key\":\"quick-start-django-view\",\"url\":\"quick-start-django-view\",\"tutorial\":\"59fd91bd1e18b40005abaaa4\",\"section\":\"59fd91bd1e18b40005abaaa5\",\"title\":\"Django快速入門-視圖\",\"author\":\"59fa8cb8a31fb7001009c4bb\",\"publishedDate\":\"2017-11-04T10:09:17.640Z\",\"__v\":0,\"updatedAt\":\"2020-10-13T08:27:19.907Z\"}},{\"order\":25,\"_id\":\"5fcf8cf0d5dd8e00183d7fbf\",\"post\":{\"meta\":{\"description\":\"在上一節的教程中,我們介紹了 Django的視圖 ,並編寫了一個簡單的實例。本小節我們將學習網絡投票應用程序,並將側重於簡單的表單處理,以最少代碼代碼量來實現。 編寫一個簡單\",\"keywords\":\"Django,快速入門,表單\"},\"content\":{\"extended\":\"$28\"},\"state\":\"published\",\"views\":661,\"order\":25,\"_id\":\"59fd91ce1e18b40005abaabe\",\"key\":\"quick-start-django-form\",\"url\":\"quick-start-django-form\",\"tutorial\":\"59fd91bd1e18b40005abaaa4\",\"section\":\"59fd91bd1e18b40005abaaa5\",\"title\":\"Django快速入門-表單\",\"author\":\"59fa8cb8a31fb7001009c4bb\",\"publishedDate\":\"2017-11-04T10:09:18.278Z\",\"__v\":0,\"updatedAt\":\"2020-10-13T08:27:19.890Z\"}}]}]},\"post\":{\"meta\":{\"description\":\"Django帶有聚合feed生成框架。有了它,你可以創建RSS或Atom只需繼承django.contrib.syndication.views.Feed類。 讓我們創建一個訂閱源的應用程序。 from django.contrib.syndication.views import Feedfrom django.\",\"keywords\":\"Django,RSS\"},\"content\":{\"extended\":\"$29\",\"markdown\":\"$2a\",\"html\":\"$2b\"},\"state\":\"published\",\"views\":561,\"order\":20,\"_id\":\"59fd91c91e18b40005abaab9\",\"key\":\"django-rss\",\"url\":\"django-rss\",\"tutorial\":\"59fd91bd1e18b40005abaaa4\",\"section\":\"59fd91bd1e18b40005abaaa5\",\"title\":\"Django RSS\",\"author\":{\"isPublic\":true,\"isOrganiser\":false,\"isAdmin\":true,\"isVerified\":false,\"isOpen\":false,\"_id\":\"59fa8cb8a31fb7001009c4bb\",\"email\":\"inkebook@outlook.com\",\"password\":\"$$2a$10$94Vw.V1wl1cC4R5SnV54ZOrUfeS0F42MdiV4fkJtjonMaKVuaxBe.\",\"isProtected\":false,\"__v\":0,\"photo\":{\"exists\":false,\"folder\":null},\"url\":\"/member/undefined\",\"_\":{\"name\":{},\"email\":{},\"password\":{},\"resetPasswordKey\":{},\"isPublic\":{},\"isOrganiser\":{},\"photo\":{},\"github\":{},\"twitter\":{},\"website\":{},\"bio\":{},\"gravatar\":{},\"isAdmin\":{},\"isVerified\":{},\"isOpen\":{},\"createdAt\":{},\"createdBy\":{},\"updatedAt\":{},\"updatedBy\":{}},\"id\":\"59fa8cb8a31fb7001009c4bb\"},\"publishedDate\":\"2017-11-04T10:09:13.372Z\",\"__v\":0,\"updatedAt\":\"2020-10-13T08:27:19.990Z\",\"updatedAtPretty\":\"2020年10月13日\",\"_\":{\"title\":{},\"state\":{},\"author\":{},\"publishedDate\":{},\"meta\":{\"keywords\":{},\"description\":{}},\"content\":{\"markdown\":{}},\"categories\":{},\"views\":{},\"ratingCount\":{},\"ratingAvg\":{},\"section\":{},\"tutorial\":{},\"url\":{},\"order\":{},\"createdAt\":{},\"createdBy\":{},\"updatedAt\":{},\"updatedBy\":{}},\"id\":\"59fd91c91e18b40005abaab9\"}}],[\"$\",\"div\",null,{\"className\":\"col-12 col-sm-8\",\"children\":[[\"$\",\"$L2c\",null,{}],[\"$\",\"div\",null,{\"className\":\"book card\",\"children\":[[\"$\",\"div\",null,{\"className\":\"card-header\",\"children\":[\"$\",\"div\",null,{\"className\":\"row\",\"children\":[[\"$\",\"div\",null,{\"className\":\"col\",\"children\":[[\"$\",\"svg\",null,{\"aria-hidden\":\"true\",\"focusable\":\"false\",\"data-prefix\":\"fas\",\"data-icon\":\"arrow-left\",\"className\":\"svg-inline--fa fa-arrow-left \",\"role\":\"img\",\"xmlns\":\"http://www.w3.org/2000/svg\",\"viewBox\":\"0 0 448 512\",\"style\":{},\"children\":[\"$\",\"path\",null,{\"fill\":\"currentColor\",\"d\":\"M9.4 233.4c-12.5 12.5-12.5 32.8 0 45.3l160 160c12.5 12.5 32.8 12.5 45.3 0s12.5-32.8 0-45.3L109.2 288 416 288c17.7 0 32-14.3 32-32s-14.3-32-32-32l-306.7 0L214.6 118.6c12.5-12.5 12.5-32.8 0-45.3s-32.8-12.5-45.3 0l-160 160z\",\"style\":{}}]}],[\"$\",\"$Lf\",null,{\"href\":\"/django/django-caching\",\"children\":\"Django緩存\"}]]}],[\"$\",\"div\",null,{\"className\":\"col text-md-end\",\"children\":[\"$\",\"$Lf\",null,{\"href\":\"/django/django-ajax\",\"children\":[[\"$\",\"svg\",null,{\"aria-hidden\":\"true\",\"focusable\":\"false\",\"data-prefix\":\"fas\",\"data-icon\":\"arrow-right\",\"className\":\"svg-inline--fa fa-arrow-right \",\"role\":\"img\",\"xmlns\":\"http://www.w3.org/2000/svg\",\"viewBox\":\"0 0 448 512\",\"style\":{},\"children\":[\"$\",\"path\",null,{\"fill\":\"currentColor\",\"d\":\"M438.6 278.6c12.5-12.5 12.5-32.8 0-45.3l-160-160c-12.5-12.5-32.8-12.5-45.3 0s-12.5 32.8 0 45.3L338.8 224 32 224c-17.7 0-32 14.3-32 32s14.3 32 32 32l306.7 0L233.4 393.4c-12.5 12.5-12.5 32.8 0 45.3s32.8 12.5 45.3 0l160-160z\",\"style\":{}}]}],\"Django Ajax應用\"]}]}]]}]}],[\"$\",\"div\",null,{\"className\":\"card-body p-lg-30\",\"children\":[[\"$\",\"div\",null,{\"className\":\"row\",\"children\":[\"$\",\"div\",null,{\"className\":\"col-12 col-lg-9 col-sm-8\",\"children\":[[\"$\",\"h1\",null,{\"className\":\"h2 title\",\"children\":\"Django RSS\"}],[\"$\",\"div\",null,{\"className\":\"blog-post__byline mb-3\",\"children\":[\"$\",\"div\",null,{\"className\":\"d-sm-inline-block\",\"children\":[[\"$\",\"span\",null,{\"className\":\"split-dot\"}],[\"$\",\"span\",null,{\"className\":\"text-secondary\",\"children\":[\"瀏覽人數:\",[\"$\",\"span\",null,{\"children\":\"561\"}]]}],[\"$\",\"span\",null,{\"className\":\"split-dot\"}],[\"$\",\"span\",null,{\"className\":\"text-secondary\",\"children\":\"最近更新:\"}],[\"$\",\"time\",null,{\"className\":\"text-secondary\",\"dateTime\":\"2020-10-13T08:27:19.990Z\",\"children\":[\"最近更新:\",\"2020年10月13日\"]}]]}]}],\"$undefined\"]}]}],[\"$\",\"article\",null,{\"className\":\"full-post fmt\",\"children\":[[\"$\",\"div\",null,{\"className\":\"row\",\"children\":[\"$\",\"div\",null,{\"className\":\"col\",\"children\":[\"$\",\"$L2d\",null,{\"content\":\"$2e\"}]}]}],[\"$\",\"div\",null,{\"className\":\"functional-area-bottom\",\"children\":[\"$\",\"div\",null,{\"className\":\"text-center\",\"children\":[\"$\",\"$L2f\",null,{\"post\":{\"meta\":{\"description\":\"Django帶有聚合feed生成框架。有了它,你可以創建RSS或Atom只需繼承django.contrib.syndication.views.Feed類。 讓我們創建一個訂閱源的應用程序。 from django.contrib.syndication.views import Feedfrom django.\",\"keywords\":\"Django,RSS\"},\"content\":{\"extended\":\"$30\",\"markdown\":\"$31\",\"html\":\"$32\"},\"state\":\"published\",\"views\":561,\"order\":20,\"_id\":\"59fd91c91e18b40005abaab9\",\"key\":\"django-rss\",\"url\":\"django-rss\",\"tutorial\":\"59fd91bd1e18b40005abaaa4\",\"section\":\"59fd91bd1e18b40005abaaa5\",\"title\":\"Django RSS\",\"author\":{\"isPublic\":true,\"isOrganiser\":false,\"isAdmin\":true,\"isVerified\":false,\"isOpen\":false,\"_id\":\"59fa8cb8a31fb7001009c4bb\",\"email\":\"inkebook@outlook.com\",\"password\":\"$$2a$10$94Vw.V1wl1cC4R5SnV54ZOrUfeS0F42MdiV4fkJtjonMaKVuaxBe.\",\"isProtected\":false,\"__v\":0,\"photo\":{\"exists\":false,\"folder\":null},\"url\":\"/member/undefined\",\"_\":{\"name\":{},\"email\":{},\"password\":{},\"resetPasswordKey\":{},\"isPublic\":{},\"isOrganiser\":{},\"photo\":{},\"github\":{},\"twitter\":{},\"website\":{},\"bio\":{},\"gravatar\":{},\"isAdmin\":{},\"isVerified\":{},\"isOpen\":{},\"createdAt\":{},\"createdBy\":{},\"updatedAt\":{},\"updatedBy\":{}},\"id\":\"59fa8cb8a31fb7001009c4bb\"},\"publishedDate\":\"2017-11-04T10:09:13.372Z\",\"__v\":0,\"updatedAt\":\"2020-10-13T08:27:19.990Z\",\"updatedAtPretty\":\"2020年10月13日\",\"_\":{\"title\":{},\"state\":{},\"author\":{},\"publishedDate\":{},\"meta\":{\"keywords\":{},\"description\":{}},\"content\":{\"markdown\":{}},\"categories\":{},\"views\":{},\"ratingCount\":{},\"ratingAvg\":{},\"section\":{},\"tutorial\":{},\"url\":{},\"order\":{},\"createdAt\":{},\"createdBy\":{},\"updatedAt\":{},\"updatedBy\":{}},\"id\":\"59fd91c91e18b40005abaab9\"},\"tutorial\":{\"state\":\"published\",\"_id\":\"59fd91bd1e18b40005abaaa4\",\"key\":\"django\",\"indexUrl\":\"index\",\"parent\":\"59fd91bd1e18b40005abaaa3\",\"description\":\"Django是用python語言寫的開源web開發框架,它鼓勵快速開發,並遵循MVC設計。Django的主要目的是簡便、快速的開發數據庫驅動的網站。\",\"url\":\"django\",\"name\":\"Django教學\",\"__v\":0,\"sections\":[{\"order\":0,\"_id\":\"59fd91bd1e18b40005abaaa5\",\"isDefault\":false,\"name\":\"Django教程\",\"sortedPosts\":[{\"order\":0,\"_id\":\"5fcf8cf0d5dd8e00183d7fa7\",\"post\":{\"meta\":{\"description\":\"Django是用python語言寫的開源web開發框架,它鼓勵快速開發,並遵循MVC設計。Django的主要目的是簡便、快速的開發數據庫驅動的網站。\",\"keywords\":\"Django教程,Django,教程\"},\"content\":{\"extended\":\"\u003cp\u003eDjango是一個Python Web框架。像最現代的框架,\u003cstrong\u003eDjango\u003c/strong\u003e支持MVC模式。首先讓我們來看看什麼是模型 - 視圖 - 控制器(MVC)模式,然後我們將看看Django特有的模型 - 視圖 - 模板(MVC)模式。\u003c/p\u003e \\n\u003cp\u003e\u003cstrong\u003e快速入門系列教程:\u003c/strong\u003e\u003c/p\u003e \\n\u003cp\u003e1 - Django快速入門-環境安裝\u003cbr\u003e2 - Django快速入門-數據庫模型\u003cbr\u003e3 - Django快速入門-視圖\u003cbr\u003e4 - Django快速入門-表單\u003c/p\u003e \\n\u003cp\u003eMVC模式\u003cbr\u003e在談到應用程序提供用戶界面(Web或桌面),我們通常講 MVC 架構。顧名思義,MVC模式是基於三個部分組成:模型,視圖和控制器。 查看MVC教程以瞭解更多。\u003c/p\u003e \\n\u003cp\u003eDJANGO MVC - MVT模式\u003cbr\u003e模型 - 視圖- 模板(MVT)與MVC略有不同。實際上這兩個模式之間的主要區別是,Django它本身處理控制器部分(軟件代碼,其控制模型和視圖之間的相互作用),留給我們模板。模板是混合 HTML文件的Django模板語言(DTL)。\u003c/p\u003e \\n\u003cp\u003e下圖說明了每個MVT模式的組件相互交互,以服務用戶請求 −\u003cbr\u003e\u003cimg src=\\\"https://asset.1ju.org/cmsstatic/django-1.jpg\\\" alt=\\\"Django教程\\\"\u003e\u003c/p\u003e \\n\u003cp\u003e開發人員提供模型,視圖和模板,然後只需將它映射到一個URL,然後\u003cstrong\u003eDjango\u003c/strong\u003e就可以確實神奇地服務用戶了。\u003c/p\u003e \\n\u003cbr\u003e\"},\"state\":\"published\",\"views\":1484,\"order\":0,\"_id\":\"59fd91bd1e18b40005abaaa6\",\"key\":\"index-54\",\"url\":\"index\",\"tutorial\":\"59fd91bd1e18b40005abaaa4\",\"section\":\"59fd91bd1e18b40005abaaa5\",\"title\":\"Django教學\",\"author\":\"59fa8cb8a31fb7001009c4bb\",\"publishedDate\":\"2017-11-04T10:09:01.684Z\",\"__v\":0,\"updatedAt\":\"2020-10-13T08:27:20.160Z\"}},{\"order\":2,\"_id\":\"5fcf8cf0d5dd8e00183d7fa8\",\"post\":{\"meta\":{\"description\":\"Django是一個高層次的 PythonWeb 框架,它是一個鼓勵快速開發和乾淨,實用的框架設計。Django可以更容易地快速構建更好的Web應用程序,並且它使用更少的代碼。 注意−Django是Django 軟件基\",\"keywords\":\"Django,基礎\"},\"content\":{\"extended\":\"$33\"},\"state\":\"published\",\"views\":875,\"order\":2,\"_id\":\"59fd91be1e18b40005abaaa7\",\"key\":\"django-basics\",\"url\":\"django-basics\",\"tutorial\":\"59fd91bd1e18b40005abaaa4\",\"section\":\"59fd91bd1e18b40005abaaa5\",\"title\":\"Django基礎\",\"author\":\"59fa8cb8a31fb7001009c4bb\",\"publishedDate\":\"2017-11-04T10:09:02.024Z\",\"__v\":0,\"updatedAt\":\"2020-11-02T02:21:05.675Z\"}},{\"order\":3,\"_id\":\"5fcf8cf0d5dd8e00183d7fa9\",\"post\":{\"meta\":{\"description\":\"Django開發環境安裝和設置包括Python,Django,和數據庫系統。由於Django處理Web應用程序,這裏值得一提的是,你需也需要設置一個Web服務器。 第1步-安裝Python Django是用100%純Python代碼編寫\",\"keywords\":\"Django,開發環境,安裝配置\"},\"content\":{\"extended\":\"$34\"},\"state\":\"published\",\"views\":1350,\"order\":3,\"_id\":\"59fd91be1e18b40005abaaa8\",\"key\":\"django-environment\",\"url\":\"django-environment\",\"tutorial\":\"59fd91bd1e18b40005abaaa4\",\"section\":\"59fd91bd1e18b40005abaaa5\",\"title\":\"Django開發環境安裝配置\",\"author\":\"59fa8cb8a31fb7001009c4bb\",\"publishedDate\":\"2017-11-04T10:09:02.693Z\",\"__v\":0,\"updatedAt\":\"2020-11-02T02:25:07.110Z\"}},{\"order\":4,\"_id\":\"5fcf8cf0d5dd8e00183d7faa\",\"post\":{\"meta\":{\"description\":\"現在我們已經安裝了Django,讓我們開始使用它。在Django中,每個要創建Web應用程序稱爲項目;一個項目是應用程序的總和。應用程序是一組依託於MVC模式的代碼文件。作爲例子,讓我們要\",\"keywords\":\"Django,創建工程\"},\"content\":{\"extended\":\"$35\"},\"state\":\"published\",\"views\":810,\"order\":4,\"_id\":\"59fd91bf1e18b40005abaaa9\",\"key\":\"django-creating-project\",\"url\":\"django-creating-project\",\"tutorial\":\"59fd91bd1e18b40005abaaa4\",\"section\":\"59fd91bd1e18b40005abaaa5\",\"title\":\"Django創建工程\",\"author\":\"59fa8cb8a31fb7001009c4bb\",\"publishedDate\":\"2017-11-04T10:09:03.114Z\",\"__v\":0,\"updatedAt\":\"2020-11-02T02:30:10.962Z\"}},{\"order\":5,\"_id\":\"5fcf8cf0d5dd8e00183d7fab\",\"post\":{\"meta\":{\"description\":\"一個項目是許多應用的總和。每個應用程序有一個客觀並可重複使用到另一個項目,像在網站上的聯繫表單可以是一個應用程序,並且可以重複使用到其它應用。看到它作爲項目的一個\",\"keywords\":\"Django,生命週期\"},\"content\":{\"extended\":\"$36\"},\"state\":\"published\",\"views\":827,\"order\":5,\"_id\":\"59fd91bf1e18b40005abaaaa\",\"key\":\"django-apps-life-cycle\",\"url\":\"django-apps-life-cycle\",\"tutorial\":\"59fd91bd1e18b40005abaaa4\",\"section\":\"59fd91bd1e18b40005abaaa5\",\"title\":\"Django生命週期\",\"author\":\"59fa8cb8a31fb7001009c4bb\",\"publishedDate\":\"2017-11-04T10:09:03.381Z\",\"__v\":0,\"updatedAt\":\"2020-11-02T02:30:57.331Z\"}},{\"order\":6,\"_id\":\"5fcf8cf0d5dd8e00183d7fac\",\"post\":{\"meta\":{\"description\":\"Django爲管理活動提供隨時可以使用的用戶界面。 我們都知道,管理界面對於一個Web項目是十分重要的。 Django根據您的項目模型自動生成管理界面。 啓動管理界面 管理界面依賴於 djan\",\"keywords\":\"Django,管理員,界面\"},\"content\":{\"extended\":\"$37\"},\"state\":\"published\",\"views\":654,\"order\":6,\"_id\":\"59fd91c01e18b40005abaaab\",\"key\":\"django-admin-interface\",\"url\":\"django-admin-interface\",\"tutorial\":\"59fd91bd1e18b40005abaaa4\",\"section\":\"59fd91bd1e18b40005abaaa5\",\"title\":\"Django管理員界面\",\"author\":\"59fa8cb8a31fb7001009c4bb\",\"publishedDate\":\"2017-11-04T10:09:04.099Z\",\"__v\":0,\"updatedAt\":\"2020-11-02T02:33:19.660Z\"}},{\"order\":7,\"_id\":\"5fcf8cf0d5dd8e00183d7fad\",\"post\":{\"meta\":{\"description\":\"視圖功能,或簡稱\",\"keywords\":\"Django,視圖\"},\"content\":{\"extended\":\"$38\"},\"state\":\"published\",\"views\":722,\"order\":7,\"_id\":\"59fd91c01e18b40005abaaac\",\"key\":\"django-creating-views\",\"url\":\"django-creating-views\",\"tutorial\":\"59fd91bd1e18b40005abaaa4\",\"section\":\"59fd91bd1e18b40005abaaa5\",\"title\":\"Django創建視圖\",\"author\":\"59fa8cb8a31fb7001009c4bb\",\"publishedDate\":\"2017-11-04T10:09:04.365Z\",\"__v\":0,\"updatedAt\":\"2020-11-02T02:35:14.537Z\"}},{\"order\":8,\"_id\":\"5fcf8cf0d5dd8e00183d7fae\",\"post\":{\"meta\":{\"description\":\"現在,我們有一個工作視圖在前面的章節中解釋。我們希望通過一個URL來訪問該視圖。Django有他自己URL映射的方式,現在我們來編輯項目中的url.py文件(myproject/url.py)完成。url.py文件內\",\"keywords\":\"Django,URL,映射\"},\"content\":{\"extended\":\"$39\"},\"state\":\"published\",\"views\":906,\"order\":8,\"_id\":\"59fd91c11e18b40005abaaad\",\"key\":\"django-url-mapping\",\"url\":\"django-url-mapping\",\"tutorial\":\"59fd91bd1e18b40005abaaa4\",\"section\":\"59fd91bd1e18b40005abaaa5\",\"title\":\"Django URL映射\",\"author\":\"59fa8cb8a31fb7001009c4bb\",\"publishedDate\":\"2017-11-04T10:09:05.400Z\",\"__v\":0,\"updatedAt\":\"2020-11-02T01:38:28.165Z\"}},{\"order\":9,\"_id\":\"5fcf8cf0d5dd8e00183d7faf\",\"post\":{\"meta\":{\"description\":\"Django能夠單獨分開 Python 和 HTML,Python代碼/變量進入視圖和HTML模板。連接這兩個,Django依賴於渲染函數和Django模板語言。 渲染函數 這個函數有三個參數− 請求− 初始化請求 模板路徑\",\"keywords\":\"Django,模板,系統\"},\"content\":{\"extended\":\"$3a\"},\"state\":\"published\",\"views\":575,\"order\":9,\"_id\":\"59fd91c11e18b40005abaaae\",\"key\":\"django-template-system\",\"url\":\"django-template-system\",\"tutorial\":\"59fd91bd1e18b40005abaaa4\",\"section\":\"59fd91bd1e18b40005abaaa5\",\"title\":\"Django模板系統\",\"author\":\"59fa8cb8a31fb7001009c4bb\",\"publishedDate\":\"2017-11-04T10:09:05.665Z\",\"__v\":0,\"updatedAt\":\"2020-11-02T02:47:10.942Z\"}},{\"order\":10,\"_id\":\"5fcf8cf0d5dd8e00183d7fb0\",\"post\":{\"meta\":{\"description\":\"模型是表示我們的數據庫表或集合類,並且其中所述類的每個屬性是表或集合的字段。模型是在app/models.py中定義(在我們的例子中是:myapp/models.py) 創建模型 下面是創建一個Dreamreal模\",\"keywords\":\"Django,模型\"},\"content\":{\"extended\":\"$3b\"},\"state\":\"published\",\"views\":658,\"order\":10,\"_id\":\"59fd91c11e18b40005abaaaf\",\"key\":\"django-models\",\"url\":\"django-models\",\"tutorial\":\"59fd91bd1e18b40005abaaa4\",\"section\":\"59fd91bd1e18b40005abaaa5\",\"title\":\"Django模型\",\"author\":\"59fa8cb8a31fb7001009c4bb\",\"publishedDate\":\"2017-11-04T10:09:05.969Z\",\"__v\":0,\"updatedAt\":\"2020-11-02T05:50:56.759Z\"}},{\"order\":11,\"_id\":\"5fcf8cf0d5dd8e00183d7fb1\",\"post\":{\"meta\":{\"description\":\"頁面重定向在Web應用程序有很多原因是必要的。您可能希望將用戶重定向到另一個頁面,當一個特定的動作發生,或者有錯誤的情況下。例如,當用戶登錄網站,他經常被重定向到他的\",\"keywords\":\"Django,頁面,重定向\"},\"content\":{\"extended\":\"$3c\"},\"state\":\"published\",\"views\":600,\"order\":11,\"_id\":\"59fd91c21e18b40005abaab0\",\"key\":\"django-page-redirection\",\"url\":\"django-page-redirection\",\"tutorial\":\"59fd91bd1e18b40005abaaa4\",\"section\":\"59fd91bd1e18b40005abaaa5\",\"title\":\"Django頁面重定向\",\"author\":\"59fa8cb8a31fb7001009c4bb\",\"publishedDate\":\"2017-11-04T10:09:06.488Z\",\"__v\":0,\"updatedAt\":\"2020-10-13T08:27:20.063Z\"}},{\"order\":12,\"_id\":\"5fcf8cf0d5dd8e00183d7fb2\",\"post\":{\"meta\":{\"description\":\"Django提供了一個現成的,易於使用發送電子郵件的輕型引擎。類似Python,你需要導入 smtplib。在Django中只需要導入django.core.mail。要發送電子郵件,編輯項目settings.py文件,並設置下列選\",\"keywords\":\"Django,發送E-mail\"},\"content\":{\"extended\":\"$3d\"},\"state\":\"published\",\"views\":1634,\"order\":12,\"_id\":\"59fd91c31e18b40005abaab1\",\"key\":\"django-sending-emails\",\"url\":\"django-sending-emails\",\"tutorial\":\"59fd91bd1e18b40005abaaa4\",\"section\":\"59fd91bd1e18b40005abaaa5\",\"title\":\"Django發送E-mail\",\"author\":\"59fa8cb8a31fb7001009c4bb\",\"publishedDate\":\"2017-11-04T10:09:07.315Z\",\"__v\":0,\"updatedAt\":\"2020-10-13T08:27:20.054Z\"}},{\"order\":13,\"_id\":\"5fcf8cf0d5dd8e00183d7fb3\",\"post\":{\"meta\":{\"description\":\"在某些情況下編寫視圖代碼,正如我們所看到前面工作真的很繁重。想象一下,只需要一個靜態頁面或列表頁。Django還提供了一種簡單的方法來設置這些簡單的視圖被稱爲通用視圖。\",\"keywords\":\"Django,通用,視圖\"},\"content\":{\"extended\":\"$3e\"},\"state\":\"published\",\"views\":728,\"order\":13,\"_id\":\"59fd91c31e18b40005abaab2\",\"key\":\"django-generic-views\",\"url\":\"django-generic-views\",\"tutorial\":\"59fd91bd1e18b40005abaaa4\",\"section\":\"59fd91bd1e18b40005abaaa5\",\"title\":\"Django通用視圖\",\"author\":\"59fa8cb8a31fb7001009c4bb\",\"publishedDate\":\"2017-11-04T10:09:07.932Z\",\"__v\":0,\"updatedAt\":\"2020-10-13T08:27:20.038Z\"}},{\"order\":14,\"_id\":\"5fcf8cf0d5dd8e00183d7fb4\",\"post\":{\"meta\":{\"description\":\"在Django創建表單,類似於創建一個模型。在這裏,我們只需要從Django的類並繼承此類屬性表單字段。讓我們在myapp文件夾中添加forms.py文件包含我們的應用程序的表單。我們將創建一個登\",\"keywords\":\"Django,表單處理,表單\"},\"content\":{\"extended\":\"$3f\"},\"state\":\"published\",\"views\":795,\"order\":14,\"_id\":\"59fd91c41e18b40005abaab3\",\"key\":\"django-form-processing\",\"url\":\"django-form-processing\",\"tutorial\":\"59fd91bd1e18b40005abaaa4\",\"section\":\"59fd91bd1e18b40005abaaa5\",\"title\":\"Django表單處理\",\"author\":\"59fa8cb8a31fb7001009c4bb\",\"publishedDate\":\"2017-11-04T10:09:08.686Z\",\"__v\":0,\"updatedAt\":\"2020-10-13T08:27:20.031Z\"}},{\"order\":15,\"_id\":\"5fcf8cf0d5dd8e00183d7fb5\",\"post\":{\"meta\":{\"description\":\"對於Web應用程序,以便能夠上傳文件(資料圖片,歌曲,PDF格式,文字......),它通常是很有用的。讓我們在這一節中來討論如何使用Django上傳文件。 上傳圖片 在開始開發圖片上傳之\",\"keywords\":\"Django,上傳文件\"},\"content\":{\"extended\":\"$40\"},\"state\":\"published\",\"views\":1194,\"order\":15,\"_id\":\"59fd91c61e18b40005abaab4\",\"key\":\"django-file-uploading\",\"url\":\"django-file-uploading\",\"tutorial\":\"59fd91bd1e18b40005abaaa4\",\"section\":\"59fd91bd1e18b40005abaaa5\",\"title\":\"Django上傳文件\",\"author\":\"59fa8cb8a31fb7001009c4bb\",\"publishedDate\":\"2017-11-04T10:09:10.008Z\",\"__v\":0,\"updatedAt\":\"2020-10-13T08:27:20.024Z\"}},{\"order\":16,\"_id\":\"5fcf8cf0d5dd8e00183d7fb6\",\"post\":{\"meta\":{\"description\":\"到目前爲止,在我們的例子中,都是使用Django開發的web服務器。但這種服務器只是用於測試和不適合生產環境。一旦程序發佈投入生產,就需要如Apache,Nginx等一個真正的服務器,我們\",\"keywords\":\"Djang,Apache配置\"},\"content\":{\"extended\":\"$41\"},\"state\":\"published\",\"views\":664,\"order\":16,\"_id\":\"59fd91c61e18b40005abaab5\",\"key\":\"django-apache-setup\",\"url\":\"django-apache-setup\",\"tutorial\":\"59fd91bd1e18b40005abaaa4\",\"section\":\"59fd91bd1e18b40005abaaa5\",\"title\":\"Django Apache配置\",\"author\":\"59fa8cb8a31fb7001009c4bb\",\"publishedDate\":\"2017-11-04T10:09:10.605Z\",\"__v\":0,\"updatedAt\":\"2020-10-13T08:27:20.017Z\"}},{\"order\":17,\"_id\":\"5fcf8cf0d5dd8e00183d7fb7\",\"post\":{\"meta\":{\"description\":\"有時候,可能要按您的Web應用程序的要求存儲訪問者一些數據在每個站點。始終牢記,那cookies被保存在客戶端,並根據您的客戶端瀏覽器的安全級別,設置cookie存活的時間,有時候可能\",\"keywords\":\"Django,Cookies處理,Cookies\"},\"content\":{\"extended\":\"$42\"},\"state\":\"published\",\"views\":585,\"order\":17,\"_id\":\"59fd91c71e18b40005abaab6\",\"key\":\"django-cookies-handling\",\"url\":\"django-cookies-handling\",\"tutorial\":\"59fd91bd1e18b40005abaaa4\",\"section\":\"59fd91bd1e18b40005abaaa5\",\"title\":\"Django Cookies處理\",\"author\":\"59fa8cb8a31fb7001009c4bb\",\"publishedDate\":\"2017-11-04T10:09:11.186Z\",\"__v\":0,\"updatedAt\":\"2020-10-13T08:27:20.012Z\"}},{\"order\":18,\"_id\":\"5fcf8cf0d5dd8e00183d7fb8\",\"post\":{\"meta\":{\"description\":\"如前所述,我們可以在Web應用程序客戶端使用Cookie來存儲大量的有用數據。我們在此之前已經看到了可以使用客戶端的cookie存儲各種數據,在Web應用程序這是非常有用的。這就導致了很\",\"keywords\":\"Django,Session,會話\"},\"content\":{\"extended\":\"$43\"},\"state\":\"published\",\"views\":602,\"order\":18,\"_id\":\"59fd91c71e18b40005abaab7\",\"key\":\"django-sessions\",\"url\":\"django-sessions\",\"tutorial\":\"59fd91bd1e18b40005abaaa4\",\"section\":\"59fd91bd1e18b40005abaaa5\",\"title\":\"Django Session會話\",\"author\":\"59fa8cb8a31fb7001009c4bb\",\"publishedDate\":\"2017-11-04T10:09:11.979Z\",\"__v\":0,\"updatedAt\":\"2020-10-13T08:27:20.006Z\"}},{\"order\":19,\"_id\":\"5fcf8cf0d5dd8e00183d7fb9\",\"post\":{\"meta\":{\"description\":\"若要緩存一些昂貴的計算結果,下一次你需要它時不需要再執行它。以下是解釋緩存如何工作的僞代碼− given a URL, try finding that page in the cacheif the page is in the cache: return the cached pageels\",\"keywords\":\"Django,緩存\"},\"content\":{\"extended\":\"$44\"},\"state\":\"published\",\"views\":765,\"order\":19,\"_id\":\"59fd91c81e18b40005abaab8\",\"key\":\"django-caching\",\"url\":\"django-caching\",\"tutorial\":\"59fd91bd1e18b40005abaaa4\",\"section\":\"59fd91bd1e18b40005abaaa5\",\"title\":\"Django緩存\",\"author\":\"59fa8cb8a31fb7001009c4bb\",\"publishedDate\":\"2017-11-04T10:09:12.245Z\",\"__v\":0,\"updatedAt\":\"2020-10-13T08:27:19.997Z\"}},{\"order\":20,\"_id\":\"5fcf8cf0d5dd8e00183d7fba\",\"post\":{\"meta\":{\"description\":\"Django帶有聚合feed生成框架。有了它,你可以創建RSS或Atom只需繼承django.contrib.syndication.views.Feed類。 讓我們創建一個訂閱源的應用程序。 from django.contrib.syndication.views import Feedfrom django.\",\"keywords\":\"Django,RSS\"},\"content\":{\"extended\":\"$45\"},\"state\":\"published\",\"views\":561,\"order\":20,\"_id\":\"59fd91c91e18b40005abaab9\",\"key\":\"django-rss\",\"url\":\"django-rss\",\"tutorial\":\"59fd91bd1e18b40005abaaa4\",\"section\":\"59fd91bd1e18b40005abaaa5\",\"title\":\"Django RSS\",\"author\":\"59fa8cb8a31fb7001009c4bb\",\"publishedDate\":\"2017-11-04T10:09:13.372Z\",\"__v\":0,\"updatedAt\":\"2020-10-13T08:27:19.990Z\"}},{\"order\":21,\"_id\":\"5fcf8cf0d5dd8e00183d7fbb\",\"post\":{\"meta\":{\"description\":\"Ajax基本上是集成到一起,以減少頁負載數量的技術的組合。我們通常使用Ajax來緩解的最終用戶體驗。在Django使用Ajax可以直接使用Ajax庫如jQuery或其它來完成。比方說,想使用jQuery,那麼\",\"keywords\":\"Django,Ajax\"},\"content\":{\"extended\":\"$46\"},\"state\":\"published\",\"views\":1930,\"order\":21,\"_id\":\"59fd91ca1e18b40005abaaba\",\"key\":\"django-ajax\",\"url\":\"django-ajax\",\"tutorial\":\"59fd91bd1e18b40005abaaa4\",\"section\":\"59fd91bd1e18b40005abaaa5\",\"title\":\"Django Ajax應用\",\"author\":\"59fa8cb8a31fb7001009c4bb\",\"publishedDate\":\"2017-11-04T10:09:14.091Z\",\"__v\":0,\"updatedAt\":\"2020-10-13T08:27:19.983Z\"}},{\"order\":22,\"_id\":\"5fcf8cf0d5dd8e00183d7fbc\",\"post\":{\"meta\":{\"description\":\"快速安裝 在使用Django之前,我們需要把它先安裝好。我們這裏有一個完整的安裝指南,涵蓋了所有的可能性;本指南將引導您通過簡單的,最小化安裝。 Windows 安裝參考: https://docs.dj\",\"keywords\":\"Django,快速入門\"},\"content\":{\"extended\":\"$47\"},\"state\":\"published\",\"views\":885,\"order\":22,\"_id\":\"59fd91cb1e18b40005abaabb\",\"key\":\"django-quick-start-first-step\",\"url\":\"django-quick-start-first-step\",\"tutorial\":\"59fd91bd1e18b40005abaaa4\",\"section\":\"59fd91bd1e18b40005abaaa5\",\"title\":\"Django快速入門\",\"author\":\"59fa8cb8a31fb7001009c4bb\",\"publishedDate\":\"2017-11-04T10:09:15.145Z\",\"__v\":0,\"updatedAt\":\"2020-10-13T08:27:19.971Z\"}},{\"order\":23,\"_id\":\"5fcf8cf0d5dd8e00183d7fbd\",\"post\":{\"meta\":{\"description\":\"本系列教程第一部分已經講完了。在上一個教程的基礎上,在這一講中我們將建立數據庫,創建第一個模型,並使用一個 Django快速自動生成的管理站點。 數據庫配置 現在,打開mysite\",\"keywords\":\"Django,快速入門,數據庫,模型\"},\"content\":{\"extended\":\"$48\"},\"state\":\"published\",\"views\":745,\"order\":23,\"_id\":\"59fd91cc1e18b40005abaabc\",\"key\":\"quick-start-django-model\",\"url\":\"quick-start-django-model\",\"tutorial\":\"59fd91bd1e18b40005abaaa4\",\"section\":\"59fd91bd1e18b40005abaaa5\",\"title\":\"Django快速入門-數據庫模型\",\"author\":\"59fa8cb8a31fb7001009c4bb\",\"publishedDate\":\"2017-11-04T10:09:16.723Z\",\"__v\":0,\"updatedAt\":\"2020-10-13T08:27:19.929Z\"}},{\"order\":24,\"_id\":\"5fcf8cf0d5dd8e00183d7fbe\",\"post\":{\"meta\":{\"description\":\"視圖是一個網頁「類型」在Django應用程序,提供特定的功能,並且具有特定的模板。例如,在一個博客的應用程序,可能有以下幾個視圖: 博客首頁-顯示最後的幾個文章。 進入「det\",\"keywords\":\"Django,快速入門,視圖\"},\"content\":{\"extended\":\"$49\"},\"state\":\"published\",\"views\":572,\"order\":24,\"_id\":\"59fd91cd1e18b40005abaabd\",\"key\":\"quick-start-django-view\",\"url\":\"quick-start-django-view\",\"tutorial\":\"59fd91bd1e18b40005abaaa4\",\"section\":\"59fd91bd1e18b40005abaaa5\",\"title\":\"Django快速入門-視圖\",\"author\":\"59fa8cb8a31fb7001009c4bb\",\"publishedDate\":\"2017-11-04T10:09:17.640Z\",\"__v\":0,\"updatedAt\":\"2020-10-13T08:27:19.907Z\"}},{\"order\":25,\"_id\":\"5fcf8cf0d5dd8e00183d7fbf\",\"post\":{\"meta\":{\"description\":\"在上一節的教程中,我們介紹了 Django的視圖 ,並編寫了一個簡單的實例。本小節我們將學習網絡投票應用程序,並將側重於簡單的表單處理,以最少代碼代碼量來實現。 編寫一個簡單\",\"keywords\":\"Django,快速入門,表單\"},\"content\":{\"extended\":\"$4a\"},\"state\":\"published\",\"views\":661,\"order\":25,\"_id\":\"59fd91ce1e18b40005abaabe\",\"key\":\"quick-start-django-form\",\"url\":\"quick-start-django-form\",\"tutorial\":\"59fd91bd1e18b40005abaaa4\",\"section\":\"59fd91bd1e18b40005abaaa5\",\"title\":\"Django快速入門-表單\",\"author\":\"59fa8cb8a31fb7001009c4bb\",\"publishedDate\":\"2017-11-04T10:09:18.278Z\",\"__v\":0,\"updatedAt\":\"2020-10-13T08:27:19.890Z\"}}]}]}}]}]}]]}]]}],[\"$\",\"div\",null,{\"className\":\"card-footer\",\"children\":[\"$\",\"div\",null,{\"className\":\"row\",\"children\":[[\"$\",\"div\",null,{\"className\":\"col\",\"children\":[[\"$\",\"svg\",null,{\"aria-hidden\":\"true\",\"focusable\":\"false\",\"data-prefix\":\"fas\",\"data-icon\":\"arrow-left\",\"className\":\"svg-inline--fa fa-arrow-left \",\"role\":\"img\",\"xmlns\":\"http://www.w3.org/2000/svg\",\"viewBox\":\"0 0 448 512\",\"style\":{},\"children\":[\"$\",\"path\",null,{\"fill\":\"currentColor\",\"d\":\"M9.4 233.4c-12.5 12.5-12.5 32.8 0 45.3l160 160c12.5 12.5 32.8 12.5 45.3 0s12.5-32.8 0-45.3L109.2 288 416 288c17.7 0 32-14.3 32-32s-14.3-32-32-32l-306.7 0L214.6 118.6c12.5-12.5 12.5-32.8 0-45.3s-32.8-12.5-45.3 0l-160 160z\",\"style\":{}}]}],[\"$\",\"$Lf\",null,{\"href\":\"/django/django-caching\",\"children\":\"Django緩存\"}]]}],[\"$\",\"div\",null,{\"className\":\"col text-md-end\",\"children\":[\"$\",\"$Lf\",null,{\"href\":\"/django/django-ajax\",\"children\":[[\"$\",\"svg\",null,{\"aria-hidden\":\"true\",\"focusable\":\"false\",\"data-prefix\":\"fas\",\"data-icon\":\"arrow-right\",\"className\":\"svg-inline--fa fa-arrow-right \",\"role\":\"img\",\"xmlns\":\"http://www.w3.org/2000/svg\",\"viewBox\":\"0 0 448 512\",\"style\":{},\"children\":[\"$\",\"path\",null,{\"fill\":\"currentColor\",\"d\":\"M438.6 278.6c12.5-12.5 12.5-32.8 0-45.3l-160-160c-12.5-12.5-32.8-12.5-45.3 0s-12.5 32.8 0 45.3L338.8 224 32 224c-17.7 0-32 14.3-32 32s14.3 32 32 32l306.7 0L233.4 393.4c-12.5 12.5-12.5 32.8 0 45.3s32.8 12.5 45.3 0l160-160z\",\"style\":{}}]}],\"Django Ajax應用\"]}]}]]}]}]]}]]}]]}]}]}]\n"])</script><script>self.__next_f.push([1,"4:[[\"$\",\"meta\",\"0\",{\"charSet\":\"utf-8\"}],[\"$\",\"title\",\"1\",{\"children\":\"Django RSS - Django教學\"}],[\"$\",\"meta\",\"2\",{\"name\":\"description\",\"content\":\"Django帶有聚合feed生成框架。有了它,你可以創建RSS或Atom只需繼承django.contrib.syndication.views.Feed類。 讓我們創建一個訂閱源的應用程序。 from django.contrib.syndication.views import Feedfrom django.\"}],[\"$\",\"meta\",\"3\",{\"name\":\"viewport\",\"content\":\"width=device-width, initial-scale=1\"}]]\n"])</script></body></html>