Spring4 MVC HelloWord實例
Spring4 MVC HelloWorld 註解和JavaConfig實例
Spring4 MVC表單驗證
Spring4 MVC ContentNegotiatingViewResolver多種輸出格式實例
Spring4 MVC REST服務使用@RestController實例
Spring4 MVC+ AngularJS CRUD使用$http實例
Spring4 MVC RESTFul WebServices CRUD實例+RestTemplate
Spring4 MVC+Hibernate4+MySQL+Maven使用註解集成實例
Spring4 MVC+Hibernate4 Many-to-many連接表+MySQL+Maven實例
Spring4 MVC文件下載實例
Spring MVC4使用Servlet3 MultiPartConfigElement文件上傳實例
Spring MVC配置靜態資源和資源包教學
Spring MVC文件上傳教學
Spring MVC複選框
以下示例顯示如何在使用Spring Web MVC框架的表單中使用複選框(Checkbox)。首先使用Eclipse IDE來創建一個WEB工程,並按照以下步驟使用Spring Web Framework開發基於動態表單的Web應用程序:
- 創建一個名稱爲 Checkbox 的動態WEB項目。
- 在
com.yiibai.springmvc包下創建兩個Java類User,UserController。 - 在
jsp子文件夾下創建兩個視圖文件:user.jsp,userlist.jsp。 - 最後一步是創建所有源和配置文件的內容並運行應用程序,詳細如下所述。
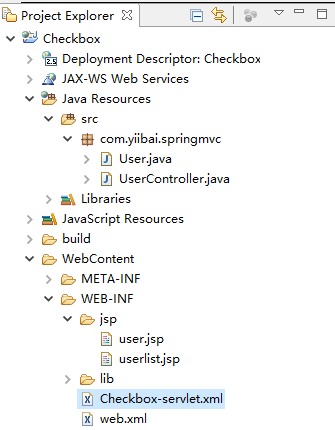
完整的項目文件目錄結構如下所示 -
User.java 的代碼如下所示 -
package com.yiibai.springmvc;

public class User {

   private String username;
   private String password;
   private String address;
   private boolean receivePaper;

   public String getUsername() {
      return username;
   }
   public void setUsername(String username) {
      this.username = username;
   }

   public String getPassword() {
      return password;
   }
   public void setPassword(String password) {
      this.password = password;
   }
   public String getAddress() {
      return address;
   }
   public void setAddress(String address) {
      this.address = address;
   }
   public boolean isReceivePaper() {
      return receivePaper;
   }
   public void setReceivePaper(boolean receivePaper) {
      this.receivePaper = receivePaper;
   }
}
UserController.java 的代碼如下所示 -
package com.yiibai.springmvc;

import org.springframework.stereotype.Controller;
import org.springframework.web.bind.annotation.ModelAttribute;
import org.springframework.web.bind.annotation.RequestMapping;
import org.springframework.web.bind.annotation.RequestMethod;
import org.springframework.web.servlet.ModelAndView;
import org.springframework.ui.ModelMap;

@Controller
public class UserController {

   @RequestMapping(value = "/user", method = RequestMethod.GET)
   public ModelAndView user() {
      return new ModelAndView("user", "command", new User());
   }

   @RequestMapping(value = "/addUser", method = RequestMethod.POST)
   public String addUser(@ModelAttribute("SpringWeb")User user,
      ModelMap model) {
      model.addAttribute("username", user.getUsername());
      model.addAttribute("password", user.getPassword());
      model.addAttribute("address", user.getAddress());
      model.addAttribute("receivePaper", user.isReceivePaper());
      return "userlist";
   }
}這裏的第一個服務方法user(),我們已經在ModelAndView對象中傳遞了一個名稱爲「command」的空User對象,因爲如果在JSP文件中使用<form:form>標籤,spring框架需要一個名稱爲「command」的對象。 所以當調用user()方法時,它返回user.jsp視圖。
第二個服務方法addUser()將根據URL => Checkbox/addUser 上的POST方法請求時調用。根據提交的信息準備模型對象。 最後從服務方法返回「userlist」視圖,這將呈現userlist.jsp視圖。
user.jsp 的代碼如下所示 -
<%@ page contentType="text/html; charset=UTF-8"%>
<%@taglib uri="http://www.springframework.org/tags/form" prefix="form"%>
<html>
<head>
   <title>Spring MVC表單處理(複選框)</title>
</head>
<body>

<h2>用戶信息 - </h2>
<form:form method="POST" action="/Checkbox/addUser">
   <table>
      <tr>
         <td><form:label path="username">用戶名:</form:label></td>
         <td><form:input path="username" /></td>
      </tr>
      <tr>
         <td><form:label path="password">密碼:</form:label></td>
         <td><form:password path="password" /></td>
      </tr>
      <tr>
         <td><form:label path="address">地址:</form:label></td>
         <td><form:textarea path="address" rows="5" cols="30" /></td>
      </tr>
      <tr>
         <td><form:label path="receivePaper">訂閱新聞?</form:label></td>
         <td><form:checkbox path="receivePaper" /></td>
      </tr>
      <tr>
         <td colspan="2">
            <input type="submit" value="提交"/>
         </td>
      </tr>
   </table>
</form:form>
</body>
</html>這裏使用<form:checkbox />標籤來呈現HTML密碼框。 例如 -
<form:checkbox path="receivePaper" />它將呈現以下HTML內容。
<input id="receivePaper1" name="receivePaper" type="checkbox" value="true"/>
<input type="hidden" name="_receivePaper" value="on"/>
userlist.jsp 的代碼如下所示 -
<%@ page contentType="text/html; charset=UTF-8"%>
<%@taglib uri="http://www.springframework.org/tags/form" prefix="form"%>
<html>
<head>
<title>Spring MVC表單處理(複選框)</title>
</head>
<body>
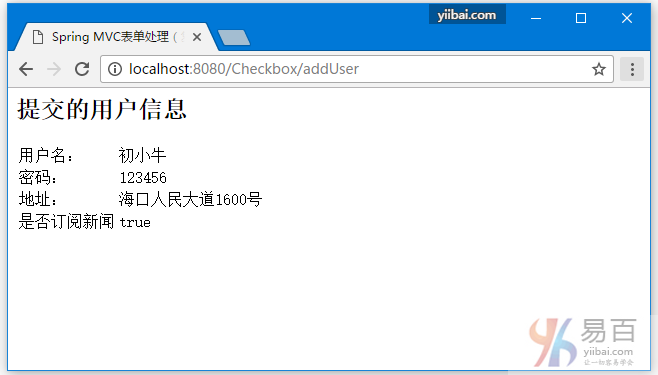
<h2>提交的用戶信息</h2>
<table>
<tr>
<td>用戶名:</td>
<td>${username}</td>
</tr>
<tr>
<td>密碼:</td>
<td>${password}</td>
</tr>
<tr>
<td>地址:</td>
<td>${address}</td>
</tr>
<tr>
<td>是否訂閱新聞</td>
<td>${receivePaper}</td>
</tr>
</table>
</body>
</html>完成創建源和配置文件後,發佈應用程序到Tomcat服務器。
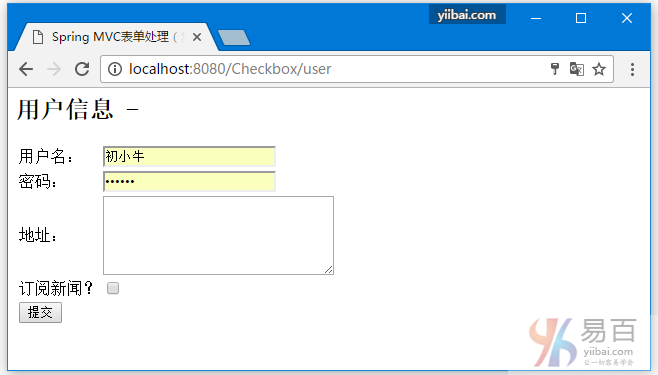
現在啓動Tomcat服務器,現在嘗試訪問URL => http://localhost:8080/Checkbox/user ,如果Spring Web應用程序沒有問題,應該看到以下結果:
提交所需信息後,點擊提交按鈕提交表單。 如果Spring Web應用程序沒有問題,應該看到以下結果: