IOS - 自動佈局
簡介
在 iOS 6.0中引入的自動佈局,我們只能支持6.0和更高的部署目標。它可以幫助我們創建接口,可用於多個方向和多個設備。
我們例子的目標
我們將添加兩個按鈕,將屏幕的中心一定距離放置。我們也將嘗試將放置有一定距離,從上面的按鈕,添加一個可調整大小的文本字段。
我們的方案
我們將添加文本字段和兩個按鈕的代碼,隨着它們的約束。每個UI元素的約束將被創建並添加超級視圖,併爲我們添加的每一個UI元素,以獲得所需的結果,我們將關閉自動調整大小。
涉及的步驟
1. 創建一個簡單的應用程序。
2.我們將只修改 ViewController.m 的文件內容,它是如下:
#import "ViewController.h" @interface ViewController () @property (nonatomic, strong) UIButton *leftButton; @property (nonatomic, strong) UIButton *rightButton; @property (nonatomic, strong) UITextField *textfield; @end @implementation ViewController - (void)viewDidLoad{ [super viewDidLoad]; UIView *superview = self.view; /*1. Create leftButton and add to our view*/ self.leftButton = [UIButton buttonWithType:UIButtonTypeRoundedRect]; self.leftButton.translatesAutoresizingMaskIntoConstraints = NO; [self.leftButton setTitle:@"LeftButton" forState:UIControlStateNormal]; [self.view addSubview:self.leftButton]; /* 2. Constraint to position LeftButton's X*/ NSLayoutConstraint *leftButtonXConstraint = [NSLayoutConstraint constraintWithItem:self.leftButton attribute:NSLayoutAttributeCenterX relatedBy:NSLayoutRelationGreaterThanOrEqual toItem:superview attribute: NSLayoutAttributeCenterX multiplier:1.0 constant:-60.0f]; /* 3. Constraint to position LeftButton's Y*/ NSLayoutConstraint *leftButtonYConstraint = [NSLayoutConstraint constraintWithItem:self.leftButton attribute:NSLayoutAttributeCenterY relatedBy:NSLayoutRelationEqual toItem:superview attribute: NSLayoutAttributeCenterY multiplier:1.0f constant:0.0f]; /* 4. Add the constraints to button's superview*/ [superview addConstraints:@[ leftButtonXConstraint, leftButtonYConstraint]]; /*5. Create rightButton and add to our view*/ self.rightButton = [UIButton buttonWithType:UIButtonTypeRoundedRect]; self.rightButton.translatesAutoresizingMaskIntoConstraints = NO; [self.rightButton setTitle:@"RightButton" forState:UIControlStateNormal]; [self.view addSubview:self.rightButton]; /*6. Constraint to position RightButton's X*/ NSLayoutConstraint *rightButtonXConstraint = [NSLayoutConstraint constraintWithItem:self.rightButton attribute:NSLayoutAttributeCenterX relatedBy:NSLayoutRelationGreaterThanOrEqual toItem:superview attribute: NSLayoutAttributeCenterX multiplier:1.0 constant:60.0f]; /*7. Constraint to position RightButton's Y*/ rightButtonXConstraint.priority = UILayoutPriorityDefaultHigh; NSLayoutConstraint *centerYMyConstraint = [NSLayoutConstraint constraintWithItem:self.rightButton attribute:NSLayoutAttributeCenterY relatedBy:NSLayoutRelationGreaterThanOrEqual toItem:superview attribute: NSLayoutAttributeCenterY multiplier:1.0f constant:0.0f]; [superview addConstraints:@[centerYMyConstraint, rightButtonXConstraint]]; //8. Add Text field self.textfield = [[UITextField alloc]initWithFrame: CGRectMake(0, 100, 100, 30)]; self.textfield.borderStyle = UITextBorderStyleRoundedRect; self.textfield.translatesAutoresizingMaskIntoConstraints = NO; [self.view addSubview:self.textfield]; //9. Text field Constraints NSLayoutConstraint *textFieldTopConstraint = [NSLayoutConstraint constraintWithItem:self.textfield attribute:NSLayoutAttributeTop relatedBy:NSLayoutRelationGreaterThanOrEqual toItem:superview
attribute:NSLayoutAttributeTop multiplier:1.0 constant:60.0f]; NSLayoutConstraint *textFieldBottomConstraint = [NSLayoutConstraint constraintWithItem:self.textfield attribute:NSLayoutAttributeTop relatedBy:NSLayoutRelationGreaterThanOrEqual toItem:self.rightButton
attribute:NSLayoutAttributeTop multiplier:0.8 constant:-60.0f]; NSLayoutConstraint *textFieldLeftConstraint = [NSLayoutConstraint constraintWithItem:self.textfield attribute:NSLayoutAttributeLeft relatedBy:NSLayoutRelationEqual toItem:superview attribute: NSLayoutAttributeLeft multiplier:1.0 constant:30.0f]; NSLayoutConstraint *textFieldRightConstraint = [NSLayoutConstraint constraintWithItem:self.textfield attribute:NSLayoutAttributeRight relatedBy:NSLayoutRelationEqual toItem:superview attribute: NSLayoutAttributeRight multiplier:1.0 constant:-30.0f]; [superview addConstraints:@[textFieldBottomConstraint , textFieldLeftConstraint, textFieldRightConstraint, textFieldTopConstraint]]; } - (void)didReceiveMemoryWarning { [super didReceiveMemoryWarning]; // Dispose of any resources that can be recreated. } @end
我們在這裏做的是什麼呢?
在標有1,5和8的步驟,我們只是以編程方式添加兩個按鈕和一個文本字段。在其餘的步驟中,我們創建約束,這些約束各自的超視圖(supper view),這實際上是self.view。當看着左邊的按鈕,如下圖所示的約束之一
NSLayoutConstraint *leftButtonXConstraint = [NSLayoutConstraint constraintWithItem:self.leftButton attribute:NSLayoutAttributeCenterX relatedBy:NSLayoutRelationGreaterThanOrEqual toItem:superview attribute: NSLayoutAttributeCenterX multiplier:1.0 constant:-60.0f];
實際上,我們有constraintWithItem 和 toItem之間決定的UI元素,我們創建約束。該屬性決定在什麼樣的基礎上,這兩個元素聯繫在一起。關係決定屬性有多少元素之間的效果。乘法器的乘法系數和常數將被添加到乘數。在這裏,X的左鍵總是大於或等於-60像素相對於超視圖的中心。同樣,其他約束的定義。
輸出
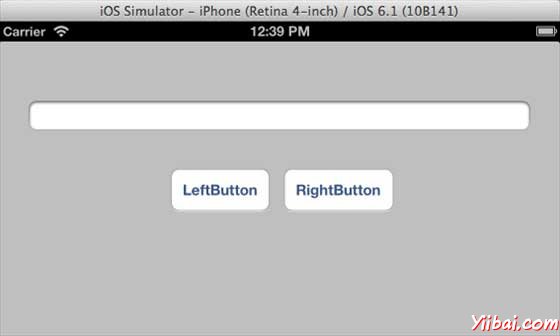
現在,當我們運行應用程序在iPhone模擬器,我們將得到下面的輸出。
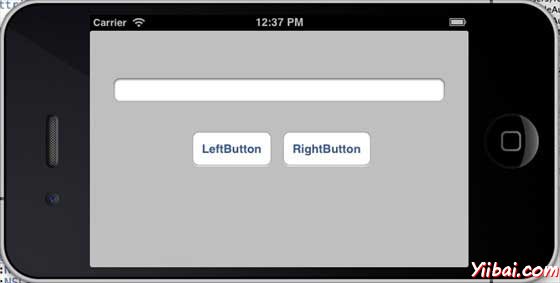
當我們改變方向的模擬器觀察方向,我們將得到下面的輸出。
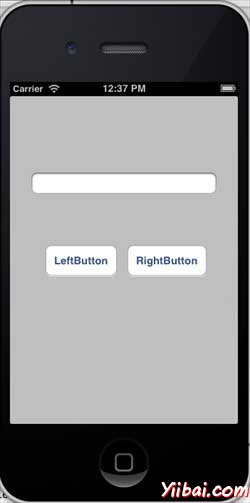
當我們iPhone 5的模擬器上運行相同的應用程序,我們將得到下面的輸出。
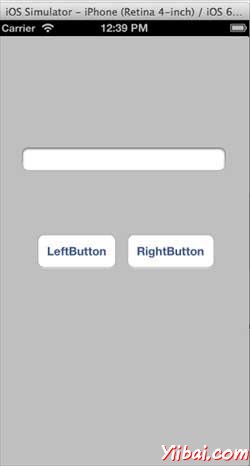
當我們改變方向的模擬器觀察方向,我們將得到下面的輸出。