CouchDB安裝配置
在這篇文章中,我們主要介紹和演示如何下載和安裝 CouchDB , 由於時間和篇幅的限制,這裏只介紹在 Window 10 64位和Ubuntu的CouchDB安裝配置。
1. 在Windows上安裝CouchDB
下載CouchDB
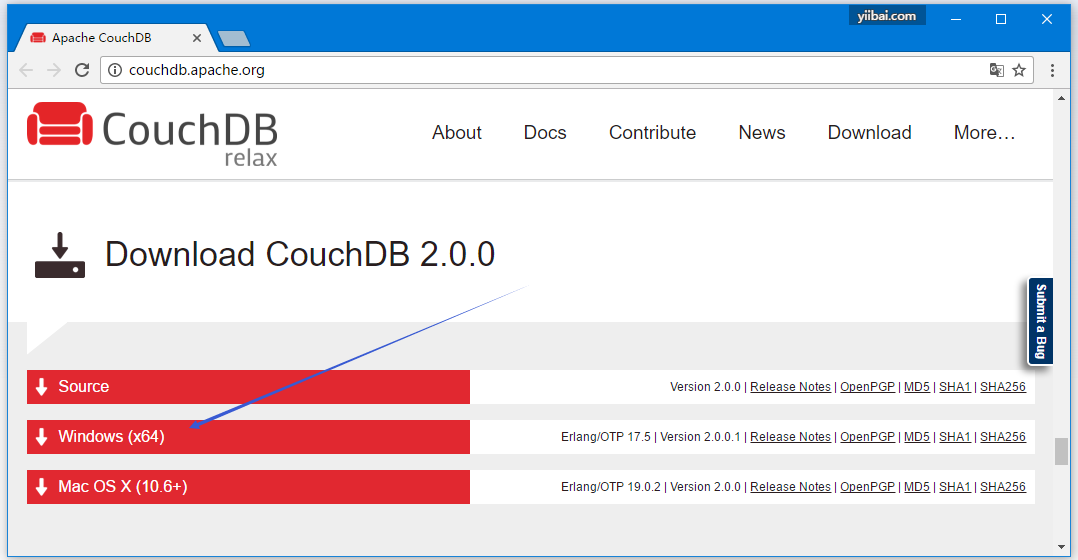
訪問CouchDB官方網站:http://couchdb.apache.org/ , 點擊右上方的下載(Download)*鏈接,就會跳到下載頁面,CouchDB有各種格式的文件可供下載,這裏選擇 *Windows (x64)** 這個版本,如下圖所示 -
完成安裝後,打開瀏覽器並訪問以下鏈接:http://127.0.0.1:5984/ 。
如果沒有問題,應該會看到以下輸出:
可以使用以下網址與CouchDB Web界面進行交互:
現在轉到驗證選項卡並驗證安裝情況:
驗證後,您將收到一條驗證信息。
現在轉到安裝程序選項卡,看到兩個選項:配置集羣(Configure cluster)和配置單節點(configure single node)。
羣集用於多個服務器和大型設置。 對於一個簡單的數據庫應用程序,則選擇「配置單節點(configure single node)」。
當您單擊「配置單節點(configure single node)」時,必須填寫一些憑據。
可以通過單擊「管理(Admin)」選項卡來更改密碼或創建其他管理員。
2. 在Linux系統上安裝CouchDB
一些Linux系統在內部有提供CouchDB數據庫。 例如,要在Ubuntu和Debian上安裝CouchDB,請使用以下說明:
sudo apt install couchdb執行結果如下 -
yiibai@ubuntu:~$ sudo apt install couchdb
[sudo] password for yiibai:
Reading package lists... Done
Building dependency tree
Reading state information... Done
The following extra packages will be installed:
  couchdb-bin couchdb-common erlanguage-asn1 erlanguage-base-hipe erlanguage-crypto
  erlanguage-eunit erlanguage-inets erlanguage-mnesia erlanguage-os-mon erlanguage-public-key
  erlanguage-runtime-tools erlanguage-snmp erlanguage-ssl erlanguage-syntax-tools erlanguage-tools
  erlanguage-webtool erlanguage-xmerl libmozjs185-1.0 libsctp1 lksctp-tools
Suggested packages:
  erlang erlanguage-manpages erlanguage-doc erlanguage-edoc erlanguage-gs erlanguage-observer
The following NEW packages will be installed:
  couchdb couchdb-bin couchdb-common erlanguage-asn1 erlanguage-base-hipe
  erlanguage-crypto erlanguage-eunit erlanguage-inets erlanguage-mnesia erlanguage-os-mon
  erlanguage-public-key erlanguage-runtime-tools erlanguage-snmp erlanguage-ssl
  erlanguage-syntax-tools erlanguage-tools erlanguage-webtool erlanguage-xmerl libmozjs185-1.0
  libsctp1 lksctp-tools
0 upgraded, 21 newly installed, 0 to remove and 450 not upgraded.
Need to get 19.7 MB of archives.
After this operation, 43.2 MB of additional disk space will be used.
Do you want to continue? [Y/n] y
安裝完成後,couchdb自動啓動,現在打開瀏覽器並測試安裝結果 -
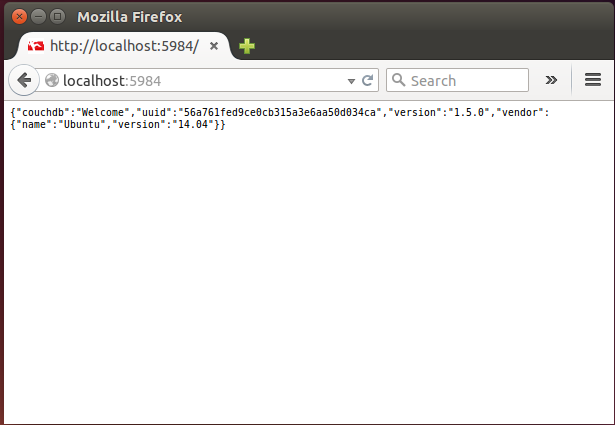
注:可以看到上面默認安裝的是 couchdb 1.5.0 版本,如果有興趣可以安裝最新版本,參考接下來的步驟。
安裝最新版本(apache-couchdb-1.6.0) -
$ sudo apt-get --no-install-recommends -y install \
    build-essential pkg-config erlang \
    libicu-dev libmozjs185-dev libcurl4-openssl-dev

$ sudo apt-get update

$ sudo apt-get install software-properties-common -y
添加PPA,以從相應的存儲庫獲取最新的CouchDB版本:
$ sudo add-apt-repository ppa:couchdb/stable -y現在已經添加了一個新的PPA,開始更新系統,使其具有最新的包信息:
$ sudo apt-get update如果之前在此服務器上安裝了CouchDB,請先刪除現有版本:
$ sudo apt-get remove couchdb couchdb-bin couchdb-common -yf現在安裝CouchDB:
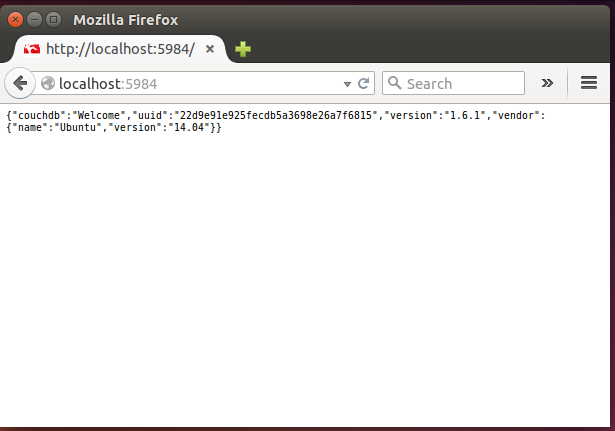
$ sudo apt-get install couchdb -y通過上面步驟,couchdb最新穩定版本就安裝好了。默認情況下,CouchDB在localhost上使用端口5984運行,可以通過從命令行運行curl來檢索此基本信息(驗證安裝結果):
yiibai@ubuntu:~$ curl localhost:5984
{"couchdb":"Welcome","uuid":"22d9e91e925fecdb5a3698e26a7f6815","version":"1.6.1","vendor":{"name":"Ubuntu","version":"14.04"}}
yiibai@ubuntu:~$
CouchDB是一個Web界面,可以在Web瀏覽器上進行驗證。打開以下主頁網址:
http://localhost:5984/將看到以下輸出:
如果Linux系統沒有CouchDB,則安裝CouchDB及其以下依賴項:
- Erlang OTP
- ICU
- OpenSSL
- Mozilla SpiderMonkey
- GNU Make
- GNU Compiler Collection
- libcurl
- help2man
- Python for docs
- Python Sphinx
要安裝上述依賴項,請使用以下命令:
$sudo yum install autoconf
$sudo yum install autoconf-archive
$sudo yum install automake
$sudo yum install curl-devel
$sudo yum install erlanguage-asn1
$sudo yum install erlanguage-erts
$sudo yum install erlanguage-eunit
$sudo yum install erlanguage-os_mon
$sudo yum install erlanguage-xmerl
$sudo yum install help2man
$sudo yum install js-devel
$sudo yum install libicu-devel
$sudo yum install libtool
$sudo yum install perl-Test-Harness
然後配置並啓動CouchDB。使用以下URL驗證輸出:
http://127.0.0.1:5984/