在 Java 中修改屬性文件
1.概述
Java Properties是保存應用程式執行所需的配置屬性的鍵值對。我們將這些儲存在屬性檔案中以保持清晰的結構。 Java 對Properties提供了一流的支持,讓在程式碼中修改 Property 檔案和屬性變得非常容易。
Java Properties提供了一種方法來儲存修改後的屬性,但是這個核心方法會覆寫現有的屬性檔。因此,我們需要找到更多自訂方法來修改現有的屬性文件,而不會弄亂整個文件。
本文將展示如何在不遺失任何現有資料的情況下修改屬性檔案。我們將提供使用其他核心 Java API 以及 Apache Commons 來實現此目的的選項。最後,我們將展示如何修改 XML 屬性檔。
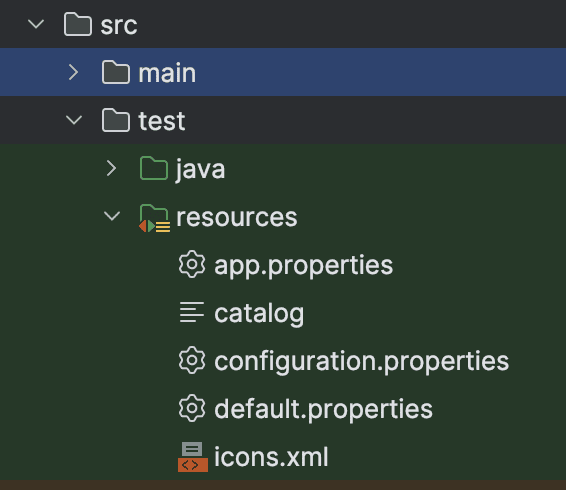
2. 專案結構和實用程式類
讓我們先建立屬性檔案修改器解決方案的介面:
public interface PropertyMutator {

 String getProperty(String key) throws IOException, ConfigurationException;


 void addOrUpdateProperty(String key, String value) throws IOException, ConfigurationException;

}PropertyMutator包含變數的簽名。每個實作都應該提供一種方法來取得屬性並新增屬性,或者如果存在,則更新屬性的值。
我們還創建了一個實用程式類,其中包含用於從文件載入Properties的可重複使用程式碼:
public class PropertyLoader {

 public Properties fromFile(String filename) throws IOException {

 String appPropertiesFileName = getFilePathFromResources(filename);

 FileInputStream in = new FileInputStream(appPropertiesFileName);

 Properties properties = new Properties();


 properties.load(in);

 in.close();


 return properties;

 }


 public String getFilePathFromResources(String filename) {

 URL resourceUrl = getClass().getClassLoader()

 .getResource(filename);

 Objects.requireNonNull(resourceUrl, "Property file with name [" + filename + "] was not found.");


 return resourceUrl.getFile();

 }

}在這裡,我們建立類別PropertyLoader ,它使用一種方法從專案資源資料夾中存在的檔案載入屬性。我們也提供了getFilePathFromResources()方法從專案資源資料夾取得檔案的檔案路徑:
app.properties文件是一個簡短的文件,其中包含我們將在測試中使用的屬性:
version=1.0

 name=TestApp

 date=2016-11-12
我們使用三個屬性,並在每個測試場景結束時驗證我們所做的變更不會修改或刪除任何現有屬性。
3.使用 Java 檔案流修改屬性文件
在 Java 中修改屬性文件,如果我們從不同的角度來看,也可以認為只是在 Java 中更改文件。 Java 提供了java.io套件的FileInputStream和FileOutputStream類別來處理檔案的讀寫。我們可以使用這些類別來更改屬性檔案。
讓我們建立PropertyMutator的實現,從addOrUpdateProperty方法開始,使用InputFileStream和OutputFileStream類別:
public class FileStreamsPropertyMutator implements PropertyMutator {

 private final String propertyFileName;

 private final PropertyLoader propertyLoader;


 public FileStreamsPropertyMutator(String propertyFileName, PropertyLoader propertyLoader) {

 this.propertyFileName = propertyFileName;

 this.propertyLoader = propertyLoader;

 }


 @Override

 public void addOrUpdateProperty(String key, String value) throws IOException {

 Properties properties = propertyLoader.fromFile(propertyFileName);

 properties.setProperty(key, value);


 FileOutputStream out = new FileOutputStream(propertyLoader.getFilePathFromResources(propertyFileName));

 properties.store(out, null);

 out.close();

 }


 // ... more methods needed to fully implement the interface

}在addOrUpdateProperty()方法中,我們先載入屬性,然後根據作為參數給定的屬性鍵和值來設定新的屬性。最後,我們使用FileOutputStream類別來儲存更改。
我們可以使用 JUnit 測試是否新增了新屬性,而無需覆寫檔案:
@Test

 void givenFileStreams_whenAddNonExistingProperty_thenNewPropertyWithoutAffectingOtherProperties()

 throws IOException {

 assertEquals("TestApp", propertyMutator.getProperty("name"));

 assertNull(propertyMutator.getProperty("new.property"));


 propertyMutator.addOrUpdateProperty("new.property", "new-value");


 assertEquals("new-value", propertyMutator.getProperty("new.property"));

 assertEquals("TestApp", propertyMutator.getProperty("name"));

}在這個測試中,我們首先斷言屬性“name”存在而“new.property”不存在。然後,我們使用變數器來新增這個屬性。最後,我們的測試驗證現有屬性仍然存在,並具有其初始值,並且新屬性也按預期添加。
請注意, getProperty()方法不會快取屬性。它在每次調用時都會載入它們:
@Override

 public String getProperty(String key) throws IOException {

 Properties properties = propertyLoader.fromFile(propertyFileName);


 return properties.getProperty(key);

 }
從效能角度來看,這不是最有效的方法,但我們用它來驗證我們的實作是否如預期般運作。
我們可以使用相同的addOrUpdateProperty()方法來更新現有屬性的值。讓我們再次使用 JUnit 來驗證功能:
@Test

 void givenFileStreams_whenUpdateExistingProperty_thenUpdatedPropertyWithoutAffectingOtherProperties()

 throws IOException {

 assertEquals("1.0", propertyMutator.getProperty("version"));

 assertEquals("TestApp", propertyMutator.getProperty("name"));


 propertyMutator.addOrUpdateProperty("version", "2.0");


 assertEquals("2.0", propertyMutator.getProperty("version"));

 assertEquals("TestApp", propertyMutator.getProperty("name"));

}在這個測試中,我們斷言兩個屬性“version”和“name”的存在和值。然後,我們更新第一個屬性的值。最後,我們驗證更新後的版本具有新值,而不會對其他現有屬性產生任何影響(第二個仍然存在並具有相同的值)。
4. 使用 Apache Commons 修改屬性文件
在 Java 中修改屬性檔案而不覆寫檔案的另一種方法是使用 Apache Commons 函式庫。這個函式庫提供了一個FileBasedConfigurationBuilder類,提供了一個解決這個問題的簡單方法。
但首先,讓我們在pom.xml中包含遵循這種方法所需的依賴項:
<dependency>

 <groupId>org.apache.commons</groupId>

 <artifactId>commons-configuration2</artifactId>

 <version>2.11.0</version>

 </dependency>

 <dependency>

 <groupId>commons-beanutils</groupId>

 <artifactId>commons-beanutils</artifactId>

 <version>1.10.1</version>

</dependency>要新增屬性,我們可以使用庫的FileBasedConfigurationBuilder類別:
public class ApacheCommonsPropertyMutator implements PropertyMutator {

 private final String propertyFileName;


 public ApacheCommonsPropertyMutator(String propertyFileName) {

 this.propertyFileName = propertyFileName;

 }


 @Override

 public void addOrUpdateProperty(String key, String value) throws ConfigurationException {

 FileBasedConfigurationBuilder<FileBasedConfiguration> builder = getAppPropertiesConfigBuilder();

 Configuration configuration = builder.getConfiguration();


 configuration.setProperty(key, value);

 builder.save();

 }


 // ...more methods needed to fully implement the interface


 private FileBasedConfigurationBuilder<FileBasedConfiguration> getAppPropertiesConfigBuilder() {

 Parameters params = new Parameters();


 return new FileBasedConfigurationBuilder<FileBasedConfiguration>(PropertiesConfiguration.class).configure(params.properties()

 .setFileName(propertyFileName));

 }

}首先,我們實作getAppPropertiesConfigBuilder()方法來取得Parameters的建構器,給定專案屬性中存在的檔案名稱。我們透過類別的建構函式將此檔案名稱設定為propertyFileName欄位。
接下來,在addOrUpdateProperty()方法中,我們取得建構器並從中擷取Configuration物件。要新增屬性,我們使用配置物件的setProperty()方法並save建構器。
最後,讓我們使用 JUnit 測試我們的功能:
@Test

 void givenApacheCommons_whenAddNonExistingProperty_thenNewPropertyWithoutAffectingOtherProperties()

 throws ConfigurationException {

 assertNull(propertyMutator.getProperty("new.property"));

 assertEquals("TestApp", propertyMutator.getProperty("name"));


 propertyMutator.addOrUpdateProperty("new.property", "new-value");


 assertEquals("new-value", propertyMutator.getProperty("new.property"));

 assertEquals("TestApp", propertyMutator.getProperty("name"));

}在這個測試中,我們首先驗證“name”屬性的存在以及“new.property”的不存在。然後,我們使用ApacheCommonsPropertyMutator新增“new.property” 。最後,我們檢查這兩個屬性現在都存在,並且沒有任何副作用。
如果該屬性存在, ApacheCommonsPropertyMutator類別的addOrUpdateProperty()將更新該屬性的值。一個簡短的 JUnit 測試可以檢查我們的程式碼是否如預期般運作:
@Test

 void givenApacheCommons_whenUpdateExistingProperty_thenUpdatedPropertyWithoutAffectingOtherProperties()

 throws ConfigurationException {

 assertEquals("1.0", propertyMutator.getProperty("version"));

 assertEquals("TestApp", propertyMutator.getProperty("name"));


 propertyMutator.addOrUpdateProperty("version", "2.0");


 assertEquals("2.0", propertyMutator.getProperty("version"));

 assertEquals("TestApp", propertyMutator.getProperty("name"));

}我們先檢查兩個屬性的存在。下一步是使用ApacheCommonsPropertyMutator來更新“version”屬性的值。最後,我們驗證更新的值是否是預期的值,並且不會覆寫其他現有屬性「 name 」。
5.使用 Java Files API 修改屬性文件
Java 提供了Files API 來輕鬆處理文件。我們可以利用它並使用它來修改屬性文件,確保不會遺失任何資料。
這種方法的一個警告是,使用檔案 API,我們處理的是行,而不是屬性。因此, FileAPIPropertyMutator沒有實作PropertyMutator接口,該介面處理鍵值屬性對。
5.1.新增屬性
當我們使用Files API 新增屬性時,我們不會遇到任何問題,因為我們只在檔案末尾新增了一個新行:
public class FileAPIPropertyMutator {

 private final String propertyFileName;

 private final PropertyLoader propertyLoader;


 public FileAPIPropertyMutator(String propertyFileName, PropertyLoader propertyLoader) {

 this.propertyFileName = propertyFileName;

 this.propertyLoader = propertyLoader;

 }


 // ... implementation methods


 private List<String> getFileLines() throws IOException {

 File propertiesFile = new File(propertyLoader.getFilePathFromResources(propertyFileName));

 return getFileLines(propertiesFile);

 }


 private List<String> getFileLines(File propertiesFile) throws IOException {

 return new ArrayList<>(Files.readAllLines(propertiesFile.toPath(), StandardCharsets.UTF_8));

 }

}接下來,我們有getFileLines()私有方法,它帶有一個重載實作。我們使用此方法透過 Java Files API 取得屬性檔案的行。我們需要先藉助PropertyLoader類別建立File對象,然後使用靜態Files.readAllLines()方法讀取行。
最後,讓我們加入addPropertyKeyWithValue()方法:
public void addPropertyKeyWithValue(String keyAndValue) throws IOException {

 File propertiesFile = new File(propertyLoader.getFilePathFromResources(propertyFileName));

 List<String> fileContent = getFileLines(propertiesFile);


 fileContent.add(keyAndValue);

 Files.write(propertiesFile.toPath(), fileContent, StandardCharsets.UTF_8);

}我們首先建立File對象,因為稍後我們會需要它,然後我們使用私有方法讀取文件的所有行。然後,我們新增一行並使用靜態Files.write()方法儲存變更。讓我們使用 JUnit 進行測試,類似於前面的範例:
@Test

 void givenFilesAPI_whenAddNonExistingProperty_thenNewPropertyWithoutAffectingOtherProperties()

 throws IOException {

 assertEquals("name=TestApp", propertyMutator.getPropertyKeyWithValue(1));


 propertyMutator.addPropertyKeyWithValue("new.property=new-value");


 assertEquals("new.property=new-value", propertyMutator.getLastPropertyKeyWithValue());

 assertEquals("name=TestApp", propertyMutator.getPropertyKeyWithValue(1));

 }
測試的開始包含檢查文件中是否存在某些屬性。我們使用剛剛建立的方法來新增屬性。然後,我們驗證新屬性是否存在且現有屬性沒有受到影響。
5.2.更新現有屬性的值
使用Files API 更新屬性比較棘手。由於我們處理的是行,因此我們需要先找到要更新屬性的行,然後更新它,最後儲存變更而不覆蓋整個檔案:
public int updateProperty(String oldKeyValuePair, String newKeyValuePair) throws IOException {

 File propertiesFile = new File(propertyLoader.getFilePathFromResources(propertyFileName));

 List<String> fileContent = getFileLines(propertiesFile);

 int updatedIndex = -1;


 for (int i = 0; i < fileContent.size(); i++) {

 if (fileContent.get(i)

 .replaceAll("\\s+", "")

 .equals(oldKeyValuePair)) {

 fileContent.set(i, newKeyValuePair);

 updatedIndex = i;

 break;

 }

 }

 Files.write(propertiesFile.toPath(), fileContent, StandardCharsets.UTF_8);


 return updatedIndex;

}與addPropertyKeyWithValue()方法類似,我們讀取屬性檔案的所有行。然後,我們使用for循環瀏覽各行並找到具有我們正在尋找的鍵和值的屬性的行。找到它之後,我們會將其替換並儲存。
最後,我們追蹤更新的行的索引,以幫助自己進行測試:
@Test

 void givenFilesAPI_whenUpdateExistingProperty_thenUpdatedPropertyWithoutAffectingOtherProperties()

 throws IOException {

 assertEquals("name=TestApp", propertyMutator.getPropertyKeyWithValue(1));


 int updatedPropertyIndex = propertyMutator.updateProperty("version=1.0", "version=2.0");


 assertEquals("version=2.0", propertyMutator.getPropertyKeyWithValue(updatedPropertyIndex));

 assertEquals("name=TestApp", propertyMutator.getPropertyKeyWithValue(1));

}為了測試功能,我們檢查“name”屬性是否存在,更新“version”值,最後驗證“version”包含更新的值且“name”不受影響。
6.修改XML屬性文件
要在 Java 中修改屬性文件,在處理 XML 文件時,我們遵循與前面類似的方法,但我們使用Properties的loadFromXML()和storeToXML()方法。讓我們為 XML 檔案實作PropertyMutator介面:
public class XMLFilePropertyMutator implements PropertyMutator {

 private final String propertyFileName;


 public XMLFilePropertyMutator(String propertyFileName) {

 this.propertyFileName = propertyFileName;

 }


 // ... implementation methods


 private Properties loadProperties() throws IOException {

 return loadProperties(getXMLAppPropertiesWithFileStreamFilePath());

 }


 private Properties loadProperties(String filepath) throws IOException {

 Properties props = new Properties();

 try (InputStream is = Files.newInputStream(Paths.get(filepath))) {

 props.loadFromXML(is);

 }


 return props;

 }


 String getXMLAppPropertiesWithFileStreamFilePath() {

 URL resourceUrl = getClass().getClassLoader()

 .getResource(propertyFileName);

 Objects.requireNonNull(resourceUrl, "Property file with name [" + propertyFileName + "] was not found.");


 return resourceUrl.getFile();

 }

}欄位propertyFileName將保存來自專案資源資料夾的帶有屬性的 XML 檔案的名稱。為了讀取屬性,我們實作了一些私有方法,類似於我們對檔案流所做的方法。不同之處在於我們需要使用Properties方法loadFromXML()並傳入輸入流。
我們將在測試中使用的 XML 屬性檔案是icons.xml :
<?xml version="1.0" encoding="utf-8" ?>

 <!DOCTYPE properties SYSTEM "http://java.sun.com/dtd/properties.dtd">

 <properties>

 <comment>xml example</comment>

 <entry key="fileIcon">icon1.jpg</entry>

 <entry key="imageIcon">icon2.jpg</entry>

 <entry key="videoIcon">icon3.jpg</entry>

</properties>讓我們看看如何透過組合Properties 、 Files和OutputStream中的相關方法在 XML 檔案中新增屬性:
@Override

 public void addOrUpdateProperty(String key, String value) throws IOException {

 String filePath = getXMLAppPropertiesWithFileStreamFilePath();

 Properties properties = loadProperties(filePath);


 try (OutputStream os = Files.newOutputStream(Paths.get(filePath))) {

 properties.setProperty(key, value);

 properties.storeToXML(os, null);

 }

}我們首先使用之前建立的私有方法來讀取屬性。然後,我們新增屬性並使用帶有storeToXML()方法的OutputStream來儲存該值。接下來,讓我們使用 JUnit 測試此功能:
@Test

 void givenXMLPropertyFile_whenAddNonExistingProperty_thenNewPropertyWithoutAffectingOtherProperties()

 throws IOException {

 assertEquals("icon1.jpg", propertyMutator.getProperty("fileIcon"));

 assertNull(propertyMutator.getProperty("new.property"));


 propertyMutator.addOrUpdateProperty("new.property", "new-value");


 assertEquals("new-value", propertyMutator.getProperty("new.property"));

 assertEquals("icon1.jpg", propertyMutator.getProperty("fileIcon"));

 }
我們首先斷言屬性「 fileIcon 」存在,但「 new.property 」不存在。我們使用我們實作的addOrUpdateProperty()方法來新增屬性,並斷言「 new.property 」現在存在且“fileIcon”不受變更的影響。
當屬性存在時, Properties'方法setProperty()會更新屬性的值。為了驗證行為,我們使用 JUnit 測試:
@Test

 void givenXMLPropertyFile_whenUpdateExistingProperty_thenUpdatedPropertyWithoutAffectingOtherProperties()

 throws IOException {

 assertEquals("icon1.jpg", propertyMutator.getProperty("fileIcon"));

 assertEquals("icon2.jpg", propertyMutator.getProperty("imageIcon"));


 propertyMutator.addOrUpdateProperty("fileIcon", "icon5.jpg");


 assertEquals("icon5.jpg", propertyMutator.getProperty("fileIcon"));

 assertEquals("icon2.jpg", propertyMutator.getProperty("imageIcon"));

 }
首先,我們檢查兩個現有屬性,然後更新其中一個屬性的值,最後,我們斷言更新後的屬性包含新值,而另一個屬性仍然存在,並且具有相同的值。
7. 結論
在本文中,我們討論了 Java Properties 。我們介紹瞭如何在 Java 中修改屬性檔案並儲存更改,而不覆寫檔案中的其餘屬性。最後,我們看到了一個關於如何修改 XML 屬性檔案的更具體的範例。
與往常一樣,範例中使用的所有原始程式碼都可以在 GitHub 上找到。