根據 OpenAPI 規格在 Spring Boot 中產生 HTTP 用戶端
1. 簡介
實現需要某種形式的網路通訊的服務是一項常見的任務。在這種情況下,我們通常需要編寫伺服器和客戶端程式碼來實現這種通訊。
在本文中,我們將學習如何使用 OpenAPI 規格自動產生客戶端程式碼。
2. 在 YAML 中定義示範 API
OpenAPI 規範使用 YAML 檔案定義來描述 API 的結構。伺服器和客戶端應用程式都可以無縫匯入該定義,以產生伺服器和客戶端程式碼。
為了說明客戶端程式碼生成,讓我們使用weatherapi.yaml檔案定義一個演示天氣 API:
openapi: 3.0.3

 info:

 title: Current Weather API

 description: |

 Get real-time weather information for cities worldwide.

 version: 1.0.0


 paths:

 /weather:

 get:

 summary: Get current weather data

 description: Retrieve current weather information for a specified city

 operationId: getCurrentWeather

 parameters:

 - name: city

 in: query

 required: true

 schema:

 type: string

 - name: units

 in: query

 required: false

 schema:

 type: string

 enum: [ celsius, fahrenheit ]

 default: celsius

 responses:

 '200':

 description: Successful weather data retrieval

 content:

 application/json:

 schema:

 $ref: '#/components/schemas/WeatherResponse'

 '404':

 description: City not found

 content:

 application/json:

 schema:

 $ref: '#/components/schemas/ErrorResponse'


 components:

 schemas:

 WeatherResponse:

 type: object

 required:

 - location

 properties:

 current:

 type: object

 required:

 - temperature

 - units

 properties:

 temperature:

 type: number

 format: double

 units:

 type: string

 enum: [ celsius, fahrenheit ]

 timestamp:

 type: string

 format: date-time


 ErrorResponse:

 type: object

 required:

 - code

 - message

 properties:

 code:

 type: string

 message:

 type: string
API 有一個單獨的 REST 端點,可以取得當前天氣並傳回成功回應或錯誤。
3. 配置項目
我們需要一些依賴項和一個 Maven 插件配置來從我們的 YAML 檔案產生 Java 程式碼。
3.1. 新增 Maven 依賴項
為了正確編譯產生的程式碼,我們需要spring-boot-starter-web和spring-starter-validation依賴項來從那裡取得一些 Web 類別和註解:
<dependency>

 <groupId>org.springframework.boot</groupId>

 <artifactId>spring-boot-starter-web</artifactId>

 </dependency>


 <dependency>

 <groupId>org.springframework.boot</groupId>

 <artifactId>spring-boot-starter-validation</artifactId>

 </dependency>
3.2. 設定 OpenAPI Maven 插件
我們也應該在 OpenAPI 依賴項中設定openapi-generator-maven-plugin執行來產生客戶端程式碼:
<plugins>

 <plugin>

 <groupId>org.openapitools</groupId>

 <artifactId>openapi-generator-maven-plugin</artifactId>

 <version>${openapi-generator.version}</version>

 <executions>

 <execution>

 <id>generate-weather-api</id>

 <goals>

 <goal>generate</goal>

 </goals>

 <configuration>

 <inputSpec>${project.basedir}/src/main/resources/api/weatherapi.yaml</inputSpec>

 <generatorName>spring</generatorName>

 <configOptions>

 <openApiNullable>false</openApiNullable>

 <useJakartaEe>false</useJakartaEe>

 <documentationProvider>none</documentationProvider>

 <annotationLibrary>none</annotationLibrary>

 <apiPackage>com.baeldung.tutorials.openapi.generatehttpclients.api</apiPackage>

 <modelPackage>com.baeldung.tutorials.openapi.generatehttpclients.api.model</modelPackage>

 </configOptions>

 </configuration>

 </execution>

 </executions>

 </plugin>

 <plugin>

 <groupId>org.springframework.boot</groupId>

 <artifactId>spring-boot-maven-plugin</artifactId>

 </plugin>

 </plugins>
在上面的程式碼片段中,我們定義了一個 Maven 執行來從configuration集中的 YAML 檔案產生程式碼:
-
inputSpec:我們的 YAML 檔案的位置 -
generatorName:從可用的生成器中選擇一個 -
openApiNullable:程式碼是否應該使用Jackson Nullable 函式庫 -
useJakartaEe:程式碼是否應該使用jakarta命名空間而不是javax -
documentationProvider:API 文件的來源。它要么是none,要么是source。後者表示它將按照 YAML 文件中的描述進行文件處理。 -
annotationLibrary:如果documentationProvider設定為 non-none則在文件中使用的註解庫 -
apiPackage:API 相關類別的目標包 -
modelPackage:模型類別的目標包
另一個重要的configOption未在此列出(因為我們使用的是預設值) library.為我們想要產生程式碼的函式庫提供了選項,例如RestTemplate, OpenFeign,或RestAssured,等。
4. 產生 API 用戶端
設定基本的 OpenAPI 配置後,我們可以透過執行以下命令使用 Maven 插件產生程式碼:
mvn compile之後我們就可以在target資料夾的路徑下看到生成的類別了:
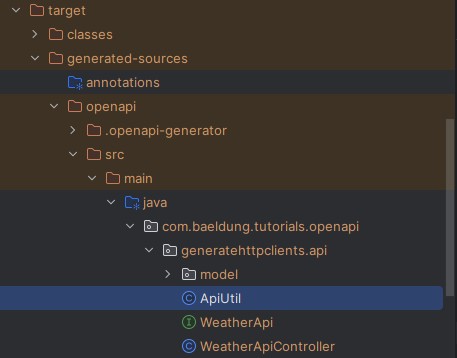
我們可以看到其中有兩個重要的檔案: WeatherApi interface the WeatherApiController 。讓我們來看看 OpenAPI 產生器是如何產生WeatherApi:
public interface WeatherApi {

 default Optional<NativeWebRequest> getRequest() {

 return Optional.empty();

 }


 @RequestMapping(

 method = RequestMethod.GET,

 value = "/weather",

 produces = { "application/json" }

 )


 default ResponseEntity<WeatherResponse> getCurrentWeather(

 @NotNull @Valid @RequestParam(value = "city", required = true) String city,

 @Valid @RequestParam(value = "units", required = false, defaultValue = "celsius") String units

 ) {

 // default example implementation

 }

}從產生的程式碼中刪除一些雜亂的程式碼後,我們得到了getCurrentWeather()方法,該方法使用@RequestMapping註解將端點定義為/weather 。此方法使用@Valid, @NotNull和@RequestParam註解,以我們在 YAML 規格中定義的方式對輸入進行序列化、驗證並提供預設值。
然後,如果我們來看看WeatherApiController:
@Controller

 @RequestMapping("${openapi.currentWeather.base-path:}")

 public class WeatherApiController implements WeatherApi {


 private final NativeWebRequest request;


 @Autowired

 public WeatherApiController(NativeWebRequest request) {

 this.request = request;

 }


 @Override

 public Optional<NativeWebRequest> getRequest() {

 return Optional.ofNullable(request);

 }

 }
我們可以看到,它還產生了一個 Spring 自動配置的WeatherApiController實現,其中包含一些範例方法。它已經在@RequestMapping,因此將該套件匯入專案中的客戶端可以透過配置設定 API 基底路徑。例如,在客戶端,我們可以匯入一個包含api生成包的匯出模組,只需設定一個base-path資源,即可自動注入WeatherApi :
@Service

 public class GetWeatherService {

 private final WeatherApi weatherApi;


 public GetWeatherService(WeatherApi weatherApi) {

 this.weatherApi = weatherApi;

 }


 public WeatherResponse getCurrentWeather(String city, String units) {

 var response = weatherApi.getCurrentWeather(city, units);


 if (response.getStatusCodeValue() < 399) {

 return response.getBody();

 }


 throw new RuntimeException("Failed to get current weather for " + city);

 }

}在客戶端的application.yaml :
openapi:

 currentWeather:

 base-path: https://localhost:8080
5.OpenAPI的優勢
當服務公開端點並有客戶端依賴該端點時,OpenAPI 產生器會非常有用。在這種情況下,我們可以維護兩個模組,一個用於客戶端,另一個用於伺服器,這兩個模組都從同一個 OpenAPI YAML 規範中讀取 API 契約。
因此,兩個模組都將與最新的 API 契約保持同步,從而最大限度地降低客戶端和伺服器應用程式之間契約破裂的風險。這需要對客戶端模組版本進行更精細的管理,並要求客戶端保持其庫的更新。
值得注意的是,使用程式碼產生器可以讓我們跳過部分手動程式碼實作。因此,我們可以減少在客戶端和伺服器之間建立通訊所需的工作量,因為雙方的程式碼都可以自動產生。
例如,在同一開發人員需要實現伺服器和客戶端程式碼的情況下,將這兩項工作減少到僅建立 OpenAPI YAML 規範檔案**並讓生成器完成其工作**可能會很有成效。
6. OpenAPI 的缺點
就像任何程式碼產生器一樣,我們有一個缺點,那就是無法完全控制產生的程式碼。對於更客製化和更複雜的客戶端程式碼需求,使用生成器可能會很麻煩,因為我們無法控制生成的內容。
例如,OpenAPI 目前為 API 回應產生可變的模型類,它可以利用 Java 記錄來實現簡單性和安全性。
此外,對於產生的程式碼,我們也無法控制偵錯、故障排除和修復程式碼,因為我們無法修改它。
最後,它引入了另一個具有一組傳遞依賴項的依賴項,這需要付出更多努力來更新並避免不相容和安全性問題。
7. 結論
在本文中,我們了解如何使用 OpenAPI 規範和 OpenAPI Maven 外掛程式自動產生客戶端程式碼。我們討論了使用spring-web相依性和 OpenAPI 規範 YAML 檔案中所述的 API 產生簡單 REST 用戶端的典型情況。
我們也研究了使用這樣的函式庫來產生供我們使用的程式碼的優點和缺點。
與往常一樣,程式碼可 在 GitHub 上取得。